Connect with us

Home Improvement

Home Weatherization: Season-by-Season Checklist

Discover essential seasonal tasks for home weatherization that can transform your energy efficiency—find out what you might be missing!

Published

on

seasonal home weatherization guide

To effectively weatherize your home, tackle seasonal tasks throughout the year. In spring, inspect your roof and service your heating system. Come summer, clean your HVAC and seal any gaps around windows. As fall arrives, prepare by checking your furnace and cleaning gutters. During winter, replace furnace filters monthly and insulate exposed pipes. Don't forget to maintain insulation year-round and schedule annual heating system inspections. These steps help improve energy efficiency, reduce heating costs, and enhance comfort. For more detailed tips and an in-depth checklist, you can uncover additional insights on seasonal weatherization strategies.

Key Takeaways

  • Inspect and maintain insulation year-round to minimize heat loss and reduce heating costs by up to 20%.
  • Clean and service HVAC systems every season to enhance performance and lower energy bills by 10-30%.
  • Seal gaps around windows and doors to prevent drafts and save up to $160 annually on heating costs.
  • Regularly clean gutters and downspouts to avoid water damage and ice dam formation, especially before winter.
  • Schedule annual heating system inspections to ensure efficient operation and reduce energy consumption by 10-20%.

Spring Weatherization Tasks

As spring arrives, it's vital to tackle your weatherization tasks to guarantee your home is ready for the season. Start by inspecting your roof for any signs of wear, such as missing shingles or damage. This is critical for preventing leaks during the spring rain.

Next, check your gutters and downspouts to make certain they're clean and functioning properly. This helps prevent water pooling around your foundation, which can lead to costly repairs.

Don't forget to inspect your windows, too. Repair or replace any damaged screens to keep insects at bay as warmer weather approaches.

While you're at it, check your outdoor faucets for leaks and confirm they're in good working condition.

You should also take a moment to service your heating system; it's easier to do this now than when you need it again in the fall. Replace filters and check for leaks to guarantee the system's efficiency.

Advertisement

Finally, make sure your insulation is intact to keep the cold air out and the warm air in, helping your home stay comfortable.

With these tasks completed, you'll be well-prepared for the spring season.

Summer Maintenance Checklist

seasonal home care essentials

Maintaining your home during the summer months is vital for keeping it comfortable and efficient. Start by inspecting and cleaning your HVAC system to guarantee it runs at peak performance. A well-maintained unit can reduce your energy bills by 10-30%, which is especially helpful as you prepare for the winter months.

Additionally, consider the benefits of a heat pump, which can provide both heating and cooling efficiently with minimal environmental impact compared to conventional systems efficient heating and cooling. Don't forget to check and replace the HVAC filters every 1-3 months to maintain air quality and improve airflow.

Next, seal any gaps around windows and doors with caulk or weather stripping to prevent air leaks. This simple step can save you up to 20% on energy costs, making your home more efficient during winter.

It's also important to clean gutters and downspouts to make sure they're clear for summer storms. This prevents water damage and foundation issues, which can lead to costly repairs later.

Advertisement

Fall Preparation Steps

autumn readiness action plan

With summer maintenance complete, it's time to shift focus to preparing your home for the fall and winter months. This season is essential for preventing issues that can arise during colder weather.

Effective home insulation is key to maximizing your heating efficiency and comfort, especially if you consider integrating energy-efficient options like commercial grade heat pumps.

Here's a checklist to get you started:

  1. Clean gutters: Verify gutters and downspouts are clear to prevent ice dam formation, which can lead to roof leaks.
  2. Inspect furnace filters: Check and replace dirty filters to maintain peak airflow and efficiency. A clean filter can enhance heating effectiveness and reduce energy loss by up to 15%.
  3. Seal gaps: Look for cracks around windows and doors, and use caulk or weather stripping to seal them. This simple step can save you up to $160 a year on heating costs by minimizing drafts.
  4. Shut off the water: Drain garden hoses and shut off outdoor spigots to prevent freezing and potential pipe bursts.

Lastly, consider scheduling a professional inspection of your heating system to verify it operates efficiently, preventing unexpected breakdowns during peak winter usage.

Taking these steps now will help keep your home safe and comfortable all season long.

Winter Readiness Actions
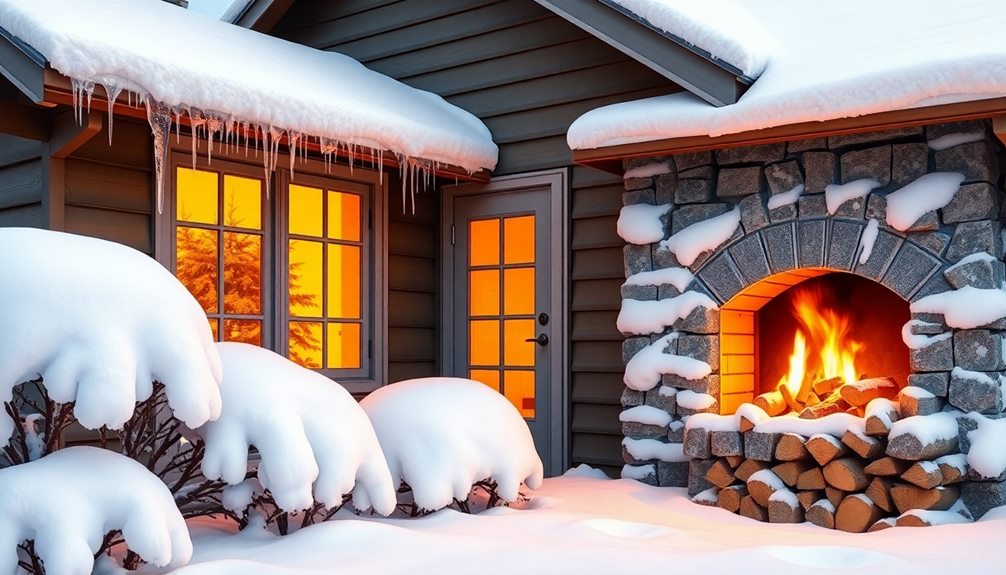
prepare for winter conditions

Preparing your home for winter is essential to guarantee comfort and safety during the cold months. Start by inspecting and replacing your furnace filters monthly to enhance your heating system's efficiency and keep energy bills low. Seal drafty windows and doors with caulk and weather stripping to help prevent heat loss, which can account for up to 30% of your heating costs.

Next, clean your gutters regularly to avoid ice dams that can cause significant roof damage. Insulate pipes, especially those in unheated areas, to prevent frozen pipes that could burst and lead to costly repairs.

Finally, test your smoke detectors and carbon monoxide alarms. With longer nights during the winter months, ensuring these devices work is critical for your safety.

Advertisement
Winter Readiness Actions Importance
Inspect Furnace Filters Boost heating efficiency
Seal Drafty Windows Reduce heat loss
Insulate Pipes Prevent costly damage

Taking these steps will help keep your home safe and warm throughout the winter. Don't wait; start your winter readiness now!

Year-Round Best Practices

consistent seasonal strategies applied

Your home's comfort and energy efficiency depend on consistent upkeep throughout the year. By implementing year-round best practices, you can effectively reduce heating costs and prevent damage.

Regular maintenance of systems like heat pumps can further enhance efficiency and prolong their lifespan, making it essential to understand features of the ultimate heat pump.

Here are four key actions to take:

  1. Inspect and Maintain Insulation: Regularly check your insulation to minimize heat loss. Inadequate insulation can cause up to 20% of your heating costs.
  2. Change HVAC Filters: Every three months, replace your HVAC filters. This simple step enhances airflow efficiency and can save you 5-15% on energy bills.
  3. Seal Drafts: Use caulk or weatherstripping around your windows and doors to seal drafts. Cold air infiltration can account for 30% of your home's heating energy use, so addressing this can markedly improve comfort.
  4. Clean Gutters and Schedule Inspections: Clean your gutters and downspouts seasonally to prevent ice dams and potential water damage.

Also, schedule annual inspections for your heating system to verify it operates efficiently, which can reduce energy consumption by 10-20%.

Frequently Asked Questions

How Often Should I Perform Weatherization Tasks Each Year?

You should perform weatherization tasks at least twice a year—once in spring and once in fall. This guarantees your home stays energy-efficient and comfortable, helping you save money on heating and cooling throughout the year.

What Tools Do I Need for Home Weatherization?

You'll need a caulking gun, weather stripping, insulation materials, a utility knife, a tape measure, a screwdriver, and safety gear. These tools help you seal drafts, insulate effectively, and guarantee your home stays energy-efficient year-round.

Advertisement

Can I Weatherize My Home Myself, or Should I Hire a Professional?

You can definitely weatherize your home yourself if you're handy and have the right tools. However, hiring a professional might save you time and guarantee everything's done correctly, especially for complex tasks.

How Does Weatherization Affect My Home's Resale Value?

Weatherization's like a warm hug for your home; it boosts energy efficiency and appeal. When potential buyers see reduced energy bills and comfort, they're more likely to pay a premium, enhancing your resale value greatly.

Are There Any Government Incentives for Weatherization Improvements?

Yes, there're government incentives for weatherization improvements. You can access tax credits, rebates, and grants that help reduce costs. Check local programs or the Department of Energy's website to find the best options available for you.

Conclusion

As you shift from the vibrant blooms of spring to the crisp chill of winter, remember that weatherization isn't just about survival; it's about comfort and efficiency year-round. While summer's heat may tempt you to ignore your home's needs, fall's colors remind you to prepare for the cold. Embrace each season's unique challenges, and you'll find that a well-weatherized home not only protects you from the elements but also enhances your living experience throughout the year.

Advertisement

Advertisement

Home Improvement

Basement Waterproofing: Complete DIY Guide

Get ready to protect your home with our complete DIY basement waterproofing guide—discover essential tips and techniques that will keep your space dry and secure!

Published

on

By

diy basement waterproofing guide

Basement waterproofing is essential for preventing moisture damage in your home, and with this complete DIY guide, you can successfully tackle the challenge yourself. Start by identifying the causes of moisture, like foundation cracks and improper grading. Prepare your space by drying the area and cleaning the walls. Use effective waterproofing techniques, such as sealing cracks and applying waterproof coatings. Don't forget to install a sump pump to manage water accumulation. Regular maintenance is key for long-term protection. Keep going, and you'll discover detailed steps and tips to guarantee your basement stays dry and secure.

Key Takeaways

  • Identify causes of basement moisture such as foundation cracks, hydrostatic pressure, and improper grading to address issues effectively.
  • Regularly inspect for signs of water damage, including visible cracks, musty odors, and water stains.
  • Prepare the basement by drying it out, using dehumidifiers, and cleaning surfaces with antifungal cleaners before waterproofing.
  • Utilize waterproofing techniques such as sealing cracks, installing sump pumps, and applying waterproof membranes for long-term protection.
  • Maintain gutters, check foundation grading, and test sump pumps regularly to prevent future moisture problems.

Causes of Basement Moisture

Basement moisture can stem from several common causes that homeowners should be aware of. One major culprit is foundation cracks, whether vertical or horizontal. These cracks can allow water to seep into your basement walls and floors.

Horizontal cracks, in particular, may signal more serious structural issues. Hydrostatic pressure from groundwater can exacerbate moisture problems, especially if you live in an area with a high water table, pushing moisture through foundation walls.

Improper grading of your landscaping can also be a significant factor. If your yard slopes toward your foundation, it can direct rainwater directly at your home, increasing the risk of water intrusion.

Clogged gutters and downspouts can worsen the situation by preventing proper drainage, causing overflow and pooling around your foundation. Heavy rainfall and melting snow can amplify these conditions, often leading to damp spots in your basement.

Signs of Water Damage

indicators of water issues

When you're in your basement, pay attention to visible cracks in the walls or floors; they can signal moisture problems.

You should also notice any musty odors, which often indicate mold or mildew growth.

Advertisement

Visible Cracks Identification

Identifying visible cracks in your basement is vital for preventing water damage and maintaining structural integrity. These cracks in your basement walls or floors often indicate water seepage and potential structural issues.

Pay close attention to horizontal cracks, as they're typically more severe than vertical ones. If you notice cracks wider than 1/8 inch, don't ignore them—they can lead to significant water intrusion and may require a professional assessment.

While inspecting for cracks, also look for efflorescence, that white chalky substance forming on your walls. It signals moisture problems, appearing when water evaporates and leaves mineral deposits behind.

Check around door frames and uneven floors; these could reveal signs of structural shifts caused by water damage.

Regular inspections after heavy rains are essential. They help you identify new cracks or worsening conditions, allowing for timely intervention before the damage escalates.

Advertisement

Musty Odor Detection

A persistent musty odor in your home often signals hidden moisture problems in your basement, indicating the potential presence of mold or mildew.

These odors are a clear warning that moisture levels may be above 60%, creating an ideal environment for mold growth. It's crucial to act quickly and investigate.

Here are some signs to look for:

  1. Visible Water Damage: Check for any discoloration or stains on walls and ceilings.
  2. Efflorescence: Look for a white, powdery residue on your basement walls, indicating ongoing moisture issues.
  3. Mold and Mildew: Inspect for any patches of mold or mildew, especially in corners and behind furniture.
  4. Health Issues: Be aware of respiratory problems or allergies that could be aggravated by mold exposure.

Regular inspections and maintenance, like cleaning gutters and ensuring proper drainage, can help prevent water intrusion and the musty odors that come with it.

Don't ignore these signs; addressing them early can save you from costly repairs and health issues down the line.

Stay vigilant and keep your basement dry!

Advertisement

Water Stains Observation

Persistent musty odors often lead homeowners to inspect their basements for hidden moisture issues. One of the first signs to look for is water stains on walls or ceilings. These stains, which can appear as yellow, brown, or dark patches, usually form around windows, doors, or plumbing fixtures. Their presence often indicates moisture intrusion, which, if ignored, can lead to serious structural damage.

Additionally, homeowners should be aware that moisture problems can also contribute to air quality issues and respiratory health risks, similar to the effects of wood-burning pollutants air quality concerns.

You should also be on the lookout for efflorescence, a white, powdery substance on masonry surfaces. This is another clear signal that water is present behind your walls. Pay special attention to stains that expand or change color after heavy rainfall; these indicate ongoing water problems that require immediate action.

Regular inspection for water stains is essential in identifying leaks early. By catching these issues before they escalate, you can prevent costly repairs and potential mold growth.

Implementing proper waterproofing measures can safeguard your basement from future water issues. Don't wait until you see mold or significant damage—stay proactive and keep your basement dry and safe.

Advertisement

Preparation and Cleaning Steps

cleaning and preparation procedures

Before you start waterproofing your basement, make sure it's as dry as possible.

Use fans and dehumidifiers to eliminate moisture, and pump out any standing water to prevent mold growth.

Once it's dry, clean the walls and floors thoroughly to remove any mold remnants and prepare for the next steps.

Drying the Basement

Your basement's dryness is important for successful waterproofing, so start by eliminating any standing water.

You'll want to minimize the risks of mold and mildew growth right away. Follow these steps to guarantee your space is as dry as possible:

  1. Pump Out Standing Water: Use a sump pump or wet vacuum to remove any pooled water.
  2. Utilize Dehumidifiers: Set up dehumidifiers to help maintain humidity levels below 60%, which is essential to prevent mold growth.
  3. Remove Damp Materials: Get rid of any damp or moldy porous materials like carpets or drywall, as they can harbor moisture.
  4. Conduct a Thorough Cleaning: Use an antifungal cleaner or diluted bleach to scrub away any mold or mildew that might remain.

After cleaning, inspect your basement for any lingering moisture sources.

Addressing these issues is crucial; unresolved moisture can undermine your waterproofing efforts in the long run.

Advertisement

Cleaning Mold Remnants

To effectively tackle mold remnants in your basement, start by guaranteeing the area is as dry as possible; this prevents the spread of mold spores during the cleaning process.

Next, equip yourself with protective gear like gloves and masks to safeguard against inhaling spores while cleaning mold.

For a thorough cleaning, use antifungal cleaners or a diluted bleach solution. Scrub moldy surfaces with this solution, paying special attention to spots.

Be sure to remove porous materials such as damp carpets or moldy drywall, as they can harbor mold growth even after cleaning.

Once you've removed the affected materials, wash the walls with a mixture of warm water and dish soap. Add bleach to tackle any stubborn mold spots, then rinse with clean water.

Advertisement

Allow all cleaned surfaces to dry completely overnight. This step is vital to prevent mold growth and guarantees a safe environment for your upcoming basement waterproofing efforts.

Waterproofing Techniques

effective moisture barrier methods

Utilizing effective waterproofing techniques is crucial for protecting your basement from moisture damage. By addressing potential issues proactively, you can prevent water from seeping in and causing havoc.

Additionally, maintaining good air quality with an air purifier can help mitigate humidity levels in your basement, guaranteeing a drier environment air purifier maintenance dos and don'ts.

Here are some key methods to take into account:

  1. Interior Waterproofing Techniques: Seal cracks or signs of damage using hydraulic cement for larger gaps and epoxy injections for smaller cracks (under 1/8 inch). This prevents moisture from infiltrating your walls.
  2. Exterior Waterproofing Methods: Improve yard grading to direct water away from your foundation. Make sure gutters and downspouts are upgraded, and apply a waterproof coating on exterior walls for extra protection.
  3. Installing a Sump Pump: If you live in a high water table area, install a sump pump to actively remove water during heavy rains, reducing the risk of flooding.
  4. Regular Maintenance: Regularly inspect and clean gutters, test your sump pump, and monitor humidity levels to guarantee your waterproofing systems remain effective.

Step-by-Step Waterproofing Process

detailed waterproofing implementation guide

Beginning the waterproofing process involves a series of methodical steps that guarantee your basement is protected from moisture.

Start by thoroughly cleaning the basement walls to remove any loose debris, dust, and mold using a mixture of warm water and grease-cutting dish soap. Allow the surfaces to dry completely overnight.

Next, inspect the walls for holes and cracks. For larger openings, use hydraulic cement for crack repair, while epoxy injection is great for narrower cracks under 1/8 inch.

Advertisement

Once you've sealed the cracks, apply a waterproof coating like DRYLOK Extreme Basement and Masonry Waterproofer. Follow the manufacturer's guidelines and make certain you apply at least two coats for ideal protection.

Don't forget to use elastic sealants around doors, windows, and pipes to create a flexible barrier against moisture.

Regularly clean and inspect the walls to identify any new cracks or signs of wear. Keeping an eye on your waterproofing system is essential.

If you find significant issues, consider professional waterproofing to make sure your foundation walls remain dry. These waterproofing tips can help maintain your basement's integrity for years to come.

Sump Pump Installation

basement water management solution

After confirming your basement walls are properly waterproofed, the next step is to install a sump pump to manage any water that may still enter the space.

A sump pump is essential, especially in areas with high water tables. Here's how to successfully install a sump pump:

Advertisement
  1. Choose the Right Model: Opt for a sump pump with a minimum capacity of 2,000 gallons per hour to handle potential water influx effectively.
  2. Dig the Sump Pit: Create a pit that's at least 24 inches deep and 18 inches wide. This provides ample space for the pump to operate efficiently.
  3. Install the Discharge Pipe: Confirm the discharge pipe directs water at least 10 feet away from your foundation. This prevents water from recirculating back into your basement.
  4. Seal with Waterproof Paint: Once the sump pump is in place, consider applying waterproof paint to the surrounding area for added protection.

Maintenance and Prevention

proactive care and management

To keep your basement dry and prevent water intrusion, it's important to stay on top of maintenance and prevention tasks.

Begin with regular gutter maintenance; inspect them at least twice a year to verify they're clear and directing water away from your foundation. Proper foundation grading is essential as well—confirm a slope of at least 6 inches over 10 feet to promote effective water drainage.

Additionally, consider using natural remedies to enhance your waterproofing efforts, such as incorporating drainage plants that can help absorb excess moisture cold medications overview.

Don't forget about sump pump testing; check its functionality every three to four months, so it operates effectively during heavy rains.

Humidity monitoring is also important; use a hygrometer to keep levels below 60% to prevent mold and mildew growth. Conduct annual checks for new cracks or gaps in your foundation, sealing any you find to enhance moisture prevention.

Consider scheduling a thorough basement inspection at least once a year to assess the effectiveness of your waterproofing measures.

Advertisement

Professional Help and Considerations

seeking expert guidance needed

When dealing with serious waterproofing challenges, seeking professional help can save you time, money, and stress.

Sometimes, DIY fixes just won't cut it, especially when structural damage or extensive mold is involved.

Here's what to reflect on when hiring a contractor:

  1. Licensed, Insured, and Bonded: Always verify your contractor meets these requirements. It protects you against potential liabilities during the waterproofing process.
  2. Free Inspections: Many professionals offer free assessments. This helps you gauge the extent of water damage without upfront costs.
  3. Cost Estimates: Obtain detailed estimates from multiple contractors. This transparency allows you to budget effectively and avoid unexpected expenses.
  4. Customer Satisfaction: Research company ratings on platforms like the Better Business Bureau and Trustpilot. Look for recent references to understand a contractor's experience specifically in basement waterproofing.

Frequently Asked Questions

How Can I Waterproof My Basement by Myself?

To waterproof your basement, start by cleaning it thoroughly, sealing cracks with hydraulic cement, and applying a quality waterproofing coating. Install a sump pump and guarantee proper drainage around your foundation to prevent water intrusion.

What Is the Best Waterproofing Method for Basements?

The best waterproofing method for your basement combines interior and exterior techniques. Seal cracks, apply coatings, improve drainage, and install a sump pump to guarantee thorough protection against moisture and flooding in your space.

Which Is the Cheapest Basement Waterproofing Method?

The cheapest basement waterproofing method involves using sealants and hydraulic cement for minor repairs. Regular maintenance, like cleaning gutters and grading, can prevent costly issues, saving you money in the long run.

Will Flex Seal Stop Basement Leaks?

Wondering if Flex Seal can stop basement leaks? It can temporarily seal minor leaks, but it won't fix underlying issues. For lasting results, combine it with proper drainage and professional repairs for severe problems.

Advertisement

Conclusion

So, there you have it! You've learned how to turn your damp dungeon into a dry sanctuary. Who needs a cozy living space when you can just embrace the charm of a musty basement, right? But if you're tired of swimming in your own home, roll up your sleeves and get to work. Remember, nothing says "I love my house" quite like a waterproofed basement. If all else fails, there's always professional help—because sometimes, DIY just means "Don't Involve Yourself!"

Continue Reading

Home Improvement

Stair Renovation: From Basic to Beautiful

Inspiring stair renovation ideas await you, transforming your basic staircase into a stunning centerpiece that captivates—discover the secrets to elevate your space!

Published

on

By

transforming stairs into beauty

Renovating your staircase can turn a basic design into a beautiful centerpiece in your home. Start with budget-friendly options like painting stairs or adding stylish stair treads. Consider unique design elements, such as bold colors, decorative wallpaper on risers, or elegant stair runners. Don't forget to enhance safety and aesthetics with battery-operated lights. For lasting results, use durable sealants and verify the area is clean and prepared before you begin. Want to uncover more tips and tricks for elevating your stairs? You'll find plenty of inspiration and practical advice just ahead.

Key Takeaways

  • Start with a thorough cleaning and preparation of the staircase for effective renovation results.
  • Use self-adhesive stair treads or stylish stair runners to enhance visual appeal easily.
  • Incorporate bold colors or decorative wallpaper to modernize and personalize the staircase.
  • Add low-maintenance plants and battery-operated stair lights for improved atmosphere and safety.
  • Finish with durable sealants and a cohesive color palette to protect and unify the design.

Importance of Staircase Makeover

A staircase makeover can dramatically transform your home's aesthetic, making it a worthwhile investment. Your staircase isn't just a functional element; it's often a focal point visible from multiple rooms. By updating stairs, you achieve a modern staircase look that incorporates clean lines and contemporary materials, enhancing your home's overall vibe.

You don't need to break the bank to achieve this. With DIY projects like painting, you can refresh the space for as little as $80. Removing carpet to expose wood treads can also lead to a stunning visual appeal, giving your staircase a fresh, polished look.

These simple updates can greatly modernize traditional designs, making your staircase not just functional but also a piece of art. A well-executed staircase makeover not only boosts the visual appeal but can also increase your home's perceived value, making it more attractive to potential buyers.

Whether you opt for a full renovation or just a few small updates, investing time and effort into your staircase can yield impressive results. After all, a stunning staircase can elevate the entire atmosphere of your home.

Budget-Friendly Renovation Techniques

affordable home improvement strategies

When it comes to renovating your staircase on a budget, you'll find plenty of creative and cost-effective techniques that can make a significant impact. One of the most budget-friendly options is to paint stairs. For under $80, including $60 for paint and $15 for tools, you can transform your staircase. This DIY project not only saves you money but also allows for personal expression.

Another great option is using self-adhesive stair treads. They're affordable and easy to install, offering a quick way to update your stairs while enhancing stair aesthetics. You can also incorporate decorative wallpaper or low-maintenance plants, adding charm without breaking the bank.

Advertisement

To guarantee your budget-friendly renovations last, consider using durable materials like water-based Polycrylic for sealing. This way, your updates will maintain their appearance and withstand wear over time.

Here's a quick overview of these techniques:

Technique Benefits
Paint Stairs Cost-effective transformation
Self-Adhesive Stair Treads Easy installation, various styles
Low-Maintenance Plants Enhances visual appeal
Water-Based Sealant Durable and long-lasting

Steps for Successful Renovation

planning budgeting execution completion

Renovating your staircase can be an exciting project that elevates your home's style. To guarantee a successful renovation, follow these essential steps: Consider how improved indoor air quality could enhance your living space, as renovations can also allow for better ventilation heat pumps filter and circulate indoor air, which can complement your new stair aesthetics.

  • Start by thoroughly cleaning and preparing the area.
  • Use a shellac-based primer for durability in high-traffic spots.
  • Apply protective finishes to maintain your new look.

First, remove the carpet and check that your stairs are level and free of debris. This promotes better paint adherence.

When you're ready to paint, utilize a shellac-based primer and apply two coats to all components, including the newel post and stair risers. For the paint, choose a porch and patio formula, applying multiple thin layers and allowing 4-6 hours of drying time between coats. Don't forget to use tape to help achieve crisp lines.

If you're replacing old stair treads, consider stylish options like Hailee Duchateau Treads, guaranteeing precise measurements for a snug fit.

Design Ideas and Inspirations

creative concepts and inspirations

With your staircase renovation underway, exploring design ideas and inspirations can take your project to the next level.

Consider adding a stylish stair runner to create warmth and comfort underfoot, while providing visual interest that complements your interior design style. Incorporating natural elements like wooden stair balusters or potted plants can further enhance the serene atmosphere of your space.

Advertisement

If your old stairs need a fresh look, think about incorporating bold colors or unique patterns that reflect your personal preference.

You can also enhance the risers with wallpaper or decorative tiles, distracting from any less appealing features while introducing a modern touch. If you're into DIY stair projects, this is a perfect opportunity to showcase your creativity.

Don't overlook the landing on the top; it's a prime spot for decorative plants that require minimal maintenance, offering a fresh and inviting atmosphere.

For safety and aesthetics, installing battery-operated stair lights will illuminate your staircase, turning it into a stylish focal point in your entryway.

Researching interior designer portfolios can provide a wealth of inspiration, helping you align your personal style with practical ideas for your staircase renovation.

Advertisement

Embrace these design concepts to transform your stairs into a stunning feature of your home!

Final Touches and Enhancements

polishing for optimal presentation

Elevate your staircase renovation by focusing on the final touches and enhancements that can truly make a difference.

These finishing details not only improve the look of your stairs but also guarantee they remain safe and stylish for years to come.

Consider how proper planning can enhance your renovation process, similar to how strategic retirement planning can optimize your financial future.

  • Apply a durable sealant to protect your beautiful work.
  • Incorporate decorative elements like unique riser designs.
  • Add low-maintenance plants for a fresh, inviting touch.

Start by applying a durable sealant, like water-based Polycrylic, after painting your stairs.

This will help prevent chips and wear, guaranteeing they look great at the top and bottom.

Next, consider decorative elements, such as wallpaper on lower wall sections or unique riser designs, to add visual interest without breaking the bank.

Advertisement

For safety and ambiance, install battery-operated stair lights.

They'll illuminate your space while enhancing the overall aesthetic.

Finally, choose a complementary color palette that ties your stair components together, creating a cohesive look in your entryway.

Adding low-maintenance plants along the staircase not only improves air quality but also adds a vibrant touch.

Gear up with safety glasses, and enjoy these enhancements that make a big impact!

Advertisement

Frequently Asked Questions

What Is the Cheapest Way to Renovate Stairs?

To renovate stairs cheaply, consider painting them for a new look. You can also add self-adhesive treads or DIY runners using inexpensive materials. Revitalizing the space and decluttering enhances safety and appearance without breaking the bank.

How Much Does It Cost to Remodel Stairs?

Remodeling stairs typically costs between $1,000 and $10,000, depending on your materials and design choices. If you choose DIY options like painting or refinishing, you can lower that cost considerably, sometimes under $500.

How Do You Modernise Existing Stairs?

To modernize your stairs, think of it like upgrading your smartphone. You can paint them, add stylish treads, replace carpets with sleek wood, or install chic railings. Don't forget to incorporate fun decor elements!

How Can I Make My Stairs Look Beautiful?

To make your stairs beautiful, paint them with vibrant colors, add decorative elements like wallpaper on risers, and incorporate plants for a fresh feel. Choose a cohesive color palette to enhance your home's overall aesthetic.

Conclusion

With just a little creativity and effort, your staircase can transform from a neglected space into a stunning focal point. Imagine walking up a beautifully renovated staircase, where every step feels like a journey through a gallery of design. By following smart renovation techniques and infusing your personal style, you'll breathe new life into this essential part of your home. So, roll up your sleeves and get started—your dream staircase is just a renovation away!

Advertisement

Continue Reading

Home Improvement

Under-Cabinet Lighting: Installation and Options

Perfect your kitchen’s ambiance with under-cabinet lighting options and installation tips—discover how to enhance your cooking space today!

Published

on

By

under cabinet lighting guide

Under-cabinet lighting can transform your kitchen by eliminating shadows and improving visibility while you cook. You've got several options, like LED light bars for energy efficiency or puck lights for focused illumination. For installation, you can choose plug-in, battery-operated, or hardwired setups. Consider brightness levels between 500 to 1,000 lumens for task lighting and color temperatures from 3,000K to 4,000K for the right ambiance. Don't forget the importance of selecting appropriate fixtures for your countertop. If you take a look into the specifics, you'll discover more tips to enhance your kitchen lighting setup.

Key Takeaways

  • Under-cabinet lighting enhances kitchen functionality by providing both task and ambient lighting, with ideal brightness levels ranging from 500 to 1,000 lumens.
  • Common types include LED light bars for energy efficiency and puck lights for focused accent lighting, available in various color temperatures.
  • Installation methods vary, with options like plug-in for DIY ease, battery-operated for flexibility, and hardwired for permanence requiring professional help.
  • Brightness and color temperature significantly impact ambiance; aim for 3,000K to 4,000K for kitchens to balance warmth and focus.
  • Regular maintenance, including cleaning and checking electrical connections, ensures optimal performance and longevity of under-cabinet lighting fixtures.

Overview of Under-Cabinet Lighting

Under-cabinet lighting transforms your kitchen by banishing shadows and brightening essential workspaces. This important feature enhances both kitchen aesthetics and functionality, illuminating dark corners and prep areas.

You'll find that under-cabinet lighting serves dual purposes: task lighting for cooking and food prep, as well as ambient lighting to create a welcoming atmosphere.

When selecting under-cabinet lighting, consider options like LED light bars, puck lights, and strips. The ideal brightness level for task lighting ranges between 500 to 1,000 lumens, while for accent or mood lighting, you should aim for 80 to 500 lumens.

Additionally, pay attention to color temperature; typically, it ranges from 3,000K to 4,000K, providing warm to natural white light that enhances your kitchen's charm.

As for installation methods, you have several choices. Plug-in options and battery-operated lights are more DIY-friendly, allowing for quick setups without complicated wiring.

Advertisement

Whether you opt for hardwired solutions or easy plug-ins, under-cabinet lighting can dramatically improve your kitchen's functionality and style, making your cooking experience more enjoyable and efficient.

Types of Under-Cabinet Lighting

under cabinet lighting options

When choosing under-cabinet lighting, you'll find options like LED light bars and puck lights that cater to different needs.

LED light bars provide efficient task lighting and can be dimmed for versatility, while puck lights offer compact accent lighting perfect for highlighting specific areas.

Understanding these types can help you create the ideal ambiance in your kitchen or workspace.

LED Light Bars

LED light bars offer a practical solution for enhancing your workspace with bright, efficient illumination. Designed specifically for under-cabinet lighting, they provide excellent task lighting that's ideal for kitchens and workspaces.

Here are some key features to evaluate:

Advertisement
  1. Energy-Efficient: LED light bars consume considerably less electricity than traditional incandescent or halogen lights, saving you money on energy bills.
  2. Long Lifespan: With a lifespan often exceeding 25,000 hours, these lights reduce the need for frequent replacements.
  3. Dimmable Settings: Many LED light bars come with dimmable settings, allowing you to adjust brightness to fit your mood or task requirements.
  4. Color Temperatures: Available in a range of color temperatures from warm white (around 3000K) to cool white (up to 5000K), they allow customization to match your existing room lighting.

Installation is straightforward, with options featuring adhesive backing or mounting clips for an easy DIY setup.

Whether you need bright task lighting or softer ambient light, LED light bars are a versatile choice for effective under-cabinet lighting.

Puck Lights

For those looking to add focused accent lighting to their space, puck lights provide an excellent alternative to LED light bars. These compact fixtures are perfect for illuminating kitchen cabinets and other areas where task lighting is essential. Typically spaced 8 to 12 inches apart, puck lights create a warm, inviting glow that enhances your room's ambiance.

Available in a variety of finishes like white, bronze, and nickel, puck lights can seamlessly blend with your decor. If you're concerned about energy savings, many models come with efficient LED options that offer impressive durability and lower energy consumption.

Puck lights also feature adjustable brightness settings, allowing you to customize the light output according to your needs. With lumen outputs generally ranging from 80 to 500 lumens, you can achieve the ideal brightness for accent lighting or functional tasks.

When it comes to installation preferences, puck lights are versatile; they can be hardwired, plugged in, or battery-operated, making them suitable for various spaces.

Advertisement

Whether you're illuminating dark corners or prep areas, puck lights enhance both visibility and aesthetic appeal in your home.

Installation Methods

various techniques for installation

When it comes to installing under-cabinet lighting, you have three main options: plug-in, battery-operated, and hardwired.

Each method comes with its own set of tools and safety precautions, so it's essential to choose what fits your needs best.

Let's explore these installation methods to help you make an informed decision.

Types of Installation Methods

Choosing the right installation method for under-cabinet lighting can greatly impact both functionality and aesthetics in your kitchen. You have three primary options to evaluate: plug-in, battery-operated, and hardwired. Each method has its unique advantages and complexities.

  1. Plug-in: These fixtures are DIY-friendly and allow you to easily relocate them as needed. You won't need a professional electrician, making them a convenient choice for many homeowners.
  2. Battery-operated: Ideal for temporary setups or areas without electrical outlets, these lights offer flexibility. However, you'll need to replace batteries regularly to guarantee they stay functional.
  3. Hardwired: This method provides a permanent solution with a sleek, clean aesthetic. It requires a skilled electrician for installation, as it involves connecting to existing electrical circuits and adhering to local electrical codes.
  4. Combination: Some setups may use a mix of these options, giving you the best of both worlds.

Reflect on your kitchen's layout and your preferences when deciding which installation method works best for you. Each option can transform your space, so choose wisely!

Tools Required for Installation

Proper installation of under-cabinet lighting requires a few essential tools to guarantee the process goes smoothly and safely.

Advertisement

First, you'll need a screwdriver to secure the fixtures in place. A measuring tape is also fundamental for precise placement, making certain your lights are installed exactly where you want them.

You'll likely need a drill to create mounting holes, so make sure it's in good working condition.

When connecting electrical wires, wire connectors are essential for making secure connections. These make certain your electrical setup is compliant and safe.

Don't forget electrical tape; it's necessary for insulating those connections and preventing any potential shorts.

Additionally, a voltage tester is critical for confirming that the power is off before you start any electrical work. This step helps make certain your safety during installation.

Advertisement

Safety Precautions During Installation

Guaranteeing safety during under-cabinet lighting installation is fundamental to prevent accidents and injuries. By following key safety precautions, you can work confidently and effectively. Here's what you need to do:

  1. Turn off power at the main electrical panel. This step is essential to prevent electrical shock during installation.
  2. Use a voltage tester to double-check that power is off at the installation site. Confirming this is critical before you handle any wires.
  3. Wear protective gear, including safety goggles, to shield yourself from potential injuries while using tools and materials. Your safety is a top priority!
  4. Maintain a clean workspace. An organized area minimizes the risk of accidents and keeps you focused on the installation task.

Additionally, it's important to follow local electrical codes and regulations throughout the installation process. This guarantees your work is compliant and safe.

Brightness and Color Temperature

light intensity and warmth

When it comes to under-cabinet lighting, understanding brightness and color temperature is vital for creating the right atmosphere in your kitchen.

Brightness is measured in lumens, and for effective task lighting, aim for 500 to 1,000 lumens. If you're focusing on accent lighting, 80 to 500 lumens will suffice. Consider your countertop material, too; glossy surfaces reflect more light, which may require higher lumen outputs to maintain ideal illumination.

Color temperature, measured in Kelvins (K), greatly impacts the ambiance. A range of 3,000K to 4,000K provides warm white to natural white light, perfect for kitchens. Warmer tones around 3,000K foster a relaxing atmosphere, while cooler temperatures above 4,000K enhance focus, making them ideal for task-oriented areas.

Choosing the right fixtures is vital for managing light reflection from dark countertops. Well-designed fixtures can guarantee that your lighting not only provides ample brightness but also enhances the aesthetic appeal of your kitchen.

With proper installation and a keen eye on brightness and color temperature, you'll create a beautifully lit space that's functional and inviting.

Advertisement

Safety and Tools for Installation

installation safety and tools

Installing under-cabinet lighting not only enhances your kitchen's functionality but also involves important safety considerations. Before you start the installation, make sure you take the necessary precautions to protect yourself from electrical hazards.

Here's a quick checklist to guide you:

  1. Turn off power: Always turn off power at the main electrical panel before beginning any installation.
  2. Use a voltage tester: Confirm with a voltage tester that there's no live current in the wires before working on any electrical connections.
  3. Gather essential tools: You'll need a screwdriver to secure fixtures, a measuring tape for accurate placement, and a drill for creating necessary holes.
  4. Wear protective gear: Don safety goggles and other protective gear to shield yourself from potential injuries while using power tools.

Additionally, keep your workspace clear of debris and obstacles to prevent accidents during the installation process.

Maintenance of Under-Cabinet Lighting

under cabinet lighting care

Maintaining your under-cabinet lighting is vital for keeping your kitchen bright and functional. Regular cleaning of your fixtures helps eliminate dust and grease buildup, which can diminish lighting performance. Make it a habit to wipe down the surfaces to guarantee ideal brightness.

You should periodically check all electrical connections to verify they're secure and free from corrosion. This step prevents flickering or complete failure of your lighting system. Don't forget to replace bulbs promptly, especially in LED fixtures that can last up to 15 years. Consistent lighting levels are essential for your kitchen's functionality.

Inspect fixtures and wiring for any signs of wear or damage during your routine maintenance checks. This practice guarantees safety compliance with local electrical codes and helps prevent potential hazards.

Schedule routine inspections of your lighting system to catch any issues early, avoiding costly repairs down the road.

Frequently Asked Questions

What Is the Best Type of Lighting for Under Cabinets?

When choosing the best lighting for under cabinets, consider LED light bars for energy efficiency and dimmable options. Puck lights also work well for accent lighting, while fluorescent fixtures are budget-friendly and provide bright illumination.

Advertisement

How Much Does It Cost to Have Under Cabinet Lighting Installed?

If you hire a pro to install under-cabinet lighting, you might pay between $100 and $300. However, going the DIY route could save you money, costing around $50 to $150 for materials.

Do You Need an Electrician to Install Under Cabinet Lighting?

You might need an electrician for under-cabinet lighting installation, especially if you're hardwiring. They guarantee safety and compliance with codes, but DIY options like plug-in lights let you skip hiring a pro entirely.

How Do You Layout Under Cabinet Lights?

Did you know that proper spacing can boost your lighting's effectiveness by 40%? When laying out under-cabinet lights, position fixtures 2 inches from edges and space them 18 to 24 inches apart for ideal coverage.

Conclusion

Incorporating under-cabinet lighting is like adding a splash of paint to a canvas; it transforms your kitchen into a warm, inviting space. With various types and installation methods at your fingertips, you can easily brighten up your countertops and enhance your cooking experience. Just remember to reflect on brightness and color temperature for the perfect ambiance. With a bit of maintenance, your under-cabinet lights will shine brightly, illuminating your culinary adventures for years to come.

Advertisement

Continue Reading
Advertisement
Advertisement

Affiliate disclaimer

As an affiliate, we may earn a commission from qualifying purchases. We get commissions for purchases made through links on this website from Amazon and other third parties.

Vetted

aldi electric throw blankets aldi electric throw blankets
Vetted13 hours ago

15 Best Electric Throw Blankets From Aldi to Keep You Cozy This Winter

Hibernate in warmth this winter with the top 15 Aldi electric throw blankets, offering cozy comfort and innovative features to...

electric throws for winter electric throws for winter
Vetted15 hours ago

15 Best Electric Throws to Keep You Cozy All Winter Long

Melt away the chill with the top 15 best electric throws to stay cozy all winter long - find your...

thoughtful gifts for dads thoughtful gifts for dads
Vetted3 weeks ago

15 Best Christmas Gifts for the Hard-to-Shop-for Dad That He’ll Actually Love

Perfect presents await in our guide to 15 Christmas gifts for dads who are tricky to shop for; discover what...

thoughtful gifts for dads thoughtful gifts for dads
Vetted3 weeks ago

14 Best Christmas Gifts for the Hard-to-Shop-for Dad That He’ll Actually Love

Discover 14 unique Christmas gifts for your hard-to-shop-for dad that he'll truly cherish, and find the perfect surprise he never...

gifts for adventurous dads gifts for adventurous dads
Vetted3 weeks ago

14 Best Gifts for Adventurous Dads That Will Fuel Their Next Outdoor Expedition

Explore practical and unique gifts that will prepare adventurous dads for their next outdoor expedition, but there's more to discover...

top gift cards for dad top gift cards for dad
Vetted3 weeks ago

10 Best Gift Cards for Dad That He’ll Actually Love

Ample gift card options await, ensuring Dad receives something he truly loves—discover the top 10 choices that will make his...

father s day card ideas father s day card ideas
Vetted3 weeks ago

15 Best Cards for Dad That Will Make Him Smile This Father’s Day

I've compiled a list of 15 amazing cards that will surely bring a smile to your dad's face this Father's...

gifts for car enthusiasts gifts for car enthusiasts
Vetted3 weeks ago

14 Best Gifts for Car-Loving Dads That Will Rev Up Their Passion

Amidst a variety of unique gifts, discover the 14 best presents for car-loving dads that will ignite their passion for...

top smart door locks top smart door locks
Vetted3 weeks ago

15 Best Smart Door Locks for Ultimate Security and Convenience in 2025

Find the ultimate smart door locks of 2025 that combine security and convenience—discover which models stand out for your home.

top rated basement dehumidifiers guide top rated basement dehumidifiers guide
Vetted3 weeks ago

15 Top-Rated Dehumidifiers for Basement Use: The Ultimate Guide for a Dry Home

Learn about the 15 top-rated dehumidifiers for basement use and discover which units can transform your damp space into a...

top home battery systems top home battery systems
Vetted3 weeks ago

15 Best Home Battery Backup Systems of 2025 – Comprehensive Reviews and Insights

Looking for the perfect home battery backup system? Discover the top 15 options of 2025 that ensure you're never left...

top smart lighting systems top smart lighting systems
Vetted3 weeks ago

15 Best Smart Lighting Systems to Illuminate Your Home in 2025

Keep your home glowing with the 15 best smart lighting systems of 2025, and discover how to elevate your space...

Trending