Installing a kitchen backsplash DIY-style can transform your space while protecting your walls from spills. Start by choosing durable materials like ceramic or porcelain tiles, which are budget-friendly and easy to clean. Prepare your walls by ensuring they're clean and dry, and mark a centerline for a balanced layout. Use spacers for consistent gaps while tiling from that centerline. After the tiles are set, mix and apply grout, then seal it for longevity. Regular maintenance will keep your backsplash looking fresh and new. Stick around, and you'll discover more tips for a successful installation!
Key Takeaways
- Begin by selecting durable materials like ceramic or porcelain for easy maintenance and long-lasting results in your kitchen backsplash installation.
- Prepare the wall by cleaning, inspecting for damage, and marking a centerline for an even and balanced tile layout.
- Dry lay the tiles to visualize the arrangement and ensure aesthetic appeal, avoiding narrow cuts at the edges.
- Apply tile adhesive in small sections and maintain consistent gaps using spacers, starting from the centerline for balanced installation.
- After tiling, mix grout to a whipped frosting consistency, apply it into seams, and seal it for long-lasting protection.

43.3in-59in Extendable Round Dining Table for 4-8,Modern Kitchen Oval Dining Table with Removable Leaves Space Saving,Wood Base with Storage Shelf for Kitchen Living Room (Walnut)
Retractable dining table for 4-8 people: Considering the use in different scenarios, the dining table adopts a retractable...
As an affiliate, we earn on qualifying purchases.
Purpose and Benefits of Backsplash
A kitchen backsplash serves multiple important purposes that enhance both functionality and aesthetics. First and foremost, it protects your walls from splashes, spills, and stains, ensuring your cooking area remains clean and well-maintained. This durability is often achieved through the use of durable materials like ceramic tiles or glass, which not only stand up to wear and tear but are also easy to clean.
Beyond practicality, a kitchen backsplash acts as a focal point in your kitchen design, allowing you to express your personal style. You can choose from various colors, patterns, and textures to create an inviting atmosphere for cooking and entertaining. The aesthetic appeal of a well-designed backsplash can transform your kitchen into a visually stunning space.
Moreover, investing in a stylish backsplash can greatly increase your home's resale value. Potential buyers frequently view a tasteful backsplash as a desirable feature in modern kitchens, making your home more attractive on the market.

LUXOAK 60" Farmhouse Dining Table Set for 6, Solid Wood Kitchen Table with 4 Upholstered Chairs & Bench, 6-Piece Dining Room & Living Room Furniture, Cream White
Farmhouse Design: Crafted from solid Elm wood, this dining set features a natural wood grain tabletop in a...
As an affiliate, we earn on qualifying purchases.
Choosing the Right Materials

When you're choosing materials for your kitchen backsplash, think about durability and maintenance.
Options like ceramic and porcelain tiles aren't only resistant to moisture and stains but also easy to clean.
If you're after a modern look, glass tiles can elevate your space, but make sure they fit with your existing decor.
Tile Material Options
Choosing the right tile material for your kitchen backsplash can really make or break the overall look and functionality of your space. When considering options, ceramic tiles are a fantastic choice for your DIY project. They're durable, easy to clean, and budget-friendly, making them a go-to for many homeowners.
If you need something with greater resistance to water and stains, porcelain tiles might be your best bet. They're denser and less porous than ceramic, ideal for busy kitchens.
For a more modern touch, glass tiles can add a striking, reflective quality to your backsplash project. While they create a stunning visual effect, they do require careful installation to prevent scratches.
Finally, consider metal tiles, like stainless steel or copper, which offer a contemporary feel and exceptional durability. However, keep in mind that they can be pricier and may need specific adhesives for proper installation.
Ultimately, your choice of tile will depend on your aesthetic preferences, budget, and how much wear and tear your backsplash will face. Each material has its unique benefits, so choose wisely!
Durability and Maintenance Considerations
Picking the right materials for your kitchen backsplash involves not just aesthetics but also durability and maintenance.
Ceramic and porcelain tiles stand out for their durability and resistance to water damage, making them perfect for high-traffic areas. They're relatively low-maintenance, requiring simple cleaning routines to keep them looking fresh.
When designing your space, consider incorporating elements from essential farmhouse aesthetics to achieve a cozy atmosphere.
If you're considering glass tiles for a modern look, be cautious—they can chip easily and need a penetrating seal to maintain their appearance.
Metal tiles offer a unique charm but may require regular polishing to prevent tarnishing.
Natural stone options, like granite or marble, boast stunning visuals but need to be sealed frequently to guard against staining and moisture absorption.
When choosing your materials, think about how easy it'll be to clean. Smoother surfaces generally require less maintenance and resist staining better than textured or porous ones.
Don't forget about grout, as it plays a vital role in the installation process.
Selecting the right grout can enhance durability and simplify cleaning, ensuring your backsplash remains beautiful and functional for years to come.

41 in-78 in Extendable Dining Room Table for 4-8, Round Expandable Kitchen Table with Fluted Base, Modern Farmhouse Oval Dinner Tables for Dining Room Kitchen Living Room (Natural)
【Versatile Expandable Design】This expandable round oval dining table transforms from a cozy 41-inch round table for 4 into...
As an affiliate, we earn on qualifying purchases.
Prepare the Walls for Tile

Properly preparing the walls for tile installation is essential for achieving a professional finish. Start by inspecting the wall surface for any damage, like holes or cracks. Clean the surfaces with a TSP solution to guarantee proper adhesion of the tiles.
Use a straightedge to identify any uneven areas and patch any imperfections with spackle, creating a smooth surface for tile application.
Next, install a ledger board by attaching a 1-inch-by-4-inch board to the wall studs. This provides sturdy support for the first row of tiles, making your installation easier and more accurate.
After that, lightly sand the wall surface to enhance bonding with the adhesive.
Don't forget to maintain a 1/8-inch expansion gap around the perimeter where the tile meets cabinets and countertops. This gap allows for natural expansion and contraction, preventing future cracks or damage to your backsplash.

weselon 78 Inch Dining Table for 6 8 10, Modern Farmhouse Rectangular Kitchen Table, Long Dining Room Tables with Wood Strip Base for Kitchen Living Room (Walnut)
SPACIOUS DESIGN: This 78.74 inch dining table comfortably seats 6-10 people, perfect for family gatherings or entertaining guests....
As an affiliate, we earn on qualifying purchases.
Plan the Tile Layout

To create a stunning backsplash, start by marking a centerline on the wall to guarantee everything aligns perfectly with your focal point.
Next, dry lay the tiles using spacers to visualize the layout and make any necessary adjustments for symmetry.
This step helps you avoid narrow cuts that can detract from the overall look, setting the stage for a successful installation.
Centerline Marking Techniques
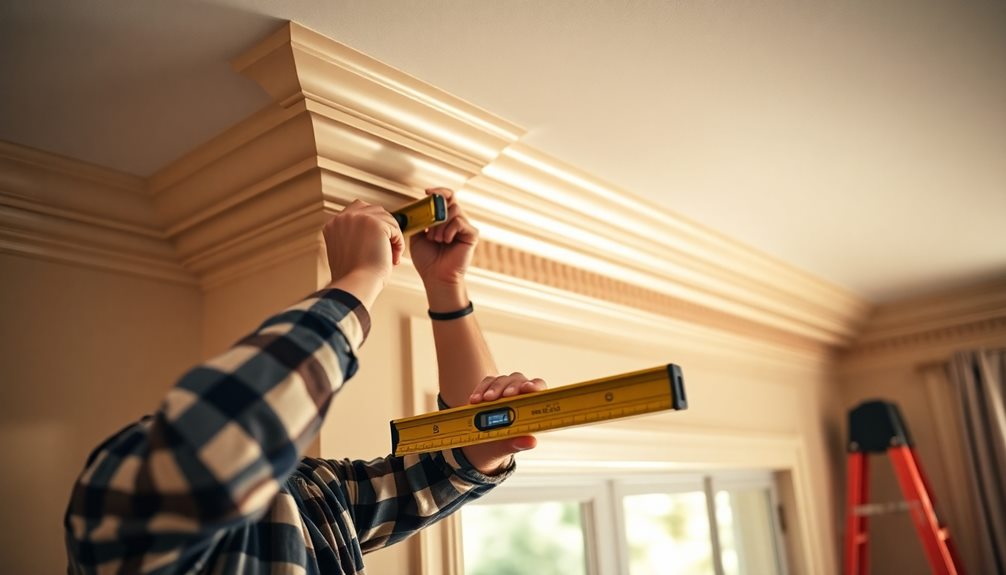
Marking the centerline is an essential step in achieving a balanced and symmetrical tile layout for your kitchen backsplash. To start, measure the width of the wall and use a vertical straightedge or chalk line to mark the centerline. This will serve as your reference point for the entire project.
Next, take a level to draw a horizontal line at the desired height for the first row of tiles. Make certain this line aligns with your centerline to guarantee consistent aesthetics.
While marking the centerline, consider the visual balance of any cabinets or fixtures above the backsplash. If you have a focal point, like a stove, you might need to adjust the centerline slightly to align with it for a more appealing design.
For wider walls, dry-laying tiles along the centerline can help you visualize the layout and adjust spacing before applying adhesive. This technique can prevent those small, awkward cuts at the edges that can disrupt the flow of your backsplash.
With careful centerline marking, you'll lay the groundwork for a stunning and harmonious tile installation.
Dry Layout Visualization
Once you've established your centerline, it's time to plan your tile layout through dry laying. This step allows you to visualize your layout before committing to adhesive. Start by arranging tiles on the countertop or wall, using spacers to maintain consistent gaps. This guarantees a uniform appearance once installed.
| Tile Type | Layout Idea | Color Consistency |
|---|---|---|
| Subway Tile | Horizontal Rows | Light Gray |
| Mosaic Tile | Accent Borders | White and Blue |
| Hexagon Tile | Full Coverage | Mixed Shades |
As you work, adjust the layout to avoid narrow tile cuts at the edges that can detract from the overall aesthetic. Wider cuts along the perimeter look much better. Don't forget to mix tiles from different boxes during the dry layout; this helps create a more cohesive color scheme, enhancing your backsplash's visual appeal.
Mark a centerline to help align the first tile, especially if there's a focal point like a stove or sink. By taking the time to dry lay and plan your tile, you'll set yourself up for a beautiful and successful backsplash installation.
Adjusting for Symmetry
Achieving symmetry in your tile layout is essential for a polished look, and it starts with a clearly defined vertical centerline on your wall. Mark this line to align your tile placement evenly on both sides.
Once that's done, dry lay the tiles horizontally with spacers to visualize the layout before installation. This approach helps guarantee you make symmetrical cuts at the edges.
As you plan the layout, adjust your starting point to avoid narrow pieces at the ends, which can disrupt the overall symmetry. If you're using patterned tiles, pay extra attention to aligning the patterns consistently across the layout.
Check for equal spacing and alignment frequently during installation. To maintain symmetry throughout the process, utilize a jury stick for precise measurements and cuts. This tool allows you to mark the vertical layout accurately, ensuring that your tiles will align perfectly.
Tile the Backsplash

Tiling the backsplash is a rewarding project that can dramatically enhance your kitchen's appearance. Start by applying tile adhesive to your work area in small sections using a notched trowel. This guarantees even coverage for proper tile adhesion. Use spacers to maintain consistent 1/16-inch gaps between tiles, making grout application easier later on.
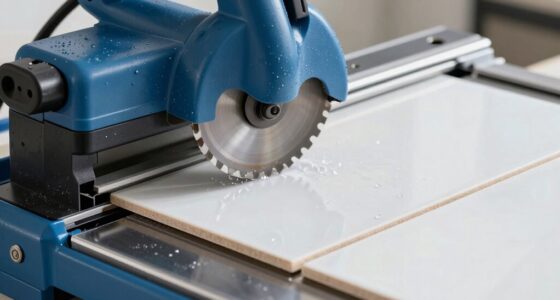
Begin tiling from a centerline or focal point. Place your first tile and adjust subsequent tiles for levelness and alignment as you progress outward. If you need to make cuts around outlets or corners, use a wet saw for precision. Cutting tiles while attached to their mesh backing helps prevent breakage.
Here's a quick reference table to keep you organized:
| Step | Tools Needed | Tips |
|---|---|---|
| Apply Adhesive | Notched Trowel | Guarantee even coverage |
| Place Tiles | Spacers | Maintain consistent gaps |
| Make Cuts | Wet Saw, Utility Knife | Cut tiles to fit around obstacles |
Once all tiles are installed, wait 24 hours for the adhesive to cure to guarantee a strong bond. Now you're ready for the next step!
Grouting and Finishing Touches

After letting the tile adhesive cure for 24 hours, it's time to move on to grouting and adding those finishing touches that will complete your backsplash project.
Start by mixing your grout to a whipped frosting consistency. Using a rubber float, apply grout diagonally into the tile seams, ensuring all gaps are filled evenly. Pay attention to the grout lines; they should be smooth and consistent for that professional look.
Once you've applied the grout, wait about 10-15 minutes before removing excess with a damp sponge. This step is vital; wiping too soon may pull grout from the joints, compromising your hard work.
Allow the grout to cure according to the manufacturer's instructions, typically between 24-72 hours. It's essential not to expose it to moisture during this time.
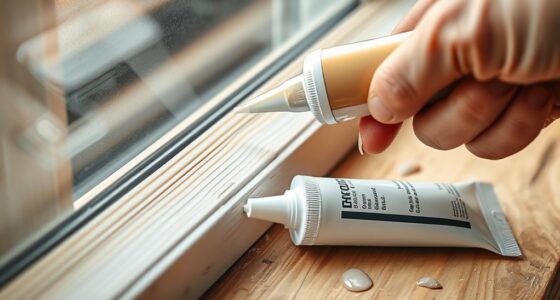
After the grout has fully cured, seal the grout with a high-quality penetrating sealer. This step protects against stains and moisture, ensuring the longevity and durability of your DIY backsplash.
With these final touches, you'll have a beautiful, functional backsplash that enhances your kitchen!
Maintenance and Care

Maintaining your backsplash is essential for keeping it looking fresh and vibrant. To do this, always use non-abrasive cleaners to clean your backsplash regularly. This prevents the buildup of grease and grime that can dull its appearance.
After grouting, take the time to use a soft cloth or sponge to remove any excess grout haze, enhancing the visual appeal of your project.
You should also inspect grout lines periodically for cracks or discoloration. These signs can indicate moisture issues or the need for resealing.
To protect against moisture and stains, reapply grout sealant at least once a year. This simple step extends the lifespan of both your grout and tiles.
If you notice any signs of water damage or mold, address these issues promptly. Ignoring them can lead to more significant problems down the line.
Finally, remember to let grout dry according to the manufacturer's instructions to guarantee peak durability.
Frequently Asked Questions
Is It Hard to Do Backsplash Yourself?
It isn't hard to install a backsplash yourself. With the right materials, tools, and preparation, you can achieve great results. Just follow a clear guide, and you'll likely finish successfully, even as a beginner.
What Is the Rule for Kitchen Backsplash?
When choosing a kitchen backsplash, aim for a height of 4 inches above countertops or to the cabinets' underside. Keep a 1/8-inch gap around edges and guarantee tile patterns are centered for balance.
Do You Leave a Gap Between a Countertop and Backsplash?
Leaving a gap between your countertop and backsplash is essential—it's like giving your kitchen a safety net! This tiny space, about 1/8 inch, allows for expansion, prevents moisture issues, and keeps everything looking sharp.
Where Should You Start When Tiling a Backsplash?
You should start tiling a backsplash from the center of the wall, marking a vertical line. This approach guarantees even placement on both sides, making it easier to achieve a balanced and visually appealing design.
Conclusion
To sum up, installing a kitchen backsplash can transform your space and add a personal touch. By following this DIY guide, you'll not only save money but also gain a sense of accomplishment. Imagine stepping into your newly updated kitchen, where vibrant tiles reflect your style and spark joy every time you cook. Just like Sarah, who turned her drab kitchen into a dazzling culinary haven, you can create a stunning backdrop that inspires your culinary adventures!