Before you start, clear the area and move furniture to prevent accidents. Protect surfaces with drop cloths and tape off edges for sharp lines. Repair any holes or dents with spackle, then sand until smooth. Clean the walls thoroughly to remove dust and grime, ensuring proper paint adhesion. Finally, apply a primer for a uniform finish. Skipping these steps can lead to uneven, less durable results—keep going to learn how to do it like a pro.
Key Takeaways
- Properly cover and protect all furniture and flooring with drop cloths to prevent drips and stains.
- Fill and sand all wall imperfections for a smooth, professional-looking finish.
- Clean walls thoroughly to remove dust, dirt, and grease, ensuring better paint adhesion.
- Apply a high-quality primer in even coats to create a uniform surface and improve durability.
- Use precise taping and masking techniques to achieve sharp, clean lines and prevent paint bleed.
paint drop cloths for furniture and floors
As an affiliate, we earn on qualifying purchases.
As an affiliate, we earn on qualifying purchases.
Clearing the Area and Protecting Surfaces
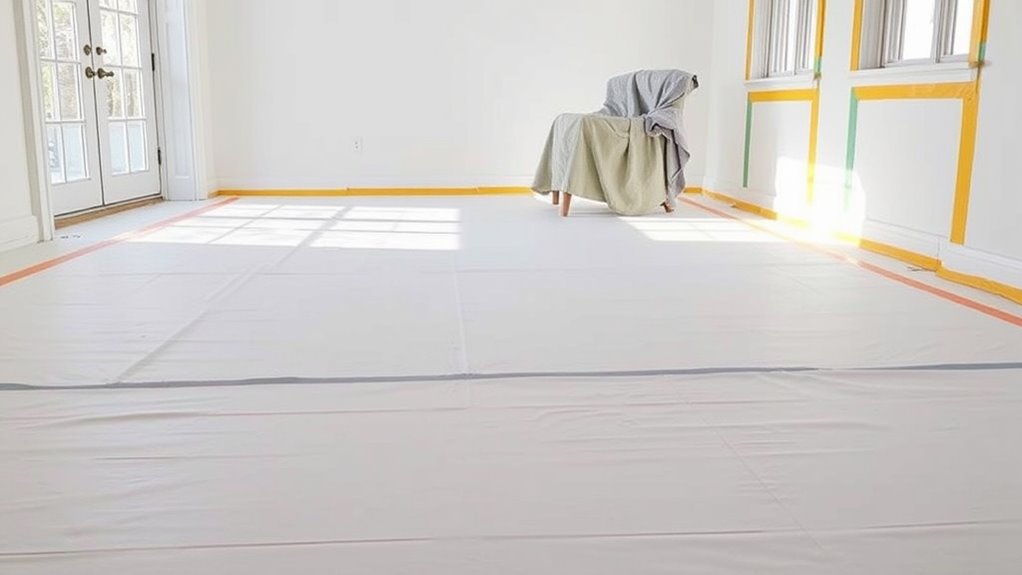
Before you begin painting, it is essential to clear the area and protect your surfaces to prevent accidents and damage. Start by removing or relocating furniture to give yourself open space. If you can’t move larger pieces, cover them with drop cloths to shield against drips and splatters. Lay down drop cloths on the floor to catch paint spills and keep your surfaces clean. Clearing the area minimizes obstacles, making it easier to work efficiently and safely. Protecting furniture and floors also saves you time during cleanup. Take the extra step to make certain everything is covered or moved, so you can focus on your painting without worry. Proper preparation guarantees a neater job and fewer surprises once you’re finished. Additionally, considering dog names for your new pet can add a touch of personality to your space once the project is complete.

Red Devil 0542 ONETIME Lightweight Spackle Wall Repair, Spackling for Holes Drywall, 1/2 Pint, White, 8 Ounce, Made in USA
EFFORTLESS REPAIRS: Fill holes, cracks, and dents in one easy application, saving time and effort on your DIY…
As an affiliate, we earn on qualifying purchases.
As an affiliate, we earn on qualifying purchases.
Repairing and Sanding Imperfections
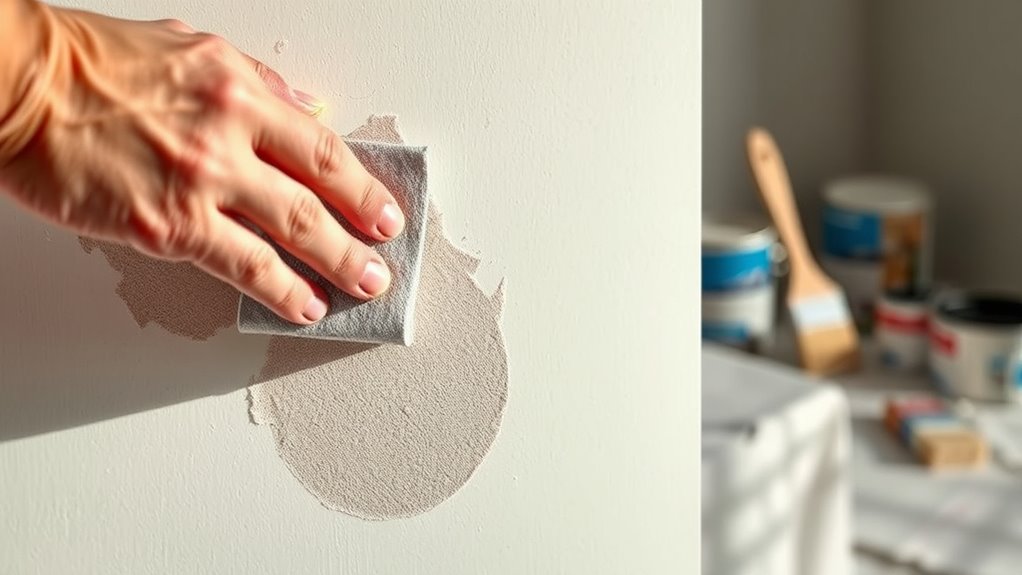
Once you’ve cleared and protected your surfaces, the next step is to address any imperfections on the wall. Start with wall repair by filling holes, dents, or cracks using spackle or joint compound. Use a putty knife to apply the filler smoothly, then let it dry completely. Once dry, sand the repaired areas using proper sanding techniques—start with medium-grit sandpaper and finish with fine grit for a smooth surface. Be gentle to avoid creating gouges or uneven spots. Focus on blending the patched areas seamlessly with the surrounding wall. Proper repair and sanding ensure a flawless surface, preventing imperfections from showing through your paint. Incorporating sector diversification strategies can also help in understanding different areas of home improvement investments, ensuring you choose the best methods for your project. Taking your time at this stage saves you from having to fix problems later and results in a professional-looking finish.

The Army Painter Color Primer, Matt White, 400ml, 13.5oz – Acrylic Spray Undercoat for Miniature Painting
UNIQUE COLOUR AND PERFECT MATCH This super fine pigment undercoat primer is perfect for any job requiring a…
As an affiliate, we earn on qualifying purchases.
As an affiliate, we earn on qualifying purchases.
Cleaning the Walls Thoroughly
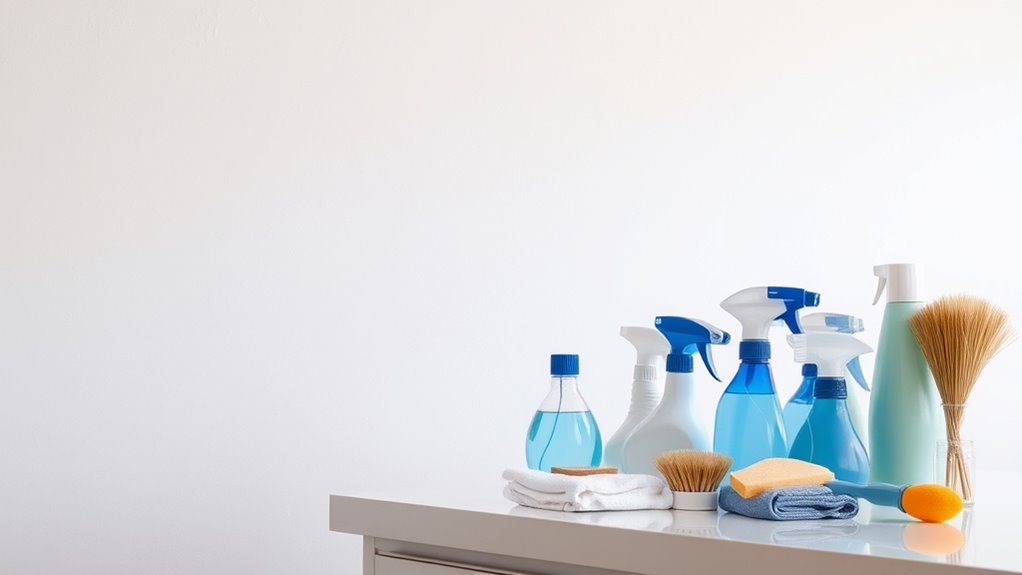
Cleaning the walls thoroughly is essential to guarantee a smooth and lasting paint job. Dust removal and eliminating wall grime are crucial steps before you start painting. Start by dusting the surfaces with a microfiber cloth or vacuum with a brush attachment to remove loose dirt. Next, wash the walls with a mixture of mild detergent and water, using a sponge or soft cloth. Pay special attention to areas with visible grime or stains. Rinse with clean water to eliminate any soap residue. Allow the walls to dry completely before moving on. Skipping this step can cause paint to peel or not adhere properly, leading to a less professional finish. Thorough cleaning sets a solid foundation for a flawless paint job that lasts. Additionally, ensuring proper surface preparation can significantly improve paint adhesion and durability.

ScotchBlue Original Multi-Surface Painters Tape, 2 Inch Wide (1.88 In. x 60 Yds), 1 Roll Blue Paint Tape Protects Surfaces & Removes Easily, Masking Tape for Indoor and Outdoor Use (2090-48NC)
READY. SET. PAINT!: 1 roll of 1.88 inch wide ScotchBlue Original Painter's Tape, a multi-surface solution for preparing…
As an affiliate, we earn on qualifying purchases.
As an affiliate, we earn on qualifying purchases.
Applying Primer for Better Adhesion

After thoroughly cleaning the walls, the next step is to apply a primer. Proper primer application is essential for adhesion enhancement, ensuring your paint sticks evenly and lasts longer. Use a high-quality primer suited for your wall type, whether drywall, wood, or previously painted surfaces. Apply it with a brush or roller in even, thin coats, working from top to bottom to prevent streaks. Don’t rush the process—allow the primer to dry completely before proceeding. Priming fills in minor imperfections and creates a uniform surface, which improves paint adhesion and results in a smoother finish. Remember, skipping this step can lead to peeling, uneven color, and reduced durability of your paint job. Proper primer application sets the foundation for a professional-looking result. Additionally, understanding contrast ratio is important when selecting a home theatre projector, as it directly impacts the perceived sharpness and clarity of your images.
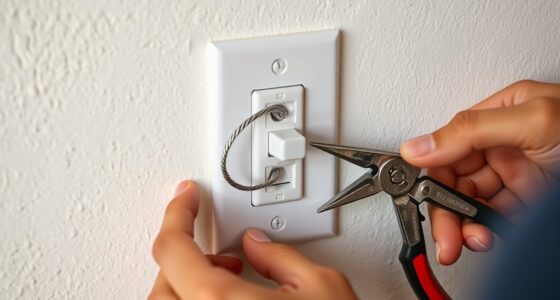
Taping and Masking With Precision

To achieve clean, sharp lines and prevent paint from bleeding onto unwanted surfaces, you need to tape and mask with precision. Start by carefully applying painter’s tape along edges, using edge trimming techniques to ensure a tight seal. Press down firmly to prevent paint seepage. When it’s time to remove the tape, use proper tape removal techniques—pull slowly at a 45-degree angle, preferably while the paint is slightly tacky. This avoids smudges or peeling paint. For intricate corners or curves, use a small brush or painter’s edge trimmer to get a crisp line before taping. Taking your time with edge trimming and proper tape removal guarantees professional-looking results, saving you time and frustration during cleanup. Additionally, ensuring your surface is properly prepared before taping, such as cleaning and sanding, can make a significant difference in the final outcome.
Frequently Asked Questions
How Do I Choose the Right Type of Paint for My Project?
To choose the right paint, consider your paint color selection and the room’s purpose. Opt for durable finish options like satin or semi-gloss in high-traffic areas, and matte or eggshell for bedrooms or living spaces. Think about the lighting and mood you want to create, and test small samples first. This way, you guarantee your paint choice matches your style, function, and the environment perfectly.
What Are Common Mistakes to Avoid During Painting?
To avoid mistakes, watch your brush strokes and prevent paint drips. Don’t overload your brush or roller, as it causes uneven coverage and drips. Keep a steady hand and work in smooth, consistent strokes to guarantee a professional finish. Always tape edges and remove excess paint from brushes to avoid drips. Take your time, and check your work frequently to catch mistakes early and achieve a flawless look.
How Long Should I Wait Between Coats for the Best Finish?
You should wait about 2 to 4 hours between coats for the best finish, but always check the paint’s drying time on the label. Proper surface preparation guarantees your coats dry evenly and adhere well. Rushing this step can cause peeling or uneven color. After each coat, make sure the surface is fully dry and free of dust or debris before applying the next, so your finish looks smooth and professional.
Can I Paint Over Wallpaper or Textured Walls?
You can paint over wallpaper or textured walls, but proper prep is essential. Start by removing any wallpaper or loose paint through wallpaper removal techniques, ensuring a smooth surface. For textured walls, clean thoroughly and sand any rough spots. Applying a primer designed for these surfaces helps the paint adhere better. Skipping these steps can lead to uneven finishes or peeling, so take your time to prep properly for a professional-looking result.
What Tools Are Essential for a Professional-Looking Paint Job?
You need the right tools for a professional-looking paint job. Start with a quality brush selection to achieve smooth, even coverage and reduce brush marks. Use painter’s tape types suited for your surfaces to create clean lines and protect edges. A good roller, drop cloths, and a steady hand are also essential. These tools guarantee precision, neatness, and a flawless finish that mimics a pro’s work.
Conclusion
Think of your wall as a blank canvas awaiting a masterpiece. Skipping prep is like trying to paint on a dusty, rough surface—you won’t get the smooth, vibrant finish you desire. When you take the time to clear, repair, clean, prime, and tape, you’re setting the stage for your paint to truly shine. With these steps, your project becomes a work of art, crafted with care and precision, transforming your space beautifully and effortlessly.