
The key to professional-quality paint jobs is thorough prep before spraying. You’ll want to guarantee surfaces are clean, smooth, and well-primed, and mask off trim and fixtures to prevent overspray. Choosing the right sprayer and adjusting settings for your project makes a big difference, too. Properly thinning paint and testing the spray pattern helps prevent messes and uneven coverage. Keep reading to discover easy tips that take your spray job from messy to masterful.
Key Takeaways
- Proper surface cleaning and sanding ensure better paint adhesion and a smooth finish with a sprayer.
- Masking off edges, trim, and fixtures prevents overspray and reduces cleanup time.
- Correct paint mixing and thinning promote consistent flow and prevent clogs during spraying.
- Selecting appropriate spray equipment and nozzle sizes improves control and reduces mess.
- Testing spray on scrap surfaces allows adjustments for even coverage and minimizes errors.

VEVOR 750W Stand Airless Paint Sprayer, 3000PSI High Efficiency Electric Airless Sprayer, Fine and Even Painting Effect, Handheld Paint Sprayers for Home Interior and Exterior Furniture and Fences
Efficient Painting: Our stand airless paint sprayer is equipped with a powerful 750W motor, capable of delivering up…
As an affiliate, we earn on qualifying purchases.
As an affiliate, we earn on qualifying purchases.
Why Proper Preparation Is Essential for a Flawless Paint Job
Before you start spraying paint, proper preparation is essential to achieving a flawless finish. Your first step is mastering brush techniques, which helps you understand how paint behaves and ensures even coverage. Mixing paint thoroughly is equally important; proper paint mixing prevents streaks and uneven color. Clean the surface thoroughly to remove dust, grease, and old paint, which can ruin your finish. Sand rough areas for smoothness, and tape off edges to protect trim and fixtures. When you’re ready to paint, use consistent brush strokes to understand how the paint flows, helping you identify spots that need touch-ups. Proper prep minimizes the need for corrections later, giving you a professional-looking result right from the start. Additionally, understanding utilitarian principles can help prioritize tasks for maximum efficiency during your painting project, especially when managing project scope and deadlines. Applying energy-efficient practices during preparation can also contribute to a more sustainable painting process. Incorporating time management techniques can further streamline your workflow and ensure timely completion. Recognizing the importance of attention to detail ensures that no imperfections are overlooked, resulting in a high-quality finish.

Gyfent 22Pcs Airless Paint Sprayer Gun Kit, 3600PSI Airless Spray Gun with 50Ft High Pressure Hose & 6Pcs Reversible Spray Tips & 4Pcs Extension Rod & 6Pcs Filters & Guide Tool & Nozzle Seat
Package Includes: You will receive 1 pcs airless spray gun, 1 pcs 50ft high pressure hose, 6 pcs…
As an affiliate, we earn on qualifying purchases.
As an affiliate, we earn on qualifying purchases.
How to Choose the Right Paint Sprayer for Your Project
Choosing the right paint sprayer depends on your project size, finish preferences, and budget. You need a sprayer that can handle the scope without wasting money or time. Consider these points carefully to make the best choice for your specific needs. Additionally, understanding consumer product categories can help you select tools that offer the best quality and value for your investment. Being aware of the exquisite post can also provide insights into the importance of preparation and selecting the right equipment for successful results. When choosing a sprayer, it’s also helpful to consider travel-friendly tools, ensuring your equipment can be transported easily if you need to work on different locations or projects. Incorporating smart home automation principles can even optimize your workflow by coordinating your tools with other project-related devices, making your work more efficient. Proper document management can streamline your entire project, from planning to execution, making your work more efficient.
Project Size Compatibility
Selecting the right paint sprayer depends heavily on the size of your project. For small tasks like furniture or cabinets, a handheld sprayer with a smaller nozzle works best, allowing precise control and easier cleanup. Larger projects, such as walls or fences, require a HVLP or airless sprayer that covers more area quickly. Consider how your brush techniques will translate with the sprayer, ensuring smooth application without overspray. Proper paint mixing is essential regardless of size, but bigger projects demand consistent, well-mixed paint to prevent clogs and uneven coverage. If your project involves detailed work, choose a sprayer that offers adjustable settings for control. Matching your sprayer to your project size helps you avoid frustration and achieve professional results. Additionally, understanding project size compatibility helps in selecting the most efficient equipment and techniques for a seamless painting experience. Being aware of tool versatility can also help you adapt your approach as your skills grow or project scope changes. For optimal results, consider paint flow control to fine-tune application based on your specific project needs. Knowing how to adjust your equipment accordingly can also lead to better paint application techniques, ensuring a smooth and professional finish.
Finish Type Options
The finish you want on your project can considerably influence the type of paint sprayer you choose. Different finish options, like smooth, matte, or glossy, require specific application techniques to achieve the desired look. For example, a high-gloss finish demands a sprayer that provides a fine, even spray to prevent streaks and uneven coverage. Conversely, textured or matte finishes might benefit from a sprayer that offers broader spray patterns for a softer look. Consider whether you need a HVLP sprayer for detailed, controlled application or an airless model for larger areas with thicker coatings. Understanding these finish options and matching them with suitable application techniques guarantees a professional result and saves you time and effort during your project. Additionally, selecting the right equipment can help you maximize your truck bed’s potential, ensuring your project is both efficient and high-quality. Knowing how to choose appropriate finish types can also help prevent costly rework and improve your overall results. Being aware of the application techniques specific to each finish can help you achieve a smoother, more professional appearance. Moreover, understanding your desired surface texture allows you to select the most suitable spray method to attain the perfect final look.
Budget Considerations
Are you trying to stick to a budget while still getting quality results? Focusing on cost efficiency is key when selecting a paint sprayer. Start with budget planning to determine how much you can spend without sacrificing performance. Cheaper models might save money upfront but could lead to higher costs later due to inconsistent application or frequent repairs. Consider your project size and type to choose a sprayer that offers the right balance of features and affordability. Look for models that deliver reliable results without unnecessary extras that inflate the price. Investing in a slightly higher-quality sprayer can save you money in the long run by reducing waste and improving finish quality. Additionally, understanding the ventilation considerations can help ensure safety and efficiency during your painting projects. Proper airflow management is also essential to prevent fumes and ensure a comfortable working environment. Paying attention to filtration systems can further improve air quality and safety during spraying. Ensuring your equipment has effective filters can significantly enhance overall air quality and protect your health. Being aware of power source options can help you select a sprayer that best fits your available tools and workspace. Ultimately, smart budget planning helps you get professional results without overspending.

IWOWHERO 10Pcs Spray can Nozzles Adjustable Aerosol Spray Caps for Graffiti Art and Touchup Painting Waterproof Button Fan Tips for Precise Application
Core Functionality: These aerosol can spray heads deliver efficient and precise spray paint application, ideal for graffiti art…
As an affiliate, we earn on qualifying purchases.
As an affiliate, we earn on qualifying purchases.
Preparing Your Workspace and Surfaces for Painting
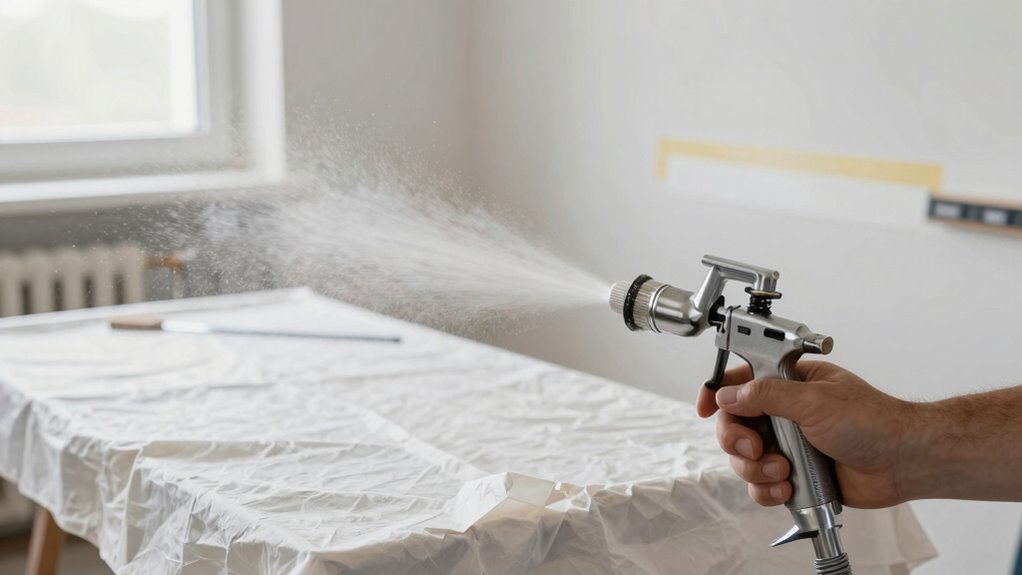
Before you begin spraying paint, it’s vital to prepare your workspace and surfaces to guarantee a smooth, professional finish. Clear the area of clutter and cover furniture and floors with drop cloths. Clean surfaces thoroughly to remove dust, grease, or old paint, ensuring proper adhesion. Use appropriate brush techniques to prep edges and corners, making the spray job easier. Proper paint mixing is essential; stir thoroughly to achieve a consistent consistency, preventing drips or uneven coverage. Tape off trim, outlets, and other details to protect them from overspray. Good preparation reduces cleanup and touch-ups later, saving time and frustration. When your workspace and surfaces are properly set, your spray application will be cleaner, more efficient, and more professional-looking. Additionally, proper surface preparation helps ensure the paint adheres evenly and lasts longer, which is key for paint durability and a professional finish. Taking the time to prepare your surfaces also minimizes the risk of paint failures such as peeling or cracking over time.
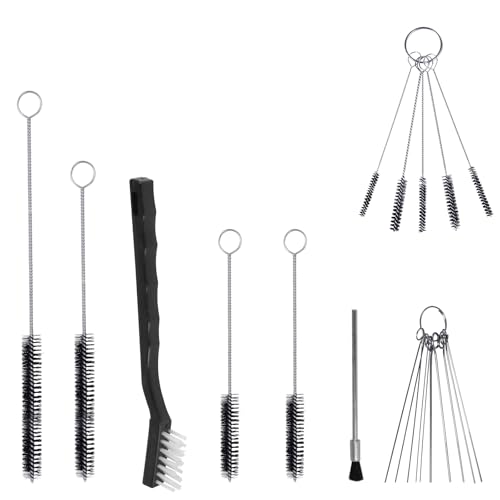
17pcs Multi-Purpose Spray Gun Cleaning Kit,Nylon Brushes Paint Gun Cleaning Kit Mini Brushes & Needles for Clean Airbrush Nozzles Spray Guns Tattoo Equipment (17)
★ This handy spray guns cleaning kit is all you need to keep your spray guns clean and…
As an affiliate, we earn on qualifying purchases.
As an affiliate, we earn on qualifying purchases.
Selecting the Best Paint and Thinner for Spraying
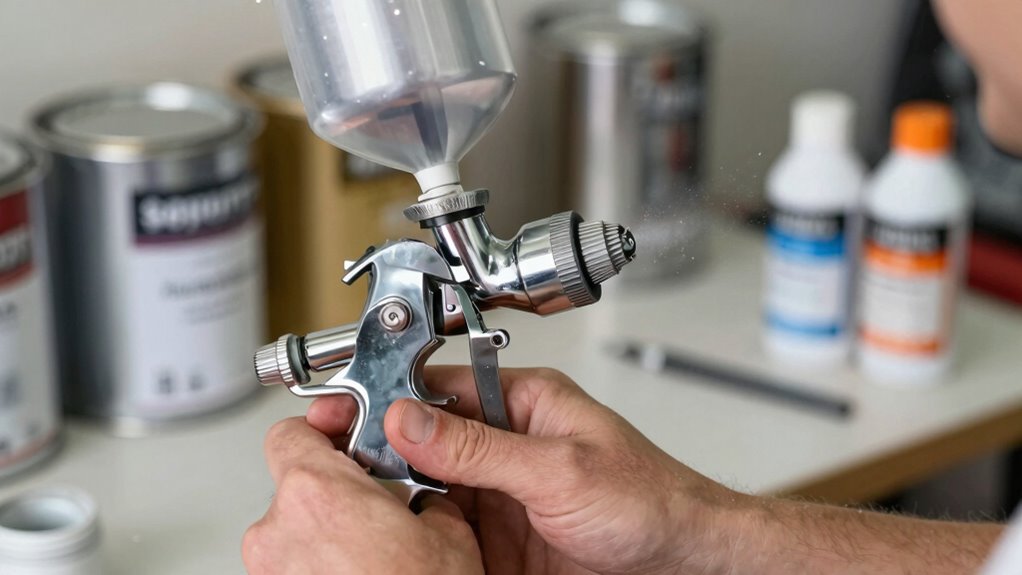
Choosing the right paint and thinner is essential for achieving a smooth, professional spray finish. Start by selecting a high-quality paint suited for spraying, as it flows better and reduces clogging. Use proper brush techniques when testing paint consistency; thinning the paint with compatible thinner guarantees it sprays evenly without splattering. Always store your paint properly in airtight containers to prevent drying out or contamination, which can affect application quality. Be mindful of the paint’s viscosity—too thick, and it’ll clog; too thin, and it won’t cover well. Adjust the thinner ratio based on your spray equipment and environmental conditions. Good paint storage practices keep your materials fresh, making your spraying process more efficient and your results more professional.
Setting Up Your Paint Sprayer for Optimal Results

Setting up your paint sprayer correctly is key to achieving smooth, even coverage. Proper setup ensures your brush techniques and color matching stay consistent, preventing drips and uneven coats. First, choose the right nozzle size for your project to control spray pattern and film thickness. Second, adjust your pressure settings to match the type of paint and surface. Third, prepare your paint by thinning it as needed for ideal flow. Fourth, test spray on a scrap surface to check for drips and coverage. This pre-spray setup helps you maintain control and precision throughout your project, making your work look professional. Remember, a well-prepared sprayer simplifies brush techniques and guarantees better color matching, elevating your results from messy to masterful.
How to Mask and Protect Areas Before Spraying
Before you start spraying, it’s essential to prepare surfaces properly and use effective masking techniques. This guarantees paint goes where you want it and protects surrounding areas from overspray. Taking these steps makes your project cleaner, faster, and results look professional.
Proper Surface Preparation
Proper surface preparation is essential to achieve a clean, professional paint job, and this starts with masking and protecting areas that shouldn’t be painted. Properly shielding surfaces ensures sharp color matching and prevents overspray from settling where it shouldn’t. Environmental factors like dust, humidity, and temperature can affect adhesion and finish, so taking extra precautions is crucial. To do this effectively, consider these steps:
- Use quality masking tape and paper for clean edges.
- Cover nearby furniture, fixtures, and floors thoroughly.
- Remove or seal any objects that could be affected by overspray.
- Assess environmental conditions to minimize dust and humidity interference.
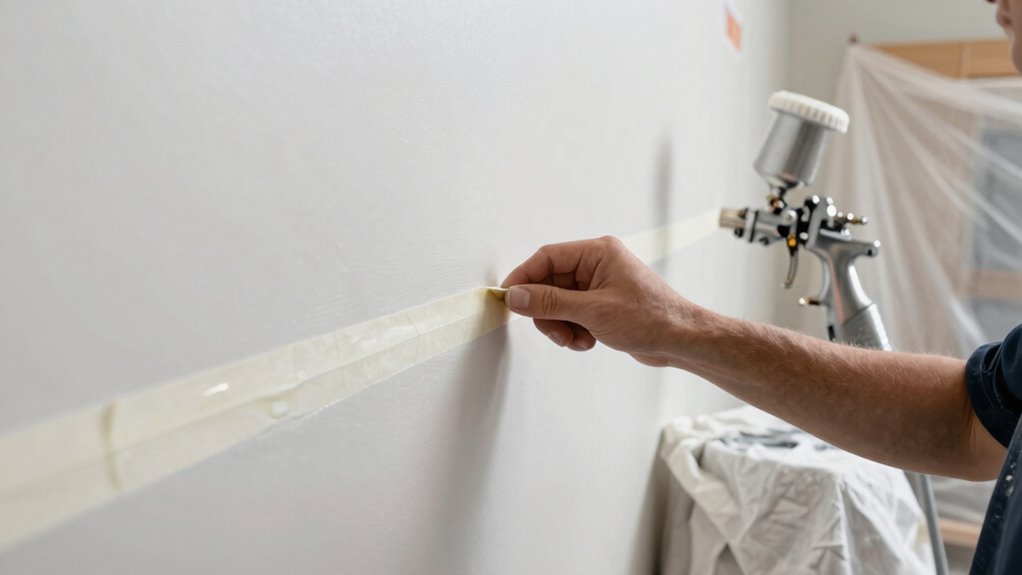
Effective Masking Techniques
Effective masking techniques are key to achieving clean, sharp paint lines and preventing overspray from ruining your project. Start by selecting the right masking materials, such as painter’s tape and drop cloths, to guarantee effective surface protection. Apply masking tape carefully along edges and corners, pressing firmly to prevent paint bleed. Use masking paper or plastic sheeting to cover large areas, securing them with tape to keep everything in place. Pay attention to details like outlets, trim, and windows, ensuring these surfaces are well protected before spraying. Proper masking not only results in professional-looking finishes but also minimizes cleanup time. Take your time to mask thoroughly; this preparation step is vital for a smooth, mess-free painting process.
Test and Adjust Spray Settings for Even Coverage

To achieve even coverage with your paint sprayer, you need to test and adjust the spray settings carefully. Start by checking the spray pattern—make sure it’s consistent and wide enough for your project. Adjust the nozzle to refine the spray width and control the flow. Here’s what to do next:
Ensure even coverage by testing and adjusting your spray pattern, nozzle, and pressure before starting.
- Spray on a test surface to observe the pattern and coverage.
- Tweak the nozzle adjustment for a narrower or wider spray as needed.
- Adjust the pressure to prevent drips or uneven flow.
- Re-test until the spray pattern is uniform and smooth.
Always remember, proper nozzle adjustment and testing are key to avoiding uneven coats and achieving professional results. Take your time to dial everything in before moving to your main surface.
Common Prep Mistakes That Lead to Messy Finishes
Have you ever started painting only to find your finish streaky or uneven? One common mistake is rushing the prep work, which affects your brush techniques and overall results. Using inconsistent brush strokes or applying too much paint at once can cause drips and uneven layers. Additionally, neglecting proper color matching leads to mismatched shades and a messy appearance. Failing to clean your brushes thoroughly before switching colors can also create unwanted blending issues. Skipping surface preparation, like sanding or priming, makes it harder to achieve a smooth finish. These mistakes often result in a finish that looks unprofessional and messy. Taking the time to perfect your brush techniques and ensure accurate color matching can make all the difference between a smooth, flawless look and a cluttered mess.
Final Tips to Finish Your Paint Job Like a Pro
After completing your prep work and applying the paint, finishing strong is what makes your project look professional. To guarantee a flawless result, focus on mastering brush techniques and choosing the right paint color. Here are some final tips:
- Use smooth, even brush strokes to avoid streaks and build-up.
- Keep a wet edge to prevent lap marks, especially on large surfaces.
- Carefully select paint colors that complement your space and lighting.
- Take your time to inspect and touch up any imperfections before the paint cures.
These steps help you achieve a polished finish that rivals professional work, making your effort stand out. Proper technique and thoughtful color choices truly elevate your project from mess to masterpiece.
Frequently Asked Questions
What Safety Equipment Should I Wear During Painting?
You should wear safety glasses to protect your eyes from paint splashes and debris. A respirator mask is essential to prevent inhaling harmful fumes and vapors. Make sure your respirator fits properly for maximum protection. Additionally, consider wearing gloves and coveralls to shield your skin. Prioritizing this safety equipment keeps you safe and ensures a professional, mess-free painting process.
How Long Should I Wait Between Coats?
You should wait for the recommended drying time before applying the next coat, which is usually around 4 to 6 hours, but always check the paint label for specific recoat interval instructions. Rushing this step can cause runs or uneven finish. Allow each coat to dry thoroughly to ensure proper adhesion and a smooth, professional-looking result. Patience with drying time guarantees your final coat looks flawless.
Can I Use a Paint Sprayer for Textured Finishes?
Think of your paint sprayer as a versatile artist’s brush, capable of creating textured masterpieces. Yes, you can use it for textured finishes; just make certain you choose the right nozzle and thinning technique. Focus on texture application and finish consistency, applying even coats to avoid drips or uneven spots. With patience and proper technique, your sprayer transforms into a tool for stunning textured walls that look professionally done.
How Often Should I Clean My Paint Sprayer?
You should clean your paint sprayer after every use to guarantee peak performance. Follow a regular maintenance schedule, cleaning techniques like flushing with water or solvent, depending on the paint type. This prevents clogs and prolongs your equipment’s life. If you use it frequently, consider cleaning it more often—ideally after each project or at least once a week. Proper cleaning keeps your sprayer working smoothly and saves you time in the long run.
Is It Necessary to Thin All Types of Paint Before Spraying?
You don’t always need to thin all types of paint before spraying, but it’s essential for maintaining proper paint consistency. Thinning methods vary based on the paint type, such as water-based or oil-based. Always check the manufacturer’s recommendations, and adjust the paint’s thickness accordingly to prevent clogging and achieve a smooth finish. Proper thinning guarantees your sprayer works efficiently and your results look professional.
Conclusion
Mastering proper prep transforms your painting into a flawless masterpiece, far from the chaos of a novice’s mess. When you carefully choose your tools, prep your surfaces, and fine-tune your sprayer, you elevate your work to a level that rivals professional perfection. Think of it as turning a simple project into an art form—your skills and attention to detail are the brushstrokes that make all the difference. With the right prep, you’re unstoppable.