Connect with us

Home Decor

Tropical Beach Diy Vases

Yearning for a coastal escape, discover how to craft enchanting DIY vases that bring the tropical beach into your home.

Published

on

beach inspired diy vase project

We often find ourselves mesmerized by the serene ambiance of tropical beaches, and it's no surprise that we turn to coastal elements for inspiration when crafting unique and enchanting DIY vases. By gathering coastal inspirations, we can prepare natural materials like seashells and pebbles, and design unique vase concepts that incorporate resin art techniques and natural materials like sand and driftwood. We can then assemble beach-inspired elements, enhance our designs with twine and beads, and add final coastal touches like seashells and tropical flowers. As we explore these techniques, we'll uncover even more ways to bring the beauty of the tropical beach into our DIY vases.

Key Takeaways

• Incorporate seashells, pebbles, and driftwood into your DIY vase design to evoke a tropical beach ambiance.

• Experiment with resin art techniques and natural materials like sand and palm leaves to create unique coastal-inspired vases.

• Wrap twine around your vase and add beads for a rustic, beachy vibe that's both sophisticated and glamorous.

• Mix and match different textures like jute, sisal, ceramic, and glass to craft one-of-a-kind tropical vases that pop with visual appeal.

Advertisement

• Add coastal charm to your DIY vase with decorations like seashells, tropical flowers, or ocean-themed patterns for a personalized touch.

Gathering Coastal Inspirations

As we explore the world of tropical beach DIY vases, we're drawn to the coastal inspirations that evoke a sense of relaxation and warmth, from the intricate patterns of seashells to the towering silhouettes of palm trees.

We're captivated by the serene ambiance of a tropical beach, where the soothing sounds of ocean waves and the warmth of the sun on our skin create a sense of tranquility.

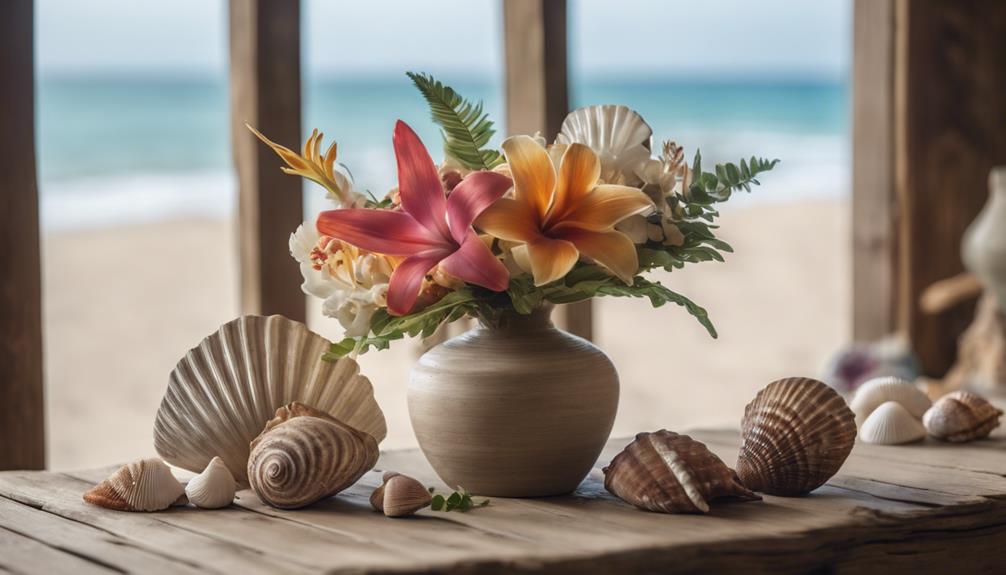
In our quest to replicate this atmosphere in our DIY vases, we turn to coastal elements like palm fronds, seashells, and ocean-inspired textures. We envision a vase that transports us to a nautical bathroom, where the aqua blue and sandy beige hues evoke a sense of coastal calm.

We're inspired by the intricate designs of handmade vases, adorned with seashell motifs and palm leaf patterns, which evoke the tropical paradise we crave.

Advertisement

As we gather coastal inspirations, we're reminded that the perfect tropical beach DIY vase is one that captures the essence of a seaside escape, where the warmth of the sun meets the serenity of the ocean.

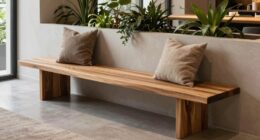
Preparing Natural Materials

creating eco friendly craft supplies

As we prepare our natural materials for our tropical beach DIY vases, we'll focus on gathering seashells and pebbles, as well as collecting driftwood and leaves, to create unique and personalized decorations.

We'll need to carefully select and clean these materials to make sure they're ready for use in our projects. By doing so, we'll be able to bring the beauty of the coast into our homes with our one-of-a-kind, beach-inspired vases.

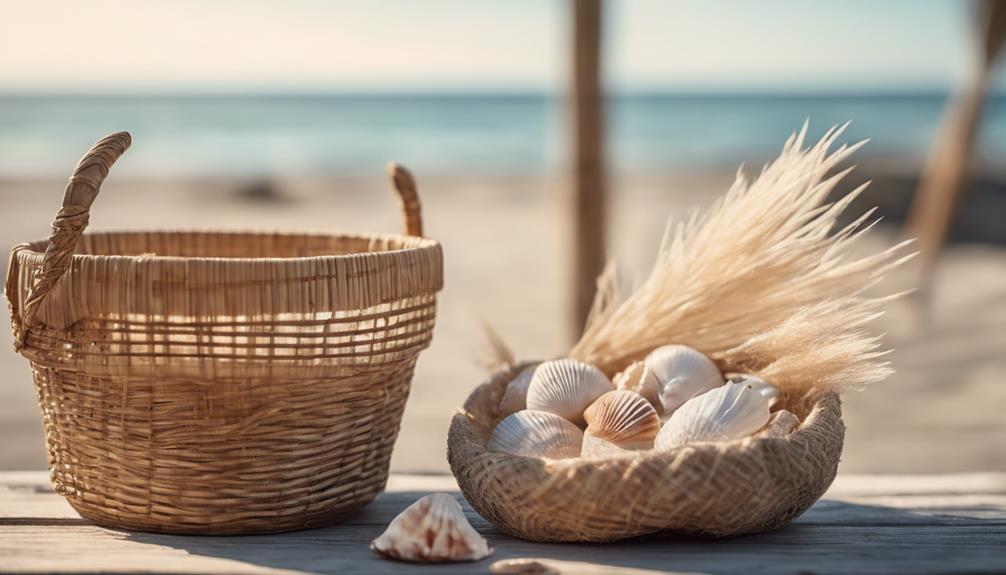
Gathering Seashells and Pebbles

We head out to our favorite beach or craft store to collect an assortment of seashells and pebbles, the foundation of our tropical beach-inspired vase decoration. We're on the hunt for a variety of shapes, sizes, and colors to add a unique touch to our DIY project.

Seashells, with their delicate curves and oceanic essence, will bring a coastal flair to our vases, while pebbles will provide texture and a natural element. We gather an array of seashells and pebbles, from delicate scallop shells to smooth, rounded pebbles, to create a visually appealing arrangement.

By combining different sizes and shapes, we can create a personalized, one-of-a-kind design that reflects our creative vision. 'The key to a beautiful tropical beach-inspired vase is to vary the textures, colors, and shapes of the natural materials,' notes a DIY expert.

Advertisement

With our seashells and pebbles in hand, we're ready to get creative and bring our tropical beach-inspired vase to life.

Collecting Driftwood and Leaves

With our seashells and pebbles gathered, we venture out to collect driftwood and leaves, two essential natural materials that will add depth and character to our tropical beach-inspired vases.

We head to beaches, riverbanks, or lakes to find unique pieces of driftwood that will bring a rustic touch to our DIY project. Meanwhile, we explore tropical gardens or our own backyards to collect leaves from palm trees or banana plants, which will add a lush, natural touch to our vases.

Before incorporating these natural materials into our vases, we make sure to clean and dry them thoroughly to prevent any damage or decay. Driftwood can be shaped, sanded, or cut to fit our desired vase design, while leaves can be used to create a vibrant, tropical flair in our decorations.

Designing Unique Vase Concepts

innovative vase designs created

We'll start by brainstorming innovative ways to infuse our DIY vases with the essence of a tropical beach, carefully balancing eclectic elements to evoke a sense of coastal charm.

As we design our unique vase concepts, we'll consider incorporating seashells, palm leaves, and ocean waves to create a beachy vibe. For a more dramatic look, we can experiment with resin art techniques to create colorful swirls and textures reminiscent of a tropical sunset.

Advertisement

To add an extra layer of authenticity, we'll use natural materials like sand, driftwood, and sea glass in our designs. If we're planning a beach wedding or tropical party, we can create customized vases with hand-painted designs, beach quotes, or personalized embellishments.

These one-of-a-kind pieces will add a touch of coastal elegance to any decor. By combining art, decor, and natural elements, we can craft vases that transport us to a tropical paradise.

As we explore the possibilities, we'll keep in mind the importance of balancing our designs to avoid overwhelming the senses. With a little creativity, our DIY vases will become stunning centerpieces for any beach-inspired celebration.

Assembling Beach-Inspired Elements

creating coastal decor vignette

As we move on to assembling beach-inspired elements, we're excited to explore the various components that will bring our tropical beach DIY vases to life.

We'll examine how incorporating beachy keen elements, such as seashells, starfish, or driftwood, can add a touch of coastal charm to our vases.

Beachy Keen Elements

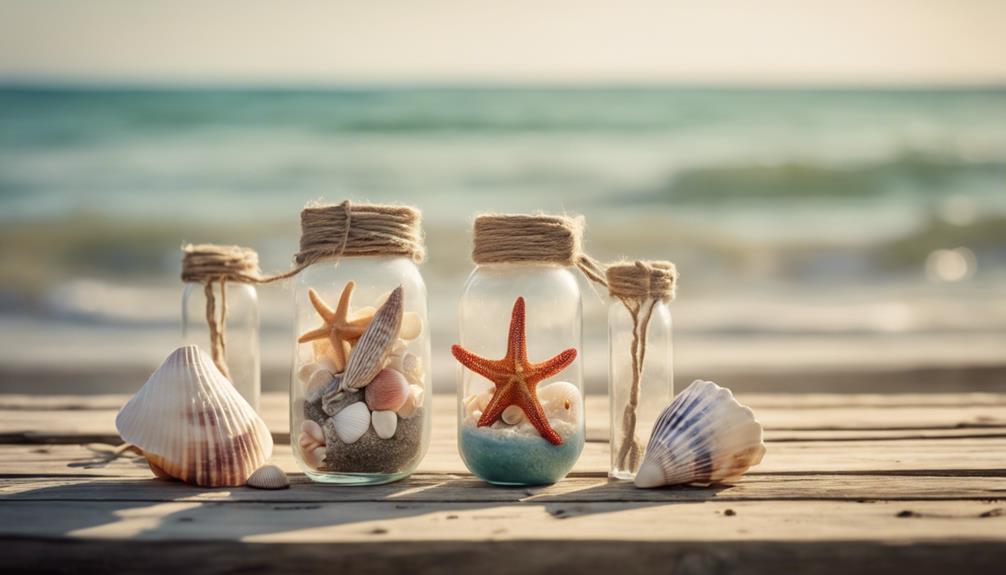
We're gathering our favorite beach finds, from shells to driftwood, to create unique and enchanting decorative elements that evoke the essence of the coast. As we assemble these beachy keen elements, we're reminded of the ocean's calming presence in our house, whether it's for a wedding or everyday decor.

Advertisement

To achieve this, we're incorporating hand-painted fish vases, ceramic vases, and pebble vases into our design. We're also repurposing a cutting board as a base for a one-of-a-kind shell vase. Meanwhile, a corked bottle transformed into a beachy centerpiece adds a touch of whimsy to our decor.

Our DIY projects wouldn't be complete without the addition of seashells, which we're using to create stunning shell vases. According to experts, 'seashells are a great way to add a touch of the ocean to your home decor' (Beach Decor Magazine).

Seashell Decor Ideas

To take our beachy keen elements to the next level, we're exploring creative ways to incorporate seashells into our decor, crafting one-of-a-kind vases and candle holders that capture the essence of the coast. By combining seashells with natural elements like driftwood and beach stones, we can create unique pieces that evoke the feeling of a seaside retreat.

Here are some seashell decor ideas to get you started:

  • Create a stunning seashell candle holder that adds a touch of coastal charm to any room
  • Design a Nautical Themed Decor with Ocean Theme Vases and Beach Stone Art that reflects your love for the ocean
  • Use Natural Stone Decor to create a beautiful Unity Sand Vase that makes a thoughtful beach house gift
  • Incorporate seashells into your Beach Theme Kitchen with decorative accents and accessories
  • Add a touch of Coastal Design Interior to your home with seashell-adorned Nautical vases and decorative accents
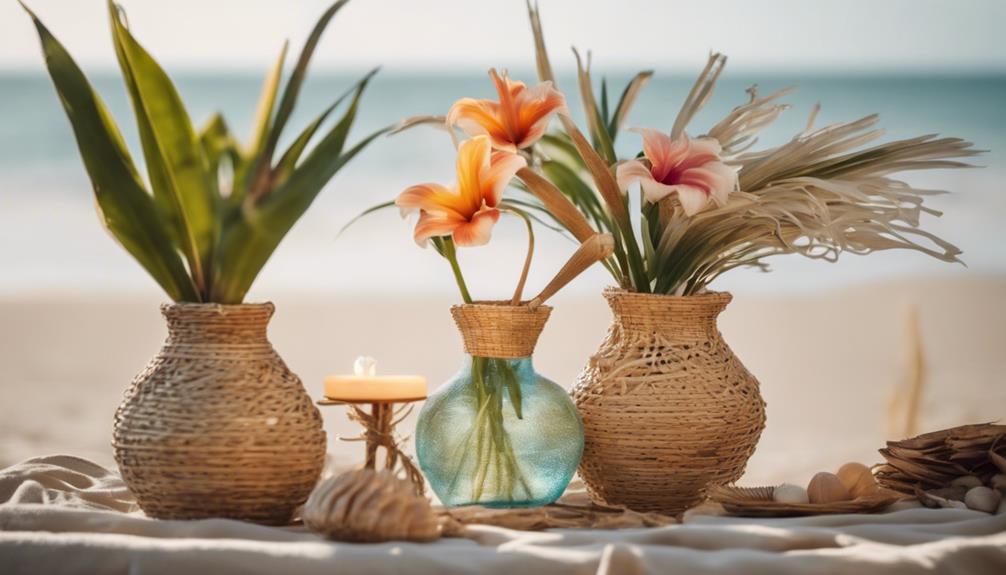
Coastal Texture Mix

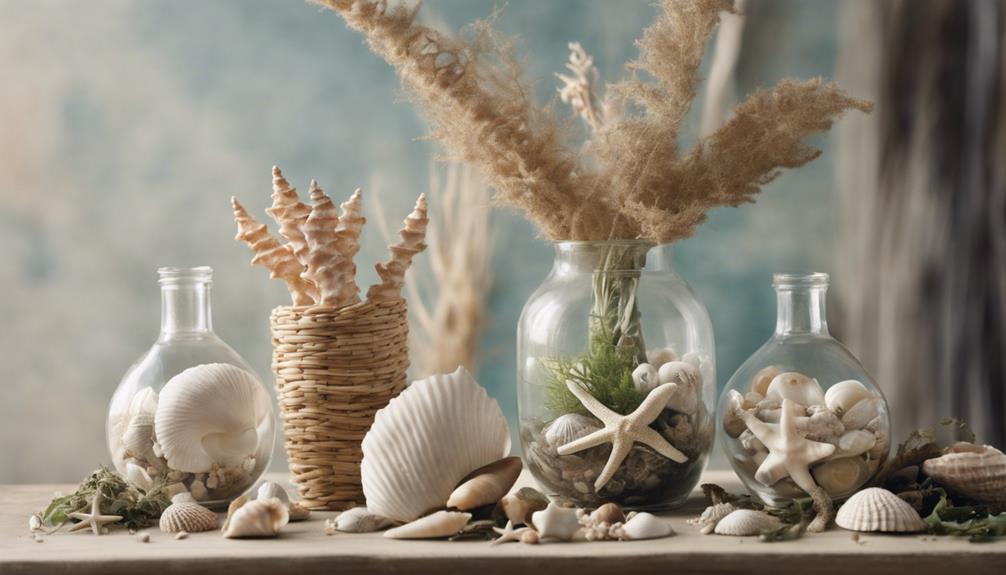
By combining a variety of beach-inspired elements, we're crafting unique DIY vases that embody the essence of the coast. To create a cohesive coastal texture mix, we're incorporating elements like seashells, sand dollars, and palm leaves. These natural elements add depth and visual interest to our vases for flowers, making them perfect for our home decor. We're also experimenting with different materials like ceramic, glass, and natural fibers to create a diverse and interesting texture mix.

To enhance the coastal theme, we're utilizing a variety of textures such as jute, sisal cording, and resin. These textures not only add depth but also evoke a beachy vibe when combined with colors like ocean blues, sandy neutrals, and tropical greens. By layering these textures and materials, we're creating a dynamic and visually appealing coastal texture mix that's perfect for our tropical beach DIY vases.

Advertisement

With these elements, we're able to bring a piece of the coast into our home, creating a unique and beautiful vase that's sure to be a conversation starter.

Enhancing With Twine and Beads

crafting with twine and beads

With a few simple twists and turns, we can transform our DIY beach vases into stunning centerpieces by incorporating twine and beads into the design. This decorative technique adds a touch of elegance and texture to our vases, giving them a unique and personalized touch.

Here are some ways we can enhance our beach vases with twine and beads:

  • Create a rustic and natural beach-inspired vibe by wrapping twine around the vase
  • Add beads to the design for a touch of sophistication and glamour
  • Mix twine and beads for a one-of-a-kind, customized beach vase
  • Experiment with different types of twine and beads to match different themes or styles
  • Use this technique to add a personal touch to our DIY beach vases, making them truly special and meaningful

Adding Final Coastal Touches

coastal touch final details

As we put the finishing touches on our DIY beach vases, we're excited to infuse them with a sense of coastal charm that welcomes the warmth and tranquility of the tropical beach into our homes.

To achieve this, we can decorate our vases with seashells, palm leaves, or tropical flowers, adding a touch of whimsy and playfulness to our Beach decor. We can also incorporate beach-inspired elements like sand dollars or ocean-themed patterns to enhance the tropical vibe.

For a more personalized look, we can try DIY techniques like resin art or hand-painted designs to elevate the look of our vases. By combining different textures and colors, we can create a cohesive and visually appealing tropical decor that's perfect for a Decoration Wedding or a Beach Home Decor.

Consider using a Natural Rock Vase or an Aqua Vase to add an extra touch of elegance. With a little creativity, our DIY vases can become stunning Wall Vases or Flower Pots that bring the beauty of the ocean into our homes.

Advertisement

As Palm tree decor expert, Sarah Johnson, notes, 'Adding coastal touches to your decor can instantly transport you to a tropical paradise.'

Frequently Asked Questions

Can I Use Artificial Seashells Instead of Real Ones?

We're wondering if artificial seashells can replace real ones, and honestly, we think they're a great alternative, offering a more sustainable and affordable option that still captures the beachy vibe we're going for!

How Do I Prevent the Twine From Fraying Over Time?

"Will our hard work go to waste if the twine frays? Luckily, we can prevent it by applying a clear coat of varnish or beeswax to the twine, sealing the fibers and ensuring our DIY masterpiece stays intact."

Can I Use Other Types of Natural Materials Like Pinecones?

We're curious about using natural materials, and yes, we can definitely experiment with pinecones! We'll just need to make sure they're completely dry and securely attached to prevent them from falling apart or shedding.

How Do I Clean My Vase Without Damaging the Decorations?

"We're not exactly experts in delicate cleaning, but we'll try not to shatter our DIY masterpieces. To clean, gently dust with a soft-bristled brush, then wipe with a damp cloth, avoiding direct water contact."

Advertisement

Are These Vases Suitable for Outdoor Decoration?

We're wondering if our decorative pieces can withstand the elements. Honestly, it depends on the materials used; if they're weather-resistant, we can confidently display them outdoors, but if not, they're better suited for indoor decor.

Conclusion

As we step back to admire our handiwork, the juxtaposition of natural textures and coastal hues transports us to a tropical beach. We've transformed ordinary vases into stunning, one-of-a-kind masterpieces that evoke the soothing rhythms of the ocean.

By combining driftwood, seashells, and twine, we've created a symphony of textures that whispers secrets of the sea. As designer, Rachel Ashwell, once said, 'The beauty of imperfection is what makes things interesting.'

Our tropical beach DIY vases are a confirmation of this philosophy, embracing the beauty of imperfection to bring a touch of the coast into our homes.

Advertisement

Continue Reading
Advertisement

Home Decor

Dollar Store Spring Cottage Birdhouses

Bring spring charm to your outdoor space with a whimsical birdhouse crafted from just a few simple dollar store supplies.

Published

on

By

affordable birdhouses for sale

We can create charming spring cottage birdhouses with just a few simple crafting supplies from the dollar store. First, gather essential supplies like birdhouse kits, chalk paint, Mod Podge, and decorative paper. Then, paint the birdhouse base with Waverly chalk paint in agave, adding a vintage look with wax. Add decorative paper details using scrapbook paper and cardstock, and incorporate floral accents for a whimsical touch. Finally, assemble the cottage birdhouse by following the kit's instructions and adding personal touches. As we continue to craft, we'll explore more creative ways to customize our birdhouse and bring spring charm to our outdoor spaces.

Key Takeaways

• Use Dollar Tree birdhouse kits as a base for your spring cottage birdhouse project to save time and money.

• Apply Waverly chalk paint in vibrant colors to create a unique and charming look for your birdhouse.

• Add decorative paper details, such as scrapbook paper and cardstock, to give your birdhouse a touch of personality.

• Embellish your birdhouse with small floral accents, like colorful flowers and greenery, for a whimsical touch.

Advertisement

• Consider adding personal touches, like painting or decorating, to make your birdhouse truly one-of-a-kind.

Gathering Essential Crafting Supplies

As we start on this creative journey, we'll need to gather a few essential crafting supplies to transform our Dollar Store finds into charming spring cottage birdhouses. The first step is to collect the necessary materials, including birdhouse kits, which will serve as the base for our project.

Next, we'll need chalk paint in various colors to give our birdhouses a unique and personalized look. Additionally, we'll require Mod Podge, decorative cardstock, and scrapbook paper to add texture and visual interest to our creations. These supplies will allow us to apply multiple coats of paint, with drying time in between, to achieve a rich and vibrant color.

We'll also need white paint on hand for touch-ups and to create a cohesive look. By gathering these essential crafting supplies, we'll be well on our way to creating beautiful and unique spring cottage birdhouses that showcase our creativity and attention to detail.

Painting the Birdhouse Base

detailing the birdhouse foundation

With our crafting supplies in hand, we're ready to bring our spring cottage birdhouses to life by painting the birdhouse base. This is where the magic happens, and our little birdhouses start to take shape.

To achieve a beautiful, solid base color, we'll apply two coats of Waverly chalk paint in agave, making sure that each coat dries completely before applying the next to prevent smudging or streaking.

Advertisement

Here are some essential tips to keep in mind:

  • Use a small brush to touch up any areas that may have been missed or need extra coverage with white paint.
  • Create a vintage look by applying wax over the dried paint, blending it in for a weathered effect.
  • Maintain a smooth and even finish by taking your time and applying the paint and wax carefully to the birdhouse base.

Adding Decorative Paper Details

creating art with paper

We're adding a personal touch to our spring cottage birdhouses by incorporating decorative paper details that infuse charm and character into these miniature homes. To guarantee this, we're using scrapbook paper and cardstock to create unique patterns and designs that reflect our personal style.

By mixing and matching different papers, we can create a cohesive and visually appealing final result. Next time, we might try adding rickrack trim or other embellishments to enhance the overall look of the birdhouse.

To make sure a secure hold, we'll attach the paper details using Mod Podge or glue. This technique is easy to master, and the results are well worth the effort.

With a little creativity, we can transform a plain birdhouse into a charming cottage that's full of personality. As we work on our birdhouses, we're reminded that it's the little details that make all the difference. By adding decorative paper details, we're creating a one-of-a-kind piece that's sure to delight.

Embellishing With Floral Accents

playing up floral details

Now that we've added personality to our birdhouses with decorative paper details, let's take them to the next level by introducing a touch of whimsy with small floral accents.

We wanted to make our birdhouses stand out, and what better way to do that than with a splash of colorful flowers and greenery? To enhance our spring cottage birdhouses, we can use a variety of small flowers and foliage to create a natural and eye-catching look.

Advertisement

Here are some tips to keep in mind when embellishing with floral accents:

  • Mix and match different flower shapes, sizes, and colors to create a visually appealing design.
  • Consider using artificial flowers for a long-lasting and low-maintenance decorative option.
  • Secure the floral accents with glue or adhesive to make certain they stay in place and withstand handling.

Assembling the Cottage Birdhouse

crafting a charming birdhouse

Let's get started on assembling our cottage birdhouse by following the instructions provided in the Dollar Tree birdhouse kit.

As we carefully read through the instructions, we'll make sure to pay attention to the finer details, such as aligning the roof and placing the windows correctly.

We'll use glue or nails to secure the pieces together, ensuring a sturdy construction that can withstand the elements.

As we assemble the birdhouse, we'll also think about adding our own personal touches, like painting or decorating, to make it truly unique.

If we're short on time, we can consider using a ready-made birdhouse from a craft store as an alternative.

Advertisement

Either way, we'll end up with a charming cottage birdhouse that's perfect for spring.

Frequently Asked Questions

Can I Use a Real Birdhouse Instead of a Wooden Birdhouse Shape?

We're wondering if we can ditch the wooden birdhouse shape and use a real birdhouse instead. Honestly, we think it's a great idea – it'll add a touch of authenticity to our DIY project!

Are There Any Alternatives to Decoupage Glue?

As we weave our creative tapestry, we ponder alternatives to decoupage glue, seeking a binding force that's strong yet gentle, like the threads of a spider's web. We find solace in mod podge, a trusty standby, or even white school glue, a humble hero.

How Do I Prevent the Paper Details From Peeling Off?

We prevent paper details from peeling off by applying a clear coat of varnish or Mod Podge after decoupage, ensuring a strong bond and protecting our artwork from wear and tear.

Can I Use Artificial Flowers Instead of Fresh Flowers?

We're wondering if artificial flowers are a viable substitute for fresh ones, and we think they're a great idea! They'll last longer and still add a pop of color, so go for it!

Advertisement

Is It Possible to Make This Project With Kids?

'As we dip our toes into the world of creativity, we ask: can little hands help craft this masterpiece? Absolutely! With patience and guidance, kids can contribute to this project, fostering a sense of pride and ownership.'

Conclusion

As we step back to admire our handiwork, our humble dollar store finds have been transformed into a charming spring cottage birdhouse, reminiscent of a 'hidden gem' tucked away in a lush garden.

The combination of soft hues and delicate details has yielded a whimsical retreat, beckoning birds to take up residence.

With a dash of creativity and some thriftiness, we've proven that beauty can indeed be found on a budget, as the saying goes, 'one person's trash is another person's treasure.'

Advertisement

Continue Reading

Alfresco

Is an Alfresco a Verandah? Know the Difference!

Navigate the differences between an alfresco and a verandah to uncover which outdoor living space suits your needs best!

Published

on

By

alfresco vs verandah comparison

An alfresco and a verandah differ considerably in purpose and design. The alfresco serves as an outdoor dining extension under the main roof, while a verandah is ground-level, providing a covered area for relaxation. Alfrescos are oriented towards modern entertainment, include modern amenities, and attach to the main house's roof. Verandahs, on the other hand, are more traditional, overlooking the front of the house with a separate pitched roof. To explore further distinctions and choose wisely between an alfresco and a verandah, grasp their unique aspects and intended functionalities for your outdoor living needs.

Key Takeaways

  • Alfresco serves as a modern outdoor dining and entertainment extension, while a verandah is a traditional covered space for relaxation.
  • Alfrescos integrate with the main house roof and offer contemporary amenities, contrasting with verandahs' classic design elements.
  • Alfrescos are ideal for outdoor dining year-round with modern finishes, while verandahs provide a sheltered area for socializing.
  • Alfrescos use the main house roof for shade and are attached to the house, while verandahs have standalone covered roofs.
  • Alfrescos prioritize modern materials like glass and steel for a sleek appearance, while verandahs typically use traditional materials like timber.

Alfresco Area Vs Verandah: Key Contrasts

When comparing an alfresco area to a verandah, the key contrasts lie in their design and intended use. An alfresco area serves as an outdoor extension for dining under the main roof, providing a space for casual meals and gatherings.

On the other hand, a verandah is a covered structure at ground level that connects front and back entrances, offering a place for relaxation and socializing in a traditional architectural style.

The alfresco area is specifically designed for outdoor dining and entertainment, often equipped with sliding doors for protection and to enhance the aesthetic value of a home. In contrast, verandahs are used for small parties and overlook the front of the house, providing a covered area to enjoy the outdoors while being protected from the elements.

While alfrescos seamlessly extend the home's living space, verandahs act as a connection space between indoor and outdoor areas. The alfresco area is commonly associated with modern outdoor living, while verandahs offer a more traditional touch to the architectural design of a house.

Design Variances Between Alfresco and Verandah

outdoor living space differences

When comparing the design variances between an alfresco and a verandah, it's important to analyze the roof structures, functional spaces, and material selections. The roof structure of an alfresco tends to be integrated into the main house roof, creating a seamless indoor-outdoor flow, while verandahs often feature a separate pitched roof design.

Functional space variations highlight how alfrescos are tailored for dining and entertaining, whereas verandahs serve as sheltered passageways around the house, emphasizing a historical architectural connection.

Advertisement

Material selection variances further distinguish these outdoor spaces, with alfrescos featuring modern amenities and finishes, contrasting with the classic design elements of verandahs.

Roof Structure Differences

In distinguishing between alfrescos and verandahs, one key aspect that sets them apart is their roof structures. Alfrescos typically utilize the main roof of the house for shade, blending seamlessly with the existing architecture. On the other hand, verandahs are standalone covered structures at ground level, having their own distinct roof separate from the main house. To help visualize the differences, refer to the table below:

Aspect Alfresco Verandah
Location Attached to the main house Standalone structure at ground level
Roof Structure Uses the main roof for shade Has its own covered roof
Purpose Outdoor dining under existing roof Connects front and back entrances of a home
Design Integrates with house design Traditional connecting space
Size Often smaller, part of the main structure Longer and narrower for small gatherings

Understanding these distinctions can assist in making informed decisions when considering the addition of either an alfresco or a verandah to your property.

Functional Space Variations

For understanding the design variances between an alfresco and a verandah, consider their functional space variations. An alfresco is an outdoor extension of the main living area, designed for modern features like outdoor kitchens and dining areas. It serves as a covered structure, offering protection from the elements year-round and can be partially enclosed for added comfort.

In contrast, a verandah is a more traditional covered structure attached along the front, back, or side of a house, serving as a space between indoors and outdoors. Verandahs are open structures that provide shade and a relaxing outdoor space. Alfrescos are commonly used for outdoor dining and entertaining purposes, while verandahs are ideal for relaxing, reading, or enjoying the surrounding landscape views.

Advertisement

While alfrescos are typically built as extensions of the home under the main roof, verandahs can be freestanding or attached structures with various roof options like flat, skillion, or gable roofs.

Material Selection Variances

If you're considering the design variances between an alfresco and a verandah, the material selection plays an essential role in distinguishing these outdoor living spaces. Alfrescos often incorporate modern materials like glass and steel, giving them a contemporary feel, while verandahs typically utilize traditional materials such as timber for a more classic appearance.

When it comes to design elements, verandahs may include decorative features like fretwork or balustrades for elegance, whereas alfrescos focus on sleek, functional designs. Prioritizing weather resistance and durability, alfrescos commonly use materials like aluminum and composite decking, contrasting with verandahs that may opt for hardwoods like cedar or merbau to achieve a natural aesthetic.

Additionally, alfrescos may integrate high-tech materials like UV-resistant polycarbonate roofing and composite cladding for low maintenance, setting them apart from the more rustic feel of verandahs. The choice of materials significantly impacts the overall style, maintenance needs, and longevity of these outdoor spaces.

Functional Disparities of Alfresco and Verandah

outdoor living space comparison

An alfresco and a verandah serve distinct functions within a home, showcasing usage variations and design elements that differentiate the two structures.

Alfrescos are designed to create an integrated outdoor living space under the main roof, often equipped with amenities like outdoor kitchens, ideal for dining and entertainment.

Advertisement

In contrast, verandahs act as covered passageways or social spaces, offering a connecting area between the indoors and outdoors, commonly used for relaxation or to enjoy the front view of the house.

Usage Variations

The functional disparities between alfrescos and verandahs are evident in their distinct usage variations. Alfrescos are primarily designed for outdoor dining and entertaining, creating a space for leisure activities and social gatherings. They offer a seamless extension of the indoor living space, blurring the lines between indoor and outdoor areas. Alfrescos often come equipped with amenities like outdoor kitchens and dining areas to enhance the overall experience.

On the other hand, verandahs serve a simpler purpose, acting as covered pathways or connecting areas within a home. They're typically used for small gatherings or as a relaxation spot, providing shelter and linking different parts of the house. Verandahs prioritize functionality over elaborate design features, focusing on their role as a covered structure rather than a dedicated entertainment space.

Essentially, while alfrescos cater to outdoor living and dining experiences, verandahs serve as practical connectors within a property.

Design Elements

When comparing the design elements of alfrescos and verandahs, it becomes evident that they serve distinct functional purposes in enhancing outdoor living spaces. Alfrescos are designed as outdoor extensions for dining under the main roof, providing a smooth shift between indoor and outdoor areas. They focus on creating a smooth flow, using the main roof for shade and offering protection from the elements year-round. These covered structures not only enhance the aesthetic value of a home but also cater to outdoor dining and entertainment needs.

Advertisement

On the other hand, verandahs are typically at ground level, overlooking the front or back of a house, and are more commonly used for relaxing or enjoying the outdoor view. Their design elements revolve around providing a covered pathway or sitting area. While alfrescos emphasize smooth shifts and outdoor extensions, verandahs prioritize offering a covered space for various activities, albeit with a different aesthetic appeal.

Comparing Alfresco and Verandah Aesthetics

outdoor living space comparison

Alfrescos and verandahs present distinct aesthetics that showcase their unique design features and styles. While alfrescos lean towards a modern and sleek appearance, verandahs exude a more traditional and classic charm. The table below highlights some key differences in the aesthetics of alfrescos and verandahs:

Aspect Alfresco Verandah
Roof Design Often a part of the main roof structure Separate roof covering the structure
Supporting Columns Minimal or absent Typically adorned with columns or posts
Architectural Style Contemporary Traditional

Alfrescos tend to prioritize a seamless integration of indoor and outdoor spaces, often featuring sliding doors and a modern appeal. In contrast, verandahs boast a more timeless look with prominent columns and a roof that extends from the main structure. These differences in design elements contribute to the overall aesthetic and feel of each outdoor living space.

Alfresco Vs Verandah: Usage Distinctions

outdoor living space comparison

Highlighting the versatile functionality of outdoor living spaces, alfrescos and verandahs offer distinct usage distinctions that cater to different preferences and needs.

Here are some key differences to help you understand how alfrescos and verandahs are used:

  1. Alfresco:
  • An alfresco is an outdoor extension primarily designed for dining under the main roof.
  • It enhances the aesthetic appeal of a home and often includes sliding doors for protection during various weather conditions.
  • Alfrescos are typically associated with outdoor dining and entertaining spaces, providing a cozy and inviting atmosphere for gatherings.
  1. Verandah:
  • In contrast, a verandah is a covered ground-level structure that connects the front and back entrances of a house.
  • Verandahs can be utilized for small gatherings or as relaxing spots overlooking the front of the house.
  • They serve as covered pathways or sitting areas along the perimeter of a property, facilitating easy shifts between indoor and outdoor spaces.

Structural Differences: Alfresco Vs Verandah

outdoor living space comparison

When comparing an alfresco to a verandah, structural differences are evident in the roofing materials used and the level of enclosure. Alfrescos typically feature roofs that are extensions of the main house structure, providing a high level of enclosure with sliding doors for protection.

Verandahs, on the other hand, may have different roofing materials and offer a more open design, often acting as covered walkways or sitting areas.

Roofing Materials Used

Utilizing the main roof of the house for support, alfrescos commonly employ roofing materials such as Colorbond steel or insulated panels. Verandahs, on the other hand, often feature independent roofing materials like corrugated iron or timber shingles.

Advertisement

When considering the roofing materials used in alfrescos and verandahs, several key differences emerge:

  1. Integration with the Main House: Alfrescos tend to integrate more seamlessly with the main house due to their shared roofing materials, creating a cohesive look. In contrast, verandahs offer a distinct aesthetic appeal by utilizing independent roofing materials.
  2. Aesthetic Variation: The choice of roofing material for alfrescos or verandahs can have a notable impact on the overall aesthetic of the outdoor structure. Colorbond steel exudes a modern and sleek appearance, while timber shingles provide a more traditional and rustic look.
  3. Durability and Maintenance: The selection of roofing materials also influences the durability and maintenance requirements of alfrescos and verandahs. Insulated panels offer enhanced insulation and energy efficiency for alfrescos, whereas corrugated iron may require more frequent maintenance for verandahs.

Level of Enclosure

For a clear distinction between an alfresco and a verandah regarding structural differences, consider the level of enclosure each outdoor space provides. An alfresco is typically more enclosed than a verandah, offering walls or privacy screens that provide a sense of coziness and protection. This enclosed structure allows for year-round use, shielding you from the elements while enjoying outdoor dining or entertainment. On the other hand, a verandah is more open, serving as a covered passage from indoors to outdoors. Verandahs are commonly used for relaxation and admiring the surroundings, creating a welcoming entry to your home. To better understand the differences, let's take a look at the comparison table below:

Aspect Alfresco Verandah
Level of Enclosure Enclosed with walls or screens More open with less enclosure
Year-round Use Suitable for all seasons May be less comfortable in extreme weather
Protection Offers protection from elements Provides minimal shelter from weather
Outdoor Dining Ideal for outdoor dining experiences Can be used for light meals or relaxation
Entertainment Great for hosting gatherings and events Suitable for relaxing and enjoying views

Alfresco or Verandah: Which to Choose?

outdoor living space options

Considering whether to opt for an alfresco or a verandah for your outdoor space can depend on your lifestyle preferences and desired functionality. Both options have their unique characteristics that cater to different needs. Here are some key points to help you make an informed decision:

  1. Functionality:
  • Alfrescos are ideal for adding an outdoor living space that seamlessly connects to your home, perfect for dining and entertaining.
  • Verandahs provide a covered area that serves as a connecting space between the indoors and outdoors.
  1. Design:
  • Alfrescos often feature outdoor kitchens, dining areas, and furniture, enhancing the outdoor living experience.
  • In contrast, verandahs offer a covered space for relaxation or small gatherings.
  1. Purpose:
  • While alfrescos focus on expanding your living area outdoors, verandahs primarily function as covered walkways or sitting areas.

Consider your lifestyle needs and desired functionality to determine which option best suits your home.

Outdoor Living: Alfresco Vs Verandah

comparing alfresco and verandah

When considering your outdoor living space, it's crucial to understand the specific characteristics of each option. Below is a comparison table highlighting key differences between an alfresco and a verandah:

Aspect Alfresco Verandah
Location Connected to the main house Along the front, back, or side of the house
Purpose Designed for dining and entertaining Serves as a connecting space between indoors and outdoors
Integration Offers a seamless look with the main house Can vary in size and shape
Features Often includes sliding doors for protection Typically has open sides for ventilation
Function Enhances the aesthetic value of the home Provides a covered area for relaxation and social gatherings

Understanding these distinctions can help you make an informed decision when planning your outdoor living space.

Alfresco Vs Verandah: Home Value Impact

outdoor living space comparisons

Understanding the impact on home value between an alfresco and a verandah is key when planning your outdoor living space. When considering whether to add an alfresco or a verandah to your home, here are some key points to keep in mind:

  1. Home Value Increase: Adding an alfresco can potentially raise your home's value by up to 20%, making it a lucrative investment for homeowners looking to increase their property's worth.
  2. Traditional Charm vs. Modern Appeal: While a verandah typically adds 12-15% to the value of a home, alfrescos are perceived as more modern and luxurious. The choice between the two can depend on whether you prefer traditional charm or modern appeal.
  3. Buyer Attraction: Both alfrescos and verandahs can enhance curb appeal and attract potential buyers. However, alfrescos, being more contemporary, might have a broader appeal to a modern buyer demographic.

Making the Choice: Alfresco or Verandah

outdoor living area options

When deciding between an alfresco and a verandah for your outdoor space, consider the primary function and desired aesthetic appeal of each option.

An alfresco is an outdoor living space connected to the main house, offering protection from the elements and customizable features like outdoor kitchens for dining and entertaining.

On the other hand, a verandah is a covered structure typically attached to the front, back, or side of a house, serving as a connecting space between indoors and outdoors, ideal for relaxation and enjoying the view.

The choice between an alfresco and a verandah depends on the function you envision for your outdoor living space. If you prioritize seamless integration with your main house and desire a space for hosting gatherings and meals, an alfresco might be the ideal option.

Advertisement

Conversely, if you seek a covered area for unwinding and appreciating the surroundings, a verandah could better suit your needs. Evaluate your preferences, location, and design goals to make an informed decision that complements your outdoor lifestyle.

Frequently Asked Questions

What Is Considered a Verandah?

When considering what is considered a verandah, think of a covered structure attached to a house, offering a sheltered outdoor space. It serves as an extension of the main roof, providing a cozy connection to the outdoors.

What Is the Difference Between a Veranda and a Verandah?

When distinguishing between a veranda and a verandah, note that they both provide covered outdoor spaces attached to a house. The key difference lies in spelling variations, with "veranda" being more common internationally and "verandah" in Australia.

What Is an Alfresco on a House?

An alfresco on a house is an outdoor living area designed for dining and entertaining. It seamlessly connects indoor and outdoor spaces under the main roof. Alfrescos provide protection from the elements and a cozy ambiance.

Is a Pergola and Verandah the Same Thing?

A pergola and a verandah are not the same thing. A verandah is attached to the main house with a covered roof, while a pergola stands freely with an open slatted roof for climbing plants.

Advertisement

Conclusion

In the end, choosing between an alfresco area and a verandah comes down to personal preference and lifestyle needs. Each option offers distinct design, functionality, and aesthetic features that cater to different outdoor living experiences.

Whether you opt for the open-air appeal of an alfresco or the traditional charm of a verandah, both can enhance your home's value and provide a delightful space for relaxation and entertainment. Make your choice wisely to create the perfect outdoor oasis for your home.

Continue Reading

Home Decor

Homemade Bird Nest Crafting: 3 Simple Steps

Prepare to take flight into the world of creative nesting, where natural beauty and personal touches come together in a unique decorative piece.

Published

on

crafting bird nests naturally

To craft a homemade bird nest, start by gathering natural materials like dried grass, twigs, and leaves from your yard or local parks. Next, mold the nest shape by wrapping angel hair vine filler around a bowl, securing it with thin wire. Finally, add decorative elements like feathers, dried flowers, or small twigs to enhance the natural look. Personalize your nest with ribbons, fabric scraps, or small ornaments to make it unique. With these three simple steps, you'll have a natural haven for birds and a stunning decorative piece for your home – and that's just the beginning of your creative journey.

Key Takeaways

• Gather natural materials like dried grass, twigs, and Spanish moss to mimic the bird's natural environment.

• Create a nest structure by wrapping angel hair vine filler around a bowl and securing it with thin wire.

• Add decorative elements like Easter eggs, feathers, and dried flowers to enhance the natural look.

• Personalize your bird nest with ribbons, fabric scraps, or small ornaments to make it unique.

Advertisement

• Experiment with different elements to unleash your creativity and make your DIY project special.

Gathering Natural Materials

Head outdoors to scour your yard, local parks, or online retailers for natural materials like dried grass, twigs, leaves, and Spanish moss that will give your DIY bird nest an authentic look. This is the first step in making a homemade bird nest that will attract birds to your backyard.

You'll want to gather materials that mimic the natural environment, allowing your DIY nest to blend in seamlessly. As you forage for materials, keep in mind the type of bird you're trying to attract, as different species have unique nesting preferences.

Once you've collected your materials, prepare your workspace by covering it with craft paper, wearing gloves, and working in a well-ventilated area to prevent mess. With your materials and workspace ready, you'll be set to start crafting your DIY bird nest, making it an inviting home for your feathered friends.

Crafting the Nest Structure

creating a cozy home

With your natural materials and workspace prepared, you're ready to start crafting the nest structure, the foundation of your DIY bird nest. This is the most essential step in creating a realistic bird nest, as it provides the base shape and form of the nest.

To craft the nest structure, follow these steps:

Advertisement
  • Wrap the angel hair vine filler around a bowl to mold the nest shape, using thin wire to secure it in place.
  • Continue wrapping the vine filler around the bowl, overlapping the layers to create a sturdy base.
  • Secure the sides of the nest together using thin wire, and trim any excess filler.
  • Once the nest is formed, carefully remove it from the bowl.

Adding Final Touches

creating a masterpiece together

You can now add the perfect finishing touches to your DIY bird nest by incorporating decorative elements that reflect your personal style and flair.

Add a pop of color and texture to your bird nest with decorative Easter eggs or faux bird eggs, which can be easily attached using a hot glue gun.

To enhance the natural look of your nest, incorporate feathers, dried flowers, or small twigs, which will add a touch of whimsy and authenticity to your decoration.

Consider adding a miniature nest or a tiny bird figurine to create a charming and unique centerpiece.

Experiment with different elements like ribbons, fabric scraps, or small ornaments to personalize and customize your bird nest decoration.

Don't be afraid to get creative and try out new ideas – after all, customization is what makes your DIY project truly special.

Advertisement

Frequently Asked Questions

How to Build a Bird Nest Step by Step?

When you're wondering how to build a bird nest step by step, start by gathering natural materials like twigs, grass, and feathers for an authentic look.

Next, use a bowl as a mold to shape the nest and hold it together with thin wire.

How to Make a Craft Nest for Kids?

When you're looking to make a craft nest for kids, start by gathering materials like construction paper, glue, a bowl, and a paintbrush.

Cut the paper into strips and layer them inside the bowl, coated with a glue and water mixture.

Encourage kids to experiment with different colors and textures to create a unique nest, adding details like eggs or birds for a realistic touch.

Advertisement

How Do Birds Build Nests for Kids?

You might wonder how birds build their nests, and it's fascinating to learn about their unique techniques. Birds collect materials like twigs, leaves, and mud, carefully arranging them to create a safe space for their eggs.

Some species weave intricate nests, while others dig simple depressions in the ground. By observing birds build nests, you'll appreciate their remarkable resourcefulness and adaptability in using their surroundings to create homes.

How to Make Birds Nest With Paper?

Are you curious about how to make a bird's nest with paper? You're in luck!

To create a realistic bird's nest, you'll need to cut paper strips about 1/4 inch thick, mix Elmer's glue with water, and arrange the strips criss-crossing inside a bowl lined with plastic wrap.

You can experiment with different colors and textures of paper to create a unique design.

Advertisement

Conclusion

As you carefully place the final twig, your homemade bird nest begins to resemble a cozy little home, a tribute to nature's intricate design.

Like a master weaver, you've intertwined twigs, leaves, and feathers to create a snug sanctuary, a symbol of hope and new life.

Just as the nest cradles its precious cargo, your creativity has given birth to something beautiful, a reminder that even the smallest acts of craftsmanship can hold profound significance.

Continue Reading

Trending