Connect with us

Home Decor

Refresh Your Home With a China Cabinet Redo

Witness the remarkable transformation of a tired china cabinet into a stunning showstopper that elevates your entire room's style and charm.

Published

on

revamp your space elegantly

With a little creativity and some elbow grease, you can transform your outdated china cabinet into a stunning focal point that showcases your personal style and revitalizes your entire room. Measure the space accurately and plan ahead, choosing the right paint type and preparation to guarantee a solid foundation. Add texture and pattern with contact paper, and update hardware for a cohesive look. Consider the cabinet's age and material when painting, and don't forget to seal and protect your work. As you begin this DIY project, you'll discover even more ways to breathe new life into this cherished piece of furniture.

Key Takeaways

• Measure the space accurately and plan ahead to ensure a solid foundation for the redo.

• Choose the right paint type, considering factors like durability, finish, and primer for a flawless look.

• Prepare the cabinet by removing hardware, cleaning, and organizing the workspace for a smooth process.

• Update hardware and drawer glides to transform the cabinet's appearance and functionality.

Advertisement

• Seal and protect the paint job with a suitable top coat to ensure longevity and durability.

Measuring and Planning Ahead

Measure the space where your China cabinet will sit, taking precise measurements to guarantee a perfect fit, and make note of any obstacles or challenges that might impact your redo project. This important step will save you from potential headaches down the line.

Once you have your measurements, gather all the necessary materials and parts for the cabinet redo project. This will make certain that you have everything you need before you start working on your China cabinet.

Next, plan and assemble components like shelves and sink openings to achieve a cohesive finish. Consider the layout and design of your cabinet, ensuring that every element works together seamlessly.

Complete prep work by securely attaching cabinets and making necessary adjustments. This will provide a solid foundation for the final stages of your project. By taking the time to measure, gather materials, plan components, and complete prep work, you'll set yourself up for success and avoid costly mistakes.

Advertisement

With a solid plan in place, you'll be ready to move on to the next stage of your China cabinet redo.
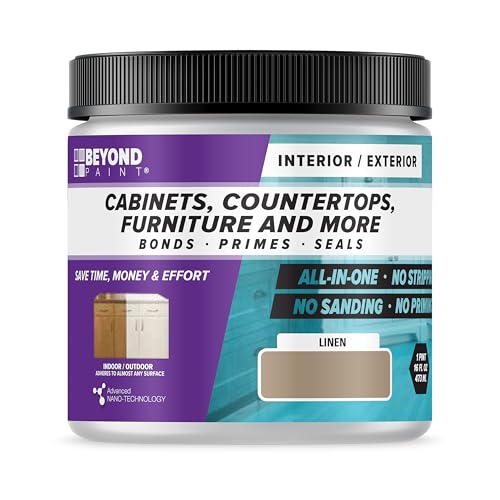
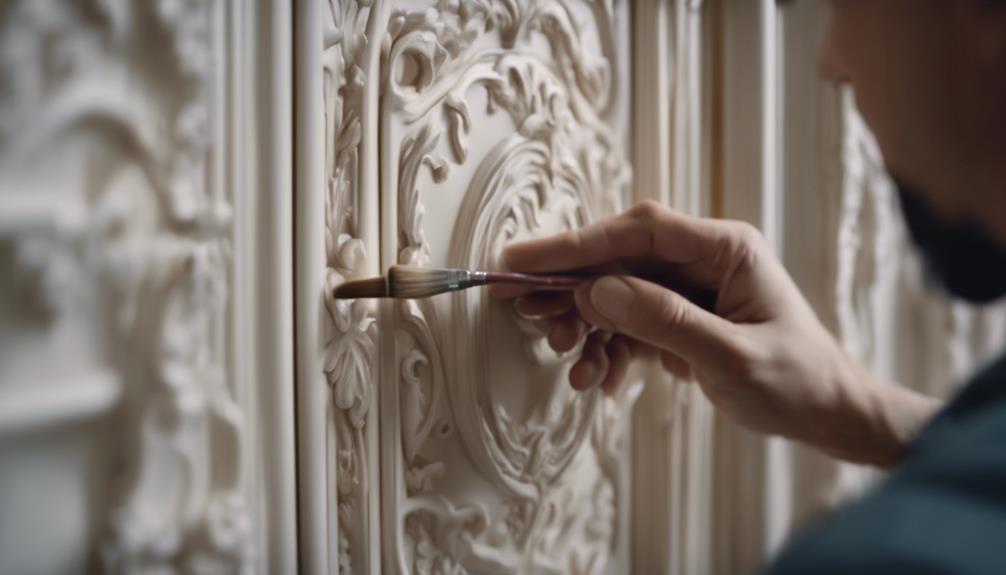
Choosing the Right Paint Type

selecting the perfect paint

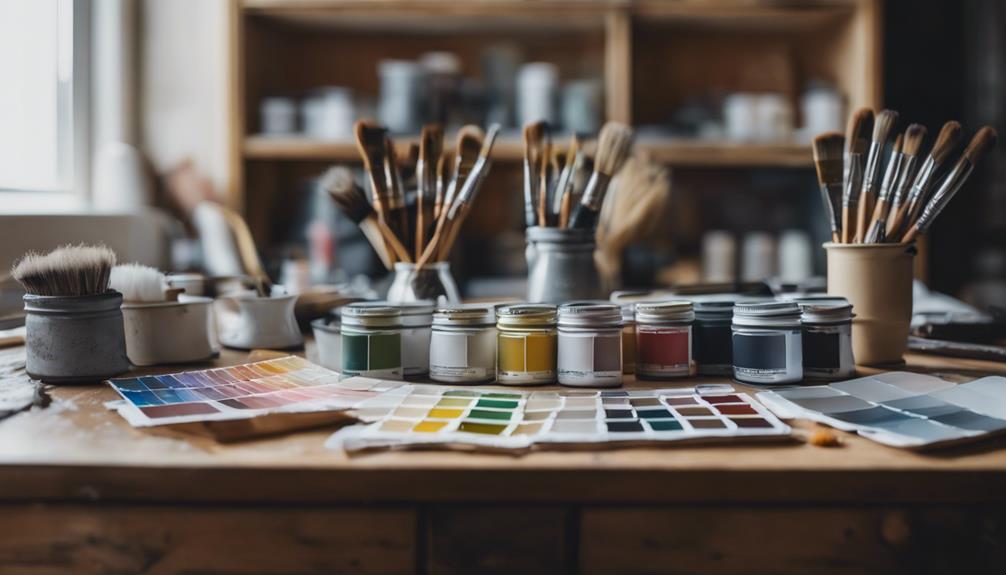
As you start exploring the right paint type for your china cabinet makeover, you'll want to evaluate the finish options that best suit your desired aesthetic – whether that's a matte, vintage look or a modern, high-gloss finish.

You'll also need to choose between various types of paint, each with its own unique characteristics and benefits. By understanding the differences between chalk, lacquer, milk, acrylic, and spray paints, you'll be able to select the perfect paint for your project.

Paint Finish Options

When selecting a paint finish for your China cabinet redo, you'll want to explore the unique benefits of each type, from the matte, vintage look of chalk paint to the high-gloss finish of lacquer.

If you're aiming for a distressed, vintage china cabinet look, chalk paint is a great choice. It requires minimal prep work and provides a soft, matte finish.

For a more rustic, textured look, milk paint is a great option, made with natural ingredients like milk protein.

Advertisement

If you're going for a modern, sleek appearance, lacquer paint provides a high-gloss finish.

When it comes to durability, oil-based paint is a great choice, but be sure to provide proper ventilation during application. On the other hand, water-based paint is eco-friendly, dries quickly, and is easy to clean up with water.

With so many options, you're sure to find the perfect paint finish to complement your China cabinet makeover.

Types of Paint

You'll have to choose from a variety of paint types, each with its unique characteristics, to find the one that best suits your China cabinet's style and your personal preferences.

For a matte, vintage look, consider using chalk paint, which can add a touch of elegance to your cabinet.

Advertisement

If you're going for a glossy, modern finish that enhances the cabinet's appearance, opt for lacquer paint.

On the other hand, milk paint is a great choice for achieving a rustic, textured look on your cabinet.

Alternatively, acrylic paint is a versatile option, offering a wide range of colors and finishes.

When selecting a paint type, think about the overall aesthetic you want to achieve and the level of durability you need.

For a durable, long-lasting finish that can withstand wear and tear, you may want to choose oil-based paint.

Advertisement

Ultimately, the right paint type will depend on your personal style and the specific needs of your China cabinet.

Primer Importance

Selecting the appropriate primer is essential to ensuring a strong bond between the paint and the surface of your China cabinet. You'll want to choose a primer that's suitable for the material of your cabinet, whether it's wood, laminate, or something else.

This prep step is critical, as it creates a smooth surface for the paint to adhere to, ultimately ensuring a lasting finish. Without proper priming, you risk a weak bond, which can lead to peeling or flaking paint down the line.

Preparation Is Key

preparation leads to success

As you begin your China cabinet redo, keep in mind that preparation is crucial to a successful outcome.

You'll want to gather all the essential supplies and clear the space to guarantee a smooth process, avoiding costly mistakes and saving yourself from wasted time and effort.

Gather Essential Supplies

Accurately measuring the space for the cabinet is crucial because a proper fit is essential for a successful redo. You'll want to guarantee your painted china cabinet fits seamlessly into its new home.

Advertisement

With your measurements in hand, it's time to gather essential supplies. Start by collecting paint, brushes, and sandpaper for a smooth, even finish. Don't forget cleaning supplies to wipe away any dirt or debris that may have accumulated on the cabinet's surface.

You'll also need to assemble components like screws, hinges, and brackets for cabinet assembly. Take this opportunity to make any necessary adjustments to your plan, ensuring all necessary parts and tools are ready for the cabinet redo.

Clear the Space

Clearing the space around the china cabinet is essential to ensuring a smooth and efficient redo process. Remove any clutter, obstacles, or tripping hazards from the area to create a clean slate.

As you prepare for the redo, take this opportunity to organize the surrounding space, making it easier to access the cabinet and gather materials as needed. Remove any items that could get in the way, such as furniture or rugs, and relocate them to a safe distance. This will give you a clear path to work on the cabinet without any distractions or obstacles.

With the area clear, you can now prepare the cabinet itself by removing glass, shelves, and hardware, giving you a fresh start for the redo. By taking the time to clear the space and prepare the cabinet, you'll be able to work efficiently and effectively, ensuring a successful redo that exceeds your expectations.

Advertisement

Adding Texture and Pattern

texture and pattern in design

You can instantly refresh your china cabinet's look by introducing texture and pattern through creative uses of contact paper. This versatile material offers a world of possibilities for redesigning your cabinet without the need for painting.

By choosing contact paper specifically designed for wood surfaces, you can add color, texture, and pattern to your cabinet's shelves, drawers, or exterior. Consider selecting contact paper with unique designs or patterns that complement the style of your cabinet. For instance, a vintage-inspired cabinet might benefit from a distressed or floral pattern, while a modern cabinet might look sleek with a geometric design.

When selecting contact paper, be cautious if you're working with an antique cabinet, as removing the paper may be difficult and potentially lower the cabinet's value. With endless options for redecorating your cabinet with different textures and patterns, contact paper provides a convenient and non-committal way to give your china cabinet a fresh new look.

Painting Antique Vs Non-Antique

comparing antique and non antique paintings

When it comes to giving your china cabinet a fresh coat of paint, it's important to take into account the cabinet's age and material composition, as the decision to paint an antique piece can have significant implications for its value.

If you're working with an antique cabinet, it's vital to weigh the potential consequences of painting it. You might diminish its value, especially if it's a high-quality piece.

Before making a decision, examine the materials used in the cabinet's construction, as some woods may not take well to paint. If you do decide to paint, choosing the right paint type, such as chalk paint or lacquer, is key for achieving the desired finish.

Proper preparation, including cleaning, sanding, and priming, is also important for a successful paint job. Alternatively, you might consider restoration or refinishing to maintain the cabinet's original value and integrity.

Advertisement

Hardware and Drawer Updates

installing new drawer knobs

As you begin your china cabinet redo, it's time to contemplate the finer details that can elevate your piece from ordinary to extraordinary.

When it comes to hardware and drawer updates, you'll find that the options are endless, and choosing the right hardware can make all the difference in achieving the look you want.

From sleek and modern to ornate and decorative, the hardware you select won't only enhance the cabinet's aesthetic appeal but also add a touch of personality to the overall design.

Hardware Options Abound

With a vast array of modern hardware options at your fingertips, it's easier than ever to give your china cabinet a stylish overhaul. You can update the hardware on your furniture with modern options like brushed nickel or brass for a fresh look. Think about replacing drawer pulls with sleek and contemporary designs to enhance the overall aesthetic.

Here are some popular hardware options to contemplate:

  1. Matte black handles: Add a touch of sophistication and modernity to your china cabinet with these trendy handles.
  2. Crystal knobs: Give your cabinet a touch of elegance and glamour with these luxurious knobs.
  3. Vintage-inspired hardware: Add a touch of nostalgia and charm to your china cabinet makeover with vintage-inspired hardware.

Upgrading your hardware can instantly transform the appearance of your cabinet, giving it a modern and updated feel. By selecting the right hardware, you can create a cohesive look that complements your furniture and enhances the overall style of your home.

Drawer Glide Upgrades

You can take your china cabinet's functionality to the next level by upgrading its drawer glides. This upgrade can make a significant difference in how smoothly and effortlessly the drawers open and close. Outdated or damaged drawer glides can hinder the overall performance of your cabinet, making it frustrating to access your fine china or treasured possessions.

Advertisement

Upgrading to modern, smooth-operating drawer glides can enhance the overall look and feel of the cabinet, making it a focal point in your dining room. When selecting new drawer glides, consider ball-bearing options for a vital and long-lasting solution. Proper installation is essential to prevent sticking or uneven movement, ensuring your drawers glide effortlessly.

As you upgrade your drawer glides, consider painting the inside of the drawers and refinishing the wood to give your old furniture a fresh, updated look. By upgrading your drawer glides, you'll be able to enjoy your china cabinet for years to come, and it will continue to be a beautiful addition to your home.

Preventing Paint Bleed-Through

stopping paint from spreading

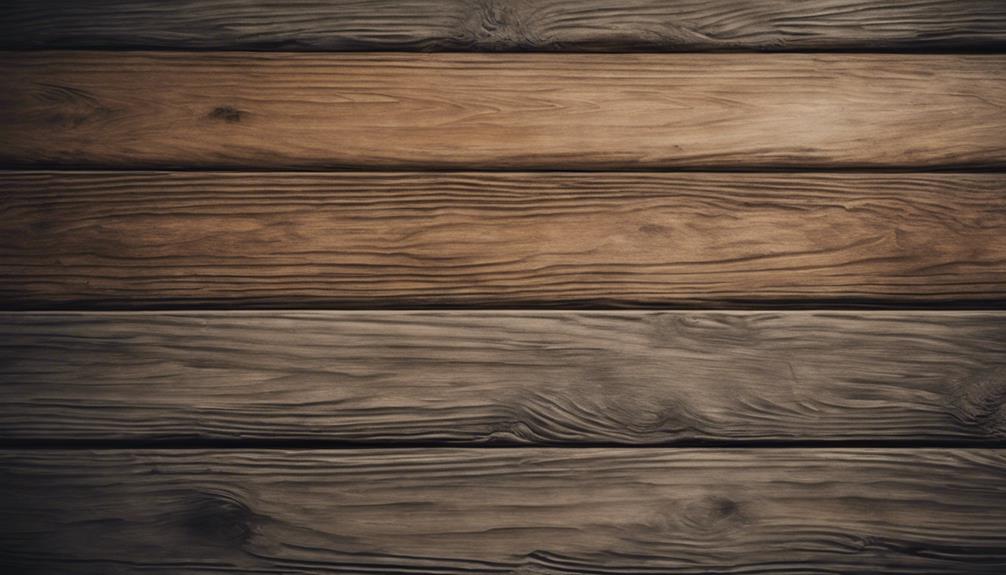
To guarantee a professional-looking finish, you'll want to take steps to prevent paint bleed-through on your wood china cabinet. Preventing paint bleed-through is vital to achieving a flawless finish.

Here's how to do it:

  1. Choose the right primer: Select a high-quality stain-blocking primer specifically designed to block tannins and stains on wood surfaces. This ensures effective coverage and prevents discoloration.
  2. Apply multiple coats: If necessary, apply multiple coats of primer to fully block any bleed-through from the wood. This ensures a smooth base for paint application.
  3. Test and confirm: Test a small area first to confirm that the primer effectively blocks any bleed-through before proceeding with the full project.

Sealing and Protecting

securing valuable items safely

Now that your china cabinet's paint job is complete, sealing and protecting it's vital to guarantee its longevity and durability.

You've invested time and effort into giving your cabinet a fresh new look, and you want to make sure it remains beautiful for years to come.

To do this, consider using a self-sealing paint like Beyond Paint, which can save you the extra step of applying a separate sealant.

Advertisement

Alternatively, you can opt for a multi-purpose sealer, especially if your cabinet is in a high-traffic area.

Another option is General Finishes High-Performance Top Coat, a reliable choice for sealing painted furniture.

Properly sealing your cabinet is important to protect it against wear and tear.

Be cautious, though, when applying a top coat over white paint, as it can cause discoloration if not done correctly.

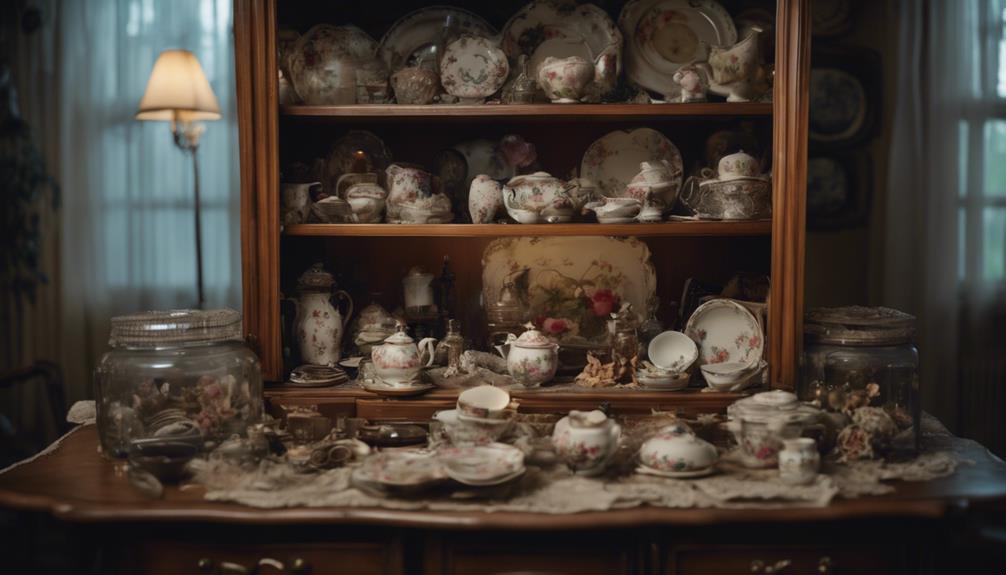
Creative Uses for a China Cabinet

repurposing a china cabinet

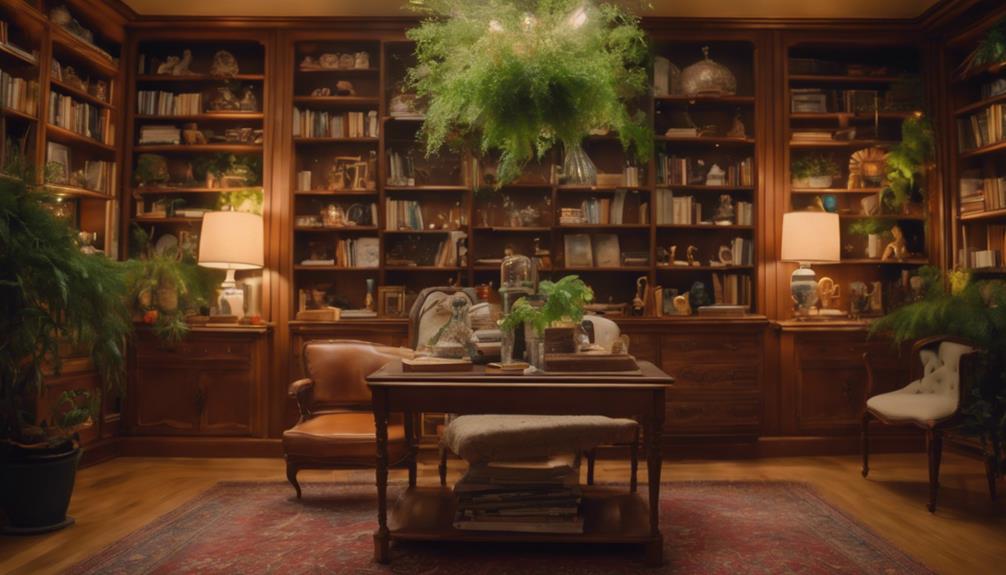
With a little creativity, your refinished china cabinet can transcend its traditional role as a mere display case and become a functional showstopper in any room.

You'll love how it can be repurposed to add functionality and style to your space. Here are a few ideas to get you started:

Advertisement
  1. Bathroom Vanity: Convert your china cabinet into a bathroom vanity, complete with a sink and mirror. The storage compartments can hold toiletries and towels, keeping your bathroom organized and clutter-free.
  2. Decorative Shelving: Repurpose the cabinet doors as decorative shelving units, perfect for displaying decorative items or storing books and linens.
  3. Storage Solutions: Add baskets and hooks inside the cabinet for efficient storage solutions that blend form and function. You can store cleaning supplies, linens, or even out-of-season clothing.

Achieving a Cohesive Look

creating a stylish home

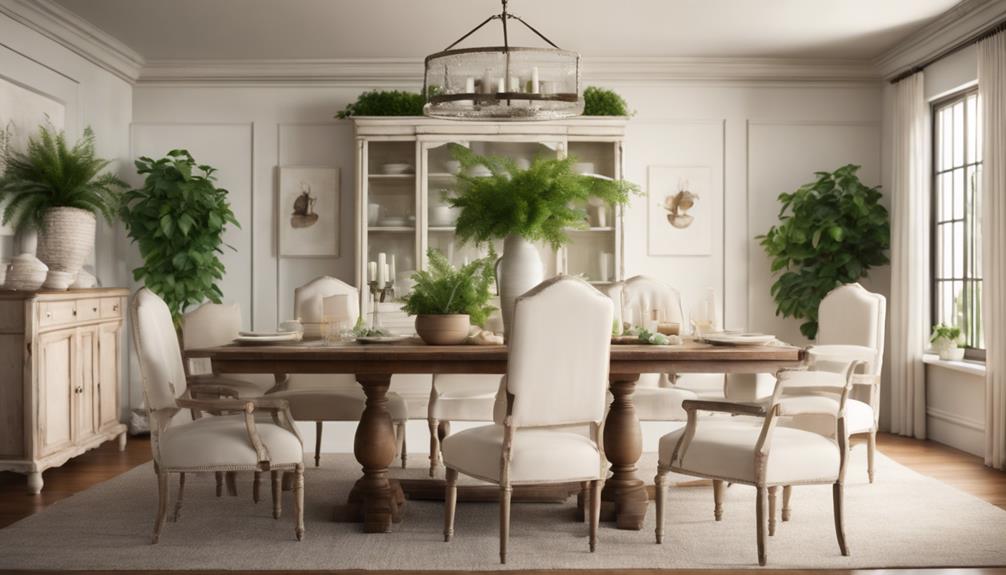
You can create a seamless, cohesive look by carefully selecting paint finishes that tie in with the overall aesthetic of the room. This guarantees that your china cabinet redo blends harmoniously with the surrounding décor.

To achieve this, consider incorporating baskets and toolboxes to bridge height differences between cabinets, creating a visually appealing and cohesive appearance.

Color coordination is also vital in maintaining a cohesive look. Make sure that the design elements, such as hardware and trim, complement the room's style. Additionally, utilize the cabinet doors for both decorative and functional purposes to maintain a cohesive style.

As you work on your project, capture your progress and final results through photographs or videos to visually represent the transformation. This won't only help you track your project progress but also serve as a visual representation of the cohesive makeover.

Frequently Asked Questions

How Do I Modernize My China Cabinet?

To modernize your china cabinet, start by painting it a bold, modern color like navy blue or emerald green.

Next, swap out traditional glass doors for sleek alternatives like metal mesh or frosted glass.

Advertisement

Update the hardware with contemporary metal pulls or geometric knobs.

What Can I Do With My Old China Cabinet?

You're wondering what to do with your old china cabinet, and the possibilities are endless! You could repurpose it as a bathroom vanity, decorative shelving, or a storage solution for crafting supplies.

Alternatively, convert it into a bar cart or a plant stand to showcase your favorite greenery. Whatever you choose, get creative and give your old china cabinet a new lease on life.

With a little imagination, you can breathe new life into this old piece of furniture.

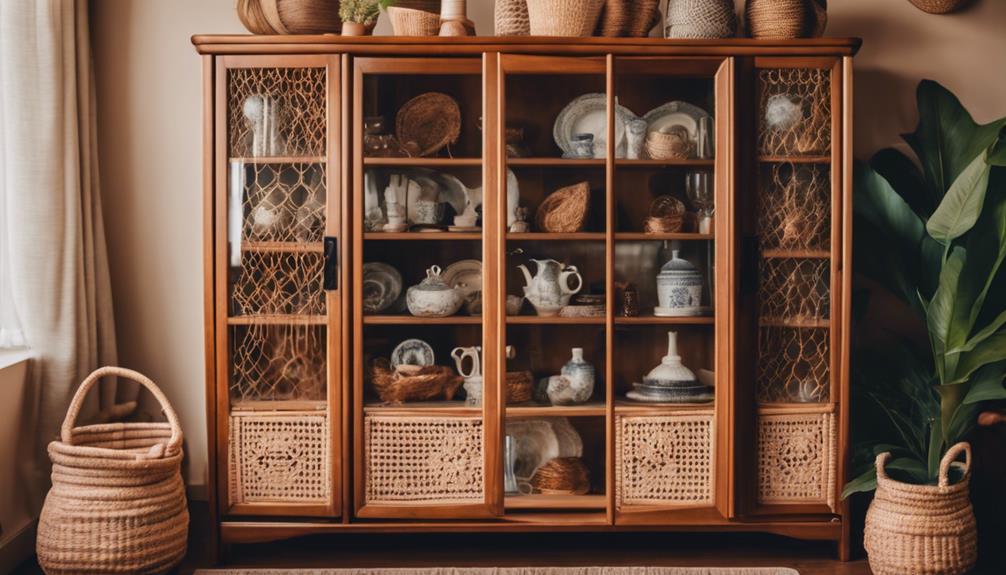
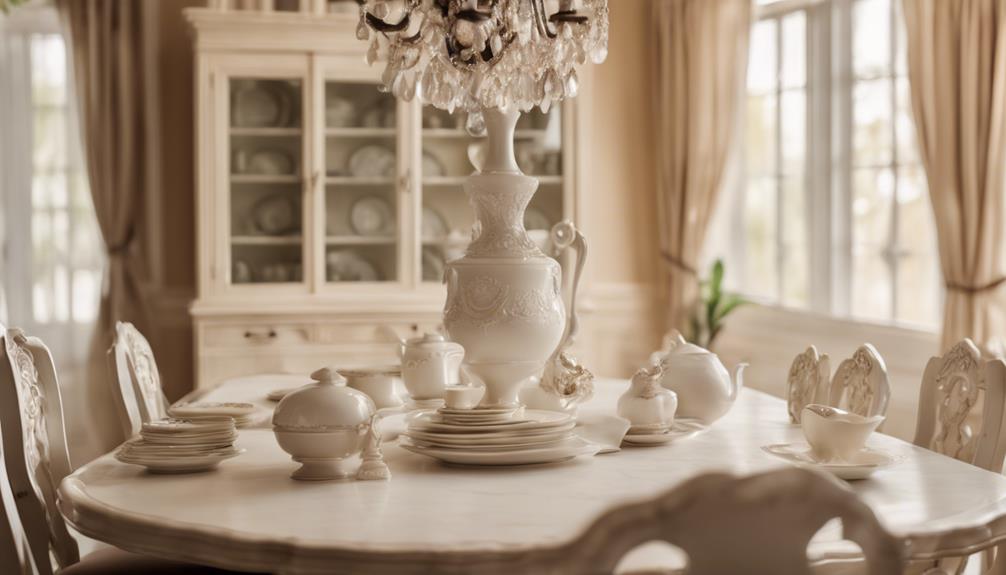
Are China Cabinets a Thing of the Past?

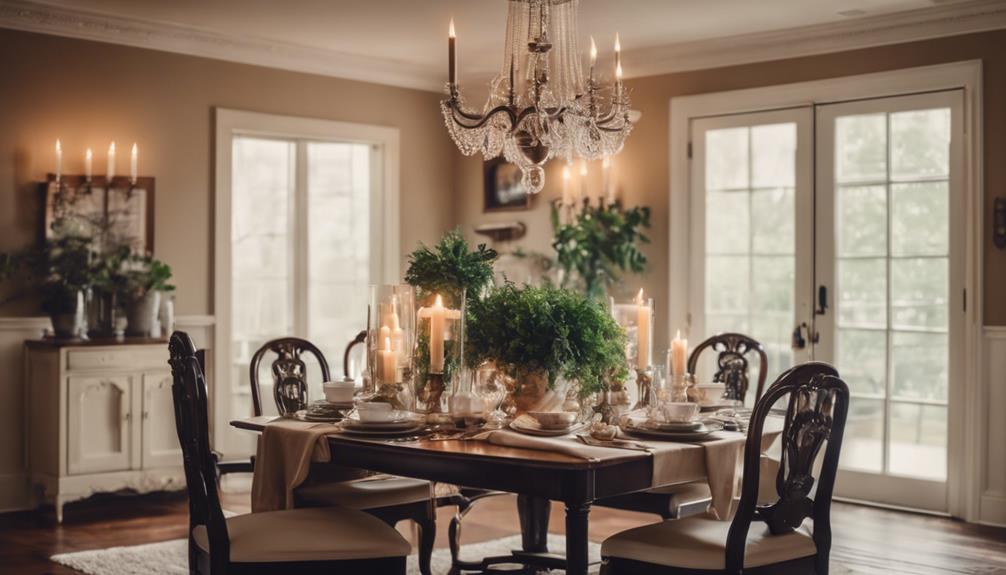
As you ponder the fate of china cabinets, imagine a stately dining room, adorned with fine china and crystal, showcasing a beautiful cabinet at its centerpiece.

Advertisement

Now, ask yourself: are china cabinets a thing of the past? Not quite. While their traditional purpose may have faded, these elegant pieces have evolved to accommodate modern tastes, incorporating new materials and designs.

They've adapted to remain relevant, waiting for you to repurpose them in your own unique way.

How to Display China in a Modern Way?

You're looking to display your china in a modern way, but where do you start? Begin by mixing traditional pieces with modern dinnerware for a unique look.

Consider open shelving or glass-front cabinets to showcase your collection in a minimalist and contemporary way.

Don't be afraid to add decorative accents like artwork or plants to give your display a modern touch.

Advertisement

Experiment with different arrangements and use lighting strategically to create a visually appealing display that's both elegant and modern.

Conclusion

With your newly revamped china cabinet, your home is now a masterpiece, a symphony of style and functionality.

Like a conductor leading an orchestra, you've harmoniously blended old and new, creating a space that's both nostalgic and modern.

As you step back to admire your handiwork, you'll be thrilled to see how this once-forgotten piece has become a showstopping centerpiece, radiating warmth and character throughout your entire home.

Advertisement

Continue Reading
Advertisement

Home Decor

August Color Palettes That Will Transform Your Home – Try Them Today!

Discover vibrant August color palettes that can transform your home, but wait until you see the unexpected accents that will elevate your space!

Published

on

By

transform your home colors

Looking to transform your home this August? Embrace vibrant color palettes to ignite your space. Start with Pink Dawn as your bold centerpiece, complemented by Symphony Blue and Jamaican Aqua for a lively mix. Adding white brings balance, while gold accents and natural elements enhance the bohemian vibes. Don't shy away from incorporating hot pink accents in unexpected places—like kitchens and bathrooms. This combination energizes your decor without overwhelming it. With these ideas, you're well on your way to creating a fresh atmosphere. Stick around, and you'll discover even more tips to elevate your home's style!

Key Takeaways

  • Embrace vibrant hues like Pink Dawn, Symphony Blue, and Jamaican Aqua to energize your living spaces this August.
  • Incorporate white accents for visual balance, enhancing the overall aesthetic of your decor.
  • Use gold accents and natural elements to add a bohemian flair to your interior design.
  • Experiment with layering colorful rugs and throw pillows for a cozy, inviting atmosphere.

Embracing Color Trends

Embracing color trends means welcoming vibrant hues like pink into your home, transforming spaces with a fresh and expressive flair. As you explore the emerging dominance of pink, consider how it can redefine your design aesthetic. This isn't just any pink—Millennial Pink is leading the charge, reflecting a cultural shift towards embracing bold colors in home decor.

To create a harmonious environment, start by developing a mood board that features August's color palette. Incorporate Pink Dawn as your main shade, pairing it with Symphony Blue and Jamaican Aqua. This combination will breathe life into your rooms, moving away from traditional neutrals and adding a lively touch.

Don't forget to enhance your design with gold accents and natural elements. These additions can elevate the overall aesthetic, making your space feel more inviting and textured.

August's Signature Color Palette

august color palette selection

August's signature color palette showcases Pink Dawn as the vibrant centerpiece, offering versatility for walls or ceilings. This striking shade isn't just a trend; it's a reflection of how colors have evolved over the years. You can easily transform a space by incorporating this bold pink into your decor.

Complementing Pink Dawn, Symphony Blue and Jamaican Aqua provide invigorating tones that breathe life into your rooms. These colors create a soothing contrast while remaining in harmony with the energetic pink. Adding white enhances visual balance, allowing the vibrant Pink Dawn to shine even more.

To elevate the overall look, consider incorporating gold accents and natural elements like orchids and hibiscus. These touches bring a bohemian flair, making your home feel both stylish and inviting.

Advertisement

This color palette not only embraces current trends but also encourages you to think outside the box when it comes to color choices.

Personal Reflections on Pink

introspective thoughts on pink

You might find your feelings about pink have changed over time, especially as life events influence your color preferences.

Once seen as just a childish hue, pink can now represent a bold choice in your home decor.

As you embrace brighter shades, consider how these shifts reflect your personal journey and evolving taste.

Journey to Embrace Pink

The journey to appreciate pink unfolded unexpectedly after welcoming a daughter, transforming my initial resistance into a vibrant acceptance of the color. You might find that your own experiences color your perspective, just as mine did.

While I once shied away from pink, especially pastel shades, I embraced hot pink with enthusiasm. It became a bold statement in my wardrobe and home decor.

Advertisement

Incorporating pink hasn't only brightened my space but also reflected a broader cultural shift towards more dynamic colors. You may notice this trend too, where blush tones are predicted to dominate upcoming fall palettes. This evolution in taste showcases how personal experiences can reshape our preferences.

Consider these aspects of your journey with pink:

  • The emotional connections tied to specific colors
  • The influence of personal milestones, like having children
  • The shift in societal color trends
  • The contrast between pastel and vibrant shades

Embracing pink, particularly in its bolder forms, can reinvigorate your surroundings and enrich your experiences. So why not take a chance on this lively hue?

Personal Color Preferences Shift

As life experiences unfolded, personal color preferences shifted dramatically, illustrating how our journeys can reshape our views on hues like pink. You might remember a time when pastel pink felt like a color to avoid, steeped in negative memories. However, welcoming a daughter into your life can change everything. Suddenly, the softness of pink transforms from something you resist to a color that carries warmth and joy.

Though pastel shades still don't resonate with you, vibrant hues like hot pink have found a place in your heart. This shift isn't just about embracing a new color; it represents a deeper evolution in your taste. You've slowly woven pink into your wardrobe and home, reflecting your changing perspective.

In this broader context, it's fascinating to see how cultural trends, like the rise of Millennial Pink, resonate with your own transformation. Your journey with pink showcases the power of personal experiences in shaping color preferences and design choices. By allowing yourself to explore the spectrum of pink, you reveal a vibrant part of your identity, demonstrating that even our color preferences can grow and evolve over time.

Advertisement

Pink in Home Decor

Embracing pink in home decor has transformed my living space into a vibrant reflection of my evolving taste, blending warmth and joy in unexpected ways. Initially, I resisted pastel shades due to their associations, but after welcoming a daughter, my perspective shifted. Now, I lean towards bold, vibrant shades like hot pink that energize my space while steering clear of softer pastels.

Integrating pink into my decor has revealed its versatility, allowing me to create a dynamic atmosphere. As pink gains popularity, especially Millennial Pink, it signifies a cultural shift towards bolder choices in home design. Engaging in conversations with others, I've discovered diverse opinions on how striking pink can be, particularly when paired with other colors like gray.

Here are some ways to incorporate pink into your home decor:

  • Use hot pink throw pillows to add a pop of color to neutral sofas.
  • Paint an accent wall in a bold pink to create a focal point.
  • Accessorize with pink artwork that complements your existing decor.
  • Choose vibrant pink rugs to enliven your floors.

Explore the transformative power of pink and see where it takes you!

Bohemian Decor Essentials

bohemian style home essentials

How can you transform your space into a vibrant bohemian haven filled with personality and warmth? Start by embracing a lively mix of colors, patterns, and textures that reflect your unique style.

Layer colorful rugs and throw pillows to create a cozy atmosphere. These textiles not only add depth but also enhance the eclectic feel that defines bohemian decor.

Incorporate plants like orchids and hibiscus to breathe life into your home. These natural elements connect your space to the outdoors, making it feel fresh and inviting.

Advertisement

Don't forget to include diverse materials such as wood, metal, and woven elements; they contribute to the layered look that's essential in bohemian design.

Curate your space with unique art pieces and decor items collected from travels or local markets. These treasures tell your story and showcase your individuality.

The key to a successful bohemian vibe is personalization, so let your creativity shine through every aspect of your decor. Mix and match until you find the perfect balance that reflects your personality, and you'll create a warm, vibrant sanctuary that feels truly like home.

Community Color Conversations

engaging local dialogue sessions

Let's talk about your color journey!

Share your favorite combinations and how you've used pink in your home decor.

Your experiences can spark inspiration for others in our vibrant community!

Advertisement

Share Your Color Journey

Sharing your color journey not only sparks inspiration but also builds a vibrant community where everyone can explore their unique tastes and preferences in home decor. Engaging with others about color choices fosters a rich dialogue and allows you to learn from diverse opinions. You might discover why pink resonates with some while gray appeals to others.

The comments section is a fantastic platform for exchanging insights and suggestions. You can share how you incorporated trending colors into your space or ask for advice on your current project. Plus, participating in monthly color challenges on social media lets you showcase your creativity and inspire others.

Here are some ways to enhance your color journey:

  • Share photos of your color transformations.
  • Discuss your favorite color palettes and why they speak to you.
  • Offer tips on blending colors effectively in your home.
  • Invite friends to join in on color challenges.

Favorite Color Combinations

Immerse yourself in the vibrant world of favorite color combinations, where each pairing tells a story and reflects personal style. In this community, you'll discover a treasure trove of color palettes that resonate with diverse preferences and experiences. Many members find joy in combining pink with complementary hues like Symphony Blue and Jamaican Aqua, creating lively atmospheres that are both modern and inviting.

As you explore these combinations, you'll notice the emotional connections people have with their chosen colors. Each story shared can inspire you to think differently about your own color choices. The ongoing dialogue encourages you to experiment with new palettes, fostering creativity in your home decor.

Don't shy away from expressing your own favorites! The community thrives on feedback and shared experiences, making it a welcoming space for everyone. Whether you're drawn to soft pastels or bold contrasts, there's a combination waiting for you to investigate.

Advertisement

Plunge into these conversations, and you might just find the perfect palette that transforms your living space into a reflection of your unique style. Embrace the journey and let your home shine with colors that speak to you!

Pink in Home Decor

As you explore favorite color combinations, you'll find that pink is making a bold statement in home decor, capturing attention with its versatility and warmth. This year, Blush is set to dominate fall color palettes, reflecting a cultural shift towards vibrant choices. You'll notice Pink Dawn as a key player in August's palette, beautifully complemented by Symphony Blue and Jamaican Aqua.

Homeowners are increasingly embracing pink, moving from a dislike of pastels to celebrating bolder shades like hot pink. This transformation is especially evident in bohemian aesthetics, where pink is integrated with textiles, plants, and natural materials to create an inviting atmosphere.

Consider these ideas to incorporate pink into your decor:

  • Pair pink with neutral tones like gray for a sophisticated look.
  • Use hot pink accents to energize a room without overwhelming it.
  • Incorporate pink textiles, like throw pillows or rugs, to add warmth.
  • Combine pink with vibrant greens to enhance a natural feel.

Embrace the versatility of pink, and watch your space transform into a vibrant haven!

Seasonal Decorating Tips

creative seasonal decor ideas

Transform your space with seasonal colors that reflect the vibrant energy of August, using shades like Pink Dawn, Symphony Blue, and Jamaican Aqua. These hues not only create a rejuvenating ambiance but also energize your home decor during the summer months.

To enhance this look, consider adding white accents alongside pink, as they provide visual balance and highlight the vibrant tones in your decor. Incorporate gold accents and natural elements like greenery to add texture and interest, contributing to a bohemian aesthetic that flourishes in warm weather.

Advertisement

Rotating seasonal colors in textiles, such as throw pillows and blankets, can effortlessly revitalize your home while creating a cozy atmosphere that resonates with August's spirit. Don't overlook the impact of small changes; introducing plants like orchids and hibiscus can greatly enhance the vibrancy of your living spaces.

These elements bring life and a touch of nature indoors, making your home feel more inviting. By embracing these seasonal decorating tips, you'll capture the essence of August and transform your home into a stylish, lively retreat. Get ready to enjoy the beauty of summer right inside your own space!

Resources for Color Inspiration

color inspiration resource guide

To find the perfect color inspiration for your home, explore a variety of resources that cater to your unique style and preferences. With the right tools and communities at your fingertips, you'll discover palettes that resonate with you and elevate your space.

  • Color analysis tools: Use free quizzes to determine your personal color types, helping you enhance your style.
  • Pinterest: Browse for downloadable resources like color palettes and wheels to aid in planning your color combinations.
  • Social media challenges: Participate in weekly color challenges on platforms like Instagram and Facebook to engage with fellow color enthusiasts and share your journey.
  • Blogs: Access insightful blog posts that offer tips on choosing paint colors, considering color psychology, and exploring trending hues for home decor inspiration.

Frequently Asked Questions

What Are the Colors for the Month of August?

For August, you've got Pink Dawn as the main color, paired with Symphony Blue and Jamaican Aqua for cool accents. Adding white creates balance, while gold accents and greenery enhance the overall vibe beautifully.

What Color Goes Best With August?

Did you know that 60% of people feel more relaxed in pink environments? For August, consider pairing Pink Dawn with Symphony Blue and Jamaican Aqua. They create a vibrant yet calming atmosphere in your space.

How Do I Choose a Color Palette for My New Home?

To choose a color palette for your new home, start with a main color you love. Then, select complementary shades and neutrals, adding accents to enhance the overall look while ensuring harmony throughout your space.

What Colors Are Associated With Months?

Colors associated with months reflect seasonal changes. For example, January features white, February has cherry red and pink, March boasts emerald green and purple, while August embraces burnt red and orange, signaling summer's shift into autumn.

Advertisement

Conclusion

As you stand in your living room, imagine the vibrant hues of August washing over your walls.

Picture how a bold pink can breathe life into your space, while soft neutrals create a serene backdrop.

The warmth of bohemian accents draws you in, inviting you to explore every corner.

So, are you ready to transform your home and embrace these enchanting color palettes?

The perfect shade awaits you—just step into your vision and let the magic unfold.

Advertisement

Continue Reading

Alfresco

What Is Alfresco Painting? Artistic Techniques Explained!

An exploration of alfresco painting, a historical technique rooted in the Renaissance, revealing artistic secrets that elevate outdoor artistry.

Published

on

By

outdoor painting technique overview

Explore the historical artistry of alfresco painting, stemming from the Renaissance in Italy. Artists like Giotto and Michelangelo led the way, painting on wet plaster to craft vivid frescoes. For this technique, you'll need outdoor-grade paints such as oil paints, acrylics, or watercolors, along with suitable brushes and water containers. Prepping the plaster surface meticulously is essential for a flawless finish. As you paint, remember to use soft brushes on wet plaster, allowing pigments to chemically bond with the surface for depth. Delve into this technique further to uncover the intricate details and techniques that make alfresco painting truly unique.

Key Takeaways

  • Originates from Renaissance Italy, involving painting on wet plaster.
  • Requires outdoor-grade paints, suitable brushes, water containers, and portable easels.
  • Involves drawing directly on wet plaster and using soft brushes for blending.
  • Fresh plaster crucial for strong paint bonding, vibrant colors, and longevity.
  • Preservation entails curing, sealing, weather considerations, and regular maintenance.

Origins of Alfresco Painting

The origins of alfresco painting trace back to Italy during the Renaissance period, where artists pioneered the technique of painting on wet plaster to create enduring murals. This artistic practice, known as fresco, emerged as a popular method for decorating the walls and ceilings of churches, palaces, and public buildings in Italy.

During the Italian Renaissance, artists like Giotto and Michelangelo utilized fresco painting to produce magnificent works of art that showcased both their technical skill and creative vision.

Fresco painting involves applying water-based pigments on freshly laid wet plaster, allowing the colors to become an integral part of the surface as they dry. Artists would transfer their designs onto the wet plaster from a cartoon or outline drawing, enabling them to create intricate and long-lasting murals.

This technique not only provided a durable finish but also allowed for the creation of monumental and detailed artworks that adorned various architectural settings, contributing to the rich artistic legacy of the Italian Renaissance.

Materials Needed for Alfresco Painting

outdoor painting supplies required

For alfresco painting, you'll need specific materials to create your artwork outdoors. Common materials for fresco painting include outdoor-grade paints such as oil paints, acrylics, or watercolors. These paints are chosen based on the artist's preferences and the desired effect.

In addition to paints, you'll require brushes suitable for outdoor use, water containers for mixing paints, and portable easels to support your canvas or surface.

Advertisement

When painting alfresco, the natural light and surroundings play a significant role in influencing the colors and atmosphere of your artwork. This medium allows artists to capture changing light, shadows, and textures in real-time, providing a unique artistic experience.

Remember that preparing the plaster surface adequately is essential before beginning your alfresco painting to maintain the longevity and quality of your artwork.

Preparing the Plaster Surface

surface ready for plaster

To start preparing the plaster surface for alfresco painting, ensure it's smooth and free of imperfections. This step is vital as the success of the painting relies heavily on the quality of the plaster surface.

Artists often employ traditional fresco techniques to achieve the desired smoothness and flawlessness required for alfresco painting. Ensuring the plaster surface is completely dry is essential before commencing the painting process, as any moisture can compromise the adhesion of the pigments to the surface.

Properly preparing the plaster surface not only enhances the aesthetic appeal of the final artwork but also contributes to its longevity. By meticulously attending to the details of the plaster surface, artists set a strong foundation for the application of water-based pigments, which is the hallmark of alfresco painting.

Drawing the Design on Plaster

designing patterns on plaster

When drawing the design on plaster for alfresco painting, artists meticulously outline their vision directly onto the wet plaster surface. This technique for tracing serves as an essential guide for applying pigments and creating the mural.

Ensuring accuracy and cohesion in the final artwork, this step allows for the seamless integration of the design into the larger mural composition.

Advertisement

Plaster Design Preparation

Efficiently transferring the desired artwork onto the fresh plaster surface is a crucial step in the process of preparing the design for an alfresco painting. Artists utilize tools like brushes, pencils, or styluses to outline the design directly onto the prepared plaster surface.

These design outlines act as a roadmap for the artist, guiding them through the painting process in the alfresco technique. Precision and accuracy in this step are essential as they greatly impact the overall composition of the artwork.

Drawing the design on plaster marks the critical initial phase in creating vibrant and enduring alfresco paintings. By carefully tracing the design onto the plaster, artists lay the foundation for a visually captivating mural that withstands the test of time.

This meticulous process ensures that the artwork isn't only visually appealing but also structurally sound, enhancing its longevity and artistic impact.

Technique for Tracing

Using a sinopia sketch or cartoon, artists meticulously trace the design onto the fresh plaster surface to prepare for the alfresco painting process. Tracing is an essential step in fresco painting, as it allows artists to transfer the intricate details of their design onto the plaster with precision and accuracy.

Advertisement

By following the lines of the sketch or cartoon, artists can guarantee that the final composition reflects their original vision faithfully. This technique not only guides the artist during the painting process but also aids in the placement of elements within the composition. Through tracing, artists can achieve a level of detail and accuracy that would be challenging to attain freehand.

Ultimately, tracing plays a significant role in ensuring that the final fresco painting is a true representation of the intended design, capturing every nuance and detail with meticulous care.

Painting Techniques in Alfresco Painting

alfresco painting methods explained

To achieve intricate details and vibrant colors in alfresco painting, artists employ specific brushwork techniques on the freshly applied plaster. Working on wet plaster allows the pigments to bond chemically with the surface, ensuring the artwork becomes a permanent part of the wall in mural painting.

The technique involves using soft brushes to apply pigments to the wet surface, with the colors becoming brighter as the plaster dries. Artists must work swiftly and confidently to capture the desired hues and textures before the plaster sets. By blending and layering pigments on the wet surface, they can achieve depth and dimension in the mural.

This method of painting on wet plaster gives the artwork a matte finish and durability that's ideal for large-scale murals. The process of painting on wet plaster requires skill and precision to create lasting and visually stunning pieces of art.

Importance of Fresh Plaster in Painting

fresh plaster for painting

Fresh plaster plays a vital role in alfresco painting by ensuring that the paint adheres securely to the wall surface, enhancing its durability over time.

The porous nature of fresh plaster allows the pigments to be absorbed, creating a strong bond between the paint and the wall.

Advertisement

Artists find that painting on fresh plaster provides a smooth and receptive canvas for their artistic expression, resulting in vibrant and long-lasting colors on the wall.

Fresh Plaster Enhances

Enhancing the vibrancy and longevity of painted colors, fresh plaster plays an essential role in alfresco painting techniques. When working with fresco painting, fresh plaster acts as a pivotal foundation that allows the colors to bond effectively, creating lasting artwork. The porous nature of fresh plaster enhances the vibrancy of the colors, ensuring they remain vivid over time. Additionally, painting on fresh plaster provides artists with a smooth and even surface to work on, allowing for intricate details and precise brushwork.

To further illustrate the importance of fresh plaster in alfresco painting, consider the following table:

Benefits of Fresh Plaster in Alfresco Painting
Allows colors to bond effectively
Enhances color vibrancy and longevity
Provides a smooth surface for detailed work

Painting Adhesion and Durability

For ideal adhesion and durability in alfresco painting, fresh plaster plays a critical role in bonding water-based pigments to the wall surface. In fresco painting, the application of fresh plaster serves as the foundation for the paint to guarantee effective bonding, ensuring a long-lasting finish.

The interaction between the fresh plaster and water-based pigments is essential for creating a strong bond that withstands the test of time. Without the use of fresh plaster, the paint may not properly set on the wall surface, leading to potential issues such as flaking or peeling over time.

Advertisement

Fresh plaster in alfresco painting isn't just a surface preparation step but a fundamental component in enhancing the vibrancy and longevity of the colors applied. It allows for a seamless integration of the paint into the wall, becoming a permanent part of the structure.

The meticulous attention to using fresh plaster guarantees a durable and visually striking outcome in fresco painting.

Curing and Sealing the Fresco

preservation of ancient artwork

Curing and sealing the fresco is an essential final step in guaranteeing its longevity and preservation. The curing process involves allowing the fresco to dry naturally over several weeks. This period is vital for achieving full strength and durability as the pigments chemically bond with the plaster. Properly curing the fresco guarantees a lasting and vibrant artwork.

Sealing the fresco with a protective coating, such as a transparent glaze or wax, further enhances its longevity. This protective layer helps shield the fresco from environmental factors like dust, dirt, and moisture, preserving its colors and details for years to come. By properly curing and sealing the fresco, you aren't only maintaining its integrity but also ensuring its beauty withstands the test of time.

This meticulous process is fundamental for the long-term preservation of fresco paintings, making them a valuable and enduring art form.

Tips for Successful Alfresco Painting

outdoor painting success guide

When starting alfresco painting, keep in mind that the choice of location can greatly impact your artwork's outcome.

Considering the weather conditions is essential for a successful painting session outdoors.

Advertisement

Location Choice Matters

Selecting the right location is key to ensuring successful alfresco painting, as it greatly impacts the outcome of your artwork. When choosing a spot for your outdoor painting session, consider factors such as lighting, scenery, and ambiance. Here are some tips to help you make an informed decision:

Consideration Description Example
Lighting Opt for locations with natural light sources to enhance colors and shadows. Painting near a lake during sunset.
Scenery Choose settings that inspire your creativity and complement your artistic vision. A lush garden with vibrant flowers.
Ambiance Look for places that provide a peaceful and inspiring atmosphere to focus on your art. A quiet meadow with the sound of birds chirping.

Weather Considerations Crucial

Considering weather conditions is crucial for successful alfresco painting. It directly impacts the quality and process of your artwork.

Temperature plays a significant role in determining the drying times of your paints. Extreme heat can cause them to dry too quickly, affecting the blending and overall finish of your piece. On the other hand, cold temperatures can prolong drying times, leading to potential smudging or smearing if not carefully monitored.

Additionally, humidity levels in the air can influence how your paints adhere to the canvas, impacting the richness and depth of colors achieved. It's advisable to work during times when the temperature is moderate, avoiding peak sunlight hours that can accelerate drying excessively.

Inspirational Examples of Alfresco Art

outdoor art installations thrive

Explore a variety of awe-inspiring alfresco artworks that showcase the beauty and creativity of painting outdoors. Alfresco painting, with its roots in capturing the essence of nature, has produced some remarkable pieces throughout history.

One of the most iconic examples of alfresco art is Michelangelo's masterpiece in the Sistine Chapel. The intricate frescoes adorning the chapel's ceiling are a testament to the skill and dedication required for this painting technique.

Advertisement

Artists like Monet and Sargent also found inspiration in painting outdoors, using plein air techniques to convey the changing light and atmosphere in their works.

These influential artists paved the way for contemporary alfresco painters, who continue to create stunning pieces that blur the lines between art and nature. From vibrant landscapes to intimate portraits, alfresco art offers a unique perspective that can only be achieved by working directly from the natural world.

Preservation and Maintenance of Alfresco Paintings

conserving outdoor artwork masterpieces

To guarantee the longevity and beauty of alfresco paintings, preservation and maintenance are crucial steps in protecting these artworks from environmental damage. Preservation of fresco paintings involves safeguarding them from weather elements such as rain, sun exposure, and temperature fluctuations.

It's essential to maintain these pieces by regularly cleaning them to remove dirt, grime, and pollutants that could harm the artwork over time. Applying protective coatings or sealants can help extend the lifespan of alfresco paintings and prevent color fading.

In cases where restoration is necessary, conservators may repair cracks, reattach loose paint, and address any structural issues to ensure the durability of the artwork. Professional conservators utilize specialized methods and materials to safeguard fresco paintings, ensuring that their beauty and historical significance are preserved for future generations to appreciate.

Frequently Asked Questions

What Is the Fresco Painting Technique?

The fresco painting technique involves applying water-based pigments on freshly applied plaster, creating durable murals. Artists grind dry-powder pigments in water to create colors that dry and set with the plaster, allowing for detailed artworks.

Advertisement

What Does Al Fresco Mean in Painting?

Imagine painting under the open sky, capturing nature's essence with each brushstroke. 'Al fresco' in painting means embracing the outdoors. Artists use this term to signify creating art in the fresh air, connecting with nature's beauty.

How Does an Artist Create a True Fresco Painting?

To create a true fresco painting, you meticulously apply water-based pigments on fresh plaster while transferring your design. Each day, you paint sections on wet plaster, ensuring colors become permanent as they dry within the surface.

Why Is Fresco Painting Significant?

Fresco painting is significant due to its durability and ability to create monumental murals. Artists like Michelangelo favored it during the Italian Renaissance. Applying water-based pigments on wet plaster makes colors permanent, allowing detailed work.

Conclusion

To sum up, alfresco painting is a timeless art form that requires skill, patience, and attention to detail.

As you commence on your own alfresco painting journey, remember that like a fresco, life is a canvas waiting to be painted with vibrant colors and intricate designs.

Advertisement

So, take inspiration from the masters of the past, embrace the process of creating something beautiful, and let your creativity shine through in every brushstroke.

Happy painting!

Continue Reading

Home Decor

Set the Perfect Mood in Any Room With These Lighting Tips – You’Ll Be Amazed!

Unlock the secrets to transforming your space with simple lighting tips that will leave you amazed at the results!

Published

on

By

transform your space s ambiance

You can easily set the perfect mood in any room with just a few lighting tips. Start by using a mix of ambient and task lighting to create comfort and functionality. Dimming your lights softens the atmosphere for intimate gatherings, while warm-toned bulbs foster positivity. Layer your lighting with floor lamps, sconces, and colored LED bulbs to add depth and visual interest. Consider natural elements, like salt lamps, to enhance relaxation. These simple adjustments can transform your space. For even more ways to elevate your home's vibe, you'll want to explore additional creative lighting techniques!

Key Takeaways

  • Use dimmable fixtures or candles to easily adjust ambiance for gatherings or relaxation, creating a warm and inviting atmosphere.
  • Layer lighting with multiple sources, such as floor lamps and wall sconces, to enhance room aesthetics and depth.
  • Choose warm-toned bulbs to create a flattering environment that boosts confidence and enhances emotional connections.
  • Incorporate task lighting in functional areas to ensure safety and productivity while maintaining a cozy atmosphere.

Understanding Mood Lighting

Understanding mood lighting is essential because it can dramatically shape your emotions and experiences in any space. The right mood lighting creates an inviting atmosphere that enhances your feelings and interactions.

Ambient lighting, particularly when it has a warm glow, is vital for setting the tone. It not only softens harsh realities but also boosts confidence, especially in romantic settings.

Research shows that many people prefer dimmed lighting during intimate moments, often due to worries about body visibility and self-image. By using warm tones, you can create a more flattering environment that reduces self-consciousness and heightens enjoyment. This positive lighting can make a significant difference in how you and your partner connect, fostering deeper emotional ties.

Incorporating multiple light sources and adjusting colors can further enhance your space. You're not just illuminating a room; you're curating an experience that promotes well-being and satisfaction.

Types of Lighting to Consider

various lighting options available

To create the perfect atmosphere in your space, it's important to explore the different types of lighting available, each serving a unique purpose in enhancing your home's ambiance.

Start with ambient lighting, which sets the overall tone and mood of a room. Options like floor lamps and recessed lights provide a soft glow that enhances comfort and relaxation, making your space feel inviting.

Advertisement

Next, consider task lighting. This type is essential for functional areas where you need focused illumination. Under-cabinet lights in kitchens or desk lamps in home offices guarantee you can perform specific activities efficiently and safely. Task lighting not only aids productivity but also prevents eye strain.

Techniques for Effective Atmosphere

creating engaging atmosphere techniques

Creating the right atmosphere in your space involves a strategic blend of lighting techniques that cater to your specific needs and preferences.

Start by using dimmable light fixtures or candles to soften the ambiance, perfect for gatherings or relaxation. Multiple light sources, like floor lamps, wall sconces, and table lamps, allow you to adjust the mood effortlessly while enhancing the overall aesthetic of your room.

Consider incorporating smart home technology, which lets you customize brightness and color to suit different occasions. This adaptability guarantees your space feels just right, whether you're hosting friends or enjoying a quiet evening alone.

Opt for warm-toned lighting to boost self-confidence and create an inviting environment, fostering positive interactions. For a calming atmosphere, try adding natural elements like Himalayan salt lamps; they not only provide a gentle glow but also contribute to a soothing vibe.

Creating Intimacy With Light

illuminating connection through light

Soft lighting sets the mood for intimacy, helping you and your partner feel more relaxed and connected. When you dim the lights, the atmosphere transforms, inviting a sense of closeness. A warm, amber glow creates a cozy environment that encourages emotional bonding.

According to a Harris Poll, 62% of people prefer intimate moments with the lights off, emphasizing the power of reduced visibility in fostering comfort.

Advertisement

Incorporating ambient lighting solutions like Himalayan salt lamps or colored bulbs can greatly enhance the mood of a space. These options not only cast a soft light but also add a unique charm that can elevate your romantic experiences.

Warm tones in lighting improve appearance and boost self-confidence, allowing both you and your partner to feel at ease during those special moments.

Practical Lighting Tips for Rooms

effective room lighting strategies

Maximizing the effectiveness of your lighting can transform any room into a more inviting and functional space. Start by incorporating dimmer switches to easily adjust the lighting intensity, allowing you to create the right ambience for relaxation or social gatherings.

Layer your lighting with multiple sources, like floor lamps, table lamps, and recessed fixtures, to add depth and visual interest.

In spaces like living rooms and bedrooms, opt for warm-toned bulbs. They enhance appearance and boost confidence, making your environment feel more welcoming.

For functional areas like kitchens, utilize task lighting by combining overhead fixtures with under-cabinet lights. This guarantees ideal usability and safety while you cook.

Advertisement

Don't forget to experiment with strip lighting! It's perfect for accentuating architectural features or creating a cozy atmosphere in various spaces.

Consider using color-changing LED bulbs as well; they allow you to customize the atmosphere according to your mood or occasion. By mixing different shades and intensities throughout your rooms, you'll achieve a well-lit space that feels just right for any activity.

Frequently Asked Questions

How to Set the Mood With Lighting?

To set the mood with lighting, use warm-toned bulbs and multiple light sources. Incorporate soft lighting for comfort, and experiment with unique options like Himalayan salt lamps to create a playful, intimate atmosphere.

What LED Light Puts You in a Good Mood?

Imagine warm, soft oranges and yellows wrapping around you like a cozy blanket. Those LED lights lift your spirits, while playful purples spark joy, and calm blues keep you alert. Choose your mood, light it up!

How Does Room Lighting Affect Mood?

Room lighting affects your mood considerably. Warm tones can boost your confidence and create a relaxing atmosphere, while bright lights keep you alert. Adjusting lighting alters your feelings, enhancing intimacy and emotional satisfaction during interactions.

Advertisement

How Does Lighting Affect the Mood of a Scene?

You might think lighting doesn't matter much, but it profoundly shapes a scene's mood. Soft, warm tones create intimacy, while harsher lights can evoke tension. Carefully chosen lighting enhances emotions, fostering connections and making moments memorable.

Conclusion

Now that you've got the tools to set the perfect mood, imagine this: you're hosting a cozy dinner party.

Soft, warm lights flicker from strategically placed lamps, while candles on the table cast a gentle glow.

Friends laugh and share stories, feeling instantly relaxed in the inviting atmosphere you've created.

With these lighting tips, you can transform any space, making every gathering memorable and every moment special.

Advertisement

So go ahead, let your creativity shine!

Continue Reading

Trending