Connect with us

Home Decor

Stylish Living Room With a Brick Wall Design Guide

Pursue a stylish living room with a brick wall design by balancing bold statements with harmonious elements, and discover the perfect blend of form and function.

Published

on

brick wall chic decor

To create a stylish living room with a brick wall design, consider essential elements like brick type, pattern, color, and finish, which work together to create a unique visual effect. Choosing the right brick color, such as classic red or white-painted bricks, sets the tone for the space. Position furniture to complement the brick wall, and experiment with decor elements like wall art and mirrors. Don't forget to incorporate plants, patterned rugs, and neutral tones to balance the room. By combining these elements, you'll create a cozy, inviting atmosphere. And, as you explore these design principles, you'll discover even more ways to elevate your brick wall design.

Key Takeaways

• Choose a brick color that complements the room's atmosphere, such as classic red for a timeless look or white-painted for a bright feel.

• Position furniture to draw attention to the brick wall, and use lighting to create warmth and depth.

• Experiment with brick patterns, such as herringbone, to add sophistication and texture to the room.

• Balance the bold charm of the brick wall with neutral tones to create a sophisticated and timeless atmosphere.

Advertisement

• Add plants or patterned rugs to create visual contrast and depth, and to soften the rugged texture of the bricks.

Essential Brick Wall Design Elements

When designing a brick wall, you'll want to take into account the four essential elements – brick type, pattern, color, and finish – as they work together to create a unique visual effect. These elements will determine the overall aesthetic of your exposed brick wall, which can add texture, warmth, and a rustic charm to your living space.

A well-designed brick wall can also serve as a focal point or a subtle backdrop, depending on your design goal. To enhance the appeal of your brick wall, consider incorporating lighting that highlights its texture and color. Additionally, choose furniture and decor that complement the wall's style, creating a sense of balance and harmony.
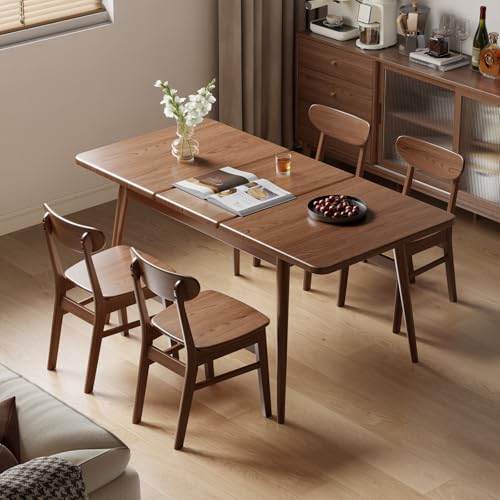
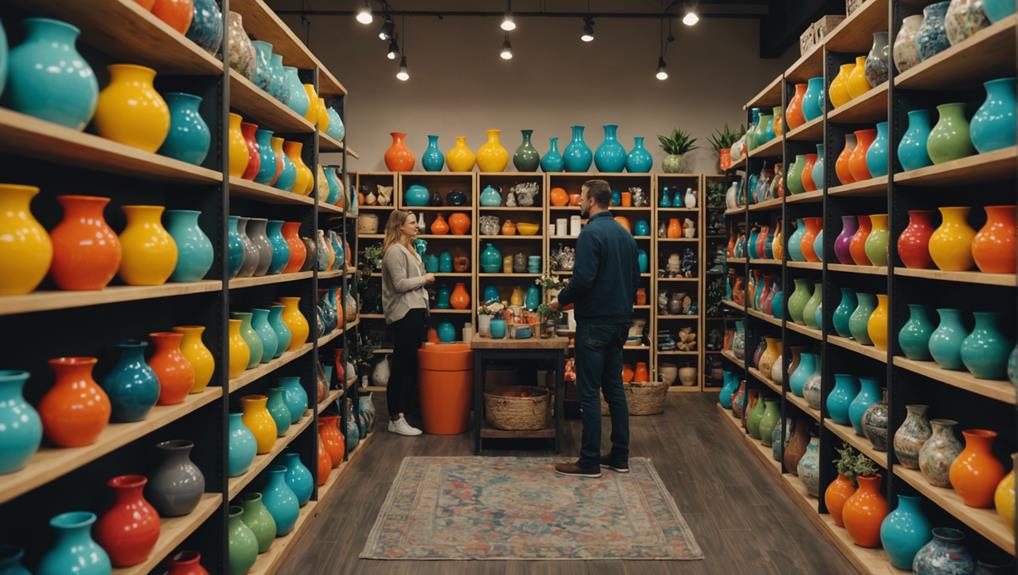
Choosing the Right Brick Colour

selecting ideal brick hue

With your brick wall's pattern and type in place, you're ready to select the perfect brick colour to bring your design vision to life. This is where you can get creative and make a statement in your living room.

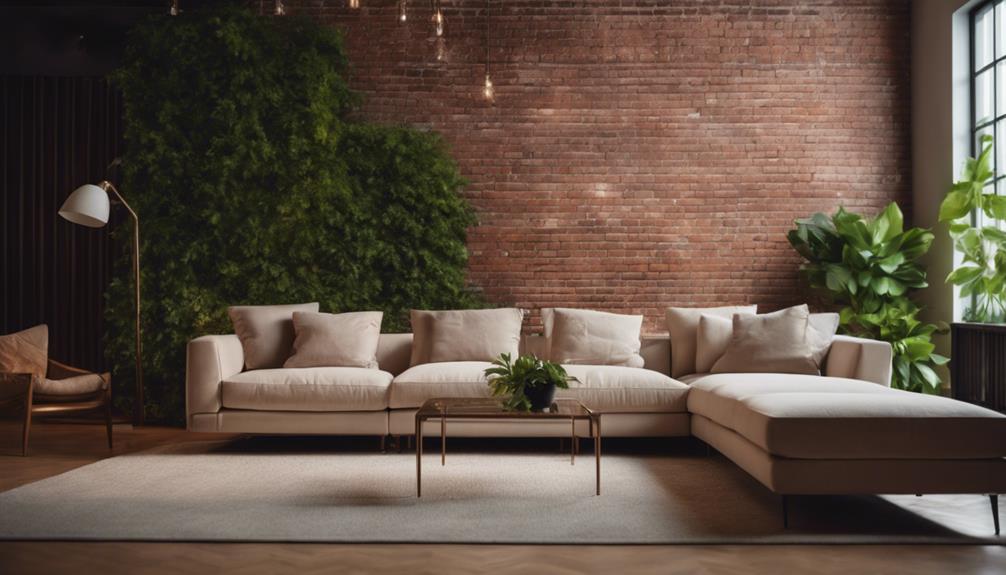
For a timeless and traditional look, consider classic red bricks, which will add warmth and coziness to your space. If you're after a bright and airy feel, opt for white-painted bricks, which will create a clean and modern aesthetic. Or, if you want to make a bold statement, choose black-painted bricks for a dramatic and modern look.

Don't forget to experiment with different brick colors to find the perfect fit for your desired living room ambiance. You can also add visual interest to your space by incorporating herringbone brick patterns, which will create a unique and sophisticated look.

Advertisement

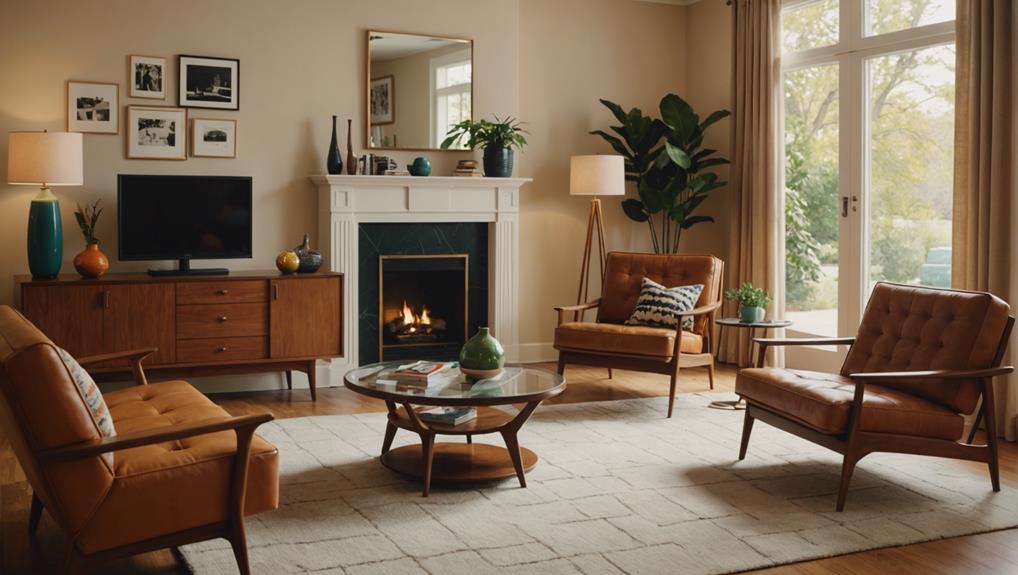
Living Room Layout Ideas With Brick

brick living room design

By incorporating a brick wall into your living room layout, you can create a cozy and inviting atmosphere that draws the eye and sparks conversation. The key to achieving this ambiance lies in thoughtful furniture placement, strategic lighting, and carefully chosen decor elements.

Here are some essential considerations for designing a living room layout with brick:

  • Furniture placement: Position sofas, chairs, and entertainment units in a way that complements the brick wall, creating a harmonious balance between textures and styles.
  • Lighting fixtures: Strategically place lighting fixtures to highlight the texture and details of the brick wall design, adding warmth and depth to the space.
  • Decor elements: Experiment with wall art, mirrors, and shelving to enhance the overall look of the living room layout with a brick wall.
  • Natural charm: Utilize the natural charm of the brick wall to create a cozy and inviting atmosphere, drawing attention to the unique texture and warmth it brings to the space.

Brick Wall TV Unit Design Inspiration

innovative brick wall design

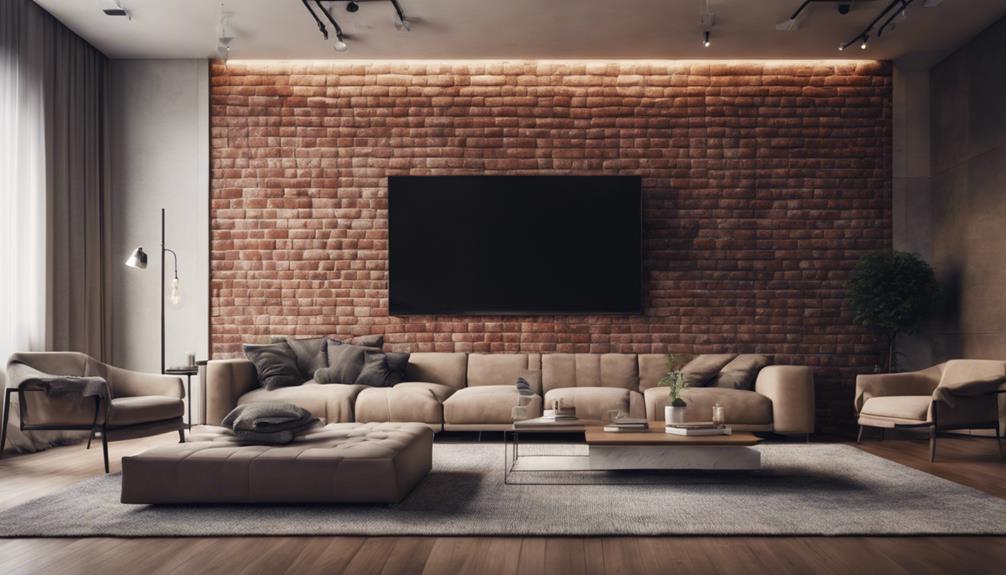
As you explore brick wall TV unit design inspiration, you'll find that the possibilities are endless, with options ranging from modern TV wall designs that seamlessly integrate technology into your living space to creative brick pattern ideas that add a touch of rustic charm.

You'll discover that the perfect blend of form and function can elevate your entertainment area, creating a focal point that's both stylish and practical.

Brick Pattern Ideas

You can choose from a diverse range of brick pattern ideas, from classic red bricks to contemporary black or white painted bricks, in order to create a unique brick wall TV unit design that reflects your personal style.

A well-designed brick wall TV unit can become a focal point in your living room, adding visual interest and depth to the space.

Some popular brick pattern ideas to explore for your living room design include:

Advertisement
  • Herringbone brick patterns, which add a touch of sophistication and elegance to the space
  • Black brick walls, which provide a bold and modern look perfect for industrial or urban-themed decor
  • White brick walls, which offer a clean, crisp, and elegant backdrop for various interior design styles
  • Classic red bricks, which evoke a sense of tradition and coziness in the living room

Modern TV Wall Design

Modern TV wall designs with brick walls elevate your living room's style and functionality, offering sleek, space-saving solutions that integrate seamlessly with your entertainment system.

As you explore modern TV wall designs, you'll find that brick walls can incorporate sleek floating shelves and hidden storage compartments, perfect for organizing electronics and decor items. Some designs even feature integrated lighting to highlight the texture and create a modern ambiance.

By opting for a floating TV unit on a brick wall, you'll achieve a contemporary look while maximizing space in your living room. The best part? Brick wall TV unit designs can be customized to suit different styles, from industrial to minimalist, ensuring that your living room reflects your unique taste.

With a brick wall design, you can create a stylish and functional focal point in your living room, perfect for relaxing and entertaining.

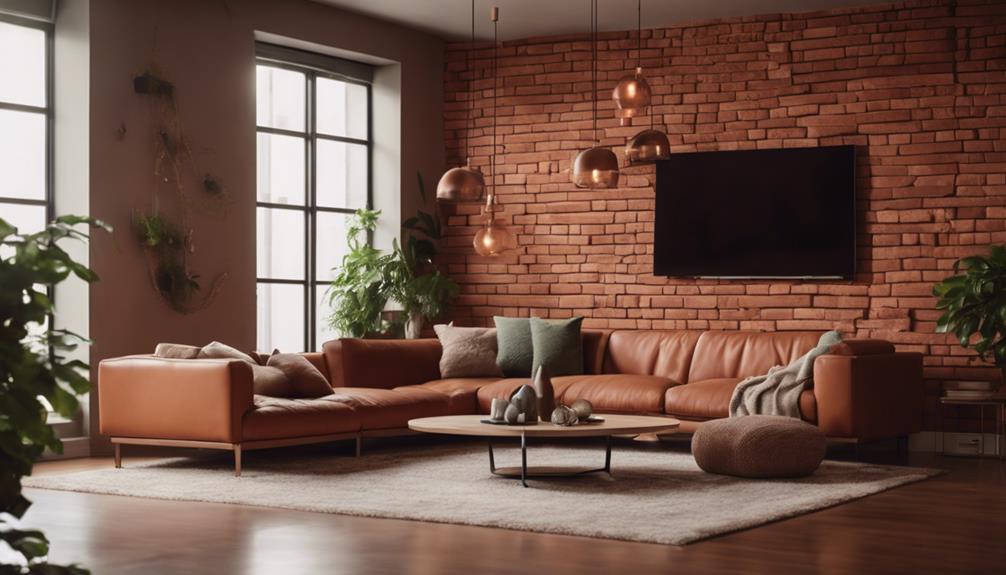
Combining Brick With Other Materials

innovative brick design solutions

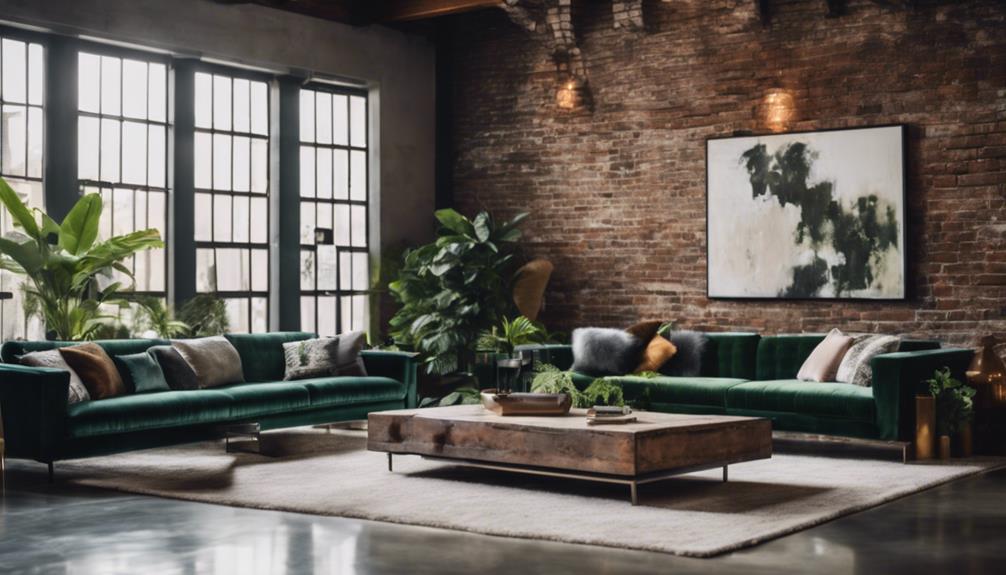
Combining brick with other materials can elevate your design, allowing you to create a unique aesthetic that reflects your personal style. By mixing and matching different textures, colors, and materials, you can create a look that's truly one-of-a-kind.

Here are a few ideas to get you started:

  • Combine brick with wood, such as a medium tone wood floor, to create a warm and natural feel in your living room.
  • Pair brick with metal accents to add an industrial and modern touch to your versatile open concept living space.
  • Incorporate brick with glass elements to achieve a sleek and contemporary look that lets in plenty of natural light.
  • Mix brick with concrete or stone materials to enhance the textural contrast in your room and create a statement piece.

Adding Texture With Brick Wall Accents

creating depth with brick

Brick wall accents bring a tactile quality to living rooms, adding texture and visual interest to the space. As you incorporate brick wall accents into your design, you'll notice how they effortlessly add depth and character to the room.

The rough texture of brick walls contrasts beautifully with modern furniture, creating a striking visual contrast that elevates the overall design aesthetic of your living space. Exposed brick walls, in particular, create a cozy and rustic ambiance, making your living room feel more intimate and inviting.

Advertisement

What's more, brick wall accents can be paired with various decor styles to create a unique look that reflects your personal taste. By incorporating brick wall accents, you can enhance the overall visual interest of your room, adding a touch of sophistication and charm to your living space.

Whether you're going for a modern, rustic, or eclectic look, brick wall accents are a versatile design element that can help you achieve the desired ambiance.

Creating a Focal Point With Brick

focal point with brick

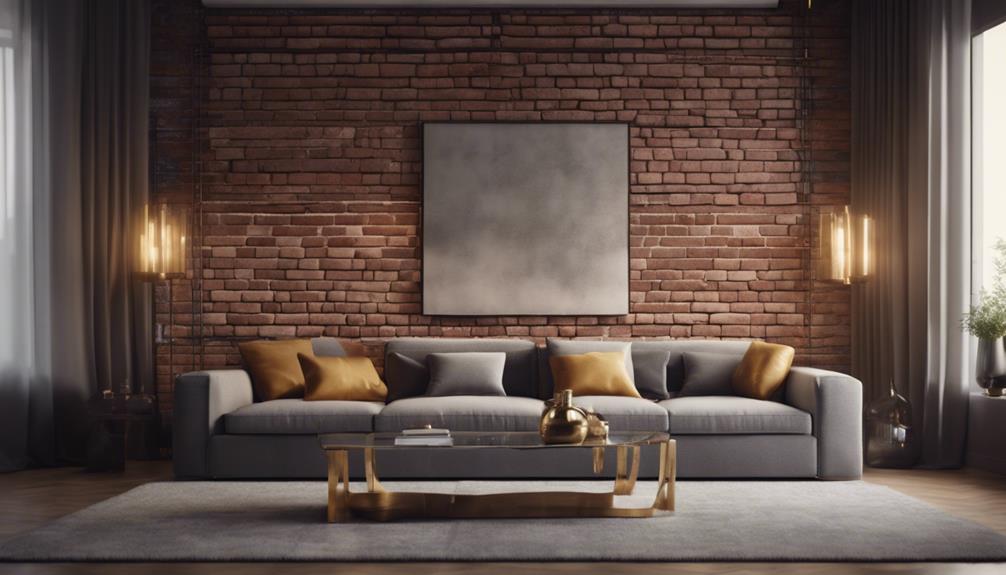
As you consider creating a focal point with brick, think about how a strategically placed brick accent wall can draw the eye and anchor the room's design.

By incorporating a brick accent wall, you'll create a natural focal point that adds texture and visual interest to the space.

Brick Accent Wall

By incorporating a brick accent wall, you can instantly create a focal point in your living room, drawing the eye towards a unique textural element that adds depth and visual interest to the space. This design element can complement various styles, from traditional to modern, depending on the color and finish of the bricks.

Here are some benefits of incorporating a brick accent wall in your living room:

Advertisement
  • Adds texture and visual interest to the space
  • Creates a cozy atmosphere, perfect for relaxing and socializing
  • Can be achieved through exposing existing brick walls or installing brick veneers for a rustic or industrial look
  • Is a cost-effective way to add character and charm to the living room without a complete renovation

Focal Point Creation

You can create a striking focal point in your living room by incorporating a brick wall that draws attention and adds character to the space. By highlighting the texture and color of the bricks, you can create a visually appealing focal point that anchors the room's design.

To take it to the next level, consider incorporating design elements like a fireplace, TV wall unit, or artwork on the brick wall to enhance its role as a focal point. Strategic placement of furniture around the brick wall can further emphasize its importance in the room's layout.

For example, placing a comfortable sofa or accent chair in front of the brick wall can create a cozy nook that draws the eye. Utilizing lighting techniques, such as spotlights or floor lamps, can also elevate the brick wall's status as the focal point of the living room design.

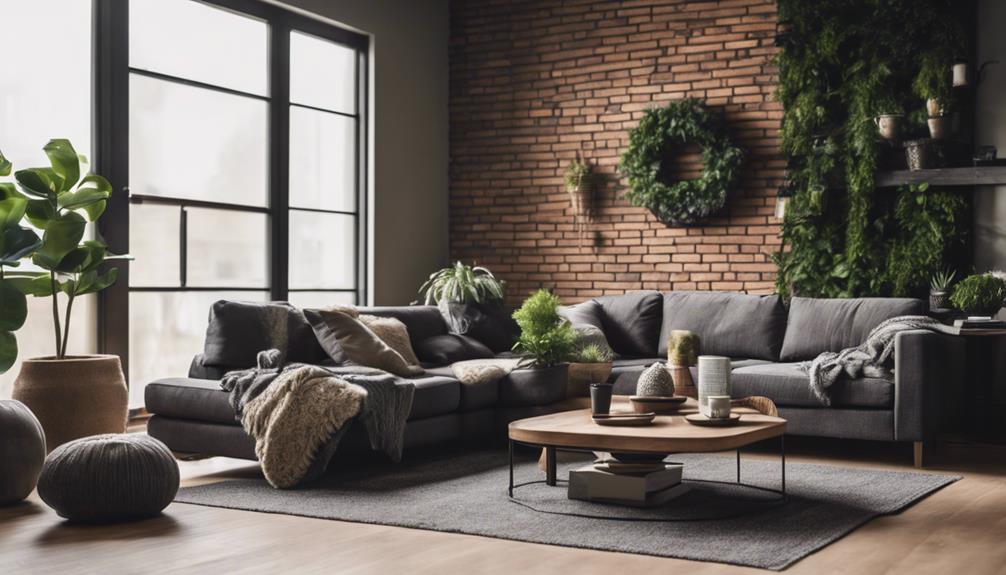
Balancing Brick With Neutral Tones

balancing brick and tones

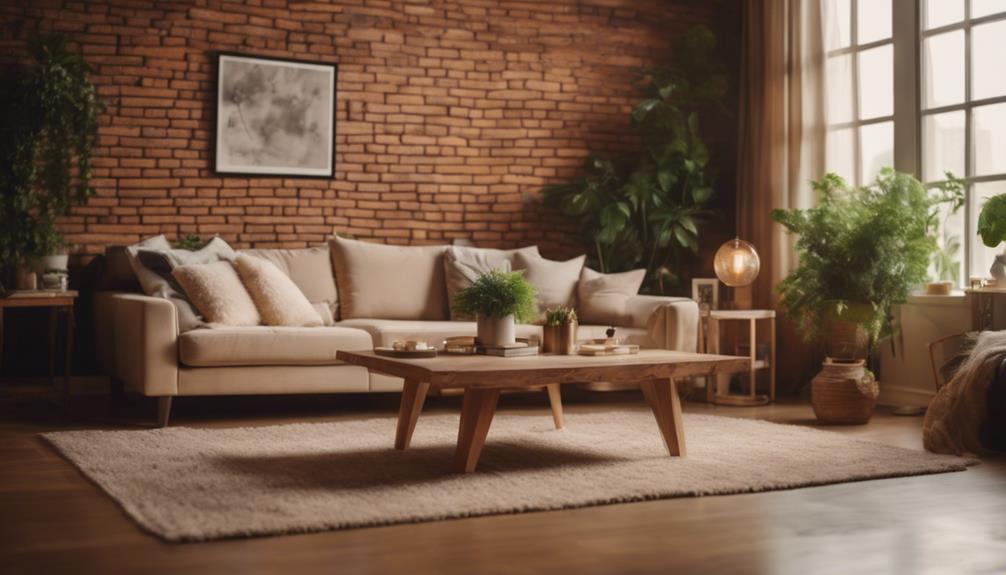
Neutral tones like beige, cream, and gray step in to soften the bold, rugged charm of a brick wall, creating a harmonious balance that lets the brick take center stage. By incorporating these calming hues into your living room design, you'll create a sophisticated atmosphere that's both timeless and elegant.

Here are some benefits of balancing brick with neutral tones:

  • Neutral colors provide a versatile backdrop for adding pops of color or different textures, giving you endless design possibilities.
  • They soften the overall look of the room, preventing the brick accent wall from overwhelming the space.
  • Neutral tones create a harmonious backdrop that lets the brick take center stage, allowing its natural beauty to shine.
  • By pairing neutral tones with a brick wall, you'll create a sophisticated living room design that exudes elegance and refinement.

Incorporating Plants in Brick Wall Design

vertical garden in architecture

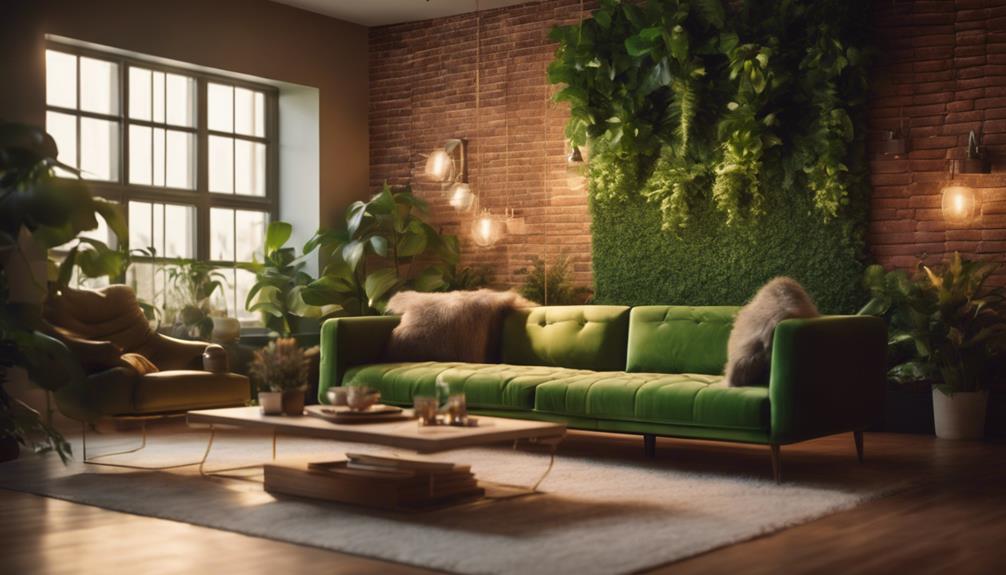
As you consider incorporating plants into your brick wall design, you'll find that they can bring a touch of elegance and sophistication to the space.

By blending greenery with the rugged texture of brick, you can create a unique visual contrast that adds depth and interest to the room.

Now, let's explore how to effectively combine brick and botanicals to create a stunning visual effect.

Advertisement

Greenery on the Wall

Incorporating lush greenery into your brick wall design can instantly elevate the ambiance of a room by adding a touch of nature and softening the rugged texture of the bricks. By bringing in plants, you can create a visually appealing contrast that will draw the eye upwards and add depth to the space.

To get started, consider the following options for adding greenery to your brick wall:

  • Use hanging planters to add a whimsical touch and create a sense of movement
  • Install wall-mounted shelves to create a lush, layered look
  • Choose low-maintenance plants like pothos, spider plants, or succulents that thrive in indoor conditions
  • Experiment with different textures and colors to add visual interest to the space

Brick and Botanical Blend

By combining brick and botanical elements, you can create a unique visual harmony that brings the outdoors into your living space.

In your living room, incorporating plants in brick wall design adds a touch of nature and freshness, softening the ruggedness of exposed brick walls and creating a harmonious blend of textures.

You can maximize space by using hanging plants or wall-mounted planters, which enhance the aesthetic appeal of your brick wall design. The greenery against the brick walls offers a pop of color and a sense of tranquility to the room.

Additionally, plants help to purify the air, improve indoor air quality, and promote a healthier environment in your living room.

Advertisement

Mixing Brick With Patterned Rugs

designing eclectic home decor

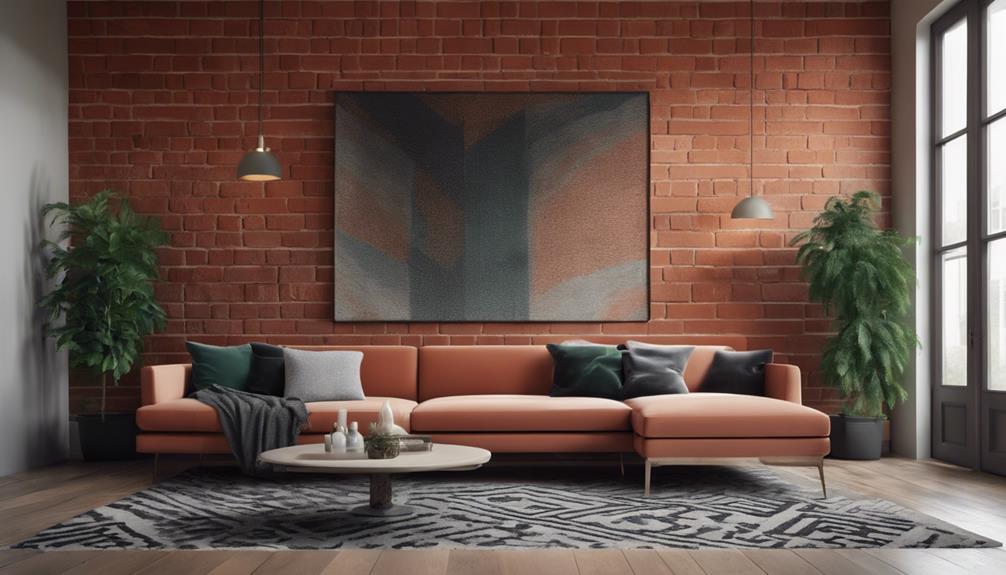
You can add a pop of personality to your brick wall design by introducing patterned rugs that inject color, texture, and visual interest into the space. Mixing brick and patterned rugs creates a visually appealing contrast in the living room, making it a great way to add some flair to your space.

Here are some tips to contemplate when mixing brick with patterned rugs:

  • Choose a rug pattern that complements the style and color scheme of your brick wall for a cohesive look.
  • Ponder the size, shape, and placement of the rug to enhance the overall aesthetic of the room.
  • Use area rugs to define seating areas, add warmth, and soften the look of a room with exposed brick walls.
  • Don't be afraid to experiment with different textures and patterns to add depth and visual interest to the space.

Frequently Asked Questions

How to Decorate a Room With a Brick Wall?

When decorating a room with a brick wall, you'll want to create a harmonious balance between the rugged texture of the bricks and the rest of the space.

Start by choosing a color scheme that complements the brick's natural tones, then add furniture and decor that contrast with the wall's roughness.

Don't forget to incorporate lighting that highlights the brick's texture, and consider adding wooden elements to bring warmth to the space.

How to Make a Brick Wall Look Nicer?

You're looking to enhance the appearance of a brick wall. To make it look nicer, consider whitewashing it to maintain its texture while lightening the tone.

Adding decorative elements like wall art, mirrors, or shelves can also create visual interest.

Advertisement

If you're feeling bold, try painting the bricks a contrasting color to create a unique focal point.

How Do You Dress an Interior Brick Wall?

As you consider dressing an interior brick wall, think beyond a mere decorative accent. You can add texture with wall hangings, tapestries, or large artwork that complements the brick's natural charm.

Alternatively, incorporate shelves, floating shelves, or wall-mounted cabinets to maximize storage and display space. By doing so, you'll create a visually appealing contrast between the rugged brick and sleek, modern elements.

Are Brick Walls Still in Style?

You might think brick walls are a relic of the past, but surprisingly, they're still very much in vogue.

While it's true that design trends often shift quickly, brick walls have defied the odds, remaining a timeless design element in modern homes.

Advertisement

Their enduring popularity stems from the unique blend of rustic charm, texture, and versatility they bring to living spaces, making them a staple in both residential and commercial interiors.

Conclusion

As you wrap up your stylish living room design, remember that a brick wall isn't just a backdrop, but a statement piece that demands attention.

Like a time-traveling DeLorean, a well-designed brick wall can transport your space to a bygone era, while still feeling modern and sleek.

By balancing bold brick with neutral tones, incorporating greenery, and combining it with other materials, you'll create a living room that's truly a blast from the past – in the best possible way.

Advertisement

Continue Reading
Advertisement

Home Decor

How to Paint Over Mirrors: A Step-By-Step Guide for You

Spruce up your space with a stunning makeover, but first, uncover the surprising techniques to paint over mirrors like a pro.

Published

on

painting mirrors step by step guide

To breathe new life into an old mirror, start by cleaning the surface with glass cleaner, followed by priming with spray primer for a strong bond. Use chalk paint specifically designed for mirrors, applying it in light, even coats. Mask off areas with painter's tape to create crisp lines, and touch up edges with acrylic paint and a fine brush. Seal your masterpiece with a clear acrylic sealer for added protection. Finally, apply a topcoat designed for glass surfaces to guarantee durability. Now that you've got the basics down, you're ready to discover the secrets to a truly transformed mirror – and it all starts with the next step.

Key Takeaways

• Clean the mirror surface with glass cleaner to ensure proper adhesion of the paint.

• Use chalk paint for its adhesion properties to prevent peeling or chipping.

• Prime the mirror's surface with spray primer for a strong bond and durability.

• Apply high-quality spray paint designed for mirrors in light, even coats for even coverage.

Advertisement

• Seal the painted mirror with a clear acrylic sealer for added protection.

Prepare the Mirror Surface

Before you can start painting, you'll need to thoroughly clean the mirror surface with a glass cleaner to remove any dirt, dust, or residue that may interfere with paint adhesion. This vital step guarantees a strong bond between the mirror and the paint, preventing peeling or chipping over time.

Once the mirror surface is clean, you're ready to move on to the next step. Since you'll be using chalk paint, which is known for its excellent adhesion properties, you can feel confident that your paint job will last. However, it's still essential to take the time to properly prepare the surface to achieve the best results.

Clean the Mirror Frame

reflecting on a cleanse

With your mirror surface sparkling clean, turn your attention to the frame, where a mixture of water and mild detergent awaits to help you scrub away dust, dirt, and grime. This important step guarantees a clean mirror frame, essential for proper paint adhesion and a professional-looking finish.

Using a microfiber cloth or sponge, gently scrub the frame, paying special attention to corners and intricate details. Remove any residue, making sure all surfaces are clean and dry. Allow the frame to dry completely after cleaning to prevent any moisture from affecting the adhesion of the paint.

A clean mirror frame is crucial, as it provides a smooth surface for painting. Take your time to thoroughly clean the frame, and you'll be rewarded with a beautifully painted mirror that looks like new. By cleaning the mirror frame, you're setting yourself up for success and ensuring a stunning final result.

Advertisement

Prime the Mirror

reflecting on inner self

As you move on to the next step, it's crucial to focus on preparing the mirror's surface for painting.

Now that you've cleaned the mirror frame, you'll need to prime the mirror itself, which involves cleaning the surface and applying a primer coat to establish a strong bond between the paint and the mirror.

Cleaning the Surface

You'll need to give your mirror a thorough cleaning to guarantee a strong bond between the mirror and the paint. This step is crucial, as any dirt, grime, or residue can affect the paint's adhesion. Reach for a trusted glass cleaner and spray it onto the mirror's surface. Wipe it down with a lint-free cloth or paper towel, making sure to remove any streaks or residue. If you want to add an extra layer of cleanliness, mix a mild detergent with water or use a vinegar solution to remove any oils or fingerprints.

Cleaning Supplies Purpose Tips
Glass Cleaner Removes dirt and grime Use a lint-free cloth or paper towel
Mild Detergent Removes oils and fingerprints Mix with water for a gentle solution
Vinegar Solution Removes oils and fingerprints Dilute with water for a gentle solution

Applying Primer Coat

Now that your mirror is sparkling clean, it's time to prime the surface to guarantee a strong bond between the mirror and paint. Applying a primer coat is an important step in ensuring a professional-looking finish and a long-lasting paint job. When you prime the mirror frame, you're promoting adhesion and durability, which prevents chipping or peeling of the paint.

To do this, use a spray primer for easy application and even coverage on the mirror frame. Hold the can 8-10 inches away from the surface and move it back and forth, applying a light coat evenly. Make sure to follow the manufacturer's instructions for drying time before moving on to the next step.

Paint the Mirror Design

reflective painting process described

With your mirror detached or masked, start by applying a light coat of primer to the frame, making sure to cover all angles for an even finish. As an Amazon Associate, I recommend using a high-quality spray paint specifically designed for mirrors to achieve a stroke-free finish. Hold the can 8-10 inches away from the frame and spray in a steady, back-and-forth motion, covering the entire surface.

Make sure to apply light coats, guaranteeing each coat to dry before applying the next. This will prevent drips and secure a smooth finish. You can use a small brush to touch up any areas the spray paint may have missed. Remember to spray from all angles to achieve even coverage on the mirror frame.

Advertisement

Once you've achieved the desired color, let the final coat dry completely before moving on to the next step.

Remove Masking and Tape

unmask and reveal truth

After applying the final coat of paint, it's time to remove the masking and tape from the mirror frame to reveal the beautifully painted design. This is an exciting step, as you get to see your hard work come together.

Step Action Tips
1 Peel off masking tape and painter's tape Use a gentle touch to avoid scratching the mirror
2 Remove excess paint Use a razor blade or craft knife to lift paint off the mirror surface
3 Clean the mirror Use glass cleaner to remove residue left behind by the tape
4 Inspect the mirror Check for any remaining paint marks or smudges that need attention

As you remove the tape, use a gentle touch to avoid scratching the mirror. You may need to use a razor blade or craft knife to gently lift any paint that may have seeped onto the mirror surface. After cleaning the mirror with glass cleaner, inspect it closely for any remaining paint marks or smudges that need to be addressed. Once you've completed these steps, you can enjoy your newly painted mirror without any masking or tape remnants detracting from its beauty.

Touch Up Mirror Edges

refine mirror frame design

Guarantee the mirror edges are carefully painted, using a small, fine paintbrush to achieve a professional finish.

You want to make sure that the paint only reaches the edges, so apply a thin layer of painter's tape along the edges of the mirror to create a clean line. This will prevent any paint from seeping onto the mirror's surface.

Next, use a high-quality acrylic paint specifically designed for glass surfaces to carefully touch up the mirror edges. Work methodically, using smooth, even strokes to cover the entire edge. Remember to maintain a steady hand and take your time – it's better to apply multiple thin coats than to risk applying too much paint at once.

Once you've completed the edges, allow the paint to dry completely before removing the painter's tape to reveal crisp, freshly painted mirror edges.

Advertisement

With patience and attention to detail, you'll achieve a flawless, professional-looking finish.

Seal the Painted Mirror

mirror painting sealed securely

As you move forward with sealing your painted mirror, you'll want to focus on two key points: protecting the paint job and adding a topcoat.

By doing so, you'll guarantee your DIY project remains vibrant and durable for years to come.

Protecting the Paint Job

Completing your painted mirror with a clear acrylic sealer is important to safeguarding your artwork from scratches and damage. This step is vital in guaranteeing your hard work lasts for years to come.

By applying a clear acrylic sealer, you're adding an extra layer of protection against the elements and daily wear and tear.

Here are some key takeaways to keep in mind when sealing your painted mirror:

Advertisement
  • Choose a high-quality sealer suitable for glass surfaces to ensure long-lasting durability.
  • Apply the sealer in thin, even coats to prevent drips or streaks on the painted mirror.
  • Allow each layer of sealer to dry completely before applying additional coats for best protection.
  • Regularly clean and maintain the sealed painted mirror to preserve its appearance and longevity.
  • Be patient and take your time when applying the sealer, as this will ensure a professional-looking finish.

Adding a Topcoat

With your painted mirror fully dry, you're ready to seal in your artwork with a clear topcoat, the final protective layer that will shield your masterpiece from scratches and wear. This step is vital to guarantee your design lasts for a long time.

When choosing a topcoat, select one specifically designed for use on glass surfaces, as it will provide better adhesion and durability. Before applying the topcoat, make sure the painted mirror is completely dry to prevent smudging or an uneven finish.

Follow the manufacturer's instructions for the topcoat application process to ensure a smooth and long-lasting result. A clear topcoat with a gloss or satin finish can enhance the painted mirror's appearance, giving it a professional look.

Hang Your New Masterpiece

create with pride always

You're ready to hang your newly painted mirror, and a few final checks will guarantee it's securely in place. After investing so much time and effort into transforming your mirror, you want to make sure it's properly secured to the wall.

Here are the final steps to complete the process:

  • Clean the frame one final time to remove any lingering dust or residue before hanging your newly painted mirror.
  • Check the hanging hardware on the back of the mirror to make sure it's secure and can support the weight of the mirror.
  • Use appropriate wall anchors or screws to hang the mirror securely, considering the weight and size of the mirror.
  • Measure and mark the desired placement of the mirror on the wall before hanging to ensure proper alignment.
  • Step back and admire your transformed mirror, appreciating the new look it brings to the space.

Frequently Asked Questions

How to Paint Over a Mirror?

When you're wondering how to paint over a mirror, remember to cover the mirror's surface with masking tape or detach it from the frame to prevent paint from seeping underneath.

Then, prime the frame with spray primer for better paint adhesion.

Apply light, even coats of spray paint from different angles, ensuring complete coverage.

Advertisement

Can I Use Acrylic Paint on a Mirror?

You're probably wondering if you can use acrylic paint on a mirror – and the answer is a resounding yes!

In fact, acrylic paint adheres amazingly well to glass surfaces, making it a fantastic choice for decorative projects or unique art pieces.

With its quick-drying properties, you'll be amazed at how swiftly you can transform your mirror into a stunning work of art.

What Do You Cover a Mirror With When Painting?

When painting around a mirror, you'll want to cover it to prevent paint from getting on the reflective surface. You can use painter's tape or masking tape to cover the mirror, and for added protection, layer newspaper or brown kraft paper on top, securing it with tape.

Alternatively, you can use plastic drop cloths or garbage bags to cover the mirror. Just make sure the covering is tightly secured to prevent any paint seepage.

Advertisement

Does Spray Paint Work on Mirrors?

You're likely wondering: does spray paint work on mirrors?

The answer is yes, it does! In fact, spray paint is a great option for painting mirrors, offering a stroke-free finish and easy application.

It's perfect for accessing tight angles and corners on the mirror frame, ensuring even coverage. Plus, it's a quick and cost-effective way to refresh your mirror's look.

Conclusion

As you step back to admire your handiwork, the transformed mirror reflects not only your new design, but also your resourcefulness and creativity.

Like a phoenix rising from the ashes, your once-bare mirror now boasts a fresh, vibrant personality, ready to elevate any room.

Advertisement

With each brushstroke, you've not only painted over the mirror but also infused it with a piece of yourself – a symbol of the power of transformation and self-expression.

Continue Reading

Alfresco

Is an Alfresco a Habitable Room? Understanding the Terms!

Find out if your alfresco can be considered a habitable room by understanding the essential terms and requirements for compliance with regulations.

Published

on

By

defining alfresco and habitable

When considering if an alfresco qualifies as a habitable room, it must adhere to specific requirements. These include suitable space for living, proper ventilation, lighting, and compliance with the Building Code of Australia (BCA). Meeting these standards guarantees safe and comfortable living spaces within a building. Importantly, alfrescos may lack adequate heating and room size, hindering them from being habitable rooms. If you seek to convert an alfresco, consulting with local authorities and following BCA guidelines for essential permits is essential. Understanding these terms is important to guarantee compliance with regulations for a habitable living space.

Key Takeaways

  • Alfrescos are not habitable rooms due to lack of heating and compliance with room size standards.
  • Permanent heating installation is essential to meet habitable room criteria.
  • Consultation with authorities is vital to determine if an alfresco can be converted into a habitable room.
  • Compliance with BCA regulations and minimum ceiling height standards is necessary for alfresco conversions.
  • Building permits are required for converting alfrescos into habitable rooms, ensuring safety and comfort.

Definition of Habitable Room

In building codes, a habitable room is defined as a space suitable for living, sleeping, eating, or cooking. To meet the standards of a habitable room, there are specific requirements such as minimum room size, proper ventilation, adequate lighting, and temperature control. These regulations guarantee that occupants have comfortable and safe living spaces within a building.

Examples of habitable rooms commonly found in a dwelling unit include bedrooms, living rooms, and kitchens. The designation of a room as habitable is essential for fulfilling the basic needs of individuals residing in a structure.

Compliance with the criteria set for habitable rooms plays a significant role in ensuring that the living environment is suitable for human occupancy. By adhering to these standards, building owners and occupants can be confident in the habitability and functionality of the living spaces provided within a property.

Building Permit Requirements

building permit application process

To convert an alfresco into a habitable room, you must adhere to strict building permit regulations. Essential compliance with the Building Code of Australia (BCA) is required when seeking a permit for this conversion.

Consider crucial aspects such as proximity to effluent systems and the necessity of a damp proofing membrane during the conversion process.

Permit Regulations Overview

For converting an alfresco into a habitable space, obtaining a building permit is an essential step that requires compliance with the Building Code of Australia (BCA).

Advertisement

When applying for a permit, it's vital to meet the minimum floor to ceiling height of 2.4m for habitable room conversions.

As part of the permit regulations overview, considerations such as proximity to effluent systems and damp proofing requirements must be addressed to guarantee the safety and livability of the space.

Required documents for a building application include a completed form, fees, design compliance certificate, site plan, and floor plan with elevations.

These documents are crucial for the permit process and demonstrate adherence to the necessary standards set by the BCA.

Compliance Checklist Essentials

How can you guarantee compliance with building permit requirements when converting your alfresco into a habitable room?

Advertisement

When converting your alfresco into a habitable room, it's important to ensure adherence to building permit requirements. This involves following the Building Code of Australia (BCA) and meeting specific criteria for habitable rooms.

Key considerations include the location of the alfresco in relation to effluent systems and the installation of damp-proofing membranes to prevent moisture issues. Additionally, habitable rooms must meet minimum floor to ceiling height requirements of 2.4 meters to ensure adequate livable space.

To ensure compliance, it's essential to submit the necessary documents as part of your building application. These documents may include design certificates, site plans, and floor plans detailing the proposed conversion of the alfresco into a habitable room.

Compliance With Building Code of Australia

meeting australian building standards

Ensuring compliance with the Building Code of Australia is vital in determining the habitability of an alfresco area. To be classified as a habitable space, alfresco areas must meet the specific BCA regulations set forth for such areas.

These regulations outline the requirements that alfresco areas need to fulfill in order to be considered habitable rooms. By adhering to the BCA guidelines, property owners can guarantee that their alfresco spaces meet the necessary standards for habitability.

Understanding and following BCA standards is essential as they dictate the specifications that alfresco areas must comply with to achieve the classification of habitable rooms. Therefore, when evaluating whether an alfresco area can be deemed habitable, it's imperative to assess its compliance with the Building Code of Australia to ensure that the space meets the required criteria for habitability.

Advertisement

Factors to Address for Conversion

factors for successful conversions

Consider key factors when aiming to convert an alfresco area into a habitable room. Alfrescos, typically outdoor recreational spaces lacking heating facilities, don't meet the requirements for habitable spaces as per building codes.

These areas aren't marketed as habitable by real estate agents. Merely adding portable heat sources doesn't transform alfrescos into habitable rooms, and even connection to the house's central heating system may not guarantee compliance with habitable space standards.

To convert an alfresco into a habitable room, addressing the heating deficiency is important. Installing a permanent heating system that adequately warms the space is essential to meet habitable room criteria.

It's important to note that the absence of proper heating remains a significant obstacle in reclassifying alfrescos as habitable areas. Therefore, ensuring a reliable heating solution is in place is a fundamental consideration when seeking to convert alfrescos into habitable rooms.

Minimum Ceiling Height Requirement

minimum height for ceilings

The minimum ceiling height requirement, typically set at 2.4 meters, plays a critical role in determining habitability. This standard guarantees that spaces are comfortable and functional for occupants while also complying with legal regulations.

Failing to meet these ceiling height standards can impact the usability and legality of a room or space.

Ceiling Height Standards

A habitable room must meet the minimum ceiling height requirement of typically 2.4 meters (7.87 feet) as mandated by building codes. The ceiling height standards are in place to guarantee that there's adequate headroom for comfortable use of habitable spaces.

Advertisement

It's important to comply with these minimum ceiling height standards as they play a significant role in designating a room as habitable. Proper ceiling height not only contributes to the overall habitability of a room but also affects its functionality.

Failure to meet these minimum requirements may have implications on the habitable status of a room. Hence, when designing or renovating a space, it's crucial to adhere to the established ceiling height standards to ensure that the room is both comfortable and functional for its intended use.

Comfort and Functionality

Meeting the minimum ceiling height requirement is essential for guaranteeing the comfort and functionality of habitable rooms. The standard height of 2.4 meters (7.87 feet) is established to provide adequate headroom and a sense of spaciousness within living areas. These dimensions contribute to a room's usability, allowing for the installation of lighting fixtures, ceiling fans, and other essential amenities without compromising comfort.

Natural light plays a key role in creating a welcoming atmosphere and can be maximized with proper ceiling height, enhancing the overall ambiance of the space. Additionally, adequate room sizes, combined with ideal ceiling height, ensure that furniture can be arranged effectively, promoting ease of movement and functionality.

While alfresco areas offer a unique outdoor experience for dining and entertainment, they don't adhere to habitable room standards due to their open nature and lack of enclosure. Therefore, compliance with minimum ceiling height requirements isn't expected for these outdoor spaces, as they serve a different purpose than traditional habitable rooms.

Advertisement

Legal Compliance Considerations

When considering legal compliance, ensuring that habitable rooms meet the minimum ceiling height requirement is vital for adherence to building regulations. The minimum ceiling height for habitable rooms, set at 2.4 meters (7.87 feet) by building codes, is essential to guarantee that the space is adequate for human occupancy.

This requirement applies to Alfresco areas as well; to be classified as habitable rooms, Alfresco spaces must also meet the 2.4-meter ceiling height standard. When submitting building applications for converting Alfresco areas, it's imperative to include detailed plans demonstrating compliance with the ceiling height requirement.

Failure to meet the minimum ceiling height could lead to non-compliance with building regulations concerning habitable spaces. Therefore, it's crucial to meticulously follow the stipulated ceiling height guidelines to ensure legal conformity and the safety and suitability of the living environment.

Consultation With Local Authorities

collaboration with community leaders

Engage local authorities early in the process to determine whether your alfresco area can be classified as a habitable room. By consulting with local authorities, you can guarantee compliance with regulations governing the habitability of alfresco spaces.

Here are three key reasons why involving local authorities is vital:

  1. Guidance on Regulations: Local authorities can provide clarity on whether your alfresco area meets the criteria set for habitable rooms in building codes, helping you understand the specific requirements that need to be met.
  2. Modification Advice: Authorities can advise on any necessary modifications or additions needed to classify your alfresco area as habitable, ensuring that it meets the standards set by the regulations.
  3. Compliance Assurance: Obtaining input from local authorities will help you navigate the complex regulations governing alfresco spaces, giving you confidence that your area complies with the necessary standards for habitable rooms.

Understanding Regulations and Approvals

navigating legal requirements efficiently

To guarantee adherence and successful conversion of your alfresco into a habitable room, understanding relevant regulations and obtaining necessary approvals is essential.

Building permits are a prerequisite for converting alfrescos into habitable rooms. Compliance with the Building Code of Australia (BCA) regulations is pivotal for ensuring a safe and habitable living space. Factors such as proximity to effluent systems and the installation of a damp proofing membrane are crucial considerations before initiating the conversion process.

Advertisement

A minimum floor to ceiling height of 2.4m must be met to classify alfrescos as habitable rooms. When applying for a building permit, make sure you have the required documents, including a completed form, design compliance certificate, site plan, and floor plan.

Remember that meeting these regulations and obtaining approvals are necessary steps in transforming your alfresco into a comfortable and legally compliant dwelling unit.

Frequently Asked Questions

What Is Considered a Habitable Room?

To be classified as habitable, a room must meet specific criteria like heating, lighting, ventilation, and insulation. Bedrooms, living rooms, studies, and recreation rooms are typical examples. Kitchens, bathrooms, and laundry rooms have their own requirements.

What Does Alfresco Mean in Housing?

Step into your outdoor oasis with an alfresco, a charming extension of your home. Alfrescos, though cozy, lack the essentials to be deemed habitable. Enjoy the fresh air and sun in this unique space!

What Is an Alfresco Room?

An alfresco room is an outdoor living space attached to a house, featuring outdoor furniture, cooking facilities, and entertainment areas. It provides a comfortable outdoor environment for dining and relaxation, popular for entertaining guests and enjoying the outdoors.

Advertisement

What Are Examples of Habitable Room?

Imagine cozy bedrooms, lively living rooms, productive studies, and fun recreation rooms. These are examples of habitable rooms where you relax, work, and play. They are designed for your comfort and daily activities.

Conclusion

To wrap up, while an alfresco area may provide a pleasant outdoor space, it doesn't meet the requirements to be classified as a habitable room. As the saying goes, 'a room is like a shell, it must offer shelter and comfort.'

It's important to understand the regulations and approvals needed before converting an alfresco into a habitable room to guarantee compliance with building codes and safety standards.

Always consult with local authorities for guidance on these matters.

Advertisement

Continue Reading

Home Decor

Step-by-Step DIY Nest Building

Crafting a whimsical bird's nest from natural materials, discover the secrets to weaving a sturdy and visually stunning abode that sparks imagination.

Published

on

diy bird nest tutorial

To create your own DIY nest, start by gathering natural materials like twigs, grass, and moss, while drawing inspiration from different bird nests. Choose a location that mimics a bird's natural habitat, providing shelter and access to food and water. Weave the nest together using long, flexible stems, securing the foundation with natural materials. Test the nest's sturdiness by gently pressing and evaluating its weight capacity. Add decorative touches like colorful leaves or feathers to create a cozy environment. Finally, display your unique nest in a decorative tray or cloche, experimenting with heights and angles for visual interest – and that's just the beginning of your creative journey.

Key Takeaways

• Gather natural materials like twigs, grass, and moss, and observe bird nests for inspiration before collecting materials.

• Choose a location that mimics a bird's natural habitat, with shelter from harsh weather and access to food and water.

• Construct the nest by securely binding twigs, using long stems for the frame, and weaving materials tightly for insulation and protection.

• Test the nest's structural integrity, weight capacity, and resistance to environmental factors, and reinforce weak spots as needed.

Advertisement

• Add decorative elements like colorful leaves, flowers, or feathers to personalize the nest and create a cozy environment.

Gathering Materials and Inspiration

Gather natural materials like twigs, grass, leaves, and moss to get started on your DIY nest building project. You'll be amazed at how these simple elements can come together to create a beautiful and intricate nest.

As you collect your materials, take inspiration from the bird nests you observe in nature or online pictures. Notice the varying shapes and sizes, and think about the type of nest you want to build. Consider the size and shape of the nest you want to create before gathering materials, as this will help you determine the quantity of materials you'll need.

Take a cue from the birds in your area, and explore different types of nests they build. From intricately woven twig structures to cozy moss-lined cups, each nest is a reflection of the birds' remarkable engineering skills.

Choosing the Perfect Location

selecting the ideal wedding spot

Now that you've gathered your materials and have a sense of the type of nest you want to build, it's time to think about where to place it. Choosing the perfect location is vital for attracting the right birds and ensuring they build a nest successfully.

To increase your chances of attracting birds, select a location that mimics the natural habitat of the species you want to attract. Make sure the nesting area is sheltered from harsh weather conditions like wind and rain. It's also essential to position the nest in a spot with easy access to food sources and water for the birds.

Advertisement

Avoid high-traffic areas where human or animal disturbances could disrupt the nesting process. Consider installing the nest at a height suitable for the bird species, ensuring safety from predators.

Weaving the Nest Together

creating a cozy home

As you begin weaving your nest together, you'll need to focus on:

  • Binding twigs together securely
  • Assembling the frame of your nest
  • Establishing a sturdy foundation

These essential steps will provide the structure for your DIY decorative nest, ensuring it's both visually appealing and durable.

Binding Twigs Together

You'll start weaving twigs together by selecting sturdy, flexible branches that will form the foundation of your nest.

As you begin binding twigs, remember that birds use this technique to create a vital foundation for their nests. By intricately weaving twigs, you'll form a secure structure that can withstand the weight of eggs and chicks. This essential step provides stability and durability to the nest, ensuring the safety of the eggs and hatchlings.

As you weave, keep in mind that twigs are an essential component in building a bird's nest. By properly binding twigs, you'll create a safe and comfortable space for bird nesting.

This intricate process requires patience and attention to detail, but the end result is well worth the effort. By following these steps, you'll be well on your way to creating a cozy and secure nest, just like birds do in the wild.

Advertisement

Nest Frame Assembly

With your sturdy twig foundation in place, gather long, flexible plant stems to shape the main frame of your nest. These stems will form the primary structure of your nest, so choose ones that are sturdy yet pliable.

To weave the nest frame together, bend the plant stems into a loop and secure them in place with twine or string. This will create the basic shape of your nest.

Next, add smaller loops and shapes to the nest frame by weaving in additional plant stems or branches. As you build, make sure to maintain a sturdy and well-shaped structure, as this will be the foundation of your nest.

Sturdy Nest Foundation

How do you plan to weave your nest together to create a sturdy foundation that will protect your eggs or young birds from the elements and predators? This vital step in DIY nest building requires careful consideration of the materials and techniques used.

By incorporating a variety of natural materials like twigs, grass, and leaves, you can create a strong and durable structure for your bird nest.

Advertisement

Here are some essential tips to keep in mind:

  • Use a combination of flexible and sturdy materials to achieve the right balance of strength and flexibility.
  • Weave the materials together tightly to prevent gaps and holes.
  • Pay attention to the nest shape, ensuring it's deep enough to protect your eggs or young birds.
  • Use weaving techniques that allow for good insulation and protection from the elements.
  • Make sure the nest is well-anchored to prevent it from toppling over or being dislodged.

Testing the Nest's Sturdiness

stress testing the nest

As you test the nest's sturdiness, you're evaluating its structural integrity, weight capacity, and ability to resist environmental factors.

By gently pressing down on the nest, you'll determine if it can hold the weight of an egg without collapsing, a vital aspect of nest building.

A sturdy nest is one that can withstand wind, rain, and other harsh conditions, so it's imperative to get it right.

Nest Structural Integrity

You'll want to put your nest to the test by gently pressing down on it to check its sturdiness. This important step guarantees that your bird nest can withstand the elements and provide a safe haven for its future inhabitants. When testing the nest's sturdiness, you're verifying if it maintains its shape and structure when pressure is applied.

Here are some key takeaways to keep in mind:

Advertisement
  • A sturdy nest will retain its shape when pressed upon, indicating proper weaving and material placement.
  • The nest should securely hold its shape without collapsing or losing its form.
  • If the nest collapses or loses its shape easily, it may need additional weaving or reinforcement.
  • Ensuring the nest's sturdiness is essential for protecting eggs and providing a stable foundation for bird nesting.
  • Building nests that can withstand the elements requires careful attention to detail and a focus on structural integrity.

Nest Weight Capacity

To determine your nest's weight capacity, place weighted objects like eggs or small rocks inside the nest, gradually increasing the weight to test its importance. This critical step guarantees that your nest can support the weight of birds and their offspring without collapsing or losing its shape.

As you're building your nest, keep in mind that birds can build their nests to last, and yours should be no exception. When you make a bird nest, it's crucial to take into account the weight capacity to attract birds and make sure the nest's functionality.

Observe how the nest reacts to different weights to gauge its durability. You can use a bucket or container to hold the weighted objects during testing. As you add more weight, pay attention to any signs of strain or weakness in the nest's structure. A sturdy nest that can hold objects without breaking is crucial for its success.

Resisting Environmental Factors

Now that you've confirmed your nest can support the weight of its inhabitants, it's time to test its sturdiness against environmental factors that could threaten its structure. As a DIY nest builder, resisting environmental factors is vital to make sure your birds nest remains safe and cozy.

To evaluate your nest's sturdiness, follow these essential steps:

  • Gently press on the nest to see if it holds its shape.
  • Check for loose or weak spots that may need reinforcement.
  • Make sure the nest can withstand mild environmental factors like wind or light pressure.
  • Evaluate the nest's resilience by lightly shaking it to see if the structure remains intact.
  • Consider using additional materials or techniques to enhance the nest's durability against environmental factors.

Adding Decorative Touches

enhancing with decorative elements

With a solid foundation in place, it's time to elevate your nest's aesthetic appeal by incorporating decorative touches that reflect your personal style.

You can make your nest truly unique by experimenting with various textures and colors. For instance, you can add some green moss to give it a natural, earthy feel, similar to what some bird species use to make nests.

Advertisement

To add an extra layer of realism, you can place eggs inside the nest, which will give it a cozy, inhabited look. Decorative touches like feathers, bark, and other natural materials can enhance the visual appeal of your nest, making it a beautiful piece of art.

By incorporating these elements, you can create a visually appealing decorative nest that showcases your creativity and attention to detail.

Completing and Displaying the Nest

building a bird s nest

You've invested time and creativity into building a unique nest, and now it's time to showcase your masterpiece by displaying it in a way that highlights its beauty and charm. A well-designed display can elevate your nest from a simple craft project to a stunning work of art.

Here are some ideas to get you started:

  • Consider placing your nest on a decorative tray or in a cloche to add an extra layer of elegance.
  • Experiment with different heights and angles to create visual interest.
  • Add some natural elements, like pinecones or twigs, to bring the outdoors in.
  • Create a themed display by incorporating seasonal decorations, like holly or ornaments, around your nest.
  • Don't be afraid to think outside the box (or nest!) and try displaying your nest in a unique way, like on a handmade cake stand or with farmhouse elements for a rustic look.

Frequently Asked Questions

How Do You Make Your Own Nest?

You're wondering how to make your own nest?

Start by gathering long, flexible plant stems to form the main shape. Bend and tie them into a loop, then add smaller loops to shape the rest of the nest.

You can decorate it with feathers, bark, moss, and other scavenged materials to give it a cozy touch.

Advertisement

How Do You Make a Nest for Yourself?

Are you thinking, 'What's the point of making a nest for myself?'

Well, creating a cozy nook can be a therapeutic escape from the world.

To make a nest for yourself, start by identifying a quiet, comfortable spot, like a corner of your bedroom or a secluded outdoor area.

Then, gather materials like blankets, pillows, and soft fabrics to create a snug, inviting space that's all yours.

How Do You Make a Simple Nest for Kids?

When creating a simple nest for kids, you'll want to gather natural materials like twigs, grass, and leaves. Collect these materials in a bucket or container, and encourage kids to observe nearby bird nests for inspiration.

Advertisement

Building the nest on a tray makes it easy to work indoors, or you can take the activity outside. Once built, test the nest's sturdiness by placing small rocks or eggs inside.

How to Build a Bird Box Step by Step?

As you start building a bird box, remember that it's not just about providing a cozy home for your feathered friends, but also about creating a safe haven that mimics their natural habitat.

To get started, choose the right materials, such as wood, screws, and waterproof paint, and measure the wood pieces according to the species you want to attract.

Conclusion

As you step back to admire your handiwork, the nest's natural nuances nestled among the branches, you'll notice the intricate interplay of twigs, leaves, and feathers.

Softly swaying in the breeze, the nest's sturdy structure shines, a confirmation of your patient persistence.

Advertisement

With each delicate detail deliberately designed, your DIY masterpiece is now a cozy, calming sanctuary, waiting to cradle its new inhabitants.

Continue Reading

Trending