Connect with us

Home Decor

How to Create a Stunning White Accent Wall in Your Bedroom

Create a modern and sophisticated bedroom retreat by following these step-by-step instructions to design and install a stunning white accent wall.

Published

on

white accent wall guide

To create a stunning white accent wall in your bedroom, start by preparing the wall for installation by clearing it of decorations and furniture, patching up holes and imperfections, and cleaning it with a mild detergent. Next, design and plan your accent wall, selecting the wall, considering white as the main color, and measuring the wall to create a sketch or digital design. From there, cut and assemble battens, attach them to the wall, and refine the accent wall by filling nail holes and applying caulk to seams. Finally, paint the accent wall white using high-quality paint and apply multiple coats, allowing each coat to dry completely between applications. By following these steps, you'll be well on your way to creating a modern and sophisticated bedroom retreat, and there's more to explore when it comes to adding those final touches and details.

Key Takeaways

• Prepare the wall by clearing decorations, patching holes, and cleaning the surface for a smooth paint job.

• Plan the design and measure the wall to ensure a precise and symmetrical look.

• Use high-quality white paint with a satin or eggshell finish to achieve a bright and airy atmosphere.

• Apply multiple coats of paint, allowing each coat to dry completely before applying the next, for a flawless finish.

Advertisement

• Add decorative elements, such as molding, metallic accents, or artwork, to elevate the overall look and feel of the bedroom.

Prepare the Wall for Installation

Clear everything off the wall, including decorations, furniture, and any other obstructions, to create a blank slate for your accent wall project. This will give you a clean canvas to work with, guaranteeing a professional-looking finish.

Next, remove any nails, screws, or wall fixtures, and patch up any holes or imperfections to establish a smooth surface. Give the wall a thorough cleaning with a mild detergent and water to eliminate dust, dirt, and grease that can impact the paint's adhesion. A light sanding will create a slightly rough surface for improved paint adhesion and smooth out any remaining imperfections.

Finally, use painter's tape to mask off areas you want to keep paint-free, such as trim pieces or adjacent walls, for a clean and professional finish. This will prevent paint from seeping into unwanted areas and create a crisp, defined edge.

Design and Plan the Accent Wall

create a stylish accent

With your wall prepped and ready, it's time to express your creativity and design the accent wall that will elevate your bedroom's style.

Begin by selecting the wall you want to accent, ideally the wall behind the bed for a focal point. Consider using white as the main color for a clean, modern look that can brighten and enlarge the space.

Advertisement

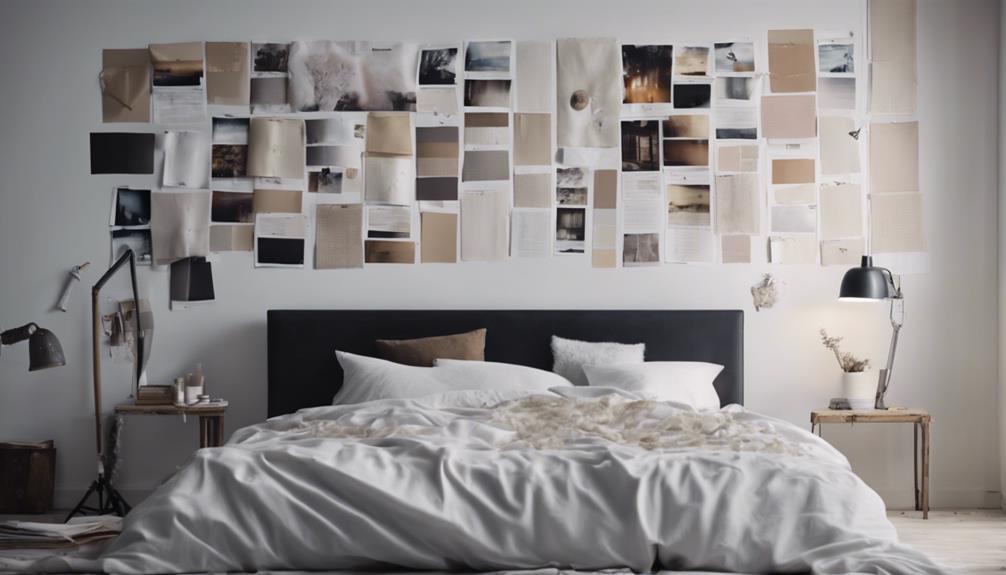
Next, plan your design by deciding on the style of the accent wall, such as a grid pattern, geometric shapes, or a simple vertical stripe. Measure the wall and map out the placement of the accent design, ensuring symmetry and balance for a cohesive look.

Create a sketch or digital design of your accent wall to visualize how the final result will appear in your bedroom space. This step is essential in ensuring your design is well-executed and error-free.

You can use painters tape to mark out your design on the wall, allowing you to make adjustments before committing to the final look.

Cut and Assemble the Battens

assemble battens for cutting

Now that you've planned your accent wall, it's time to bring it to life by cutting and assembling the battens.

You'll start by measuring the wall space to determine the length of your battens, then cut them to size using a miter saw.

Next, you'll assemble the frame on the floor, ensuring the battens are evenly spaced and straight before attaching them to the wall.

Advertisement

Measuring the Wall Space

You'll need to measure the wall space carefully to determine how many battens you'll require for your accent wall project. This important step will guarantee you have the right amount of materials and avoid any costly mistakes. Take out your tape measure and record the length and width of the wall space where your accent wall will be created. Make sure to note any obstacles, such as electrical outlets or windows, that may impact the placement of your battens.

Here are some key things to keep in mind when measuring the wall space:

  1. Record the length and width of the wall space: Take precise measurements to determine the number of battens you'll need.
  2. Note any obstacles: Account for any electrical outlets, windows, or other features that may impact the placement of your battens.
  3. Check for uneven walls: Verify if your walls are even or if they've any imperfections that may influence your design.
  4. Double-check your measurements: Ensure accuracy to avoid errors and maintain a symmetrical design.

Cutting the Battens

Cutting the Battens

Measure and cut the battens to the desired length using a miter saw for clean, precise edges. This guarantees that your accent wall looks polished and well-crafted. To achieve a uniform appearance, make sure all battens are cut to the same length. You'll be grateful for this attention to detail later on.

After cutting, sand the edges of the battens to smooth out any rough spots and create a professional finish. This step may seem minor, but it makes a big difference in the final result.

Batten Length Position
1 48' Top-left
2 48' Top-right
3 60' Bottom-left
4 60' Bottom-right

Label each batten with its position to make the installation process easier and more organized. This will save you time and frustration later on. Use painters tape to mark the battens, and you'll be ready to assemble them on the floor before mounting them on the wall.

Advertisement

Assembling the Frame

With your battens cut and labeled, start assembling the frame by laying them out on the floor to create a visual plan, ensuring a precise and balanced arrangement before attaching them to the wall. This step is vital in achieving a stunning white accent wall in your bedroom. Take your time to adjust and correct any misalignments before securing them to the wall.

To guarantee a successful assembly, remember to:

  1. Use a stud finder to locate studs in the wall for secure attachment of the battens.
  2. Secure the battens to the wall with a nail gun, maintaining consistent spacing between each batten for a uniform look.
  3. Double-check the alignment and levelness of the battens as you attach them to the wall.
  4. Use painters tape to temporarily hold the battens in place while you attach them, especially on textured walls.

Attach Battens and Trim Pieces

secure battens and trims

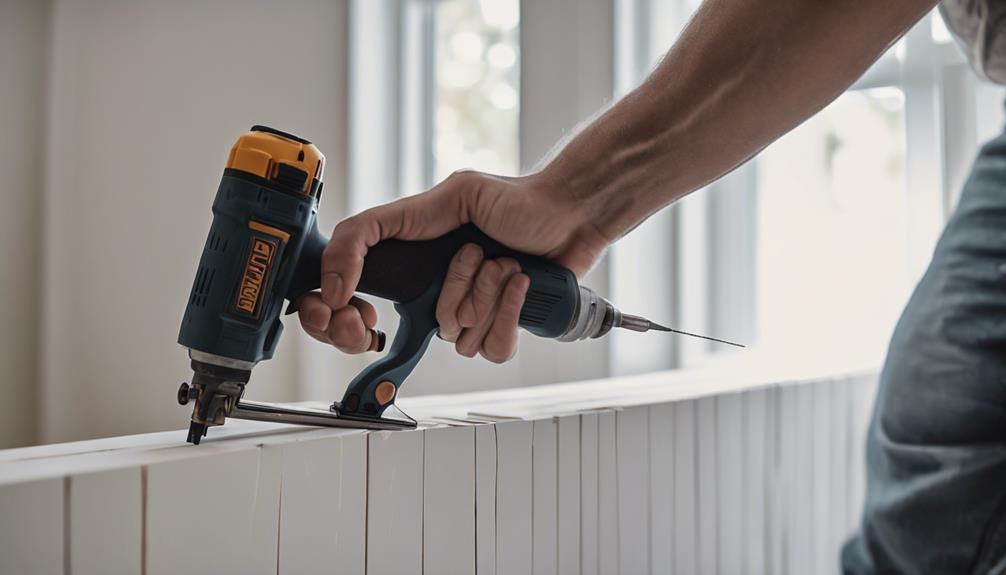
Now that your wall is prepared, securely attach the battens and trim pieces to the wall, carefully spacing them 12-16 inches apart to achieve a balanced look.

When attaching the battens, use a nail gun with 18 gauge brad nails to guarantee a sturdy attachment. Make sure to double-check your measurements and placements of battens and trim pieces before securing them to avoid any mistakes or rework.

Consider painting the battens and trim pieces before attaching them to the wall to make the process easier and guarantee full coverage of your desired paint color.

As you attach each batten and trim piece, use a level to check the alignment, maintaining straight lines and a professional finish. By doing so, you'll create a stunning white accent wall that adds a touch of elegance to your bedroom.

Advertisement

Remember to take your time and be precise, as this step lays the foundation for a beautiful and visually appealing design.

Finish and Refine the Accent Wall

accent wall design process

Your freshly installed battens and trim pieces are ready for the final touches, so grab your putty knife and wood filler to refine the surface. Fill any nail holes with wood filler and sand the surface smooth for a professional finish. You'll be amazed at how this simple step can elevate the overall look of your accent wall.

Here are the essential steps to refine your accent wall:

  1. Fill nail holes with wood filler and sand smooth.
  2. Apply caulk to the seams between the battens and the wall for a seamless look.
  3. Make sure all surfaces are clean and free of dust or debris before painting.
  4. Choose a high-quality paint that complements your room's decor, considering factors like natural light and room size.

Paint the Accent Wall White

fresh coat of paint

You're prepared to bring your accent wall to life with a fresh coat of white paint, and the correct techniques will guarantee a flawless finish. To guarantee a smooth process, choose a high-quality white paint with a satin or eggshell finish, which will provide a sophisticated look for your bedroom.

Consider applying a primer before painting to enhance coverage and adhesion. Use painter's tape to create crisp lines and edges, giving your accent wall a professional finish.

Apply multiple coats of white paint, allowing each coat to dry completely before applying the next to prevent streaks or uneven coverage. This process requires patience, but the result will be worth it.

As you store the process data in your mind, remember that accessing the right techniques will make all the difference. By following these steps, you'll achieve a stunning white accent wall that becomes the focal point of your bedroom.

Advertisement

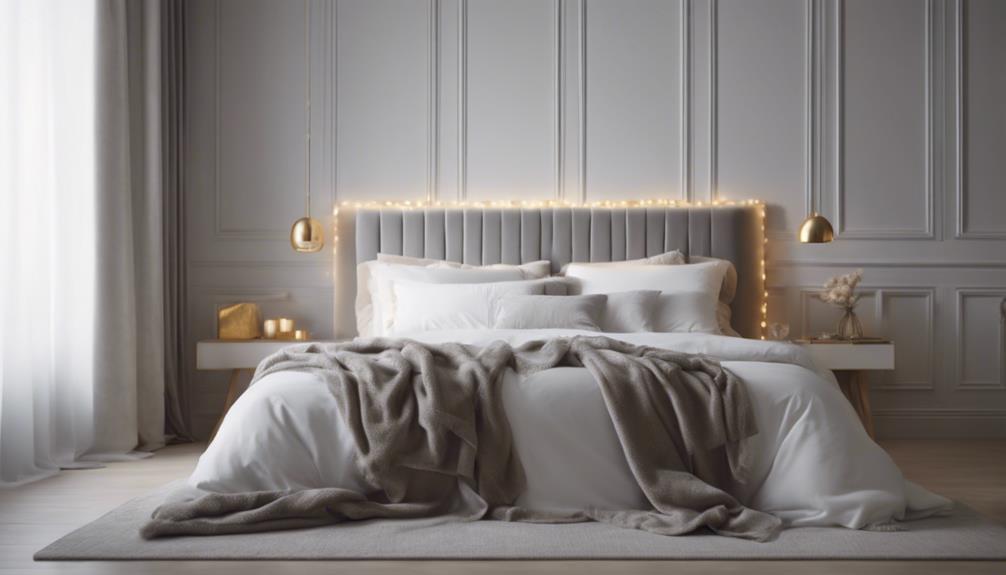
Add Final Touches and Details

perfecting the finishing touches

With your newly painted white accent wall serving as a clean canvas, it's time to add decorative elements that bring personality and style to your bedroom. As an experienced designer, I've seen how the right details can elevate a space, and with years of experience, I've developed a keen eye for what works.

To take your bedroom to the next level, consider these final touches:

  1. Add decorative molding or trim to create visual interest and give your wall a unique ID.
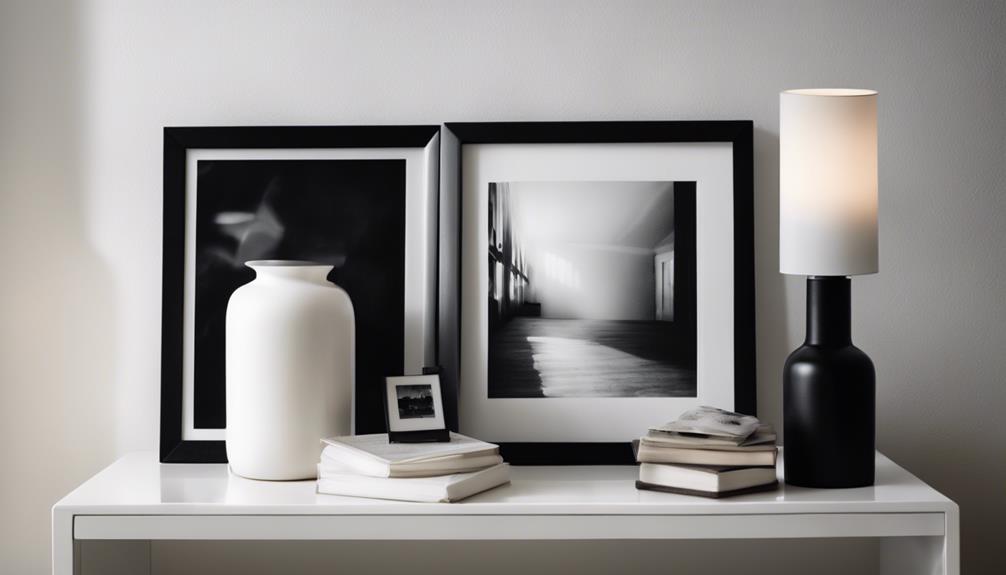
  2. Incorporate metallic accents like gold or silver hardware or light fixtures to complement the white wall.
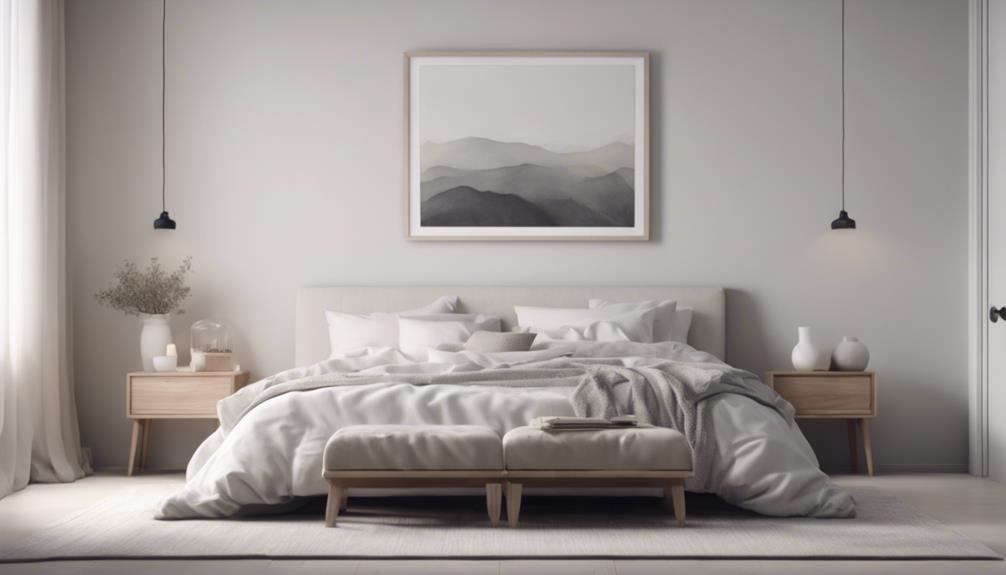
  3. Hang a statement mirror or artwork on the accent wall to serve as a focal point in the bedroom.
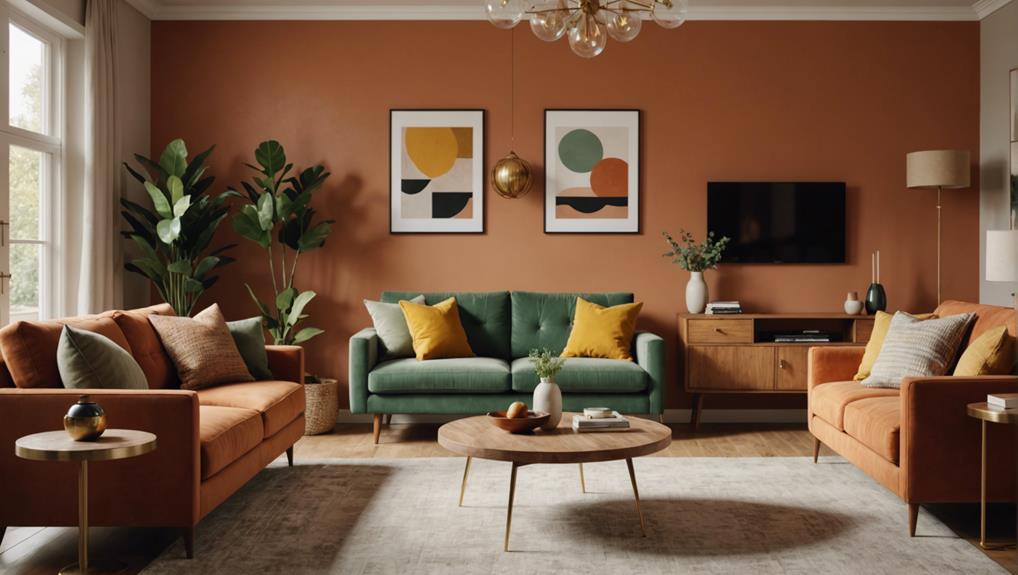
  4. Introduce pops of color through throw pillows, blankets, or a rug to contrast with the white wall and add depth to the room.

Frequently Asked Questions

How Do I Make My Bedroom Accent Wall Stunning?

To make your bedroom accent wall stunning, you'll want to start by choosing the perfect shade of white that complements your decor.

Consider adding texture or pattern for visual interest, and strategically use lighting to enhance the brightness and dimension.

Then, add decorative molding or trim to create a sophisticated touch, and finally, personalize the space with curated artwork or accents that reflect your style.

What Is the Best Color Accent Wall for a Bedroom?

When it comes to choosing the best color accent wall for your bedroom, you're spoiled for choice.

Did you know that 60% of homeowners opt for a neutral shade, like white, beige, or gray?

Advertisement

These calming hues create a serene atmosphere, perfect for a restful night's sleep.

White, in particular, is a timeless choice, reflecting light and making small bedrooms appear larger.

Where Is the Best Place to Put an Accent Wall in a Bedroom?

When deciding where to put an accent wall in your bedroom, you'll want to strategically choose a location that creates a focal point. Typically, placing it behind the bed is a great option, as it draws the eye to the bed and creates a cozy atmosphere.

Alternatively, you could place it on the wall opposite the entry door to draw the eye into the room, or on a wall with architectural features like a fireplace or large window.

What Is the Rule of Thumb for Accent Walls?

As you envision your dream bedroom, imagine a focal point that draws your gaze. That's where the guideline for accent walls comes in: choose a wall that naturally captures attention, like the one behind your bed.

Advertisement

This guarantees your accent wall is a visual anchor, creating a sense of balance and harmony in the room. By following this guideline, you'll create a stunning visual effect that elevates your bedroom's style.

Conclusion

As you step back to admire your handiwork, the stunning white accent wall in your bedroom is akin to a beacon of serenity, radiating a sense of calm and tranquility.

With every element meticulously planned and executed, the final result is a masterclass in understated elegance, a validation of your creativity and perseverance.

Your bedroom has been transformed, and you're now the proud owner of a serene retreat that's the epitome of relaxation.

Advertisement

Continue Reading
Advertisement

Alfresco

Is an Alfresco a Verandah? Know the Difference!

Navigate the differences between an alfresco and a verandah to uncover which outdoor living space suits your needs best!

Published

on

By

alfresco vs verandah comparison

An alfresco and a verandah differ considerably in purpose and design. The alfresco serves as an outdoor dining extension under the main roof, while a verandah is ground-level, providing a covered area for relaxation. Alfrescos are oriented towards modern entertainment, include modern amenities, and attach to the main house's roof. Verandahs, on the other hand, are more traditional, overlooking the front of the house with a separate pitched roof. To explore further distinctions and choose wisely between an alfresco and a verandah, grasp their unique aspects and intended functionalities for your outdoor living needs.

Key Takeaways

  • Alfresco serves as a modern outdoor dining and entertainment extension, while a verandah is a traditional covered space for relaxation.
  • Alfrescos integrate with the main house roof and offer contemporary amenities, contrasting with verandahs' classic design elements.
  • Alfrescos are ideal for outdoor dining year-round with modern finishes, while verandahs provide a sheltered area for socializing.
  • Alfrescos use the main house roof for shade and are attached to the house, while verandahs have standalone covered roofs.
  • Alfrescos prioritize modern materials like glass and steel for a sleek appearance, while verandahs typically use traditional materials like timber.

Alfresco Area Vs Verandah: Key Contrasts

When comparing an alfresco area to a verandah, the key contrasts lie in their design and intended use. An alfresco area serves as an outdoor extension for dining under the main roof, providing a space for casual meals and gatherings.

On the other hand, a verandah is a covered structure at ground level that connects front and back entrances, offering a place for relaxation and socializing in a traditional architectural style.

The alfresco area is specifically designed for outdoor dining and entertainment, often equipped with sliding doors for protection and to enhance the aesthetic value of a home. In contrast, verandahs are used for small parties and overlook the front of the house, providing a covered area to enjoy the outdoors while being protected from the elements.

While alfrescos seamlessly extend the home's living space, verandahs act as a connection space between indoor and outdoor areas. The alfresco area is commonly associated with modern outdoor living, while verandahs offer a more traditional touch to the architectural design of a house.

Design Variances Between Alfresco and Verandah

outdoor living space differences

When comparing the design variances between an alfresco and a verandah, it's important to analyze the roof structures, functional spaces, and material selections. The roof structure of an alfresco tends to be integrated into the main house roof, creating a seamless indoor-outdoor flow, while verandahs often feature a separate pitched roof design.

Functional space variations highlight how alfrescos are tailored for dining and entertaining, whereas verandahs serve as sheltered passageways around the house, emphasizing a historical architectural connection.

Advertisement

Material selection variances further distinguish these outdoor spaces, with alfrescos featuring modern amenities and finishes, contrasting with the classic design elements of verandahs.

Roof Structure Differences

In distinguishing between alfrescos and verandahs, one key aspect that sets them apart is their roof structures. Alfrescos typically utilize the main roof of the house for shade, blending seamlessly with the existing architecture. On the other hand, verandahs are standalone covered structures at ground level, having their own distinct roof separate from the main house. To help visualize the differences, refer to the table below:

Aspect Alfresco Verandah
Location Attached to the main house Standalone structure at ground level
Roof Structure Uses the main roof for shade Has its own covered roof
Purpose Outdoor dining under existing roof Connects front and back entrances of a home
Design Integrates with house design Traditional connecting space
Size Often smaller, part of the main structure Longer and narrower for small gatherings

Understanding these distinctions can assist in making informed decisions when considering the addition of either an alfresco or a verandah to your property.

Functional Space Variations

For understanding the design variances between an alfresco and a verandah, consider their functional space variations. An alfresco is an outdoor extension of the main living area, designed for modern features like outdoor kitchens and dining areas. It serves as a covered structure, offering protection from the elements year-round and can be partially enclosed for added comfort.

In contrast, a verandah is a more traditional covered structure attached along the front, back, or side of a house, serving as a space between indoors and outdoors. Verandahs are open structures that provide shade and a relaxing outdoor space. Alfrescos are commonly used for outdoor dining and entertaining purposes, while verandahs are ideal for relaxing, reading, or enjoying the surrounding landscape views.

Advertisement

While alfrescos are typically built as extensions of the home under the main roof, verandahs can be freestanding or attached structures with various roof options like flat, skillion, or gable roofs.

Material Selection Variances

If you're considering the design variances between an alfresco and a verandah, the material selection plays an essential role in distinguishing these outdoor living spaces. Alfrescos often incorporate modern materials like glass and steel, giving them a contemporary feel, while verandahs typically utilize traditional materials such as timber for a more classic appearance.

When it comes to design elements, verandahs may include decorative features like fretwork or balustrades for elegance, whereas alfrescos focus on sleek, functional designs. Prioritizing weather resistance and durability, alfrescos commonly use materials like aluminum and composite decking, contrasting with verandahs that may opt for hardwoods like cedar or merbau to achieve a natural aesthetic.

Additionally, alfrescos may integrate high-tech materials like UV-resistant polycarbonate roofing and composite cladding for low maintenance, setting them apart from the more rustic feel of verandahs. The choice of materials significantly impacts the overall style, maintenance needs, and longevity of these outdoor spaces.

Functional Disparities of Alfresco and Verandah

outdoor living space comparison

An alfresco and a verandah serve distinct functions within a home, showcasing usage variations and design elements that differentiate the two structures.

Alfrescos are designed to create an integrated outdoor living space under the main roof, often equipped with amenities like outdoor kitchens, ideal for dining and entertainment.

Advertisement

In contrast, verandahs act as covered passageways or social spaces, offering a connecting area between the indoors and outdoors, commonly used for relaxation or to enjoy the front view of the house.

Usage Variations

The functional disparities between alfrescos and verandahs are evident in their distinct usage variations. Alfrescos are primarily designed for outdoor dining and entertaining, creating a space for leisure activities and social gatherings. They offer a seamless extension of the indoor living space, blurring the lines between indoor and outdoor areas. Alfrescos often come equipped with amenities like outdoor kitchens and dining areas to enhance the overall experience.

On the other hand, verandahs serve a simpler purpose, acting as covered pathways or connecting areas within a home. They're typically used for small gatherings or as a relaxation spot, providing shelter and linking different parts of the house. Verandahs prioritize functionality over elaborate design features, focusing on their role as a covered structure rather than a dedicated entertainment space.

Essentially, while alfrescos cater to outdoor living and dining experiences, verandahs serve as practical connectors within a property.

Design Elements

When comparing the design elements of alfrescos and verandahs, it becomes evident that they serve distinct functional purposes in enhancing outdoor living spaces. Alfrescos are designed as outdoor extensions for dining under the main roof, providing a smooth shift between indoor and outdoor areas. They focus on creating a smooth flow, using the main roof for shade and offering protection from the elements year-round. These covered structures not only enhance the aesthetic value of a home but also cater to outdoor dining and entertainment needs.

Advertisement

On the other hand, verandahs are typically at ground level, overlooking the front or back of a house, and are more commonly used for relaxing or enjoying the outdoor view. Their design elements revolve around providing a covered pathway or sitting area. While alfrescos emphasize smooth shifts and outdoor extensions, verandahs prioritize offering a covered space for various activities, albeit with a different aesthetic appeal.

Comparing Alfresco and Verandah Aesthetics

outdoor living space comparison

Alfrescos and verandahs present distinct aesthetics that showcase their unique design features and styles. While alfrescos lean towards a modern and sleek appearance, verandahs exude a more traditional and classic charm. The table below highlights some key differences in the aesthetics of alfrescos and verandahs:

Aspect Alfresco Verandah
Roof Design Often a part of the main roof structure Separate roof covering the structure
Supporting Columns Minimal or absent Typically adorned with columns or posts
Architectural Style Contemporary Traditional

Alfrescos tend to prioritize a seamless integration of indoor and outdoor spaces, often featuring sliding doors and a modern appeal. In contrast, verandahs boast a more timeless look with prominent columns and a roof that extends from the main structure. These differences in design elements contribute to the overall aesthetic and feel of each outdoor living space.

Alfresco Vs Verandah: Usage Distinctions

outdoor living space comparison

Highlighting the versatile functionality of outdoor living spaces, alfrescos and verandahs offer distinct usage distinctions that cater to different preferences and needs.

Here are some key differences to help you understand how alfrescos and verandahs are used:

  1. Alfresco:
  • An alfresco is an outdoor extension primarily designed for dining under the main roof.
  • It enhances the aesthetic appeal of a home and often includes sliding doors for protection during various weather conditions.
  • Alfrescos are typically associated with outdoor dining and entertaining spaces, providing a cozy and inviting atmosphere for gatherings.
  1. Verandah:
  • In contrast, a verandah is a covered ground-level structure that connects the front and back entrances of a house.
  • Verandahs can be utilized for small gatherings or as relaxing spots overlooking the front of the house.
  • They serve as covered pathways or sitting areas along the perimeter of a property, facilitating easy shifts between indoor and outdoor spaces.

Structural Differences: Alfresco Vs Verandah

outdoor living space comparison

When comparing an alfresco to a verandah, structural differences are evident in the roofing materials used and the level of enclosure. Alfrescos typically feature roofs that are extensions of the main house structure, providing a high level of enclosure with sliding doors for protection.

Verandahs, on the other hand, may have different roofing materials and offer a more open design, often acting as covered walkways or sitting areas.

Roofing Materials Used

Utilizing the main roof of the house for support, alfrescos commonly employ roofing materials such as Colorbond steel or insulated panels. Verandahs, on the other hand, often feature independent roofing materials like corrugated iron or timber shingles.

Advertisement

When considering the roofing materials used in alfrescos and verandahs, several key differences emerge:

  1. Integration with the Main House: Alfrescos tend to integrate more seamlessly with the main house due to their shared roofing materials, creating a cohesive look. In contrast, verandahs offer a distinct aesthetic appeal by utilizing independent roofing materials.
  2. Aesthetic Variation: The choice of roofing material for alfrescos or verandahs can have a notable impact on the overall aesthetic of the outdoor structure. Colorbond steel exudes a modern and sleek appearance, while timber shingles provide a more traditional and rustic look.
  3. Durability and Maintenance: The selection of roofing materials also influences the durability and maintenance requirements of alfrescos and verandahs. Insulated panels offer enhanced insulation and energy efficiency for alfrescos, whereas corrugated iron may require more frequent maintenance for verandahs.

Level of Enclosure

For a clear distinction between an alfresco and a verandah regarding structural differences, consider the level of enclosure each outdoor space provides. An alfresco is typically more enclosed than a verandah, offering walls or privacy screens that provide a sense of coziness and protection. This enclosed structure allows for year-round use, shielding you from the elements while enjoying outdoor dining or entertainment. On the other hand, a verandah is more open, serving as a covered passage from indoors to outdoors. Verandahs are commonly used for relaxation and admiring the surroundings, creating a welcoming entry to your home. To better understand the differences, let's take a look at the comparison table below:

Aspect Alfresco Verandah
Level of Enclosure Enclosed with walls or screens More open with less enclosure
Year-round Use Suitable for all seasons May be less comfortable in extreme weather
Protection Offers protection from elements Provides minimal shelter from weather
Outdoor Dining Ideal for outdoor dining experiences Can be used for light meals or relaxation
Entertainment Great for hosting gatherings and events Suitable for relaxing and enjoying views

Alfresco or Verandah: Which to Choose?

outdoor living space options

Considering whether to opt for an alfresco or a verandah for your outdoor space can depend on your lifestyle preferences and desired functionality. Both options have their unique characteristics that cater to different needs. Here are some key points to help you make an informed decision:

  1. Functionality:
  • Alfrescos are ideal for adding an outdoor living space that seamlessly connects to your home, perfect for dining and entertaining.
  • Verandahs provide a covered area that serves as a connecting space between the indoors and outdoors.
  1. Design:
  • Alfrescos often feature outdoor kitchens, dining areas, and furniture, enhancing the outdoor living experience.
  • In contrast, verandahs offer a covered space for relaxation or small gatherings.
  1. Purpose:
  • While alfrescos focus on expanding your living area outdoors, verandahs primarily function as covered walkways or sitting areas.

Consider your lifestyle needs and desired functionality to determine which option best suits your home.

Outdoor Living: Alfresco Vs Verandah

comparing alfresco and verandah

When considering your outdoor living space, it's crucial to understand the specific characteristics of each option. Below is a comparison table highlighting key differences between an alfresco and a verandah:

Aspect Alfresco Verandah
Location Connected to the main house Along the front, back, or side of the house
Purpose Designed for dining and entertaining Serves as a connecting space between indoors and outdoors
Integration Offers a seamless look with the main house Can vary in size and shape
Features Often includes sliding doors for protection Typically has open sides for ventilation
Function Enhances the aesthetic value of the home Provides a covered area for relaxation and social gatherings

Understanding these distinctions can help you make an informed decision when planning your outdoor living space.

Alfresco Vs Verandah: Home Value Impact

outdoor living space comparisons

Understanding the impact on home value between an alfresco and a verandah is key when planning your outdoor living space. When considering whether to add an alfresco or a verandah to your home, here are some key points to keep in mind:

  1. Home Value Increase: Adding an alfresco can potentially raise your home's value by up to 20%, making it a lucrative investment for homeowners looking to increase their property's worth.
  2. Traditional Charm vs. Modern Appeal: While a verandah typically adds 12-15% to the value of a home, alfrescos are perceived as more modern and luxurious. The choice between the two can depend on whether you prefer traditional charm or modern appeal.
  3. Buyer Attraction: Both alfrescos and verandahs can enhance curb appeal and attract potential buyers. However, alfrescos, being more contemporary, might have a broader appeal to a modern buyer demographic.

Making the Choice: Alfresco or Verandah

outdoor living area options

When deciding between an alfresco and a verandah for your outdoor space, consider the primary function and desired aesthetic appeal of each option.

An alfresco is an outdoor living space connected to the main house, offering protection from the elements and customizable features like outdoor kitchens for dining and entertaining.

On the other hand, a verandah is a covered structure typically attached to the front, back, or side of a house, serving as a connecting space between indoors and outdoors, ideal for relaxation and enjoying the view.

The choice between an alfresco and a verandah depends on the function you envision for your outdoor living space. If you prioritize seamless integration with your main house and desire a space for hosting gatherings and meals, an alfresco might be the ideal option.

Advertisement

Conversely, if you seek a covered area for unwinding and appreciating the surroundings, a verandah could better suit your needs. Evaluate your preferences, location, and design goals to make an informed decision that complements your outdoor lifestyle.

Frequently Asked Questions

What Is Considered a Verandah?

When considering what is considered a verandah, think of a covered structure attached to a house, offering a sheltered outdoor space. It serves as an extension of the main roof, providing a cozy connection to the outdoors.

What Is the Difference Between a Veranda and a Verandah?

When distinguishing between a veranda and a verandah, note that they both provide covered outdoor spaces attached to a house. The key difference lies in spelling variations, with "veranda" being more common internationally and "verandah" in Australia.

What Is an Alfresco on a House?

An alfresco on a house is an outdoor living area designed for dining and entertaining. It seamlessly connects indoor and outdoor spaces under the main roof. Alfrescos provide protection from the elements and a cozy ambiance.

Is a Pergola and Verandah the Same Thing?

A pergola and a verandah are not the same thing. A verandah is attached to the main house with a covered roof, while a pergola stands freely with an open slatted roof for climbing plants.

Advertisement

Conclusion

In the end, choosing between an alfresco area and a verandah comes down to personal preference and lifestyle needs. Each option offers distinct design, functionality, and aesthetic features that cater to different outdoor living experiences.

Whether you opt for the open-air appeal of an alfresco or the traditional charm of a verandah, both can enhance your home's value and provide a delightful space for relaxation and entertainment. Make your choice wisely to create the perfect outdoor oasis for your home.

Continue Reading

Home Decor

Homemade Bird Nest Crafting: 3 Simple Steps

Prepare to take flight into the world of creative nesting, where natural beauty and personal touches come together in a unique decorative piece.

Published

on

crafting bird nests naturally

To craft a homemade bird nest, start by gathering natural materials like dried grass, twigs, and leaves from your yard or local parks. Next, mold the nest shape by wrapping angel hair vine filler around a bowl, securing it with thin wire. Finally, add decorative elements like feathers, dried flowers, or small twigs to enhance the natural look. Personalize your nest with ribbons, fabric scraps, or small ornaments to make it unique. With these three simple steps, you'll have a natural haven for birds and a stunning decorative piece for your home – and that's just the beginning of your creative journey.

Key Takeaways

• Gather natural materials like dried grass, twigs, and Spanish moss to mimic the bird's natural environment.

• Create a nest structure by wrapping angel hair vine filler around a bowl and securing it with thin wire.

• Add decorative elements like Easter eggs, feathers, and dried flowers to enhance the natural look.

• Personalize your bird nest with ribbons, fabric scraps, or small ornaments to make it unique.

Advertisement

• Experiment with different elements to unleash your creativity and make your DIY project special.

Gathering Natural Materials

Head outdoors to scour your yard, local parks, or online retailers for natural materials like dried grass, twigs, leaves, and Spanish moss that will give your DIY bird nest an authentic look. This is the first step in making a homemade bird nest that will attract birds to your backyard.

You'll want to gather materials that mimic the natural environment, allowing your DIY nest to blend in seamlessly. As you forage for materials, keep in mind the type of bird you're trying to attract, as different species have unique nesting preferences.

Once you've collected your materials, prepare your workspace by covering it with craft paper, wearing gloves, and working in a well-ventilated area to prevent mess. With your materials and workspace ready, you'll be set to start crafting your DIY bird nest, making it an inviting home for your feathered friends.

Crafting the Nest Structure

creating a cozy home

With your natural materials and workspace prepared, you're ready to start crafting the nest structure, the foundation of your DIY bird nest. This is the most essential step in creating a realistic bird nest, as it provides the base shape and form of the nest.

To craft the nest structure, follow these steps:

Advertisement
  • Wrap the angel hair vine filler around a bowl to mold the nest shape, using thin wire to secure it in place.
  • Continue wrapping the vine filler around the bowl, overlapping the layers to create a sturdy base.
  • Secure the sides of the nest together using thin wire, and trim any excess filler.
  • Once the nest is formed, carefully remove it from the bowl.

Adding Final Touches

creating a masterpiece together

You can now add the perfect finishing touches to your DIY bird nest by incorporating decorative elements that reflect your personal style and flair.

Add a pop of color and texture to your bird nest with decorative Easter eggs or faux bird eggs, which can be easily attached using a hot glue gun.

To enhance the natural look of your nest, incorporate feathers, dried flowers, or small twigs, which will add a touch of whimsy and authenticity to your decoration.

Consider adding a miniature nest or a tiny bird figurine to create a charming and unique centerpiece.

Experiment with different elements like ribbons, fabric scraps, or small ornaments to personalize and customize your bird nest decoration.

Don't be afraid to get creative and try out new ideas – after all, customization is what makes your DIY project truly special.

Advertisement

Frequently Asked Questions

How to Build a Bird Nest Step by Step?

When you're wondering how to build a bird nest step by step, start by gathering natural materials like twigs, grass, and feathers for an authentic look.

Next, use a bowl as a mold to shape the nest and hold it together with thin wire.

How to Make a Craft Nest for Kids?

When you're looking to make a craft nest for kids, start by gathering materials like construction paper, glue, a bowl, and a paintbrush.

Cut the paper into strips and layer them inside the bowl, coated with a glue and water mixture.

Encourage kids to experiment with different colors and textures to create a unique nest, adding details like eggs or birds for a realistic touch.

Advertisement

How Do Birds Build Nests for Kids?

You might wonder how birds build their nests, and it's fascinating to learn about their unique techniques. Birds collect materials like twigs, leaves, and mud, carefully arranging them to create a safe space for their eggs.

Some species weave intricate nests, while others dig simple depressions in the ground. By observing birds build nests, you'll appreciate their remarkable resourcefulness and adaptability in using their surroundings to create homes.

How to Make Birds Nest With Paper?

Are you curious about how to make a bird's nest with paper? You're in luck!

To create a realistic bird's nest, you'll need to cut paper strips about 1/4 inch thick, mix Elmer's glue with water, and arrange the strips criss-crossing inside a bowl lined with plastic wrap.

You can experiment with different colors and textures of paper to create a unique design.

Advertisement

Conclusion

As you carefully place the final twig, your homemade bird nest begins to resemble a cozy little home, a tribute to nature's intricate design.

Like a master weaver, you've intertwined twigs, leaves, and feathers to create a snug sanctuary, a symbol of hope and new life.

Just as the nest cradles its precious cargo, your creativity has given birth to something beautiful, a reminder that even the smallest acts of craftsmanship can hold profound significance.

Continue Reading

Home Decor

Remarkable Hallway Makeover

Witness the transformation of a mundane hallway into a stunning focal point, and discover the creative secrets behind this remarkable makeover.

Published

on

By

stunning transformation of hallway

As we started on our remarkable hallway makeover, we transformed this often-overlooked space into a stunning focal point through careful planning, meticulous execution, and creativity. We initiated the transformation with prep work, selecting the perfect paint swatch, Evergreen Fog SW 9130, and a satin finish for a cohesive look. Clever sticker removal techniques and personalized decor and artwork added a unique touch. Thoughtful arrangement of artwork and decor created harmony, while mixing sizes, styles, and unconventional items added visual interest. To achieve a balanced look, we considered size, color, and style, and our hard work paid off, resulting in a beautiful, inviting space that showcased our personal style – and that's just the beginning of our remarkable hallway makeover journey.

Key Takeaways

• A remarkable hallway makeover begins with prep work, paint swatches, and clever sticker removal techniques for a fresh start.

• Selecting a cohesive paint color scheme, such as Evergreen Fog SW 9130, sets the tone for a bright and welcoming space.

• Personalized decor and artwork, including unique displays and custom pieces, add a touch of whimsy and visual interest to the hallway.

• Thoughtfully arranging artwork and decor, considering size, color, and style, creates harmony and visual appeal in the space.

Advertisement

• Final touches, such as pendant lights and mirrors, enhance the ambiance, create the illusion of more space, and add a sense of glamour.

Hallway Transformation Journey Begins

We started our hallway transformation journey by tackling the necessary prep work, scrubbing the walls, washing the trim, and safeguarding the floors to guarantee a smooth makeover process. This essential step paved the way for a successful hallway transformation.

Next, we delved into the exciting task of selecting paint swatches, carefully choosing the perfect hues to bring our vision to life. However, we soon realized that removing stickers from the walls was no easy feat. We employed clever sticker removal techniques, soaking rags in vinegar, scraping off stickers, and using an electric sander for stubborn residue.

After overcoming this hurdle, we strategically hung our beloved artwork collections, personalizing the space with decor and adorning doors with new designs. As we approached the final touches, we took a moment to appreciate the beautiful transformation unfolding before our eyes.

With a sense of achievement, we celebrated with pizza and a series finale, basking in the glorious outcome of our hallway transformation journey.

Advertisement

Painting and Decorating Essentials

perfecting the art form

As we move forward with our hallway makeover, we're now focusing on the essential aspects of painting and decorating.

When it comes to selecting a color scheme, we need to take into account the overall aesthetic we want to achieve, factoring in the natural light, furniture, and decor that will complement our chosen hues.

Color Scheme Selection

How do we create a harmonious color scheme that not only complements the adjacent bold and vibrant wallpapered rooms but also transforms the narrow hallway into a bright and welcoming space?

We opted for Evergreen Fog SW 9130 from Sherwin-Williams, the 2022 Color of the Year, as our paint color of choice. To enhance the brightness and create a cohesive look, we chose a satin finish for the paint. By painting the hallway ceiling with Evergreen Fog, we can carry light farther down the hall, making it feel more spacious.

Personalization and style were key factors in selecting a color scheme that complements the adjacent rooms. We collaborated with Minted to design a gallery wall that adds a visually appealing touch to the hallway. The resulting color scheme isn't only harmonious but also reflects our personal style.

As we wanted the hallway to feel bright and welcoming, we made sure to select a color scheme that would achieve this goal. By incorporating our personal style and preferences, we were able to create a unique and inviting space that sets the tone for the rest of the house.

Advertisement

Decorating Accent Walls

By incorporating accent walls into our hallway design, we can strategically draw attention to specific areas, add visual interest, and create a sense of depth. Accent walls can transform a space by adding depth and visual interest through contrasting colors or textures.

Painting an accent wall can create a focal point in a room, drawing attention to architectural features or artwork.

Here are three ways to elevate the design of an accent wall:

  1. Stripes and patterns: Add a touch of sophistication with stripes, geometric patterns, or textured finishes.
  2. Bold colors: Make a statement with bold, contrasting colors or metallic paints for a dramatic effect.
  3. Unique materials: Incorporate wallpaper, wood paneling, or tile to create a one-of-a-kind accent wall that complements the room's decor.

Unveiling Hidden Designs

revealing intricate architectural blueprints

We began by removing old stickers from the doors, which revealed hidden designs that added a personal touch to our hallway makeover.

To remove the stickers, we utilized the vinegar method, soaking rags in vinegar and applying them to the stickers. This loosened the adhesive, making it easier to scrape them off. For more stubborn residue, we used electric sanders to smooth out the surface. We treated both sides of the doors with the vinegar method to guarantee complete sticker removal.

The result was astonishing – the hidden designs on the doors added a fresh and personalized touch to our hallway makeover. By removing the old stickers, we uncovered a unique aspect of our doors that complemented our design aesthetic. This subtle detail elevated our hallway makeover, making it truly remarkable.

Advertisement

As we worked on this project, we realized that sometimes, it's the smallest details that make the biggest impact.

Adding Personal Touches

crafting a cozy space

As we move on to adding personal touches to our hallway makeover, we're excited to explore the various ways to make this space truly reflective of our style and personality.

From showcasing unique artwork displays to creating a personalized photo gallery, we'll discover how incorporating meaningful decor pieces can elevate the overall aesthetic of our hallway.

Unique Artwork Displays

Incorporating unique artwork displays into our hallway makeover allows us to put our personal stamp on the space. By doing so, we can create a visually appealing and inviting atmosphere that reflects our personality and style.

Here are three ways we can make our hallway makeover stand out with unique artwork displays:

  1. Mix and match sizes and styles: Combining different frame sizes, shapes, and styles adds visual interest to our gallery wall.
  2. Incorporate unconventional items: Using vintage mirrors, upcycled decor pieces, or other unexpected items adds a touch of whimsy to our hallway decor.
  3. Opt for custom artwork: Commissioning a custom piece or creating our own DIY artwork allows us to add a truly one-of-a-kind touch to our hallway makeover.

Personalized Photo Gallery

A personalized photo gallery wall adds a unique and sentimental touch to our hallway makeover, allowing us to curate a visually appealing display of cherished memories. By incorporating family photos, we create a focal point in the hallway, making it a constantly evolving space that reflects our individual style preferences.

We can mix and match prints and mementos on a gallery wall to showcase our personal memories and experiences, making it a true reflection of who we are. This personalized approach to hallway design allows us to customize the space to our liking, making it feel truly our own.

Advertisement

As we curate our photo gallery, we're not just hanging pictures – we're telling our story. By incorporating personal photos, we're able to put our own spin on the traditional hallway makeover, making it a space that's truly one-of-a-kind.

As a result, our hallway makeover is transformed into a warm and inviting space that's bursting with personality.

Meaningful Decor Pieces

We take our hallway makeover to the next level by adding meaningful decor pieces that reflect our personality, interests, and experiences. These personal touches not only make our hallway unique but also create a warm and inviting atmosphere.

Here are a few ways to incorporate meaningful decor pieces into our hallway makeover:

  1. Family heirlooms: Adding antiques or family heirlooms can infuse our hallway with history and nostalgia.
  2. Personalized art: Displaying meaningful artwork or crafts created by family members can enhance our hallway's personalization.
  3. DIY projects: Customizing decor elements with DIY projects or handmade items can showcase our creativity and personal style.

Balancing Artwork and Decor

finding harmony in design

By thoughtfully arranging artwork and decor, we can create a visually appealing hallway that showcases our personal style. When it comes to balancing artwork and decor, the key is to create harmony and visual interest. We consider the size, color, and style of artwork to complement the hallway's design. Mixing and matching different types of art, like photography, paintings, and prints, adds dynamism to the display.

Decor Element Placement Tips Visual Interest
Artwork Group similar pieces together Creates a focal point
Mirrors Hang opposite windows for natural light Adds depth and brightness
Lighting Fixtures Install above or beside artwork Highlights the piece
Furniture Place at the end of the hallway for a sense of arrival Creates a sense of warmth

Final Touches and Reveals

adding last minute details

Now that our hallway's artwork and decor are thoughtfully arranged, it's time to put the finishing touches on our remarkable makeover. We're excited to add those final flourishes that will make our hallway look great. To add visual interest, we're incorporating a few key elements to elevate the space.

Here are a few of the details that will take our hallway to the next level:

Advertisement
  1. Collections of paintings: We're grouping a few of our favorite pieces together to create a cohesive look that adds depth and visual appeal.
  2. Pendant lights: These stylish fixtures won't only provide ample lighting but also add a touch of sophistication to our wide hallway.
  3. Large mirror: By placing a large mirror at the end of the hallway, we'll create the illusion of even more space and add a touch of glamour to the overall design.

With these final touches in place, we can't wait to stand back and admire our handiwork. Our hallway looks great, and we're thrilled with the results of our remarkable makeover.

Celebrating a Job Well Done

recognizing hard work success

After a year-long renovation process, we're thrilled to stand back and admire our remarkable hallway makeover, reveling in the dramatic transformation from dark and outdated to light and airy. It's a moment to celebrate, and we're doing just that – celebrating a job well done.

The final touches, including personalization with decor and furniture, have enhanced the hallway's aesthetic appeal, making it a true showstopper. We're proud of the hard work that went into this hallway makeover, and it's evident in the enjoyment of the beautiful new decor and ambiance.

To mark the project's completion, we treated ourselves to a celebratory pizza and some well-deserved relaxation in our newly transformed space. As we gaze upon our handiwork, we can't help but feel a sense of accomplishment, knowing that our efforts have paid off.

This hallway makeover is more than just a renovation – it's a reflection of our perseverance and dedication.

Enjoying the New Ambiance

adapting to a change

We're savoring every moment in our freshly renovated hallway, where the soft glow of new lighting and the soothing hue of fresh paint envelop us in a sense of serenity. The transformation is nothing short of remarkable, and we're thrilled to be enjoying the fruits of our labor.

Here's what we're loving about our new hallway space:

  1. Cozy atmosphere: The combination of fresh paint color, enhanced lighting, and personalized touches has created a warm and inviting ambiance that makes us feel right at home.
  2. Functional storage solutions: Our clever use of shelves and cabinets has maximized storage space, keeping clutter at bay and making it easy to find what we need.
  3. Personalized decor: From the gallery wall to the stylish accessories, every element has been carefully curated to reflect our personal style and make the space truly our own.

As we indulge in a well-deserved treat, we can't help but feel a sense of pride and accomplishment at the successful completion of our remarkable hallway makeover.

Frequently Asked Questions

How Can I Make My Hallway Look Good?

We're wondering how to make our hallway look good, and we're considering a few tricks to create a more inviting space – adding mirrors, a gallery wall, and some stylish lighting to make it feel more spacious and stylish.

Advertisement

How to Modernise a Hallway?

As we step into our humble abode, we envision a sleek, modern oasis, a far cry from the drab, cramped hallways of yesteryear. To modernize our hallway, we'll swap outdated fixtures for sleek, minimalist designs and infuse the space with vibrant hues and clever storage solutions.

How to Make a Long Hallway More Interesting?

We're tired of our long hallway feeling dull, so we're adding visual interest with a mix of art pieces, bold runners, and strategically placed mirrors to create a more engaging space that reflects our style.

How to Decorate Awkward Hallways?

As we navigate life's twists and turns, we often find ourselves stuck in awkward hallways, but we're not lost, we're just redirecting – we'll cleverly use mirrors, bold art, and stylish lighting to turn these spaces into grand entrances.

Conclusion

As we step back to admire our remarkable hallway makeover, we can't help but feel a sense of pride and accomplishment.

One potential concern, 'Will a bold design choice overwhelm the space?' is alleviated by the clever balancing of artwork and decor. According to interior design expert, Sarah Taylor, 'A well-curated mix of textures, colors, and patterns creates visual interest without overwhelming the senses.'

Advertisement

Our transformed hallway is now a warm, inviting space that showcases our personal style.

Continue Reading

Trending