Connect with us

Home Decor

How to Create Empty Frame Wall Decor Ideas

Ignite your creativity and discover the art of transforming blank walls into stunning focal points with these innovative empty frame decor ideas.

Published

on

diy empty frame decor

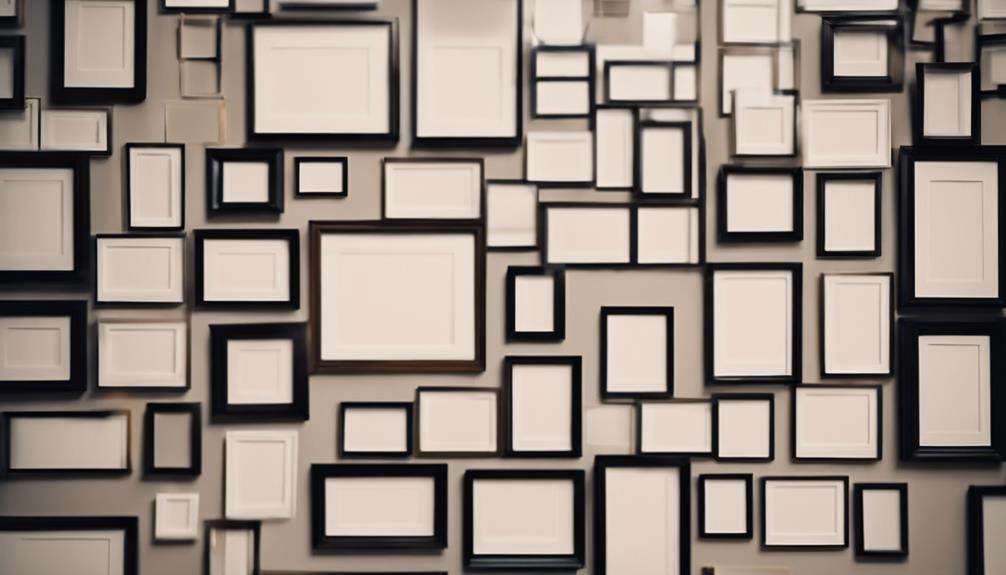
You can transform any blank wall into a visually stunning focal point by creatively arranging empty frames in a way that reflects your personal style. Mix and match frame sizes, styles, and colors to add depth and visual interest. Strategically place statement pieces or groupings to direct attention and create balance. Experiment with overlapping frames, layering, and clustering to add texture and dimension. Combine ornate and simple frames, or mix circular, hexagonal, and rectangular shapes to create a unique display. As you explore these techniques, you'll uncover even more ways to make your empty frame wall decor truly unforgettable.

Key Takeaways

• Combine ornate and simple empty frames in varied sizes and styles for a dynamic, eclectic look.

• Experiment with layering frames of different textures, like wood, metal, and distressed finishes, for added depth.

• Strategically place empty frames to create focal points, directing attention to specific areas of the wall.

• Cluster empty frames of varying sizes and shapes to create a visually appealing display with texture and depth.

Advertisement

• Alternate large and small frames, and experiment with orientations, to create a unique and striking display.
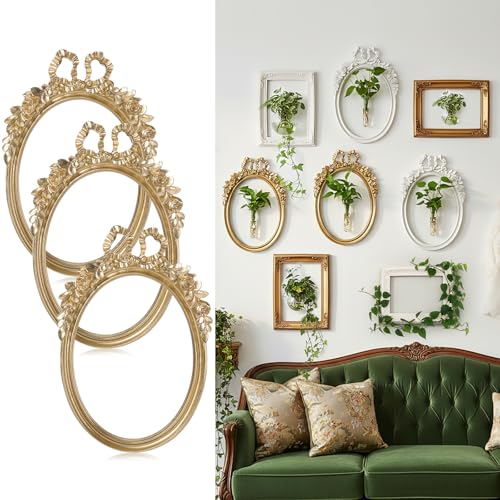
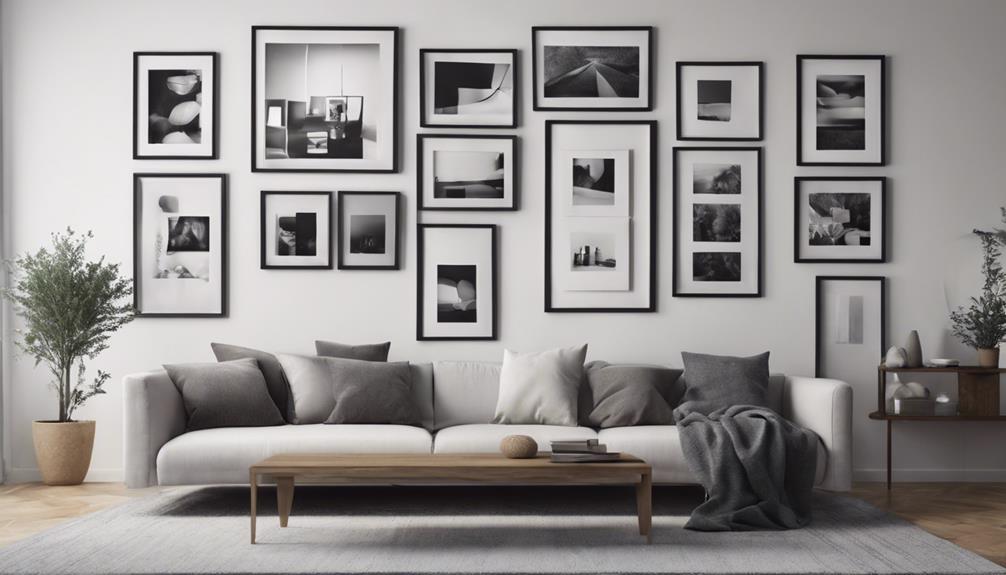
Mixing Frame Sizes and Styles

As you start arranging your empty frame wall decor, consider mixing and matching different frame sizes and styles to add visual interest and dimension to your display.

Combining ornate and simple frames creates a dynamic and eclectic look on the wall. You can find unique picture frames at thrift stores or scour antique shops to add character to your display.

Varied frame sizes can help fill up larger wall spaces effectively, creating a visually appealing arrangement. Experimenting with frames of different colors and finishes can add a pop of personality to the decor.

Empty frames in different shapes, such as circular or hexagonal, can add an extra layer of interest. Mixing frame styles allows for a customizable and unique display that reflects your individual taste and creativity.

Advertisement

Creating Focal Points With Frames

framing your art beautifully

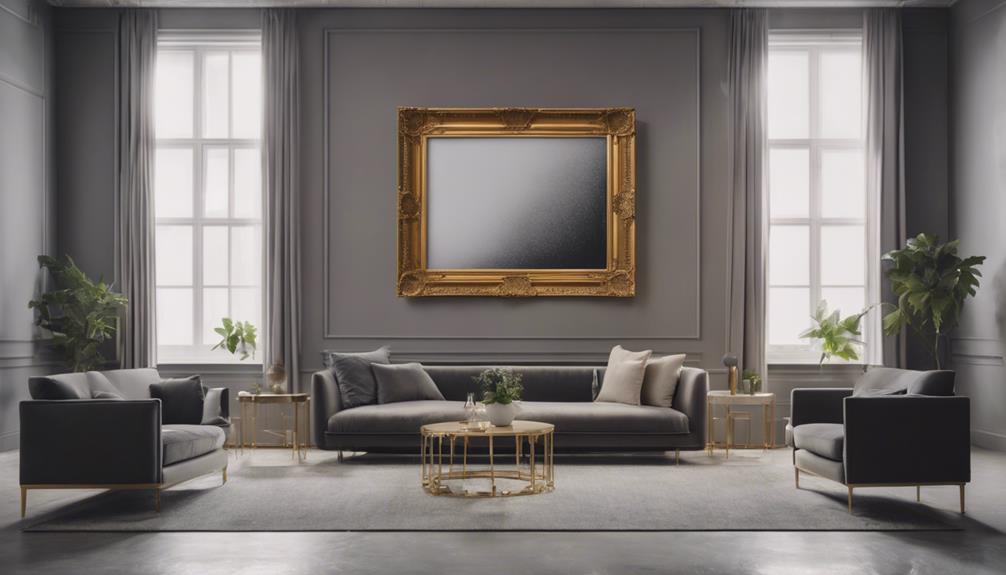
By strategically placing a single statement piece or a grouping of empty frames, you can create a striking focal point that draws the eye and adds visual interest to any room.

Using empty frames, you can thoughtfully direct attention to a specific area of the room, creating a sense of balance and harmony. One way to do this is by grouping frames of varying sizes and shapes, creating a visually appealing arrangement that adds depth and interest to the space.

Alternatively, you could use a single large frame as a statement piece, drawing the eye to a particular area of the room. By placing empty frames thoughtfully, you can create a unique and compelling focal point that complements the room's decor.

For instance, you could place a large frame around a stunning piece of artwork or a cherished photograph, highlighting its importance and adding emotional resonance to the space. By incorporating empty frames as focal points, you can add a touch of sophistication and elegance to your room's decor.

Adding Depth With Overlapping Frames

exploring artistic techniques visually

You can add an extra layer of sophistication to your empty frame wall decor by overlapping frames, creating a visually intriguing display that draws the eye and invites exploration. By layering frames of varying sizes, shapes, and colors, you can create a dynamic visual effect that adds depth and complexity to your wall decor. To take it to the next level, try mixing and matching different frame colors or finishes to enhance the overall aesthetic.

Here are some tips for creating a stunning overlapping frame display:

Technique Description Visual Effect
Cascading Frames are arranged in a flowing, staggered pattern Creates a sense of movement and energy
Staggered Frames are placed at varying heights and widths Adds visual interest and depth
Mismatched Frames of different sizes and shapes are used Creates a playful, eclectic look

Using Frames to Display Personal Items

showcasing personal items creatively

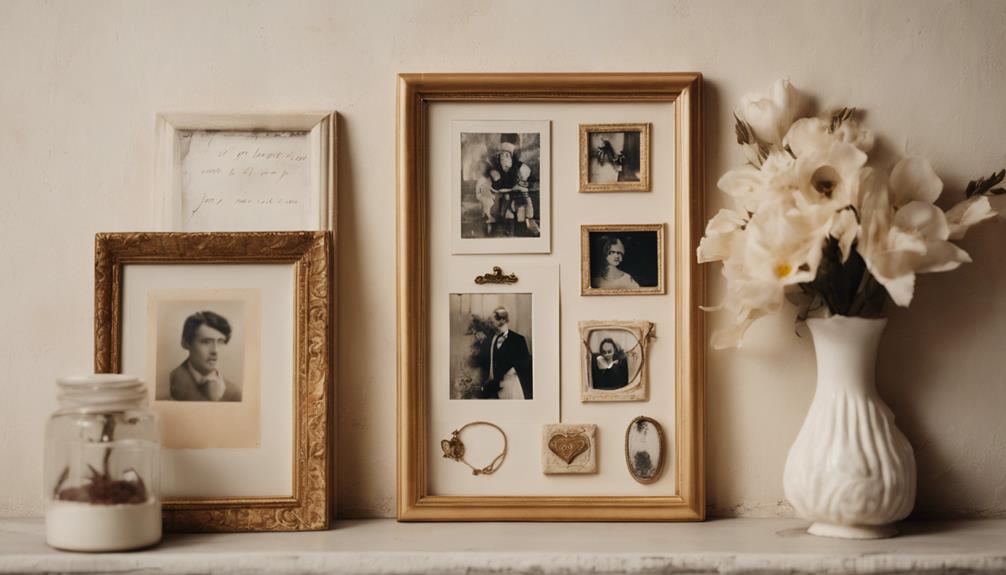
As you explore using frames to display personal items, you'll discover the unique opportunity to showcase your most treasured possessions in a creative and visually appealing way.

By framing family photos, personal treasures, and memories, you can create a meaningful and customized display that reflects your personality and style.

Advertisement

Through this approach, you'll be able to curate a beautiful and nostalgic arrangement that tells your story and adds a touch of warmth to any room.

Family Photos Showcase

Transform your empty frames into a heartwarming family photos showcase by displaying cherished memories and personal items in a unique and visually appealing way. By creatively arranging your frames, you can create a stunning gallery wall that tells your family's story.

Here are some ideas to get you started:

  • Mix and match frame sizes and styles to add visual interest and depth to your display.
  • Incorporate special mementos like tickets, letters, or small objects within the frames for a unique touch.
  • Experiment with hanging techniques, such as using wire or ledges, to create a dynamic and engaging presentation of your family memories.
  • Arrange the frames in a cohesive layout or mix and match for an eclectic look that tells your family's story.

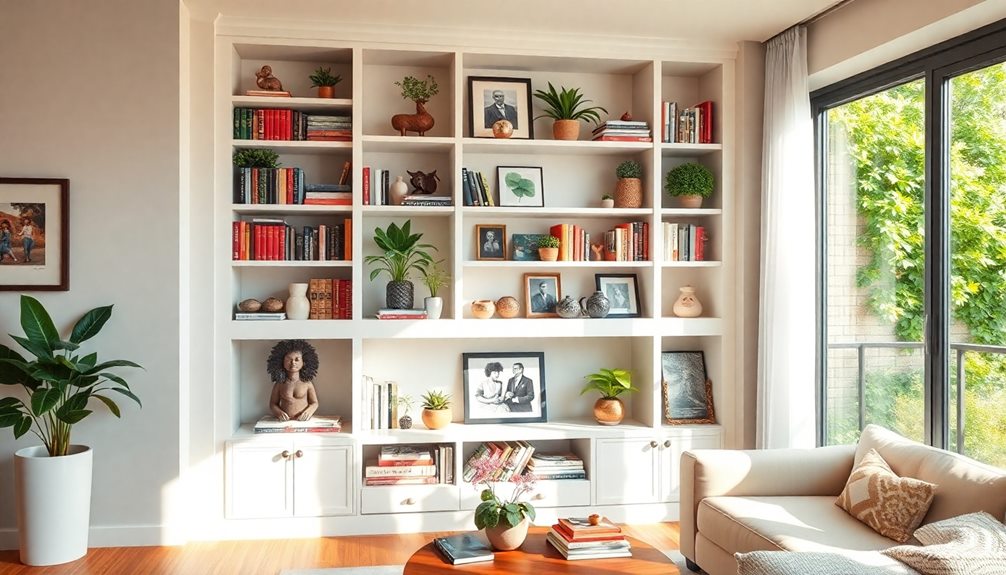
Personal Treasures Display

Fill empty frames with personal treasures like vintage keys, postcards, or small collectibles to create a unique and personalized gallery wall that tells your story. You can showcase sentimental items within frames, adding a personal touch to your decor. Empty frames can become a showcase for cherished items, telling a story or reflecting your interests. By incorporating personal treasures in frames, you'll add a meaningful and decorative element to your space.

Here are some ideas to get you started:

Treasure Frame Style Wall Layout
Vintage keys Distressed wood Random pattern
Postcards White minimalist Grid pattern
Small collectibles Ornate gold Symmetrical layout
Coins Modern black Asymmetrical design

Memories on Display

You can bring your favorite memories to life by showcasing personal items like photos, tickets, and postcards in frames, creating a unique display that tells your story. This is a great way to add a personal touch to your decor and make your space truly special.

Advertisement

By using frames to display your personal items, you can create a one-of-a-kind display that reflects your personality and style.

Here are some ideas to get you started:

  • Use a mix of frame sizes and shapes to add visual interest to your display.
  • Arrange your frames in a grid or gallery style to create a cohesive look.
  • Choose frames that complement the colors and style of your personal items.
  • Experiment with different frame materials, such as wood, metal, or glass, to add texture and depth to your display.

Creating a Gallery Wall With Frames

displaying artwork with style

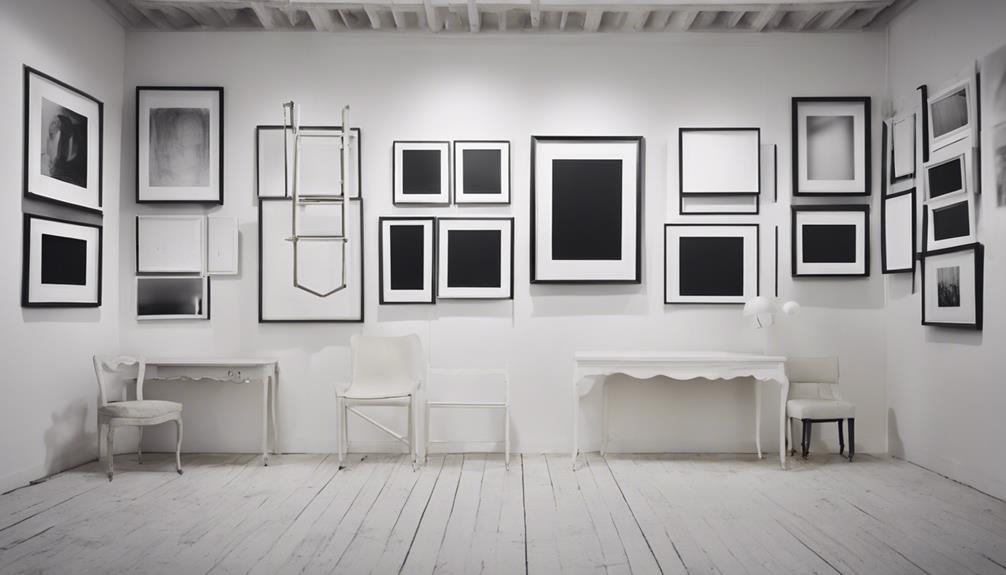
When starting to create a gallery wall with frames, you'll want to take into account the size and shape of the frames, as well as how you'll balance their placement on the wall.

By selecting frames that vary in size, shape, and style, you'll add visual interest to your gallery wall.

Next, you'll need to ponder how to arrange the frames in a way that creates a sense of harmony and balance.

Frame Size and Shape

To create a visually striking gallery wall, combine frames of varying sizes and shapes to add depth and visual interest to your empty frame wall decor. This mix-and-match approach will keep your arrangement from feeling too uniform or boring.

Advertisement

When selecting frames, consider the following tips to create a dynamic display:

  • Mix rectangular, square, and circular frames for visual interest
  • Create a balanced arrangement by alternating large and small frames
  • Experiment with different frame orientations (portrait vs. landscape) for a unique layout
  • Use templates or mock-ups to plan the placement of frames on the wall before hanging

Balancing Frame Placement

With your frame selection in hand, start visualizing the overall aesthetic you want to achieve by arranging your frames in a way that creates balance and harmony on your wall. Aim for a balanced arrangement by mixing frame sizes and shapes to add visual interest to your gallery wall.

Consider using a grid layout or a symmetrical arrangement for a cohesive look with your empty frame wall decor. Don't be afraid to experiment with different frame orientations, such as landscape and portrait, to create a dynamic display.

To add an extra layer of personalization, incorporate a mix of empty frames and artwork to create a unique and eye-catching arrangement. Before you start hammering nails, use templates or paper cutouts to plan the placement of your frames. This will help you achieve a polished and professional look, ensuring your gallery wall is a stunning focal point in your room.

Adding Texture With Frame Groupings

enhancing walls with art

By clustering empty frames of varying sizes, shapes, and styles, you create a visually appealing display that adds texture and depth to your wall decor. This technique is particularly effective in adding visual interest to a room, as the mix of frames creates a dynamic display that draws the eye.

To take your frame grouping to the next level, consider these tips:

  • Mix and match frames with different textures, such as wood, metal, and distressed finishes, to add depth to the arrangement.
  • Experiment with layering frames of varying depths to create a three-dimensional effect on your wall.
  • Combine empty frames with other decor elements, like mirrors or artwork, to enhance the overall aesthetic.
  • Don't be afraid to get creative with frame placement – asymmetrical arrangements can be just as striking as symmetrical ones.

Frequently Asked Questions

How to Decorate With an Empty Frame on a Wall?

When you're looking to decorate with an empty frame on a wall, you're opening yourself up to a world of creative possibilities.

You can use it to highlight a small decorative piece, like a Putz house, or create a unique display by suspending photos with string and clothespins.

Advertisement

You can also customize the frame to match your room's decor by painting it, allowing you to seamlessly integrate it into your overall aesthetic.

How to Style an Empty Wall?

You're staring at a blank wall, wondering how to style it. Start by considering the room's purpose and your personal taste.

Think about the colors, textures, and patterns you want to incorporate. Do you prefer a minimalist or eclectic look? Will you use a single statement piece or create a gallery wall?

Take a step back, envision the space, and let your creativity flow. You'll be surprised at how easily your vision takes shape.

How Do You Decorate a Wall With Frames?

You're looking to decorate a wall with frames, but before you start, let's debunk the myth that empty frames are just for filling gaps. In reality, they can be a stylish focal point.

Advertisement

By mixing frame sizes, colors, and styles, you can create a visually appealing display that adds depth and interest to your wall.

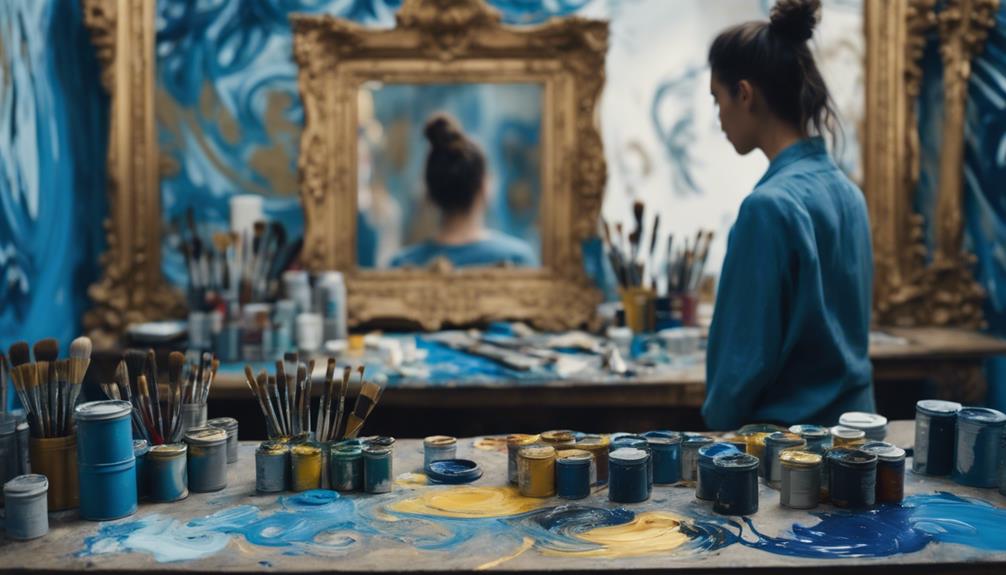
How Do You Decorate a Plain Frame?

You can elevate a plain frame by adding a personal touch. Start by painting it a color that resonates with your decor style, such as a crisp white or a sophisticated gold.

Next, embellish it with decorative elements like beads, ribbons, or trims to add visual interest.

You can also repurpose the frame to hold a small mirror, unique print, or sentimental photo, giving it a personalized flair.

Conclusion

As you step back to admire your handiwork, the empty frames come alive, a symphony of shapes, sizes, and textures dancing across the wall.

Advertisement

The empty spaces within seem to pulse with possibility, inviting the eye to linger and explore.

Your carefully crafted collage is more than just a decorative flourish – it's a reflection of your unique perspective, a celebration of the beauty in the blank.

Continue Reading
Advertisement

Home Decor

Dollar Store Spring Cottage Birdhouses

Bring spring charm to your outdoor space with a whimsical birdhouse crafted from just a few simple dollar store supplies.

Published

on

By

affordable birdhouses for sale

We can create charming spring cottage birdhouses with just a few simple crafting supplies from the dollar store. First, gather essential supplies like birdhouse kits, chalk paint, Mod Podge, and decorative paper. Then, paint the birdhouse base with Waverly chalk paint in agave, adding a vintage look with wax. Add decorative paper details using scrapbook paper and cardstock, and incorporate floral accents for a whimsical touch. Finally, assemble the cottage birdhouse by following the kit's instructions and adding personal touches. As we continue to craft, we'll explore more creative ways to customize our birdhouse and bring spring charm to our outdoor spaces.

Key Takeaways

• Use Dollar Tree birdhouse kits as a base for your spring cottage birdhouse project to save time and money.

• Apply Waverly chalk paint in vibrant colors to create a unique and charming look for your birdhouse.

• Add decorative paper details, such as scrapbook paper and cardstock, to give your birdhouse a touch of personality.

• Embellish your birdhouse with small floral accents, like colorful flowers and greenery, for a whimsical touch.

Advertisement

• Consider adding personal touches, like painting or decorating, to make your birdhouse truly one-of-a-kind.

Gathering Essential Crafting Supplies

As we start on this creative journey, we'll need to gather a few essential crafting supplies to transform our Dollar Store finds into charming spring cottage birdhouses. The first step is to collect the necessary materials, including birdhouse kits, which will serve as the base for our project.

Next, we'll need chalk paint in various colors to give our birdhouses a unique and personalized look. Additionally, we'll require Mod Podge, decorative cardstock, and scrapbook paper to add texture and visual interest to our creations. These supplies will allow us to apply multiple coats of paint, with drying time in between, to achieve a rich and vibrant color.

We'll also need white paint on hand for touch-ups and to create a cohesive look. By gathering these essential crafting supplies, we'll be well on our way to creating beautiful and unique spring cottage birdhouses that showcase our creativity and attention to detail.

Painting the Birdhouse Base

detailing the birdhouse foundation

With our crafting supplies in hand, we're ready to bring our spring cottage birdhouses to life by painting the birdhouse base. This is where the magic happens, and our little birdhouses start to take shape.

To achieve a beautiful, solid base color, we'll apply two coats of Waverly chalk paint in agave, making sure that each coat dries completely before applying the next to prevent smudging or streaking.

Advertisement

Here are some essential tips to keep in mind:

  • Use a small brush to touch up any areas that may have been missed or need extra coverage with white paint.
  • Create a vintage look by applying wax over the dried paint, blending it in for a weathered effect.
  • Maintain a smooth and even finish by taking your time and applying the paint and wax carefully to the birdhouse base.

Adding Decorative Paper Details

creating art with paper

We're adding a personal touch to our spring cottage birdhouses by incorporating decorative paper details that infuse charm and character into these miniature homes. To guarantee this, we're using scrapbook paper and cardstock to create unique patterns and designs that reflect our personal style.

By mixing and matching different papers, we can create a cohesive and visually appealing final result. Next time, we might try adding rickrack trim or other embellishments to enhance the overall look of the birdhouse.

To make sure a secure hold, we'll attach the paper details using Mod Podge or glue. This technique is easy to master, and the results are well worth the effort.

With a little creativity, we can transform a plain birdhouse into a charming cottage that's full of personality. As we work on our birdhouses, we're reminded that it's the little details that make all the difference. By adding decorative paper details, we're creating a one-of-a-kind piece that's sure to delight.

Embellishing With Floral Accents

playing up floral details

Now that we've added personality to our birdhouses with decorative paper details, let's take them to the next level by introducing a touch of whimsy with small floral accents.

We wanted to make our birdhouses stand out, and what better way to do that than with a splash of colorful flowers and greenery? To enhance our spring cottage birdhouses, we can use a variety of small flowers and foliage to create a natural and eye-catching look.

Advertisement

Here are some tips to keep in mind when embellishing with floral accents:

  • Mix and match different flower shapes, sizes, and colors to create a visually appealing design.
  • Consider using artificial flowers for a long-lasting and low-maintenance decorative option.
  • Secure the floral accents with glue or adhesive to make certain they stay in place and withstand handling.

Assembling the Cottage Birdhouse

crafting a charming birdhouse

Let's get started on assembling our cottage birdhouse by following the instructions provided in the Dollar Tree birdhouse kit.

As we carefully read through the instructions, we'll make sure to pay attention to the finer details, such as aligning the roof and placing the windows correctly.

We'll use glue or nails to secure the pieces together, ensuring a sturdy construction that can withstand the elements.

As we assemble the birdhouse, we'll also think about adding our own personal touches, like painting or decorating, to make it truly unique.

If we're short on time, we can consider using a ready-made birdhouse from a craft store as an alternative.

Advertisement

Either way, we'll end up with a charming cottage birdhouse that's perfect for spring.

Frequently Asked Questions

Can I Use a Real Birdhouse Instead of a Wooden Birdhouse Shape?

We're wondering if we can ditch the wooden birdhouse shape and use a real birdhouse instead. Honestly, we think it's a great idea – it'll add a touch of authenticity to our DIY project!

Are There Any Alternatives to Decoupage Glue?

As we weave our creative tapestry, we ponder alternatives to decoupage glue, seeking a binding force that's strong yet gentle, like the threads of a spider's web. We find solace in mod podge, a trusty standby, or even white school glue, a humble hero.

How Do I Prevent the Paper Details From Peeling Off?

We prevent paper details from peeling off by applying a clear coat of varnish or Mod Podge after decoupage, ensuring a strong bond and protecting our artwork from wear and tear.

Can I Use Artificial Flowers Instead of Fresh Flowers?

We're wondering if artificial flowers are a viable substitute for fresh ones, and we think they're a great idea! They'll last longer and still add a pop of color, so go for it!

Advertisement

Is It Possible to Make This Project With Kids?

'As we dip our toes into the world of creativity, we ask: can little hands help craft this masterpiece? Absolutely! With patience and guidance, kids can contribute to this project, fostering a sense of pride and ownership.'

Conclusion

As we step back to admire our handiwork, our humble dollar store finds have been transformed into a charming spring cottage birdhouse, reminiscent of a 'hidden gem' tucked away in a lush garden.

The combination of soft hues and delicate details has yielded a whimsical retreat, beckoning birds to take up residence.

With a dash of creativity and some thriftiness, we've proven that beauty can indeed be found on a budget, as the saying goes, 'one person's trash is another person's treasure.'

Advertisement

Continue Reading

Alfresco

Is an Alfresco a Verandah? Know the Difference!

Navigate the differences between an alfresco and a verandah to uncover which outdoor living space suits your needs best!

Published

on

By

alfresco vs verandah comparison

An alfresco and a verandah differ considerably in purpose and design. The alfresco serves as an outdoor dining extension under the main roof, while a verandah is ground-level, providing a covered area for relaxation. Alfrescos are oriented towards modern entertainment, include modern amenities, and attach to the main house's roof. Verandahs, on the other hand, are more traditional, overlooking the front of the house with a separate pitched roof. To explore further distinctions and choose wisely between an alfresco and a verandah, grasp their unique aspects and intended functionalities for your outdoor living needs.

Key Takeaways

  • Alfresco serves as a modern outdoor dining and entertainment extension, while a verandah is a traditional covered space for relaxation.
  • Alfrescos integrate with the main house roof and offer contemporary amenities, contrasting with verandahs' classic design elements.
  • Alfrescos are ideal for outdoor dining year-round with modern finishes, while verandahs provide a sheltered area for socializing.
  • Alfrescos use the main house roof for shade and are attached to the house, while verandahs have standalone covered roofs.
  • Alfrescos prioritize modern materials like glass and steel for a sleek appearance, while verandahs typically use traditional materials like timber.

Alfresco Area Vs Verandah: Key Contrasts

When comparing an alfresco area to a verandah, the key contrasts lie in their design and intended use. An alfresco area serves as an outdoor extension for dining under the main roof, providing a space for casual meals and gatherings.

On the other hand, a verandah is a covered structure at ground level that connects front and back entrances, offering a place for relaxation and socializing in a traditional architectural style.

The alfresco area is specifically designed for outdoor dining and entertainment, often equipped with sliding doors for protection and to enhance the aesthetic value of a home. In contrast, verandahs are used for small parties and overlook the front of the house, providing a covered area to enjoy the outdoors while being protected from the elements.

While alfrescos seamlessly extend the home's living space, verandahs act as a connection space between indoor and outdoor areas. The alfresco area is commonly associated with modern outdoor living, while verandahs offer a more traditional touch to the architectural design of a house.

Design Variances Between Alfresco and Verandah

outdoor living space differences

When comparing the design variances between an alfresco and a verandah, it's important to analyze the roof structures, functional spaces, and material selections. The roof structure of an alfresco tends to be integrated into the main house roof, creating a seamless indoor-outdoor flow, while verandahs often feature a separate pitched roof design.

Functional space variations highlight how alfrescos are tailored for dining and entertaining, whereas verandahs serve as sheltered passageways around the house, emphasizing a historical architectural connection.

Advertisement

Material selection variances further distinguish these outdoor spaces, with alfrescos featuring modern amenities and finishes, contrasting with the classic design elements of verandahs.

Roof Structure Differences

In distinguishing between alfrescos and verandahs, one key aspect that sets them apart is their roof structures. Alfrescos typically utilize the main roof of the house for shade, blending seamlessly with the existing architecture. On the other hand, verandahs are standalone covered structures at ground level, having their own distinct roof separate from the main house. To help visualize the differences, refer to the table below:

Aspect Alfresco Verandah
Location Attached to the main house Standalone structure at ground level
Roof Structure Uses the main roof for shade Has its own covered roof
Purpose Outdoor dining under existing roof Connects front and back entrances of a home
Design Integrates with house design Traditional connecting space
Size Often smaller, part of the main structure Longer and narrower for small gatherings

Understanding these distinctions can assist in making informed decisions when considering the addition of either an alfresco or a verandah to your property.

Functional Space Variations

For understanding the design variances between an alfresco and a verandah, consider their functional space variations. An alfresco is an outdoor extension of the main living area, designed for modern features like outdoor kitchens and dining areas. It serves as a covered structure, offering protection from the elements year-round and can be partially enclosed for added comfort.

In contrast, a verandah is a more traditional covered structure attached along the front, back, or side of a house, serving as a space between indoors and outdoors. Verandahs are open structures that provide shade and a relaxing outdoor space. Alfrescos are commonly used for outdoor dining and entertaining purposes, while verandahs are ideal for relaxing, reading, or enjoying the surrounding landscape views.

Advertisement

While alfrescos are typically built as extensions of the home under the main roof, verandahs can be freestanding or attached structures with various roof options like flat, skillion, or gable roofs.

Material Selection Variances

If you're considering the design variances between an alfresco and a verandah, the material selection plays an essential role in distinguishing these outdoor living spaces. Alfrescos often incorporate modern materials like glass and steel, giving them a contemporary feel, while verandahs typically utilize traditional materials such as timber for a more classic appearance.

When it comes to design elements, verandahs may include decorative features like fretwork or balustrades for elegance, whereas alfrescos focus on sleek, functional designs. Prioritizing weather resistance and durability, alfrescos commonly use materials like aluminum and composite decking, contrasting with verandahs that may opt for hardwoods like cedar or merbau to achieve a natural aesthetic.

Additionally, alfrescos may integrate high-tech materials like UV-resistant polycarbonate roofing and composite cladding for low maintenance, setting them apart from the more rustic feel of verandahs. The choice of materials significantly impacts the overall style, maintenance needs, and longevity of these outdoor spaces.

Functional Disparities of Alfresco and Verandah

outdoor living space comparison

An alfresco and a verandah serve distinct functions within a home, showcasing usage variations and design elements that differentiate the two structures.

Alfrescos are designed to create an integrated outdoor living space under the main roof, often equipped with amenities like outdoor kitchens, ideal for dining and entertainment.

Advertisement

In contrast, verandahs act as covered passageways or social spaces, offering a connecting area between the indoors and outdoors, commonly used for relaxation or to enjoy the front view of the house.

Usage Variations

The functional disparities between alfrescos and verandahs are evident in their distinct usage variations. Alfrescos are primarily designed for outdoor dining and entertaining, creating a space for leisure activities and social gatherings. They offer a seamless extension of the indoor living space, blurring the lines between indoor and outdoor areas. Alfrescos often come equipped with amenities like outdoor kitchens and dining areas to enhance the overall experience.

On the other hand, verandahs serve a simpler purpose, acting as covered pathways or connecting areas within a home. They're typically used for small gatherings or as a relaxation spot, providing shelter and linking different parts of the house. Verandahs prioritize functionality over elaborate design features, focusing on their role as a covered structure rather than a dedicated entertainment space.

Essentially, while alfrescos cater to outdoor living and dining experiences, verandahs serve as practical connectors within a property.

Design Elements

When comparing the design elements of alfrescos and verandahs, it becomes evident that they serve distinct functional purposes in enhancing outdoor living spaces. Alfrescos are designed as outdoor extensions for dining under the main roof, providing a smooth shift between indoor and outdoor areas. They focus on creating a smooth flow, using the main roof for shade and offering protection from the elements year-round. These covered structures not only enhance the aesthetic value of a home but also cater to outdoor dining and entertainment needs.

Advertisement

On the other hand, verandahs are typically at ground level, overlooking the front or back of a house, and are more commonly used for relaxing or enjoying the outdoor view. Their design elements revolve around providing a covered pathway or sitting area. While alfrescos emphasize smooth shifts and outdoor extensions, verandahs prioritize offering a covered space for various activities, albeit with a different aesthetic appeal.

Comparing Alfresco and Verandah Aesthetics

outdoor living space comparison

Alfrescos and verandahs present distinct aesthetics that showcase their unique design features and styles. While alfrescos lean towards a modern and sleek appearance, verandahs exude a more traditional and classic charm. The table below highlights some key differences in the aesthetics of alfrescos and verandahs:

Aspect Alfresco Verandah
Roof Design Often a part of the main roof structure Separate roof covering the structure
Supporting Columns Minimal or absent Typically adorned with columns or posts
Architectural Style Contemporary Traditional

Alfrescos tend to prioritize a seamless integration of indoor and outdoor spaces, often featuring sliding doors and a modern appeal. In contrast, verandahs boast a more timeless look with prominent columns and a roof that extends from the main structure. These differences in design elements contribute to the overall aesthetic and feel of each outdoor living space.

Alfresco Vs Verandah: Usage Distinctions

outdoor living space comparison

Highlighting the versatile functionality of outdoor living spaces, alfrescos and verandahs offer distinct usage distinctions that cater to different preferences and needs.

Here are some key differences to help you understand how alfrescos and verandahs are used:

  1. Alfresco:
  • An alfresco is an outdoor extension primarily designed for dining under the main roof.
  • It enhances the aesthetic appeal of a home and often includes sliding doors for protection during various weather conditions.
  • Alfrescos are typically associated with outdoor dining and entertaining spaces, providing a cozy and inviting atmosphere for gatherings.
  1. Verandah:
  • In contrast, a verandah is a covered ground-level structure that connects the front and back entrances of a house.
  • Verandahs can be utilized for small gatherings or as relaxing spots overlooking the front of the house.
  • They serve as covered pathways or sitting areas along the perimeter of a property, facilitating easy shifts between indoor and outdoor spaces.

Structural Differences: Alfresco Vs Verandah

outdoor living space comparison

When comparing an alfresco to a verandah, structural differences are evident in the roofing materials used and the level of enclosure. Alfrescos typically feature roofs that are extensions of the main house structure, providing a high level of enclosure with sliding doors for protection.

Verandahs, on the other hand, may have different roofing materials and offer a more open design, often acting as covered walkways or sitting areas.

Roofing Materials Used

Utilizing the main roof of the house for support, alfrescos commonly employ roofing materials such as Colorbond steel or insulated panels. Verandahs, on the other hand, often feature independent roofing materials like corrugated iron or timber shingles.

Advertisement

When considering the roofing materials used in alfrescos and verandahs, several key differences emerge:

  1. Integration with the Main House: Alfrescos tend to integrate more seamlessly with the main house due to their shared roofing materials, creating a cohesive look. In contrast, verandahs offer a distinct aesthetic appeal by utilizing independent roofing materials.
  2. Aesthetic Variation: The choice of roofing material for alfrescos or verandahs can have a notable impact on the overall aesthetic of the outdoor structure. Colorbond steel exudes a modern and sleek appearance, while timber shingles provide a more traditional and rustic look.
  3. Durability and Maintenance: The selection of roofing materials also influences the durability and maintenance requirements of alfrescos and verandahs. Insulated panels offer enhanced insulation and energy efficiency for alfrescos, whereas corrugated iron may require more frequent maintenance for verandahs.

Level of Enclosure

For a clear distinction between an alfresco and a verandah regarding structural differences, consider the level of enclosure each outdoor space provides. An alfresco is typically more enclosed than a verandah, offering walls or privacy screens that provide a sense of coziness and protection. This enclosed structure allows for year-round use, shielding you from the elements while enjoying outdoor dining or entertainment. On the other hand, a verandah is more open, serving as a covered passage from indoors to outdoors. Verandahs are commonly used for relaxation and admiring the surroundings, creating a welcoming entry to your home. To better understand the differences, let's take a look at the comparison table below:

Aspect Alfresco Verandah
Level of Enclosure Enclosed with walls or screens More open with less enclosure
Year-round Use Suitable for all seasons May be less comfortable in extreme weather
Protection Offers protection from elements Provides minimal shelter from weather
Outdoor Dining Ideal for outdoor dining experiences Can be used for light meals or relaxation
Entertainment Great for hosting gatherings and events Suitable for relaxing and enjoying views

Alfresco or Verandah: Which to Choose?

outdoor living space options

Considering whether to opt for an alfresco or a verandah for your outdoor space can depend on your lifestyle preferences and desired functionality. Both options have their unique characteristics that cater to different needs. Here are some key points to help you make an informed decision:

  1. Functionality:
  • Alfrescos are ideal for adding an outdoor living space that seamlessly connects to your home, perfect for dining and entertaining.
  • Verandahs provide a covered area that serves as a connecting space between the indoors and outdoors.
  1. Design:
  • Alfrescos often feature outdoor kitchens, dining areas, and furniture, enhancing the outdoor living experience.
  • In contrast, verandahs offer a covered space for relaxation or small gatherings.
  1. Purpose:
  • While alfrescos focus on expanding your living area outdoors, verandahs primarily function as covered walkways or sitting areas.

Consider your lifestyle needs and desired functionality to determine which option best suits your home.

Outdoor Living: Alfresco Vs Verandah

comparing alfresco and verandah

When considering your outdoor living space, it's crucial to understand the specific characteristics of each option. Below is a comparison table highlighting key differences between an alfresco and a verandah:

Aspect Alfresco Verandah
Location Connected to the main house Along the front, back, or side of the house
Purpose Designed for dining and entertaining Serves as a connecting space between indoors and outdoors
Integration Offers a seamless look with the main house Can vary in size and shape
Features Often includes sliding doors for protection Typically has open sides for ventilation
Function Enhances the aesthetic value of the home Provides a covered area for relaxation and social gatherings

Understanding these distinctions can help you make an informed decision when planning your outdoor living space.

Alfresco Vs Verandah: Home Value Impact

outdoor living space comparisons

Understanding the impact on home value between an alfresco and a verandah is key when planning your outdoor living space. When considering whether to add an alfresco or a verandah to your home, here are some key points to keep in mind:

  1. Home Value Increase: Adding an alfresco can potentially raise your home's value by up to 20%, making it a lucrative investment for homeowners looking to increase their property's worth.
  2. Traditional Charm vs. Modern Appeal: While a verandah typically adds 12-15% to the value of a home, alfrescos are perceived as more modern and luxurious. The choice between the two can depend on whether you prefer traditional charm or modern appeal.
  3. Buyer Attraction: Both alfrescos and verandahs can enhance curb appeal and attract potential buyers. However, alfrescos, being more contemporary, might have a broader appeal to a modern buyer demographic.

Making the Choice: Alfresco or Verandah

outdoor living area options

When deciding between an alfresco and a verandah for your outdoor space, consider the primary function and desired aesthetic appeal of each option.

An alfresco is an outdoor living space connected to the main house, offering protection from the elements and customizable features like outdoor kitchens for dining and entertaining.

On the other hand, a verandah is a covered structure typically attached to the front, back, or side of a house, serving as a connecting space between indoors and outdoors, ideal for relaxation and enjoying the view.

The choice between an alfresco and a verandah depends on the function you envision for your outdoor living space. If you prioritize seamless integration with your main house and desire a space for hosting gatherings and meals, an alfresco might be the ideal option.

Advertisement

Conversely, if you seek a covered area for unwinding and appreciating the surroundings, a verandah could better suit your needs. Evaluate your preferences, location, and design goals to make an informed decision that complements your outdoor lifestyle.

Frequently Asked Questions

What Is Considered a Verandah?

When considering what is considered a verandah, think of a covered structure attached to a house, offering a sheltered outdoor space. It serves as an extension of the main roof, providing a cozy connection to the outdoors.

What Is the Difference Between a Veranda and a Verandah?

When distinguishing between a veranda and a verandah, note that they both provide covered outdoor spaces attached to a house. The key difference lies in spelling variations, with "veranda" being more common internationally and "verandah" in Australia.

What Is an Alfresco on a House?

An alfresco on a house is an outdoor living area designed for dining and entertaining. It seamlessly connects indoor and outdoor spaces under the main roof. Alfrescos provide protection from the elements and a cozy ambiance.

Is a Pergola and Verandah the Same Thing?

A pergola and a verandah are not the same thing. A verandah is attached to the main house with a covered roof, while a pergola stands freely with an open slatted roof for climbing plants.

Advertisement

Conclusion

In the end, choosing between an alfresco area and a verandah comes down to personal preference and lifestyle needs. Each option offers distinct design, functionality, and aesthetic features that cater to different outdoor living experiences.

Whether you opt for the open-air appeal of an alfresco or the traditional charm of a verandah, both can enhance your home's value and provide a delightful space for relaxation and entertainment. Make your choice wisely to create the perfect outdoor oasis for your home.

Continue Reading

Home Decor

Homemade Bird Nest Crafting: 3 Simple Steps

Prepare to take flight into the world of creative nesting, where natural beauty and personal touches come together in a unique decorative piece.

Published

on

crafting bird nests naturally

To craft a homemade bird nest, start by gathering natural materials like dried grass, twigs, and leaves from your yard or local parks. Next, mold the nest shape by wrapping angel hair vine filler around a bowl, securing it with thin wire. Finally, add decorative elements like feathers, dried flowers, or small twigs to enhance the natural look. Personalize your nest with ribbons, fabric scraps, or small ornaments to make it unique. With these three simple steps, you'll have a natural haven for birds and a stunning decorative piece for your home – and that's just the beginning of your creative journey.

Key Takeaways

• Gather natural materials like dried grass, twigs, and Spanish moss to mimic the bird's natural environment.

• Create a nest structure by wrapping angel hair vine filler around a bowl and securing it with thin wire.

• Add decorative elements like Easter eggs, feathers, and dried flowers to enhance the natural look.

• Personalize your bird nest with ribbons, fabric scraps, or small ornaments to make it unique.

Advertisement

• Experiment with different elements to unleash your creativity and make your DIY project special.

Gathering Natural Materials

Head outdoors to scour your yard, local parks, or online retailers for natural materials like dried grass, twigs, leaves, and Spanish moss that will give your DIY bird nest an authentic look. This is the first step in making a homemade bird nest that will attract birds to your backyard.

You'll want to gather materials that mimic the natural environment, allowing your DIY nest to blend in seamlessly. As you forage for materials, keep in mind the type of bird you're trying to attract, as different species have unique nesting preferences.

Once you've collected your materials, prepare your workspace by covering it with craft paper, wearing gloves, and working in a well-ventilated area to prevent mess. With your materials and workspace ready, you'll be set to start crafting your DIY bird nest, making it an inviting home for your feathered friends.

Crafting the Nest Structure

creating a cozy home

With your natural materials and workspace prepared, you're ready to start crafting the nest structure, the foundation of your DIY bird nest. This is the most essential step in creating a realistic bird nest, as it provides the base shape and form of the nest.

To craft the nest structure, follow these steps:

Advertisement
  • Wrap the angel hair vine filler around a bowl to mold the nest shape, using thin wire to secure it in place.
  • Continue wrapping the vine filler around the bowl, overlapping the layers to create a sturdy base.
  • Secure the sides of the nest together using thin wire, and trim any excess filler.
  • Once the nest is formed, carefully remove it from the bowl.

Adding Final Touches

creating a masterpiece together

You can now add the perfect finishing touches to your DIY bird nest by incorporating decorative elements that reflect your personal style and flair.

Add a pop of color and texture to your bird nest with decorative Easter eggs or faux bird eggs, which can be easily attached using a hot glue gun.

To enhance the natural look of your nest, incorporate feathers, dried flowers, or small twigs, which will add a touch of whimsy and authenticity to your decoration.

Consider adding a miniature nest or a tiny bird figurine to create a charming and unique centerpiece.

Experiment with different elements like ribbons, fabric scraps, or small ornaments to personalize and customize your bird nest decoration.

Don't be afraid to get creative and try out new ideas – after all, customization is what makes your DIY project truly special.

Advertisement

Frequently Asked Questions

How to Build a Bird Nest Step by Step?

When you're wondering how to build a bird nest step by step, start by gathering natural materials like twigs, grass, and feathers for an authentic look.

Next, use a bowl as a mold to shape the nest and hold it together with thin wire.

How to Make a Craft Nest for Kids?

When you're looking to make a craft nest for kids, start by gathering materials like construction paper, glue, a bowl, and a paintbrush.

Cut the paper into strips and layer them inside the bowl, coated with a glue and water mixture.

Encourage kids to experiment with different colors and textures to create a unique nest, adding details like eggs or birds for a realistic touch.

Advertisement

How Do Birds Build Nests for Kids?

You might wonder how birds build their nests, and it's fascinating to learn about their unique techniques. Birds collect materials like twigs, leaves, and mud, carefully arranging them to create a safe space for their eggs.

Some species weave intricate nests, while others dig simple depressions in the ground. By observing birds build nests, you'll appreciate their remarkable resourcefulness and adaptability in using their surroundings to create homes.

How to Make Birds Nest With Paper?

Are you curious about how to make a bird's nest with paper? You're in luck!

To create a realistic bird's nest, you'll need to cut paper strips about 1/4 inch thick, mix Elmer's glue with water, and arrange the strips criss-crossing inside a bowl lined with plastic wrap.

You can experiment with different colors and textures of paper to create a unique design.

Advertisement

Conclusion

As you carefully place the final twig, your homemade bird nest begins to resemble a cozy little home, a tribute to nature's intricate design.

Like a master weaver, you've intertwined twigs, leaves, and feathers to create a snug sanctuary, a symbol of hope and new life.

Just as the nest cradles its precious cargo, your creativity has given birth to something beautiful, a reminder that even the smallest acts of craftsmanship can hold profound significance.

Continue Reading

Trending