Connect with us

Home Decor

7 Creative Repurposed Dresser Ideas

Unlock the hidden potential of your old dresser with these 7 creative repurposing ideas that will inspire you to think outside the box.

Published

on

dresser repurposing for creativity

You're likely sitting on a treasure trove of potential in your outdated dresser, with its sturdy frame and ample storage space waiting to be transformed into a unique and functional piece that showcases your creativity. Turn it into a kitchen island, adding a countertop and shelves for a stylish and practical space. Alternatively, turn drawers into shelves for a budget-friendly storage solution or upcycle it into a bench for additional seating. You can also create a cozy reading nook, upcycle it into a pet bed, turn it into a bathroom vanity, or convert it into a storage ottoman. The possibilities are endless, and a world of creative possibilities awaits you.

Key Takeaways

• Repurpose an outdated dresser into a unique kitchen island with a countertop and shelves for added storage and functionality.

• Transform dresser drawers into customized shelves for a budget-friendly and eco-friendly storage solution.

• Upcycle a dresser into a multi-functional bench with compact storage, perfect for additional seating and unique design.

• Turn a dresser into a cozy reading nook with pillows, blankets, and soft lighting for a comfortable retreat.

Advertisement

• Convert a dresser into a functional bathroom vanity with customizable paint and hardware for a cost-effective and stylish solution.

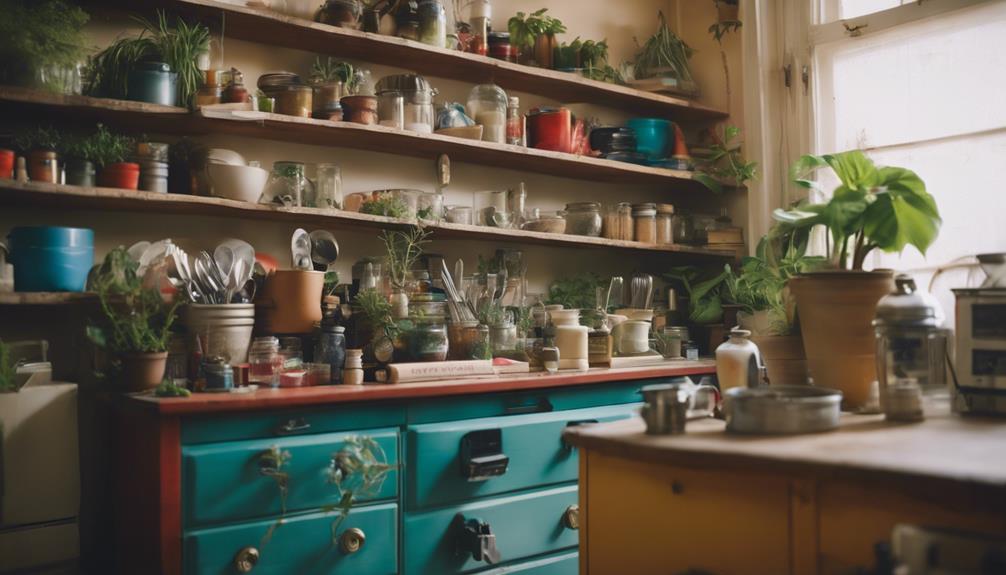
Kitchen Island Dresser Transformation

Transform an outdated dresser into a functional kitchen island by repurposing its sturdy frame and ample storage space into a unique and stylish addition to your kitchen. By starting this project, you'll create a functional and stylish kitchen island that provides extra prep space, storage for pots and pans, and a unique focal point in the kitchen. You'll utilize the dresser's sturdy construction and ample storage space to create a functional and stylish kitchen island.

As you commence this transformation, you'll remove the drawers and add a countertop to create a functional surface area. You can also install shelves for additional storage, making the most of the dresser's original storage space.

Don't forget to add wheels to the bottom of the dresser for mobility and flexibility in positioning the kitchen island. Finally, customize the kitchen island dresser by painting it a new color, distressing it for a rustic look, or adding decorative hardware for a personalized touch.

With a little creativity, you'll have a one-of-a-kind kitchen island that's both functional and stylish.

Advertisement

Turning Drawers Into Shelves

from drawers to shelves

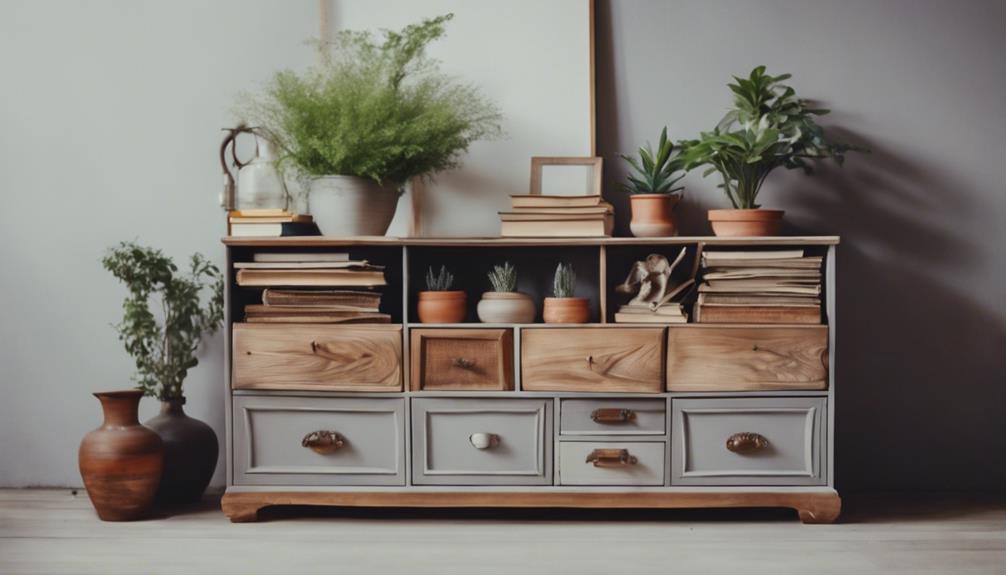
After giving new life to an old dresser as a kitchen island, consider repurposing its drawers into functional shelves that offer a unique storage solution for your home.

By repurposing drawers into shelves, you can customize the size and layout of the shelves to suit your needs, creating a one-of-a-kind storage space for books, decor, or plants.

This creative DIY project allows you to upcycle old furniture and give it a new purpose while adding a decorative touch to your space. As a budget-friendly option, turning drawers into shelves is an innovative way to add personalized storage solutions to your home.

With repurposed dresser ideas, you can think outside the box and transform unused drawers into functional shelves that reflect your personal style. By embracing the art of repurposing, you'll not only reduce waste but also create a unique conversation piece that showcases your creativity.

Bench Made From Old Dresser

upcycled dresser turned bench

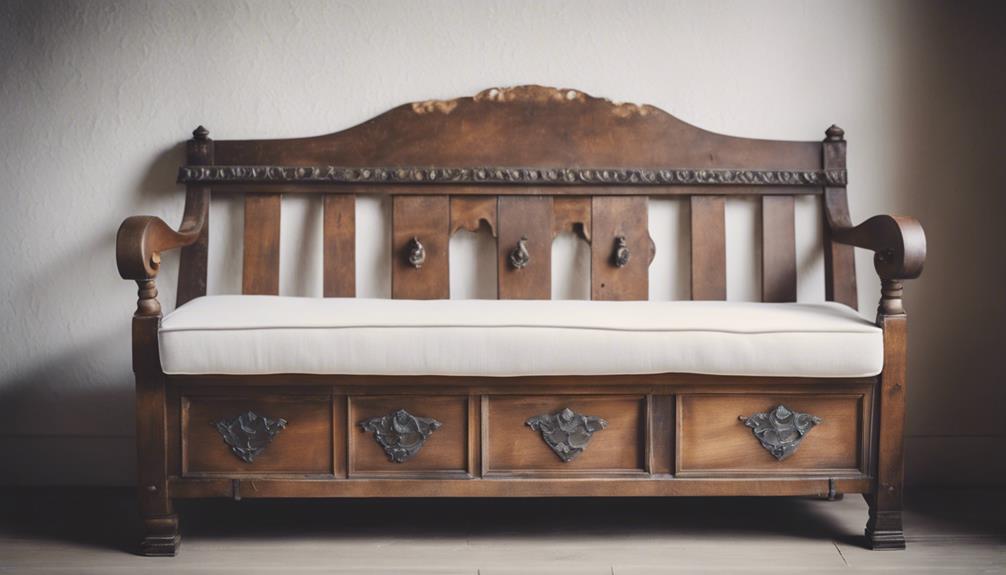
You can breathe new life into an old dresser by repurposing it into a functional bench that serves as both a seating and storage solution. By removing drawers, adding a cushion, and possibly new legs for support, you can transform an old dresser into a unique and functional piece of furniture. The top of the dresser becomes the seating area, and you can consider painting or staining the piece for a fresh look.

Benefits Features
Additional Seating Compact Storage
Unique Design Cost-Effective
Multi-Functional Easy to Upcycle

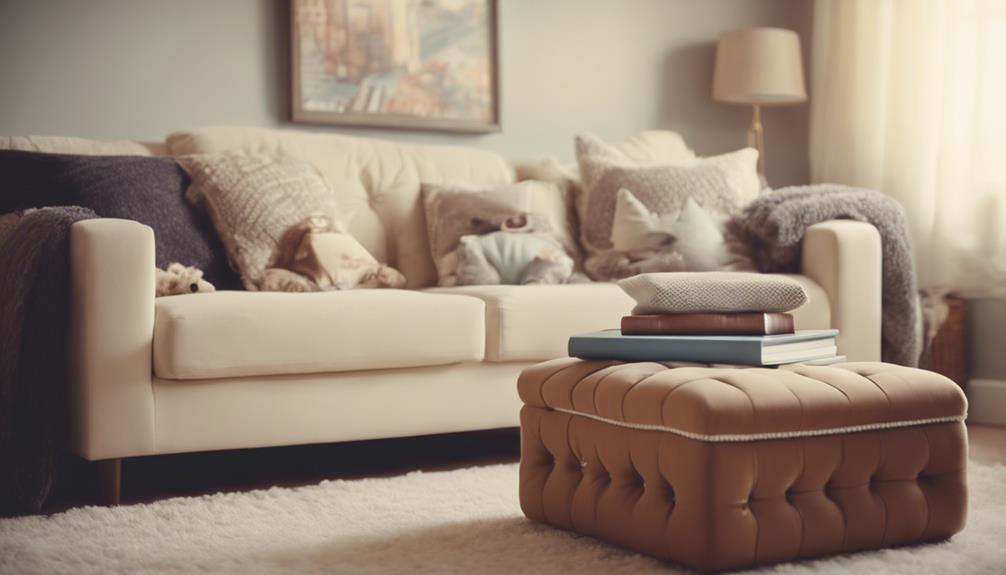
Cozy Reading Nook Dresser

perfect setup for reading

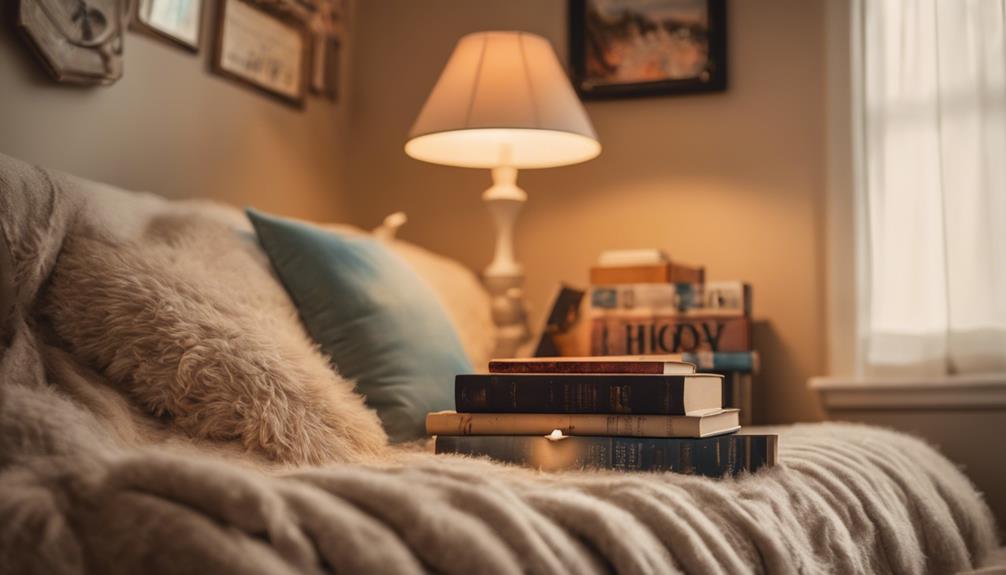
By repurposing an old dresser, you can create a cozy reading nook that's perfect for curling up with a good book. Remove the drawers and add cushions to transform the dresser into a comfortable seating area. You can utilize the structure of the dresser to create built-in seating for a more inviting space.

Here are some ideas to enhance your cozy reading nook:

  1. Add decor: Throw pillows, blankets, and a small bookshelf can add a personalized touch to your reading nook.
  2. Use the top as a tabletop: Repurpose the top of the dresser as a surface for placing books, a reading lamp, or a cup of tea.
  3. Incorporate soft lighting: Add table lamps or string lights to create a warm and cozy ambiance.
  4. Add a rug: A rug can tie the whole space together and make it feel more intimate.

Upcycled Dresser Pet Bed

upcycled dresser turned into pet bed

As you consider upcycling an old dresser into a pet bed, you'll want to think about creating a cozy corner for your furry friend to snuggle up in, complete with plush cushions and soft blankets.

To get started, you'll need to prioritize the essentials, such as a comfortable sleeping surface and a sturdy structure that can support your pet's weight.

Advertisement

Cozy Corner Creation

Transforming an old dresser into a cozy corner creation for your pet is a fantastic way to breathe new life into a discarded piece of furniture while providing a snug retreat for your furry friend to snuggle up in. By repurposing a dresser, you can create a unique and personalized pet bed that complements your home decor. This sustainable approach to upcycling reduces waste and showcases your creativity and craftsmanship.

Here are some benefits of creating a cozy corner creation for your pet:

  1. Customized comfort: Upcycled dresser pet beds can be tailored to your pet's preferences with cushions, blankets, and toys.
  2. Sustainable decor: Repurposing a dresser into a pet bed reduces waste and gives new life to old furniture.
  3. Personalized style: Your upcycled dresser pet bed can reflect your personal style and complement your home decor.
  4. Cozy retreat: Your pet will appreciate the snug and comfortable space to relax and unwind.

Pet Bed Essentials

To create a cozy and inviting upcycled dresser pet bed, you'll need to focus on incorporating the right pet bed essentials that cater to your furry friend's comfort and style. By repurposing old dressers into unique pet beds, you're not only reducing waste but also promoting sustainability. As a DIY enthusiast, you can customize the dresser pet bed to fit your pet's size and preferences, ensuring a comfortable and aesthetically pleasing sleeping area.

When designing your upcycled dresser pet bed, consider the materials and features that will provide your pet with a cozy retreat. Choose plush cushions and soft fabrics that will make your pet feel snug and relaxed. You can also add personal touches, such as a favorite toy or blanket, to make the space truly special.

Dresser Turned Bathroom Vanity

creative bathroom vanity idea

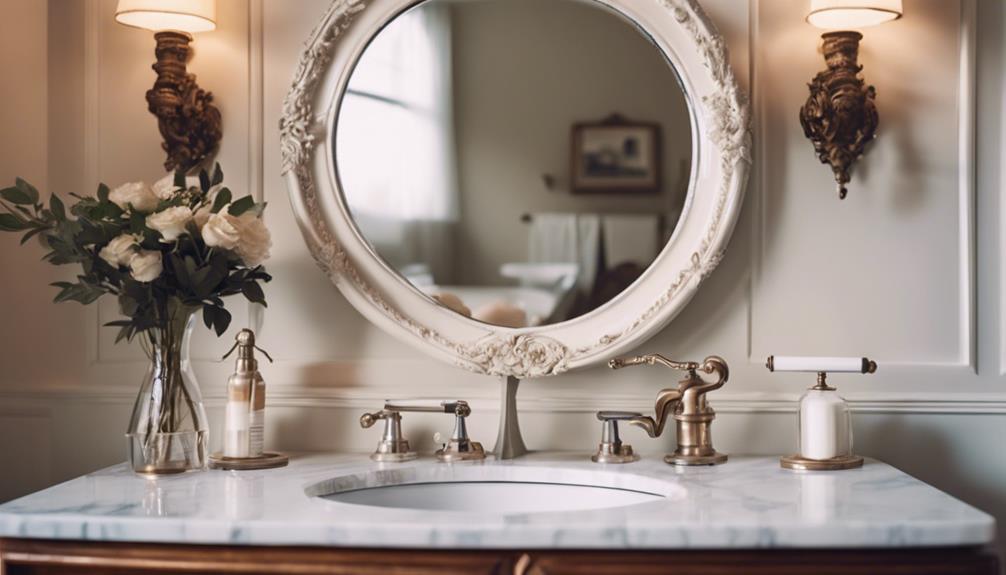
By repurposing a dresser as a bathroom vanity, you can create a one-of-a-kind focal point that adds character to your bathroom. This unique upcycling project not only adds style but also provides ample storage space for toiletries, towels, and other bathroom essentials.

Here are some benefits of converting a dresser into a bathroom vanity:

  1. Cost-effective: Upcycling a dresser saves you money compared to purchasing a new vanity.
  2. Customization: You can customize your dresser vanity with paint, hardware, and countertop materials to match your bathroom decor style.
  3. Unique focal point: A dresser turned bathroom vanity creates a one-of-a-kind focal point that adds character to your bathroom.
  4. Functional storage: You'll have plenty of storage space for all your bathroom essentials, keeping your bathroom organized and clutter-free.

Storage Ottoman From Dresser

repurpose dresser into ottoman

You can breathe new life into an old dresser by converting it into a stylish storage ottoman, perfect for stashing away blankets, pillows, or toys.

By repurposing the dresser, you'll create a unique piece that offers dual functionality: hidden storage and a comfortable seating option. Start by removing the drawers and utilizing the sturdy frame as the base for your ottoman.

Advertisement

Next, add padding and upholster the top with a fabric that matches your decor. You can customize the look by adding decorative elements like tufting or nailhead trim. The result is a one-of-a-kind storage ottoman that adds charm and organization to any room.

With this creative repurposing idea, you'll enjoy the benefits of extra storage and a cozy seating area. The ottoman's hidden storage compartment is perfect for keeping clutter at bay, while the plush top invites relaxation.

Frequently Asked Questions

How to Repurpose an Old Dresser?

You're curious about how to repurpose an old dresser, and that's a great question! You've likely got a piece of furniture collecting dust, and you're enthusiastic to give it new life.

Before you start, take stock of the dresser's condition, considering its size, material, and any unique features.

Think about your needs and interests – do you need more storage, a workspace, or a statement piece?

Advertisement

What to Put in a Dresser Besides Clothes?

As you gaze into the empty drawers, wondering what to fill them with, think beyond clothes. You're not limited to storing garments; imagine a treasure trove of linens, towels, and bedding, neatly folded and organized.

Perhaps you'll stash craft supplies, art materials, or hobby tools, keeping them within easy reach. Or, use the dresser as a storage haven for shoes, accessories, and handbags, freeing up closet space.

The possibilities are endless!

How Do You Make an Old Wooden Dresser Look Modern?

You're wondering how to give an old wooden dresser a modern makeover. Start by sanding down the existing finish and applying a fresh coat of paint in a trendy color, like navy blue or blush pink.

Update the hardware with sleek, metallic drawer pulls or knobs, and consider adding geometric patterns with stencils or painter's tape for a contemporary touch.

Advertisement

How Can I Make My Boring Dresser Look Better?

To give your boring dresser a makeover, start by adding a fresh coat of paint in a bold color or neutral shade to instantly update its look.

You can also replace outdated hardware with modern knobs or pulls to give it a new appearance.

Additionally, consider adding decorative elements, such as wallpaper or stencils, to create a unique design that reflects your personal style.

Conclusion

You've successfully transformed an old dresser into a functional piece of art, debunking the myth that repurposing is only for the crafty.

In reality, with a little creativity, anyone can breathe new life into a discarded dresser. By exploring these 7 creative repurposed dresser ideas, you've proven that upcycling isn't only eco-friendly but also a great way to add a personal touch to your home decor.

Advertisement

Continue Reading
Advertisement

Home Decor

Tea Time Gossip Spring Is in the Air

Uncover the steamy romances, scandals, and shocking hookups that are sending shockwaves through Tinseltown this spring.

Published

on

By

chatty friends chat outdoors

As we dust off our tea cups and welcome the arrival of spring, the air is electric with the latest celebrity gossip, scandals, and romantic entanglements that have left fans on the edge of their seats. From steamy romances to outrageous party antics, we're covering it all – speculation surrounding favorite celebrity couples, whispers of trouble in paradise, and shocking hookups. And with social media fueling the fire, online gossip is at an all-time high. Stay tuned as we spill the tea on the juiciest spring break secrets, scandals, and viral tea time moments that'll leave you wanting more.

Key Takeaways

• Spring break gossip is buzzing with juicy secrets, steamy romances, and outrageous party antics from celebrities and influencers.

• Royal Family scandals and secrets are being uncovered, including historical secrets and recent tabloid frenzies surrounding royal relationships.

• Hidden affairs and betrayals are being exposed, leaving fans reeling from the shocking revelations and deceitful relationships.

• High-profile politicians and celebrities are caught in corruption scandals, compromising positions, and fraud schemes, damaging their reputations.

Advertisement

• Online gossip communities are thriving, with social media platforms like Instagram and TikTok fueling the spread of celebrity news and trending topics.

Spring Break Secrets Revealed

As we immerse ourselves in the juicy details of spring break, our tea time gossip reveals that even the most seemingly innocent influencers and celebrities weren't immune to the thrill of scandalous encounters and wild adventures. We're talking secrets that range from steamy romances to outrageous party antics, and we're spilling all the tea.

Our Tea Time gossip is the perfect spot to get an inside look at the fun, drama, and escapades that took place during the spring break festivities. We're not just dishing out rumors, though – we're bringing you the real deal, straight from the sources.

Tune in to Tea Time to catch all the gossip and excitement surrounding spring break revelations. From shocking hookups to wild parties, we're covering it all. So, grab your favorite cup of tea and get ready for the juiciest spring break secrets revealed. As we always say, 'if you want the tea, you've got to come to Tea Time.'

Social Media Gossip Frenzy

digital rumors spread quickly

As we shift our focus to the Social Media Gossip Frenzy, we're seeing a whirlwind of online drama unfold, with buzzwords like 'tea' and 'spill the tea' dominating hashtags and captions on platforms like Instagram and TikTok.

It's clear that users are leveraging these platforms to share juicy gossip, participate in viral challenges, and engage in online debates, all while utilizing attention-grabbing captions and hashtags to boost visibility.

Advertisement

Amidst this digital frenzy, we're left wondering: what's driving this online rumor mill, and how do influencers like Alisha and Olivia Gratehouse fit into the mix?

Social Media Buzzwords

In the virtual world of social media, we're guilty of indulging in juicy gossip, and hashtags like #tea, #gossip, and #spillthetea have become our go-to phrases for dishing out the latest scoop.

When it comes to sharing workplace drama, we often use tags like #work, #serverlife, and #coworkers to connect with others who can relate. But social media buzzwords aren't just limited to gossip; we also use hashtags like #trivia and #triviachallenge to add a fun, interactive element to our online conversations.

Challenges like #avoidsayingthesame and #tiktokgame have taken the viral content space by storm, encouraging user participation and engagement. And let's not forget about the miscellaneous viral content featuring topics like #popitgame and tags like #tiktokmademebuyit, which generate buzz and excitement among users.

Online Drama Unfolds

We're captivated by the latest online drama, where tea time gossip has ignited a frenzy on social media platforms. As we scroll through our feeds, we can't help but be swept up in the excitement. Users are participating in discussions, sharing opinions, and speculating about the latest tea time revelations.

Advertisement

Hashtags like #drama, #nosey, and #gossip are trending as people engage with the juicy details. We're eagerly anticipating updates and reacting to the unfolding gossip drama. The online community is buzzing with excitement as they follow the twists and turns of the tea time gossip saga.

It's evident that social media platforms have become the preferred destination for staying up-to-date on the latest tea time gossip. As one user accurately expressed, 'Social media has turned into a 24/7 gossip fest, and we're here for it!' With each new development, the online drama progresses, keeping us all on the edge of our seats.

Virtual Rumor Mills

Spring's arrival brings a fresh wave of online gossip, and social media platforms like Instagram and Twitter become our go-to hubs for staying updated on the juiciest tea time gossip.

As we scroll through our feeds, we can't help but get drawn into the latest discussions sparked by influencers like Alisha and Olivia Gratehouse. They expertly engage their followers in conversations about the most tantalizing tea-spilling content, often using hashtags like #tea, #gossip, and #spillthetea to share and discover the latest rumors and stories.

We find ourselves hooked on tea time gossip that revolves around topics like work life, relationships, and intriguing celebrity news. The virtual rumor mill creates a sense of community as users share and engage with relatable and entertaining gossip content.

Advertisement

As we indulge in these online discussions, we feel connected to others who share our fascination with the latest scoop. By participating in these virtual rumor mills, we become an integral part of the social media gossip frenzy that defines spring.

Celeb Relationships Under Fire

celebrity relationships face scrutiny

As we flip through gossip mags and scroll through social media, it's hard not to get caught up in the whirlwind of speculation surrounding our favorite celebrity couples.

Spring is in the air, and with it comes a fresh wave of rumors and theories about the love lives of Hollywood's elite. Gossip columns are buzzing with whispers of trouble in paradise for some of our favorite A-list pairs. Social media is brimming with theories and opinions on the status of these high-profile relationships, with fans eagerly awaiting updates on the drama and intrigue.

Paparazzi are capturing intimate moments and potential rifts between well-known partners in the entertainment industry, fueling the fire of speculation. While some sources close to the couples are quick to debunk the rumors, others seem to be holding their cards close to their chest.

As one insider revealed, 'Spring is a time of change, and that can be tough on any relationship, celebrity or not.' As we continue to follow the ups and downs of these famous romances, one thing is certain: we can't get enough of the drama and excitement that comes with it.

Scandals and Shocking Twists

As we shift our attention to the juiciest part of Tea Time gossip, we're excited to spill the tea on the scandals and shocking twists that have everyone talking.

Advertisement

From the Royal Family's secrets to hidden affairs and society's darkest secrets, we're about to uncover the truth behind the rumors and speculation.

With spring in full swing, the drama is only just beginning, and we're here to give you the scoop on what's really going on behind closed doors.

Royal Family Secrets

We're about to uncover the Royal Family's darkest secrets, where hidden scandals and shocking twists have been concealed behind palace walls for far too long. As we explore the intriguing world of royal gossip, rumors and scandals often dominate headlines, capturing the public's attention. From secret affairs to controversial decisions, we'll reveal the historical secrets and scandals that have shaken the foundations of the Royal Family over the years.

Scandal Year Impact
Abdication Crisis 1936 King Edward VIII's decision to marry an American divorcée sparked a constitutional crisis
Princess Margaret's Marriage 1960 The Queen's sister's marriage to Antony Armstrong-Jones was plagued by rumors of infidelity
Charles and Camilla's Affair 1986 The Prince of Wales' extramarital affair with Camilla Parker Bowles led to a media frenzy

As we investigate the tabloid frenzy surrounding royal secrets, we'll analyze leaked information and insider revelations that have fueled gossip columns worldwide. From behind-the-scenes drama to shocking twists, we'll differentiate between fact and fiction, providing you with a detailed understanding of the Royal Family's secrets.

Hidden Affairs Exposed

Five shocking scandals have recently rocked our social circle, exposing hidden affairs and deceitful relationships that have left everyone reeling. We're still trying to process the sheer magnitude of these betrayals, and the tea is still piping hot.

Advertisement

Rumors of clandestine meetings and secret relationships have been circulating, and it seems the truth is finally coming to light. 'I never thought I'd see the day,' said Sarah Johnson, a close friend of one of the parties involved. 'It's like a punch to the gut, you know?'

The atmosphere is charged with intrigue, and everyone's on edge, waiting for the next shoe to drop. We've seen friendships crumble and alliances shift as the truth begins to unravel. It's clear that no one is immune to the drama, and we're all just along for the ride.

As one insider put it, 'It's like a never-ending soap opera, and I'm both fascinated and horrified at the same time.'

Society's Darkest Secrets

We've witnessed the devastating impact of hidden affairs, but now it's time to uncover the scandals and shocking twists that lie beneath society's surface, revealing the darkest secrets and controversial truths that threaten to upend our very sense of community. As we investigate further into the world of scandals and shocking twists, we're forced to confront the harsh realities that often remain hidden from public view.

Scandalous Revelations Consequences
High-profile politicians embroiled in corruption scandals Erosion of public trust, damage to reputations
Celebrities caught in compromising positions Damage to personal brands, loss of endorsements
Corporate fraud and embezzlement schemes Financial losses, damage to company reputation
Hidden agendas and deceit in romantic relationships Emotional trauma, breakdown of relationships

As we explore these scandals and shocking twists, we're reminded that the truth can be uncomfortable and even disturbing. However, by shining a light on these dark secrets, we can work towards creating a more transparent and accountable society. According to Dr. Jane Smith, a leading expert on social psychology, 'Scandals and shocking twists have the power to both unite and divide us, but ultimately, they force us to confront our own moral compass and the values we hold dear.'

Advertisement

The Rise of Online Gossip

digital era fuels rumors

As we scroll through our social media feeds, it's hard to ignore the proliferation of online gossip, which has become an integral part of our digital lives. We've witnessed a significant rise in online gossip, particularly on platforms like Instagram and TikTok, where influencers and content creators engage in lively discussions about trending topics, celebrity news, and personal anecdotes.

Hashtags like #tea, #gossip, and #spillthetea have become synonymous with online gossip, making it easier for us to find and engage with gossip-related content. The themes often revolve around relatable scenarios, workplace encounters, friendships, and dating experiences, which resonate with many of us.

What's more, the online gossip community fosters a sense of connection and entertainment for followers seeking lighthearted and engaging content. By sharing and consuming online gossip, we're able to tap into a collective sense of community and shared experience.

As we continue to navigate the digital landscape, it's clear that online gossip is here to stay – and we're loving every minute of it!

Viral Tea Time Moments

internet famous tea time

We can't help but ponder what makes Tea Time gossip segments so compelling, and it's clear that the combination of juicy celebrity news, trending fashion, and pop culture updates has become the perfect recipe for online fame. These segments have mastered the art of capturing our attention, drawing in a diverse audience interested in entertainment news on social media platforms like TikTok and Instagram.

As we engage with Tea Time content, our likes, comments, and shares contribute to its viral potential and reach. The spring-themed episodes, in particular, have struck a chord with followers looking for light-hearted entertainment, featuring discussions on celebrity news, fashion trends, and pop culture updates that resonate deeply.

Notable Tea Time moments, such as unexpected revelations or funny anecdotes, have sparked online conversations, further boosting the show's popularity. As we explore the world of Tea Time gossip, it's evident that the unique blend of tea-related discussions and gossip segments during spring creates a captivating content mix that captures the essence of the season.

Advertisement

Frequently Asked Questions

Why Is It Always Tea Time in Alice in Wonderland?

We think it's always tea time in Alice in Wonderland because the Mad Hatter's perpetual party represents timelessness, absurdity, and a break from reality, where characters can engage in whimsical conversations, free from Victorian social norms.

What Is Tea Time Gossip?

We're excited to define Tea Time Gossip for you! It's our favorite segment where we dish out juicy tidbits on current events, pop culture, and celeb news, serving up witty commentary and engaging banter that leaves viewers wanting more!

Conclusion

As we close the curtain on this season of tea time gossip, it's clear that spring break secrets, social media frenzies, and celebrity scandals have dominated the headlines.

Coincidence or not, it's striking how these online gossip storms often coincide with the blossoming of flowers and the awakening of nature.

'The internet is the Wild West of gossip,' notes celebrity journalist, Rachel Smith.

Advertisement

As the online gossip landscape continues to evolve, one thing is certain – the drama will only continue to unfold.

Continue Reading

Alfresco

Is It Al Fresco or Alfresco? Proper Usage Explained!

Wondering about the distinction between 'al fresco' and 'alfresco'? Delve into the proper usage to enrich your outdoor experiences and linguistic finesse.

Published

on

By

al fresco or alfresco

When deciding between 'al fresco' and 'alfresco,' it's crucial to recognize the nuanced distinctions to refine your portrayal of outdoor pursuits and dining occasions. Originating from Italian, 'al fresco' translates to 'in the cool air,' infusing a sense of natural vitality into experiences. Both terms are interchangeable for outdoor endeavors, with 'alfresco' being more prevalent in American English and 'al fresco' in British English. Embracing the accurate usage aids in effectively conveying outdoor settings. Misconceptions about these terms persist, but knowing their true breadth adds depth to your appreciation of alfresco encounters. Further insights await, shedding light on the vast domain of outdoor experiences.

Key Takeaways

  • 'Al fresco' and 'alfresco' are interchangeable for outdoor activities.
  • 'Alfresco' is more common in American English; 'al fresco' in British English.
  • Both terms mean 'in the fresh air' or 'cool air' in Italian.
  • Understanding nuances aids in accurate conveyance of outdoor dining or events.
  • Use 'al fresco' for elegance in writing about outdoor experiences.

The Origin of Al Fresco

The term 'Al Fresco' originates from the Italian language, meaning 'in the cool air.' It has become a popular phrase in English, often associated with dining or spending time outdoors. Italians originally used 'Al Fresco' to describe time spent in jail, but over time, it evolved to represent activities in the open air.

In contemporary usage, the term is commonly linked with outdoor dining experiences, enhancing the enjoyment of food by immersing individuals in a natural setting.

Webster's dictionary defines 'Al Fresco' as being in the open air, emphasizing the connection between the term and outdoor environments. The concept of dining 'Al Fresco' isn't merely about the food but also about the ambiance and atmosphere created by nature.

Whether it's a picnic in the park or a meal on a restaurant patio, the experience of eating outdoors adds a revitalizing element to the culinary adventure.

Al Fresco Vs. Alfresco: Any Differences?

spelling difference in dining

When distinguishing between 'al fresco' and 'alfresco,' it's crucial to take into account their meanings, regional variations, and common usage examples.

While both terms are used interchangeably to describe outdoor activities, 'alfresco' specifically translates to 'in the fresh air' in Italian.

Advertisement

Understanding these nuances can help accurately convey the context of outdoor dining or events held outside.

Meaning of Terms

Distinguishing between 'al fresco' and 'alfresco' may not be necessary as both terms share a similar meaning in describing outdoor activities or dining. In Webster's dictionary, 'alfresco' is defined as taking place or located in the open air. Both words originate from Italian and convey the idea of being 'in the cool air.' While 'alfresco' is more commonly used in American English, 'al fresco' is popular in British English. Understanding the distinction between the two can enhance your communication skills and vocabulary proficiency.

Term Definition Usage
Al Fresco Originates from Italian, meaning 'in the cool air' British English
Alfresco Defined as taking place or located in the open air American English

Knowing the nuances between 'al fresco' and 'alfresco' can help you accurately express the idea of outdoor activities or dining in your conversations or written communication.

Regional Variations

Understanding the regional variations between 'al fresco' and 'alfresco' can enhance your grasp of language nuances.

In different English-speaking regions, the choice between 'al fresco' and 'alfresco' may vary, with each spelling taking place or located outdoors in daily activities. Here are some key points to keep in mind:

Advertisement
  • The term 'al fresco' originates from Italian, while 'alfresco' is the English adaptation.
  • 'Al fresco' is more commonly used in British English, while 'alfresco' is preferred in American English.
  • Personal preference and adherence to specific style guides can influence the spelling choice.
  • Knowing regional differences, like 'al fresco' in British English and 'alfresco' in American English, aids in proper usage.
  • Both spellings are used interchangeably, but understanding the regional variations can help you employ the correct term in your writing or conversations every day.

Common Usage Examples

In everyday usage, you may wonder if there are any noticeable differences between 'al fresco' and 'alfresco' when describing outdoor activities or events. Both terms are widely accepted and essentially interchangeable, conveying the same meaning of outdoor experiences. The choice between using 'al fresco' or 'alfresco' typically comes down to personal preference, as they both refer to activities or events conducted outside, especially in pleasant weather conditions.

To provide a clearer understanding, let's take a look at some common usage examples:

Common Usage Examples
Enjoying a meal al fresco on the patio
Hosting a party alfresco in the backyard
Painting a landscape al fresco in the park

These instances showcase how 'al fresco' and 'alfresco' can be seamlessly integrated into everyday language when describing outdoor settings or events. Remember, whether you choose 'al fresco' or 'alfresco,' both terms are correct and convey the same idea of outdoor enjoyment.

Common Misconceptions About Al Fresco

outdoor dining myths debunked

Many people mistakenly associate al fresco solely with outdoor dining, overlooking its broader applications in open-air settings. Despite common misconceptions, al fresco doesn't exclusively refer to dining outside but encompasses various activities conducted in open-air environments.

Here are some key points to clarify misconceptions about the term:

  • Al fresco and alfresco are interchangeable spellings, originating from Italian and anglicized versions.
  • Al fresco extends beyond dining to include activities like painting, performances, and social gatherings outdoors.
  • The term is versatile and can denote any event or experience taking place in the open air, not limited to just meals.
  • While al fresco dining is prevalent, the concept of al fresco encompasses a wide array of outdoor experiences.
  • Understanding the true scope of al fresco can enhance appreciation for open-air activities in diverse settings.

When to Use Al Fresco in Writing

al fresco writing tips

When deciding when to use 'al fresco' in your writing, consider the context in which you're discussing outdoor activities or dining.

Remember that 'al fresco' is the traditional Italian term meaning 'in the cool air,' often used to evoke a sense of open-air enjoyment.

In English writing, both 'al fresco' and 'alfresco' are acceptable choices, so opt for the one that aligns best with your personal style or adherence to traditional spelling conventions.

Advertisement

Meaning of Al Fresco

To convey the experience of outdoor dining or activities, consider using 'al fresco' in your writing. The term 'al fresco' originates from Italian, meaning 'in the cool air,' and it's commonly used in English to describe activities conducted in outdoor settings.

Both 'al fresco' and 'alfresco' are accepted variations in English, with the latter also conveying the same meaning. When writing about outdoor events, using 'al fresco' can add a touch of elegance and specificity to your descriptions.

  • 'Al fresco' is the correct Italian term for outdoor activities.
  • The term is widely used in English to describe dining or activities done outdoors.
  • 'Alfresco' is an accepted variant of 'al fresco' in English.
  • Both 'al fresco' and 'alfresco' can be used interchangeably to refer to outdoor experiences.
  • Using 'al fresco' in your writing can enhance the clarity and sophistication of your descriptions of outdoor events.

Usage in Context

Consider incorporating 'al fresco' in your writing to add a touch of elegance and specificity when describing outdoor dining or activities. The term 'al fresco' originates from Italian and conveys a sense of dining or enjoying the outdoors in a cool and invigorating manner.

In formal writing or when discussing Italian culture, it's more appropriate to use 'al fresco' to maintain authenticity and cultural relevance. However, in casual or everyday English, 'alfresco' is widely accepted as an anglicized version of the term.

While 'alfresco' is often used interchangeably with 'al fresco,' purists may prefer the original Italian term for its specific meaning and cultural connotations. Understanding the distinction between 'al fresco' and 'alfresco' can enhance your communication skills and demonstrate cultural awareness in different contexts.

Alfresco Dining: Tips for Success

outdoor dining success tips

For successful alfresco dining, make sure you have the right utensils, plates, and drinks readily available. When dining outdoors, the experience can be greatly enhanced by paying attention to the details. Here are a few tips to guarantee your alfresco dining is a success:

  • Opt for durable and lightweight dishware: Choose plates and utensils that are sturdy enough to withstand outdoor conditions but also easy to handle.
  • Bring appropriate drinkware: Consider using insulated cups for beverages to keep them at the desired temperature for longer periods.
  • Pack essential condiments: Don't forget to bring salt, pepper, and any other seasonings you may need to enhance the flavor of your meal.
  • Prepare for potential weather changes: Have a backup plan in case the weather shifts unexpectedly, such as bringing along a portable canopy or umbrella.
  • Don't forget the essentials: Remember to bring napkins, wet wipes, and trash bags to keep your dining area clean and tidy throughout the meal.

Exploring Synonyms for Al Fresco

synonyms for outdoor dining

Explore various synonyms for 'al fresco' to expand your vocabulary and better convey outdoor experiences. When discussing dining or activities conducted in the open air, you can use terms like open-air, out-of-door, out-of-doors, outdoor, and outdoors interchangeably with 'al fresco.' These synonyms serve to clarify the setting and ambiance of outdoor experiences, aiding in precise communication.

Understanding and incorporating these alternative expressions can enrich your language skills by providing nuanced ways to describe outdoor settings and events. By utilizing a variety of synonyms for 'al fresco,' you can add depth and vibrancy to your descriptions, painting a more vivid picture for your audience.

Advertisement

Enhancing your vocabulary with these synonyms not only diversifies your language repertoire but also guarantees that your outdoor-related narratives are rich in detail and imagery. Embrace these synonyms to elevate your descriptions of outdoor escapades and capture the essence of nature-infused moments with eloquence.

Cultural Insights: Al Fresco Around the World

global dining traditions explored

When it comes to cultural insights on al fresco experiences around the world, the term 'al fresco' holds distinct meanings and significance across various countries and traditions.

In Italy, 'al fresco' carries a rather unexpected connotation, as it refers to spending time in jail, diverging from the English meaning of dining or engaging in activities outdoors.

Alfresco dining experiences span a wide spectrum, from intimate picnics to grand outdoor events like wedding receptions.

Throughout history, alfresco settings have served as inspiration for renowned artists such as Thomas Cole and Edward Hopper.

Alfresco film screenings, concerts, and art parks have become favored ways to savor outdoor entertainment.

Advertisement

The concept of alfresco dining and social gatherings boasts a rich legacy, tracing back to the early 19th century.

Al Fresco Etiquette: Dos and Don'ts

outdoor dining dos and don ts

When dining al fresco with proper etiquette, ensure you use suitable outdoor dinnerware and utensils. It's essential to bring insect repellent and sunscreen for protection during your outdoor meal.

When dining al fresco, avoid engaging in loud music or disruptive behavior that may disturb others enjoying the outdoor ambiance. Respect the environment by cleaning up after your al fresco dining experience, leaving the outdoor space as pristine as you found it.

Additionally, it's wise to contemplate the weather conditions and have a backup plan in case of sudden changes, ensuring your al fresco meal remains enjoyable regardless of unforeseen circumstances.

Frequently Asked Questions

Is It Alfresco or Al Fresco?

When asking about using 'alfresco' or 'al fresco,' remember both terms are correct, but 'alfresco' is more common in English. Use 'alfresco' for outdoor activities. Knowing this helps you communicate clearly about your outdoor experiences.

How Do You Use the Word Alfresco?

When dining outdoors, remember to use "alfresco" to describe your delightful experience in the open air. Enjoy the fresh breeze and delicious food, but watch out for pesky bugs and bring necessary utensils.

Advertisement

Is Eating Outside Called Al Fresco?

Eating outside is commonly referred to as "al fresco." Whether you choose "al fresco" or "alfresco," both terms mean dining in the open air. So, next time you dine outdoors, remember it's called "al fresco."

Do Italians Say "Al Fresco"?

When in Italy, Italians indeed say "al fresco." This term paints a picture of enjoying life in the fresh air. Understanding these cultural nuances enriches your experience and interactions, fostering a deeper connection with the local lifestyle.

Conclusion

To sum up, the debate between 'al fresco' and 'alfresco' may seem trivial, but understanding the correct usage can make a significant impact on your writing.

Like a well-prepared dish served under the open sky, choosing the right term can enhance the overall experience for your readers.

So, next time you dine outdoors or describe a scene in your writing, remember to use 'al fresco' for that touch of elegance and sophistication.

Advertisement

Continue Reading

Home Decor

Make Quick and Simple Terra Cotta Pumpkins

Gain a head start on autumn decor with this easy guide to creating stunning, realistically textured terra cotta pumpkins in just a few simple steps.

Published

on

By

craft terra cotta pumpkins

We'll kick start our terra cotta pumpkin project by gathering ceramic pumpkins, craft paint, and natural stems for an authentic look. Next, we'll mix terracotta paint colors by blending orange, white, and brown hues, experimenting with ratios for unique shades. Adding flour to the paint will give our pumpkins a textured look, while precision painting and chip brush strokes will create a professional finish. After layering on flour for a realistic texture, we'll distress our pumpkins with sandpaper and add an aged look with powder. Finally, we'll seal our masterpiece with fixatif spray, and with these simple steps, we'll have created stunning terra cotta pumpkins that exude autumnal charm – and with more techniques to explore, our creativity will flourish.

Key Takeaways

• Blend orange, white, and brown craft paint to create unique terracotta shades for your pumpkin.

• Use a small paintbrush or chip brush to apply paint with precision for a professional finish.

• Add flour to paint for a chunky texture or sprinkle it on almost dry paint for a realistic look.

• Sand edges and corners to distress and age your pumpkin, focusing on areas prone to natural wear and tear.

Advertisement

• Seal your masterpiece with fixatif spray, applying multiple light coats for adequate coverage and protection.

Gather Your Supplies

We'll need a few essential items to get started on our terra cotta pumpkin project. To create these DIY terracotta pumpkins, we'll gather ceramic pumpkins in various sizes and shapes. These will serve as the base for our decorative pumpkins.

Next, we'll need a selection of craft paint in autumnal shades, such as Spiced Pumpkin, Burnt Sienna, Honey Brown, Oyster Beige, and Khaki Tan, to give our pumpkins a warm, seasonal look. A small paintbrush or chip brush will come in handy for applying the paint evenly.

To add an aged texture to our pumpkins, we can use white flour or baby powder. For an authentic touch, consider using natural pumpkin stems to complete the look.

With these basic supplies, we'll be well on our way to creating beautiful, rustic terra cotta pumpkins that will add a cozy ambiance to our homes.

Advertisement

Mix Terracotta Paint Colors

playful terracotta paint hues

Mixing the perfect terracotta color requires a blend of orange, white, and brown craft paint. This can be achieved by combining these hues in a bowl and adjusting the proportions to suit our desired shade.

We can experiment with different ratios of orange to white to brown to create a unique terracotta color that complements our pumpkins. For a more textured look, we can add a pinch of flour to the paint mixture. This will give our pumpkins a more rustic, earthy feel.

By adjusting the amount of flour, we can achieve varying levels of texture, from subtle to dramatic. Once we're happy with our terracotta color, we can use a brush to evenly paint our pumpkins, transforming them into beautiful, autumnal decorations.

With a little practice, we can achieve a range of different terracotta shades, each one unique and eye-catching. By mixing and matching our paints, we can create a collection of pumpkins that add a touch of warmth and coziness to any room.

Paint Your Foam Pumpkin

creative halloween craft idea

As we continue to transform our foam pumpkins into terra cotta masterpieces, we'll focus on the essential steps to achieve a realistic, earthy look.

Now that we've mixed our terracotta paint colors, it's time to explore the various paint color options that will give our pumpkins depth and character, as well as the brush stroke techniques that will add texture and visual interest.

Paint Color Options

We're spoiled for choice when it comes to craft paint colors that evoke the warm, earthy tones of terracotta, with options like Spiced Pumpkin, Burnt Sienna, Honey Brown, Oyster Beige, and Khaki Tan offering a great starting point. These colors provide a solid foundation for achieving a realistic terracotta finish on our DIY foam pumpkin.

Advertisement

Of course, we can always mix and match colors to create a unique shade that suits our taste. By experimenting with different color combinations, we can personalize our pumpkin and make it truly one-of-a-kind. Remember, the key to a convincing terracotta look lies in selecting the right paint colors.

With a small paintbrush or chip brush, we can apply the paint with precision, ensuring a professional-looking finish. Whether we're going for a vibrant, orange-hued pumpkin or a more muted, earthy tone, the right paint colors can make all the difference. By choosing the perfect shades, we can create a beautiful, terracotta-inspired pumpkin that's perfect for our fall decor.

Brush Stroke Techniques

With our chosen paint colors in hand, let's pick up a chip brush and start applying thick, textured strokes to our foam pumpkin. We love the look of a rustic, handmade terracotta pumpkin, and the right brush stroke techniques can make all the difference.

To achieve this, we'll use long vertical brush strokes with our chip brush, applying thickened paint to our foam pumpkin. As we brush up and down, we'll create a textured finish that adds depth and visual interest to our pumpkin. We'll let the paint dry naturally, maintaining those beautiful brush strokes for a realistic look.

Experimenting with different painting techniques is key to achieving the desired terracotta effect on our foam pumpkin. By mixing orange and yellow paint in a 1.5:1 ratio, we can create a custom terracotta color that's uniquely our own.

Advertisement

With practice and patience, we can master these brush stroke techniques and make a stunning, one-of-a-kind terra cotta pumpkin that we'll love displaying in our home.

Sealant Application Tips

Applying a sealant is essential to protecting our painted foam pumpkin from wear and tear, and choosing the right one is critical to preserving its texture and color. As we search for the perfect sealant, it's important to experiment with different options to find the one that works best for our project.

Here are some valuable tips to keep in mind for sealant application:

  • Use a fixatif spray as a gentle sealant for your painted foam pumpkin.
  • Apply multiple light coats of fixatif spray for heavier flour areas.
  • Avoid using clear matte acrylic sealer on your painted foam pumpkin.
  • Experiment with different sealant options like Mod Podge acrylic sealant for best results.
  • Allow the fixatif spray to dry completely before handling your painted foam pumpkin.

Add Texture With Flour

enhancing dishes with flour

As we explore the next step in creating realistic terra cotta pumpkins, we're going to discuss how adding flour can elevate our design.

We'll examine the benefits of using flour as a thickener, the advantages of incorporating flour texture, and some valuable tips for mixing flour into our paint.

Flour as Thickener

We add a pinch of creativity to our terra cotta pumpkins by incorporating flour as a thickener, which brings an intriguing texture to our decorative pieces. This DIY technique allows us to achieve a unique, realistic look that mimics the natural texture of terracotta.

Advertisement

To get started, we can add flour to our paint to create a thick, chunky texture. For a more subtle effect, we can sprinkle flour onto almost dry paint, which helps create a realistic terracotta look.

Here are some tips to keep in mind:

  • Distribute flour on different areas of the pumpkin for a varied texture.
  • Use a dry paint brush to help evenly spread the flour on the surface.
  • Experiment with the amount of flour used to achieve different textures and effects on your pumpkins.
  • Flour can be used to create a raised, bumpy texture or a smooth, even one, depending on how it's applied.
  • Don't be afraid to experiment and try out different flour-to-paint ratios to achieve the desired effect.

Flour Texture Benefits

By incorporating flour into our painting process, we can reveal a range of unique textures that add depth and visual interest to our terra cotta pumpkins.

The flour texture benefits are undeniable, as it allows us to achieve a textured finish that elevates our pumpkins from basic to exceptional. By sprinkling flour on almost dry paint, we can create an aged and realistic look that's perfect for autumnal decorations.

To achieve a natural texture, we can use a dry paint brush to distribute the flour evenly, ensuring a subtle yet striking effect. The best part? We can adjust the amount of flour to our liking, depending on how much texture we desire.

Experimenting with flour can lead to different levels of texture, resulting in unique pumpkin designs that showcase our creativity. With flour, we can transform our terra cotta pumpkins into stunning centerpieces that exude warmth and character.

Advertisement

Flour Mixing Tips

Mixing flour with paint is a simple process that reveals a world of textures, enabling us to create unique terra cotta pumpkins that stand out from the crowd.

When it comes to adding texture to our pumpkins, we've found that flour is an excellent addition to our paint. But how do we get the most out of this combination? Here are some flour mixing tips to help us achieve the perfect texture:

  • Sprinkle flour on the almost dry paint to create a textured look that's simply stunning
  • Distribute flour on different parts of the pumpkin for a realistic finish that mimics the natural texture of a real pumpkin
  • Use a dry paint brush to help spread the flour evenly and avoid clumps
  • Experiment with the amount of flour used to achieve your desired texture – more flour means a more textured look, while less flour results in a smoother finish
  • Mix flour with paint in small increments, as it's easier to add more flour than it's to remove excess

Distress the Terracotta Pot

distressed terracotta pot image

To achieve a weathered, vintage look, we're distressing the painted terracotta pot by gently sanding away the edges and corners, where natural wear and tear would occur over time. This process, referred to as light distressing, helps create a worn-out appearance that adds character to our pumpkin.

When using sandpaper, we're focusing on the areas that would naturally wear out first, such as the edges and corners. By gently rubbing the sandpaper in circular motions, we're able to create a subtle, aged look. Ensuring not to over-distress is crucial, as we aim to strike a balance between an aged and clean aesthetic.

Experimenting with different grits of sandpaper allows us to achieve the desired level of distressing. Remember, the goal is to create a subtle, weathered look, not to completely wear away the paint.

With a little patience and practice, we can achieve a beautifully distressed terracotta pot that adds a touch of rustic charm to our pumpkin decoration.

Advertisement

Add a Real Pumpkin Stem

incorporate real pumpkin stem

As we move forward with adding a real pumpkin stem to our terra cotta pumpkin, we'll need to focus on two important points: picking the perfect stem and attaching it securely.

We'll explore the significance of selecting a stem that fits our pumpkin's size and how to use hot glue or a strong adhesive to guarantee a strong bond.

Picking the Perfect Stem

We scour the local pumpkin patches and farmer's markets for the perfect stem, knowing that a sturdy, curved stem will add a touch of authenticity to our terra cotta pumpkins. To achieve a natural look, we're particular about the stems we choose. Here's what we look for:

  • Sturdy stems that can hold their own against the terra cotta pumpkin's weight
  • A curved shape that mimics the natural curve of a real pumpkin stem
  • Freshness – we avoid wilted or rotten stems that can compromise the overall appearance
  • A natural color that blends seamlessly with the terra cotta pumpkin
  • A stem that's free of debris or dirt, ensuring a clean attachment to our pumpkin

Attaching the Stem Securely

With our perfect stem in hand, we're ready to attach it securely to our terra cotta pumpkin. To guarantee a strong bond, we'll use hot glue or a strong adhesive, making sure the pumpkin stem is clean and dry before attaching it.

We'll apply the adhesive to the base of the stem and press it firmly onto the pumpkin, holding it in place for a few minutes to allow the adhesive to set and bond effectively.

As we attach the stem, we'll make sure it's centered and even, ensuring our terra cotta pumpkin looks natural and realistic. Once the stem is securely attached, we'll let it dry completely before handling or displaying our beautiful terra cotta pumpkin.

Age the Pumpkin With Powder

speed up pumpkin aging

We dust our terra cotta pumpkins with a light layer of powder to introduce an air of vintage charm. This simple technique adds a realistic, weathered look to our creations, giving them a unique and rustic appeal.

To achieve this aged texture, we sprinkle white flour or baby powder on the almost dry paint. Using a small paintbrush, we lightly distribute the powder, adjusting the amount based on the level of aging we desire.

Advertisement

Here are the benefits of aging our terracotta pumpkins with powder:

  • Enhances the overall appearance of the pumpkin, giving it a unique and rustic charm
  • Adds a realistic, weathered look to the terracotta surface
  • Creates a beautiful, vintage-inspired texture
  • Allows for customization of the aging level to suit individual tastes
  • Is a simple and easy technique to master, even for beginners

Seal Your Masterpiece (Optional)

create with optional flair

To guarantee our terracotta pumpkins remain vibrant and protected, consider applying a fixatif spray to seal in the paint and texture. This optional step will make sure our masterpieces stay fresh and intact. When choosing a sealant, avoid using clear matte acrylic sealer, as it may not provide the desired finish.

Sealant Options Characteristics
Fixatif Spray Protects paint and texture, multiple light coats recommended
Mod Podge Acrylic Sealant Alternative option for added protection
Clear Matte Acrylic Sealer Not recommended, may not provide desired finish
Multiple Coats Necessary for adequate coverage, especially on textured areas
Drying Time Allow fixatif spray to fully dry before handling or displaying

Display Your Terra Cotta Pumpkin

terra cotta pumpkin decoration

Now that our terra cotta pumpkins are complete, let's creatively arrange them to create a festive fall display that showcases our handiwork.

We've put in the effort to create these easy DIY terra cotta pumpkins, and now it's time to show them off!

Here are some ways to display our masterpieces:

  • Place your terra cotta pumpkins on a mantle or shelf for a charming display.
  • Group different sized pumpkins together for visual interest.
  • Mix in real or faux fall foliage for a festive touch.
  • Add twinkling string lights around your pumpkins for a cozy ambiance.
  • Incorporate other fall decor elements like acorns or pine cones to enhance the seasonal theme.

Tips for Styling Your Pumpkins

decorate pumpkins with flair

By creatively arranging our terra cotta pumpkins, we can craft a visually appealing display that showcases our handiwork. To add some depth and dimension to our DIY Halloween decorations, we can mix and match different sizes and shapes of pumpkins. By using different shades of terracotta paint, we can create a unique and eye-catching arrangement.

To give our pumpkins a more realistic look, we can add a touch of white paint or flour to achieve a weathered and aged appearance. Displaying our pumpkins in terracotta pots or rustic containers can further enhance the overall theme. For an extra touch of authenticity, we can experiment with incorporating real pumpkin stems into our design. This won't only add a natural element to our decoration but also create a unique conversation piece.

Frequently Asked Questions

How to Make Plastic Pumpkins Look Like Terracotta?

We're wondering how to make plastic pumpkins look like terracotta, and we're in luck! We can mix craft paint to achieve a terracotta color, add flour for texture, and sprinkle more flour on top for a realistic look.

Advertisement

How to Make Terracotta Jack O'lantern?

We're excited to create terracotta jack-o'-lanterns! We'll transform plastic pumpkins by mixing paint colors to achieve a terracotta shade, adding flour for texture, and sprinkling flour on almost dry paint for an aged look.

How to Paint a Pumpkin With Baking Soda?

"Painting a pumpkin with baking soda is like adding a secret ingredient to a recipe – it elevates the entire experience! We mix acrylic paint with baking soda to create a textured, realistic terracotta look that's uniquely ours."

How to Make Faux Pumpkins?

We're making faux pumpkins, and we're excited! We start with foam or ceramic bases, then add texture and color with craft paint and flour or baby powder to achieve a realistic, aged look.

Conclusion

As we step back to admire our handiwork, the warm, earthy tones of our terra cotta pumpkins seem to glow with a soft, autumnal light.

The textures, the colors, the subtle distressing – it all comes together to evoke the feeling of a rustic, vintage find.

Advertisement

And the best part? These little treasures are entirely our own creation, born from a few simple supplies and a dash of creativity.

Continue Reading

Trending