
Set up smart home devices, connect them to a compatible hub or app, and create a simple automation such as turning on a light at sunset. This guide is for beginners setting up a few devices in a home with reliable Wi-Fi. Allow 45-90 minutes, depending on how many devices you add and whether any need firmware updates.

Get furniture and decor delivered free with Prime
- Fast, free delivery on millions of items
- Prime Video, Amazon Music and more included
- Member-only deals all year

Hubitat Elevation C-8 Pro Smart Home Hub
- ✔ Model: C-8 Pro
- ✔ Protocols: Matter 1.5, Z-Wave 800 Series with Long Range, Zigbee 3.0, Bluetooth
- ✔ Processing: Local

Lutron Caseta Smart Dimmer Starter Kit with Smart Hub, Dimmer Switch, and Pico Remote
- ✔ Included items: Smart Hub, Dimmer Switch, Pico Remote, Wall Plate Bracket
- ✔ Connectivity: Proprietary Clear Connect (Wi-Fi free)
- ✔ Compatibility: Alexa, Apple HomeKit, Google Home, Ring, Sonos, Samsung SmartThings
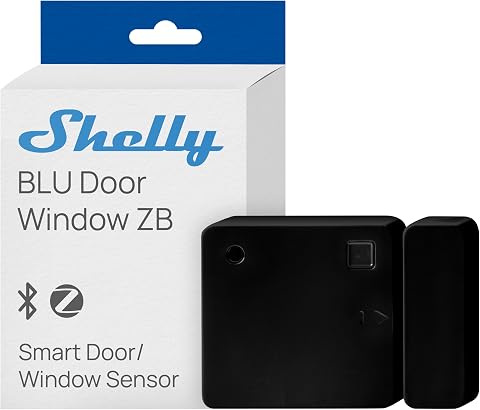
Shelly BLU Door/Window Sensor, Black, Zigbee and Bluetooth
- ✔ Connectivity: Zigbee and Bluetooth
- ✔ Power source: Battery powered
- ✔ Battery type: Lithium-ion (nonstandard type)
Difficulty: Beginner | Time: 45-90 minutes
What You’ll Need
Tools & Materials:
- Smart home devices, such as a smart bulb, plug, sensor, or switch
- Manufacturer apps for your devices and the smart home platform you plan to use
- A phone or tablet with Bluetooth and Wi-Fi
- Home Wi-Fi network name and password
- A compatible hub, if required by your devices
Knowledge:
- Basic use of a phone or tablet
- Ability to connect a device to your home Wi-Fi
Check each device’s packaging or product page for supported platforms, Wi-Fi bands, hub requirements, and electrical ratings. Some devices use Matter, Thread, Zigbee, or a manufacturer-specific system. Devices need a shared platform or compatible hub to work together in one automation. Keep your Wi-Fi password available, and install devices near the router during setup.
Hubitat Elevation C-8 Pro Smart Home Hub
The Hubitat Elevation C-8 Pro is the strongest overall choice when the goal is to make devices from different parts of a smart home work together. It supports Matter, Z-Wave, Zigbee, and Bluetooth, so buyers have more room to choose sensors, switches, and other compatible gear instead of building around one narrow ecosystem. Its local processing is especially relevant to automation: routines can continue to run even when internet access is down, which gives it an advantage over a sensor or lighting kit that depends on another system to coordinate broader actions.That flexibility comes with a learning curve. The AI-assisted routine builder may help, but advanced Rule Machine features still make this a more hands-on platform than the Lutron Caseta kit. Lutron is easier to understand if all we need is reliable dimming and remote control for a light circuit; Hubitat makes more sense when we want a central brain for multiple devices. Its two external antennas are designed to extend wireless reach, and the platform has no subscription requirement. We should still check that our existing devices and desired integrations are supported, since a hub’s protocol list alone does not guarantee every device feature will be available.
Pros:
- Runs automations locally, including when internet access is unavailable
- Supports Matter, Z-Wave, Zigbee, and Bluetooth devices
- Works with Alexa, Google Home, Apple HomeKit, and Ring integrations
- No recurring subscription is required for platform features
Cons:
- Advanced automations can take time to configure
- Requires compatible devices to build useful routines
Best for: We recommend it for smart home owners who want local routines and a central hub for compatible devices using several wireless protocols.
Not ideal for: Skip it if you only want a quick lighting upgrade or prefer a system that needs little configuration.
Bottom line: Choose Hubitat when we want the broadest automation foundation in this lineup and are willing to spend time setting it up.
“Choose Hubitat when we want the broadest automation foundation in this lineup and are willing to spend time setting it up.”
Lutron Caseta Smart Dimmer Starter Kit with Smart Hub, Dimmer Switch, and Pico Remote
For buyers who want lighting to respond to schedules, voice commands, or a remote, the Lutron Caseta Smart Dimmer Starter Kit is the most direct fit in this comparison. Its key practical advantage is that the wall dimmer does not require a neutral wire, which can simplify installation in older homes where that wire may be missing from the switch box. The included Pico remote also gives us a wireless control point for a multi-location setup without running additional wiring. This makes Caseta more purpose-built for a lighting circuit than the broader Hubitat hub.Caseta uses its own hub and Clear Connect connection rather than Wi-Fi, helping keep its lighting link separate from the home network. It supports Alexa, Apple HomeKit, Google Home, Ring, Sonos, and Samsung SmartThings, so it can fit into several larger setups. The tradeoff is that it is a focused system: compared with Hubitat, it does not provide the same multi-protocol automation center. We also need to account for the missing wall plate and the 150W dimmable LED limit per dimmer. Buyers should confirm the light load and circuit are suitable before selecting it.
Pros:
- No neutral wire required for installation
- Dedicated hub provides Wi-Fi-free Clear Connect connectivity
- Pico remote supports wireless multi-location control
- Compatible with major voice assistants and smart home platforms
Cons:
- Requires the proprietary Lutron Hub
- Wall plate is not included
- Limited to a 150W dimmable LED load per dimmer
Best for: We recommend it for homeowners upgrading an existing dimmable light circuit, particularly where the switch box lacks a neutral wire.
Not ideal for: Skip it if you want one hub to coordinate a wide range of sensors and devices, or if the LED load exceeds the dimmer limit.
Bottom line: Choose Caseta when reliable retrofit dimming matters more than having a general-purpose automation hub.
“Choose Caseta when reliable retrofit dimming matters more than having a general-purpose automation hub.”
Shelly BLU Door/Window Sensor, Black, Zigbee and Bluetooth
The Shelly BLU Door/Window Sensor is the specialist pick: it detects changes at a door, window, gate, or garage door and can feed those events into an automation. Its small, battery-powered design suits locations where a wired contact would be awkward, while tilt-angle and luminosity readings provide more context than a simple open-or-closed trigger. For example, those measurements may be useful when setting up routines around a tilted garage door or changing light conditions, provided the rest of the system supports the desired action.Unlike Hubitat, Shelly is not the central coordinator in this trio, and unlike Caseta, it does not directly control a lighting circuit. It needs a gateway; compatible Shelly Plus, Pro, Gen3, and Gen4 devices can serve that role. That makes it a sensible add-on for buyers already in the Shelly ecosystem, but a less straightforward first purchase for someone starting from scratch. The advertised battery life of up to five years reduces routine maintenance, though actual life depends on use, and the battery type is described as nonstandard. We should check replacement availability before mounting it somewhere inconvenient.
Pros:
- Supports Zigbee and Bluetooth connectivity
- Measures tilt angle and luminosity as well as opening events
- Battery life is listed as up to five years
- Compact form suits doors, windows, gates, and garage doors
Cons:
- Requires a gateway for use
- Uses a nonstandard battery type
Best for: We recommend it for buyers with a compatible Shelly gateway who want compact, battery-powered door, window, gate, or garage sensing.
Not ideal for: Skip it if you need a standalone automation hub or do not have a compatible gateway.
Bottom line: Choose Shelly BLU as a compact automation trigger when a compatible gateway is already part of our setup.
“Choose Shelly BLU as a compact automation trigger when a compatible gateway is already part of our setup.”
As an Amazon Associate we earn from qualifying purchases.
Before You Start
Protect your account and network. Use a unique password for the smart home account, turn on two-factor authentication if available, and install app and device updates. Do not connect a device that requires an electrical load beyond its rated capacity. For wired switches or fixtures, turn off power at the breaker and follow the manufacturer’s instructions; hire a qualified electrician if you are unsure.
Start with one device, confirm it works in its own app, and then add the rest. This makes setup problems easier to isolate.
Step-by-Step Instructions
Pick the platform you will use to control devices, such as Apple Home, Google Home, Amazon Alexa, or a manufacturer’s system. Check that every planned device works with that platform, either directly or through a compatible hub. If you are mixing brands, look for the same Matter support or confirm compatibility in the platform’s device list before buying.
Tip:A device can connect to Wi-Fi and still be incompatible with your chosen platform. Check the exact model, not just the brand.
Check: You can identify the app or hub that will control every device you plan to automate.
Step 2: Prepare the network and accounts
Install the platform app and each device’s required manufacturer app from your phone’s app store. Sign in or create accounts with unique passwords. Confirm your phone is connected to your home Wi-Fi and Bluetooth is enabled. If your router combines 2.4 GHz and 5 GHz bands, follow the device instructions; many smart devices require 2.4 GHz during setup.
Tip:Do not share your Wi-Fi password through an untrusted link or message. If your router has a guest network, use it only if device discovery and control work correctly from your phone.
Check: The apps open, you can sign in, and your phone has a stable connection to the home network.
Step 3: Add the hub, if your setup needs one
Plug in the compatible hub, connect it to power and the network as directed, then open its app and follow the setup prompts. Place the hub in a central location away from thick walls, enclosed cabinets, and sources of interference. Allow any initial update to finish before pairing devices.
Tip:Some hubs use Ethernet while others connect over Wi-Fi. Use the connection type specified for your model.
Check: The hub appears online in its app and reports that setup or updates are complete.
Step 4: Install and pair one device
Place or install your first device according to its instructions. For a plug or bulb, connect it to power; for a battery sensor, insert the battery. Open the manufacturer app or your platform app, choose its add-device option, and scan the setup code or follow the pairing prompts. Give the device a clear name such as “Hallway Lamp.”
Tip:Keep the phone close to the device during pairing. Avoid factory resets unless the app’s setup instructions call for one.
Check: The device appears online in the app, has a recognizable name, and responds to a manual on/off or status check.
Step 5: Add the remaining devices
Repeat the pairing process for each device, one at a time. Assign each one to the correct room and use names that distinguish similar devices, such as “Kitchen Counter Plug” and “Kitchen Ceiling Light.” If the platform offers device sharing or linking, connect the manufacturer account or hub as instructed so the devices appear in the same control system.
Tip:Do not rename devices while an automation is being created. Finish naming and room assignment first to reduce confusion.
Check: Every device appears in the chosen platform, shows the right room, and responds to a manual control.
Step 6: Create a simple automation
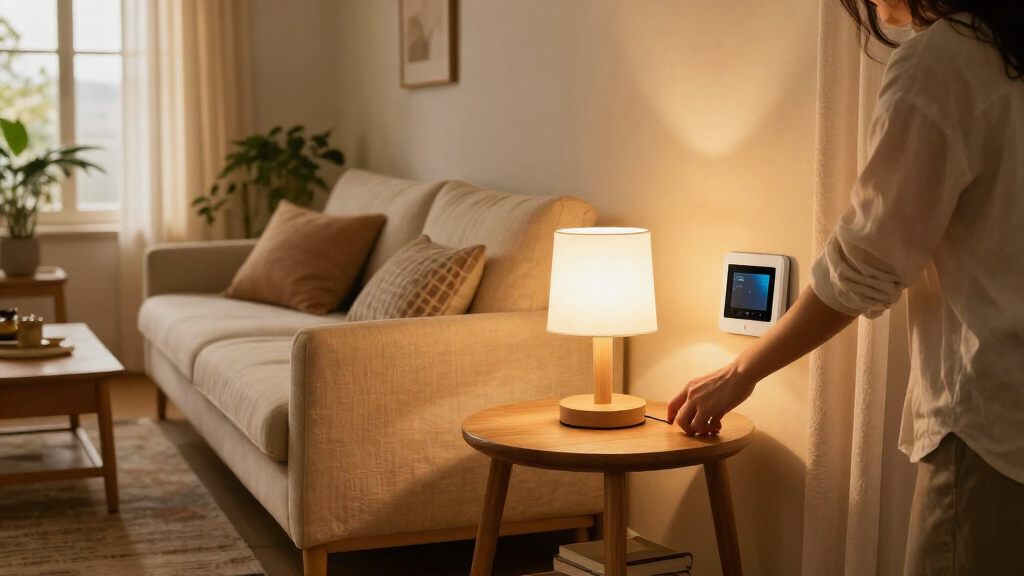
Open the platform’s Automations, Routines, or Scenes section and choose to create one. Select a clear trigger, such as sunset, a schedule, or a motion sensor detecting movement. Add one action, such as turning on a lamp, then select the exact device and set its desired state or brightness. Choose which days or conditions apply, and save the automation.
Tip:Start with a single trigger and action. Add more conditions only after the basic routine works.
Check: The automation is listed in the app with the trigger, target device, and action you intended.
Step 7: Test the automation and adjust it
Use the app’s test or run option if available. Otherwise, wait for the trigger or temporarily choose a near-term schedule, then restore the intended schedule after testing. Confirm the device performs the action. Adjust timing, room, or sensor placement if the result is late or inconsistent.
Tip:If the routine depends on motion, walk through the sensor’s coverage area and check that pets, sunlight, or nearby movement do not cause unwanted activation.
Check: The trigger causes the correct device to perform the expected action, and the routine remains enabled for the intended schedule.
Common Mistakes to Avoid
- Buying devices that do not work together in the chosen platform. — Check the exact device model’s compatibility and hub requirements before purchase; confirm that mixed-brand devices can appear in one app.
- Pairing a device on an unsupported Wi-Fi band or with a weak signal. — Follow the manufacturer’s network requirements and pair near the router or hub before moving the device to its final location.
- Using vague device names or assigning a device to the wrong room. — Name each device by location and purpose, then verify its room before building automations.
- Creating a complex routine before checking basic device control. — Test each device manually first, then build and test an automation with one trigger and one action.
Troubleshooting
Problem: The app cannot find the device during pairing.
Solution: Check that the device has power and is in pairing mode, enable Bluetooth and location permissions if requested, and move the phone closer. Confirm the Wi-Fi band requirement. Restart the app and retry; reset the device only as its instructions describe.
Problem: The device pairs but shows offline or does not respond.
Solution: Check power, Wi-Fi coverage, hub status, and any router settings that block local device discovery. Move the device or hub temporarily closer to the router. Restart the device and app, then check for firmware updates.
Problem: The device appears in its own app but not in the main platform.
Solution: Confirm that the platform supports the model. In the platform app, use its add-device or link-account flow, scan the Matter code if applicable, or connect the required hub. Make sure both apps use the correct account and home.
Problem: The automation does not run at the expected time or trigger.
Solution: Check that it is enabled, the correct days and time zone are selected, and the intended device is targeted. For location or sunset triggers, verify that the home address and location permissions are correct. Run a manual test and review any activity history the app provides.
What Success Looks Like
Your devices appear online in the same control platform, have clear names and correct room assignments, and respond to manual controls. At least one saved automation runs from its selected trigger and produces the expected device action. Check the app’s status or activity history after the test if available.
Next Steps
Use the system for a few days and adjust schedules or sensor placement if actions happen too early or too often. Review account security, enable automatic updates where supported, and remove devices you no longer use from the account. Add devices gradually, testing each one before including it in a routine. For wired installations or devices controlling heating, locks, or other safety-sensitive equipment, follow the product’s specific installation and access controls.
Frequently Asked Questions
Do all smart home devices need a hub?
No. Some connect directly to Wi-Fi or Bluetooth, while others require a hub for control or for connection to a platform. Check the model’s instructions and compatibility details before setup.
Can I use devices from different brands in one automation?
Often, yes, if both devices are supported by the same platform or compatible hub. Matter can help with cross-brand support, but check that each specific model supports the features you need.
Why does a smart device need 2.4 GHz Wi-Fi?
Many small smart devices use 2.4 GHz because it offers broad coverage and their radios support that band. Follow the device’s setup directions; some newer models support other network options.
Can I control devices when I am away from home?
Remote control depends on the device, hub, platform, and internet connection. Enable the platform’s remote access feature and account security settings, then test control while your phone is using cellular data.
What should I automate first?
Choose a low-risk task with a clear result, such as turning on a lamp at a set time or sunset. Confirm the device responds reliably before automating locks, heating, or other equipment with greater consequences.