Connect with us

Home Decor

Creating Your Own Tropical Escape at Home

Witness the transformation of your backyard into a vibrant tropical oasis, complete with lush plants, soothing water features, and cozy seating areas.

Published

on

tropical paradise in home

We're bringing the tropical vacation vibe into our backyards, with over 70% of homeowners considering outdoor spaces essential, according to the National Association of Landscape Professionals. To create our own tropical escape at home, we consider sunlight, soil type, and climate zone for plant selection, factoring in care and maintenance needs. We design with water features for a lush landscape, aiming for a functional and sustainable tropical garden. By mixing different plant species, incorporating water features, and creating cozy seating areas, we can achieve a vibrant and tranquil oasis. As we explore further, we'll uncover even more secrets to crafting our ultimate tropical retreat.

Key Takeaways

• Consider sunlight, soil type, and climate zone when selecting plants for your tropical garden to ensure their survival and thrive.

• Incorporate a mix of foliage plants, flowering plants, and ground covers to create a lush and vibrant garden.

• Design your tropical landscape with layers of foliage, varying heights, and textures to create a balanced and diverse look.

• Incorporate water features, such as ponds or fountains, to add visual interest and create a tranquil atmosphere.

Advertisement

• Add natural elements, such as bamboo benches and rattan furniture, to create a cozy outdoor seating area that complements your tropical garden.

Planning Your Tropical Oasis

As we embark on creating our tropical getaway, we must first take into account the unique conditions of our yard, including climate, sunlight levels, and soil type to choose the perfect tropical plants that will thrive in our outdoor space.

When planning our tropical sanctuary, we need to factor in elements such as the climate zone we're in, as this will dictate which plants will flourish and which will struggle. We must also contemplate the care and maintenance needs of the plants we choose, ensuring we can provide the necessary attention to keep them healthy.

Designing a tropical backyard requires thoughtful consideration, incorporating water features and layers of tall trees, midsize shrubs, and low-lying plants to create a lush and diverse landscape. By taking these aspects into account, we can create a tropical paradise that transports us to a tropical state of mind.

As we plan our oasis, we must remember that 'a well-designed tropical garden isn't just visually appealing, but also functional and sustainable' (Tropical Garden Design). By keeping these elements in mind, we can create a truly unforgettable tropical escape.

Advertisement

Selecting the Right Plants

choosing the perfect garden

We'll start by choosing the stars of our tropical show, selecting plants that will thrive in our unique outdoor conditions and create a lush, vibrant atmosphere. When it comes to tropical landscaping, we want a mix of height, texture, and color to achieve a balanced and visually appealing design. For a lush and vibrant tropical garden, we'll choose tropical plants like palms, elephant ears, bird of paradise, and ginger.

Plant Type Description
Foliage Plants Provide lush, vibrant foliage, e.g., palms, elephant ears
Flowering Plants Add pops of color, e.g., orchids, bromeliads
Ground Covers Add texture and visual interest, e.g., liriope, mondo grass

Creating Layers of Foliage

artistic exploration of nature

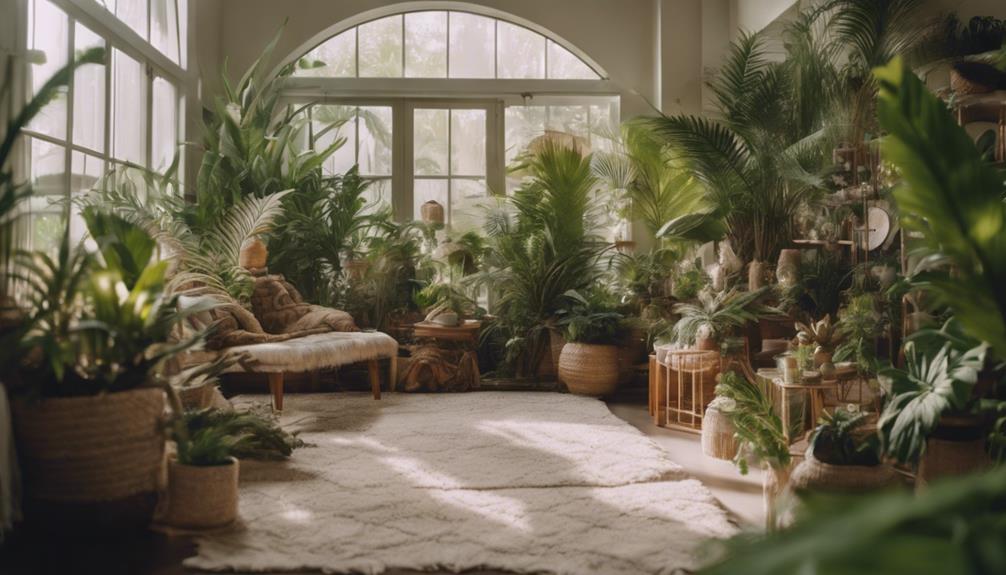
By combining plants of varying heights, textures, and colors, we can create a lush, multi-dimensional landscape that transports us to a tropical paradise. When it comes to creating layers of foliage, we're not just limited to a single type of plant. We can mix and match different species to achieve a diverse look that's reminiscent of a tropical jungle.

For instance, tall trees like palms or bamboo provide a canopy, while midsize shrubs like hibiscus add color and structure. Meanwhile, low-lying plants such as ferns and ground covers fill in gaps and create a dense, jungle-like atmosphere. Large-leaf plants like elephant ears or philodendrons add visual interest and a tropical rainforest feel to the garden.

Incorporating Water Features

enhancing spaces with water

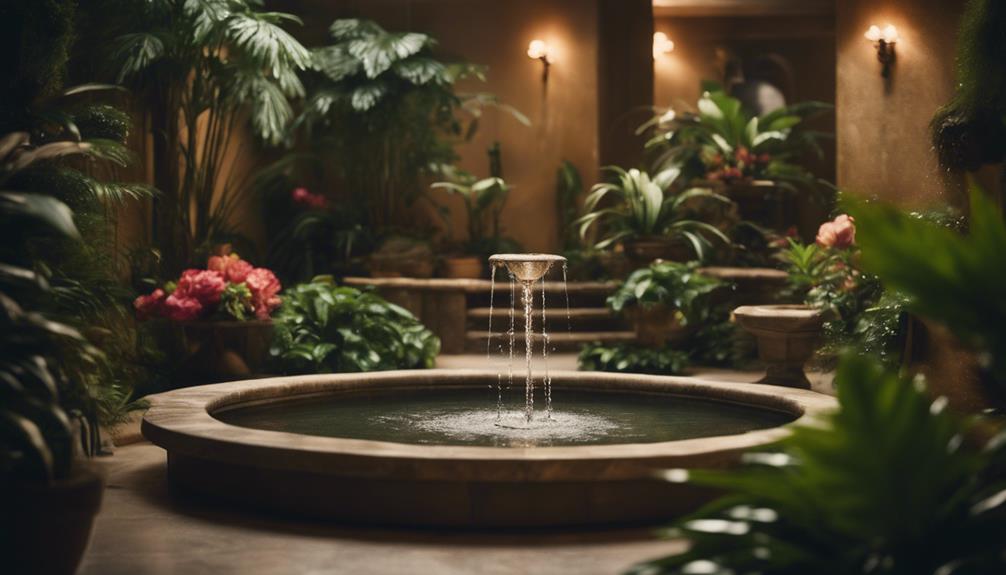
To take our tropical escape to the next level, we're incorporating water features that not only soothe our senses but also create a thriving ecosystem. Ponds, for instance, can be a serene addition to our tropical garden, especially when adorned with aquatic plants like water lilies and lotus.

Adding fish like koi or goldfish not only enhances visual interest but also contributes to the ecosystem of our tropical oasis. We're also considering incorporating cascading waterfalls, babbling brooks, or fountains to create movement and a sense of tranquility.

By designing our water features to provide a habitat for wildlife, we can attract birds and butterflies, adding dynamic elements to the space. Whether it's a small fountain or a large pond, water features can serve as focal points in our tropical garden, enhancing the overall tropical paradise experience with their beauty and sound.

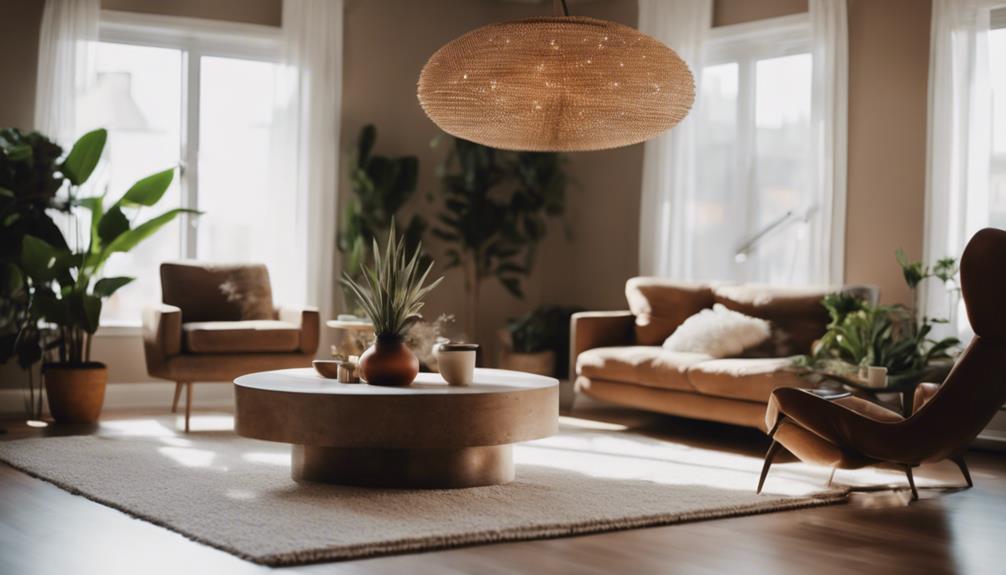
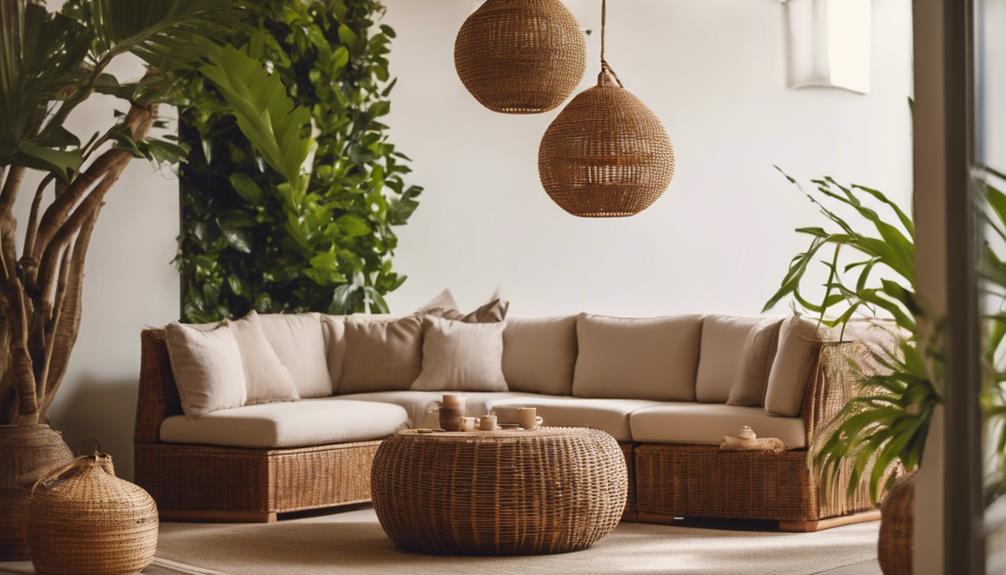
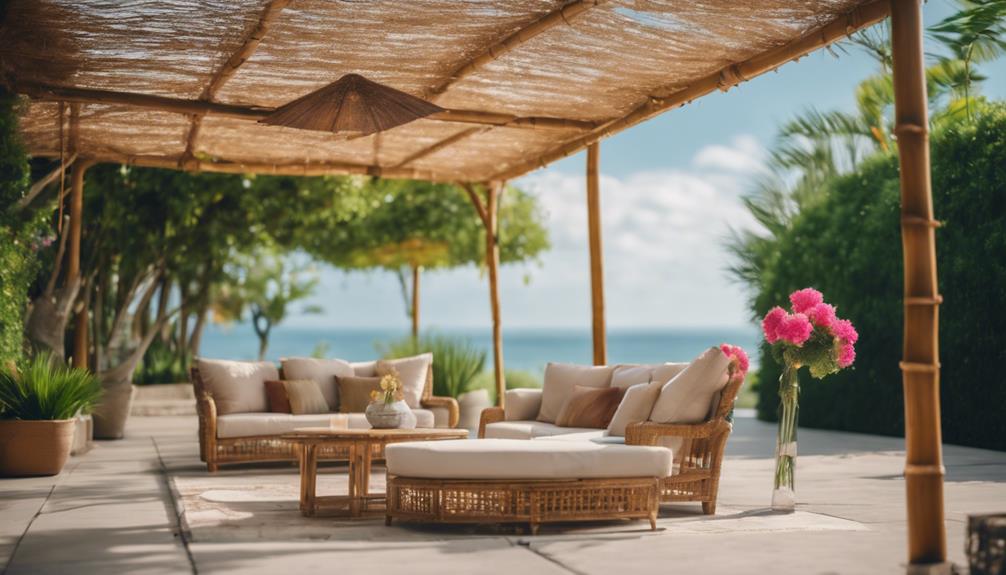
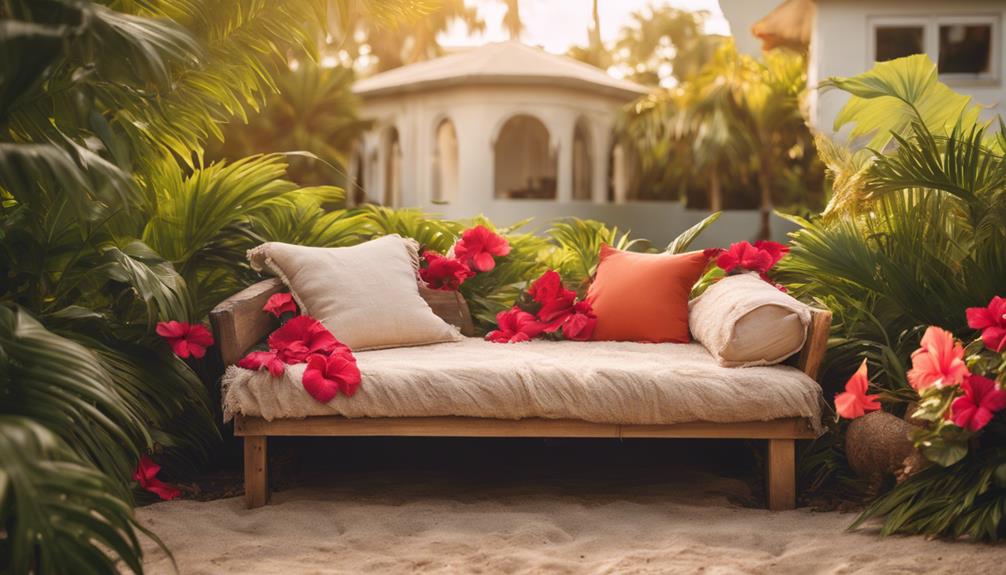
Designing a Cozy Seating Area

creating a comfortable space

As we create our own tropical escape at home, we're excited to design a cozy seating area that's perfect for relaxation. To achieve this, we'll focus on three essential elements:

Cozy Corner Essentials

Comforting Fabric Choices

Advertisement

Soothing Color Palette

These elements will work together to create a tranquil atmosphere that invites lounging and socializing. By incorporating these elements, we'll be able to craft a seating area that's both functional and aesthetically pleasing, making our tropical oasis feel like a true retreat.

Cozy Corner Essentials

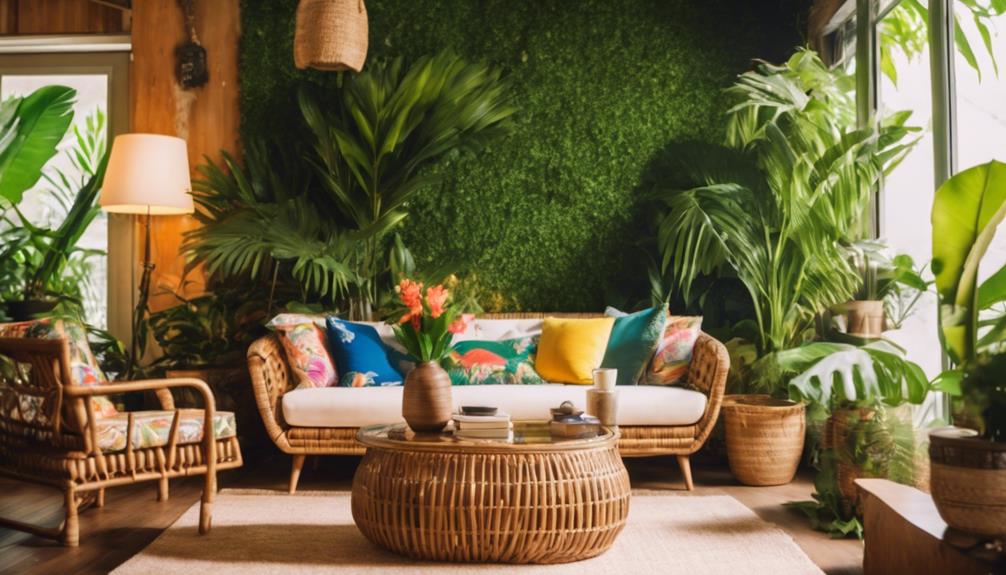
We craft our cozy corner's inviting atmosphere by incorporating natural elements, like bamboo benches and hammocks, which instantly evoke the warmth and tranquility of a tropical escape.

As we design our seating area, we want to create a space that transports us to a tropical garden oasis. To achieve this, we focus on incorporating essential elements that evoke a sense of relaxation and tranquility.

Here are a few must-haves for our cozy corner:

Advertisement
  • Accent pillows and cushions in bold colors or tropical patterns to add a pop of color.
  • Tables for drinks and snacks to enhance functionality.
  • A Tiki bar as a focal point for a tropical backyard oasis.

Comforting Fabric Choices

We're wrapping ourselves in comfort with fabric choices that evoke the warmth and serenity of a tropical haven. When designing a cozy seating area, we opt for cozy fabric options like cotton, linen, and velvet, which provide the perfect blend of softness and durability.

To guarantee our outdoor space remains comfortable and low-maintenance, we incorporate outdoor fabrics that are weather-resistant and easy to clean. Tropical patterns, such as palm leaves and floral prints, add a touch of whimsy and vibrancy to our seating area. We also choose upholstery with tropical motifs like pineapples, flamingos, or exotic flowers for a fun and playful touch.

To further enhance the comfort level, we add throw pillows and blankets made from soft materials. By selecting these fabrics, we create a comfortable seating area that invites relaxation and tranquility, perfect for a tropical escape at home.

Soothing Color Palette

To evoke the serene ambiance of a tropical haven, we select a soothing color palette that calms the senses, setting the tone for a cozy seating area that beckons relaxation. When it comes to creating a tranquil atmosphere, our color choices play a significant role.

We opt for a palette that combines soft blues, greens, and neutrals to create a calming ambiance. To add a touch of vibrancy, we incorporate pops of tropical colors like coral, turquoise, and yellow.

Some tips to keep in mind:

Advertisement
  • Choose a soothing color palette that calms the senses
  • Incorporate tropical colors like coral, turquoise, and yellow for a vibrant touch
  • Balance bold colors with natural materials like rattan, bamboo, or teak for a cozy tropical feel

Attracting Wildlife to Your Yard

garden for wildlife conservation

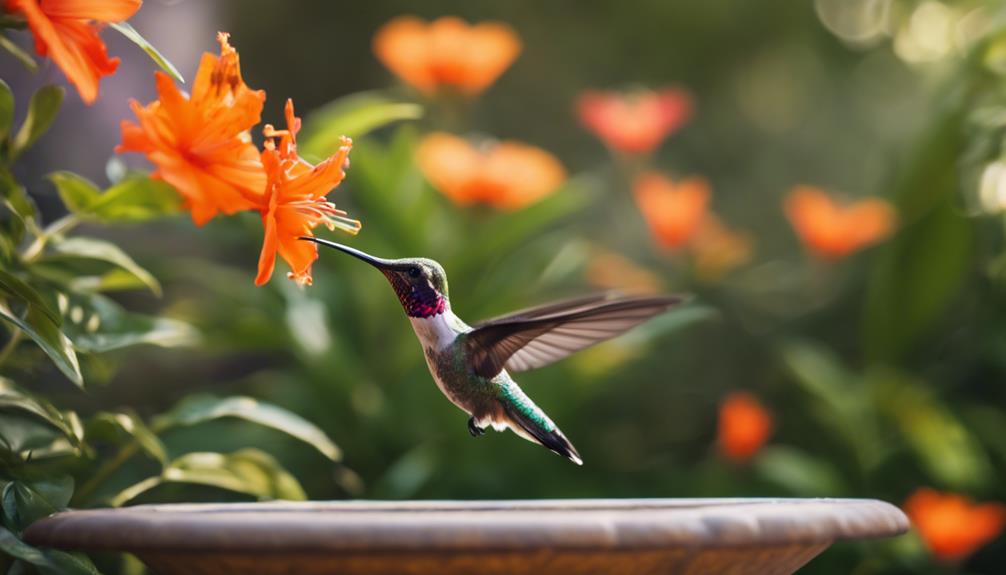
By incorporating plants like Mexican salvia and bulbine, we can transform our outdoor space into a vibrant oasis that beckons in butterflies and hummingbirds. These specific plants are known to attract these beautiful creatures, creating a wildlife presence that enhances our outdoor space. To further attract butterflies, we can incorporate bright tropical colors in our garden, creating a cheerful ambiance that's perfect for a tropical escape.

Attracting Wildlife Tips
Butterflies Plant Mexican salvia, use bright tropical colors
Hummingbirds Plant bulbine, add tropical signs and bamboo wind chimes
Jungle-like atmosphere Incorporate specific plants, add Tiki masks

Adding Shade Options

customizing patio with awnings

Our tropical escape isn't complete without incorporating shade options to protect our plants and create a comfortable outdoor space. As we design our oasis, we need to ponder the importance of shade in creating a relaxing atmosphere. Not only does shade shield our plants from direct sunlight, but it also provides a comfortable spot to lounge and enjoy the outdoors.

To achieve this, we can integrate various shade options into our design. Here are a few ideas to get us started:

  • Adding a Palapa or thatch umbrella provides beauty and shade in our backyard, creating a perfect spot to relax.
  • Thatch umbrellas are movable and versatile, suitable for various areas in our tropical oasis.
  • Contemplate ordering an umbrella kit for convenience and easy assembly, allowing us to enhance our outdoor space with shade options.

Building a Focal Point

designing a striking architecture

We're now ready to create a show-stopping centerpiece that draws the eye and defines our tropical escape. A well-designed focal point can elevate our outdoor space, creating an unforgettable ambiance.

For us, this could be a stunning Tiki bar, complete with bamboo accents and thatched roofing, instantly transporting us to a tropical paradise. Alternatively, incorporating a fire pit adds a dramatic touch, perfect for cozying up on cool evenings.

To further enhance the ambiance, we can create natural stone pathways that lead to our focal point, such as a pool or outdoor kitchen. Adding shade with a Palapa or thatch umbrella not only provides comfort but also enhances the beauty of our backyard.

For a more hands-on approach, we can consider DIY projects like building a fire pit with stones, sand, and a steel ring for durability. By incorporating these elements, we can create a captivating focal point that becomes the heart of our tropical escape.

Designing Pathways and Walkways

creating outdoor walking areas

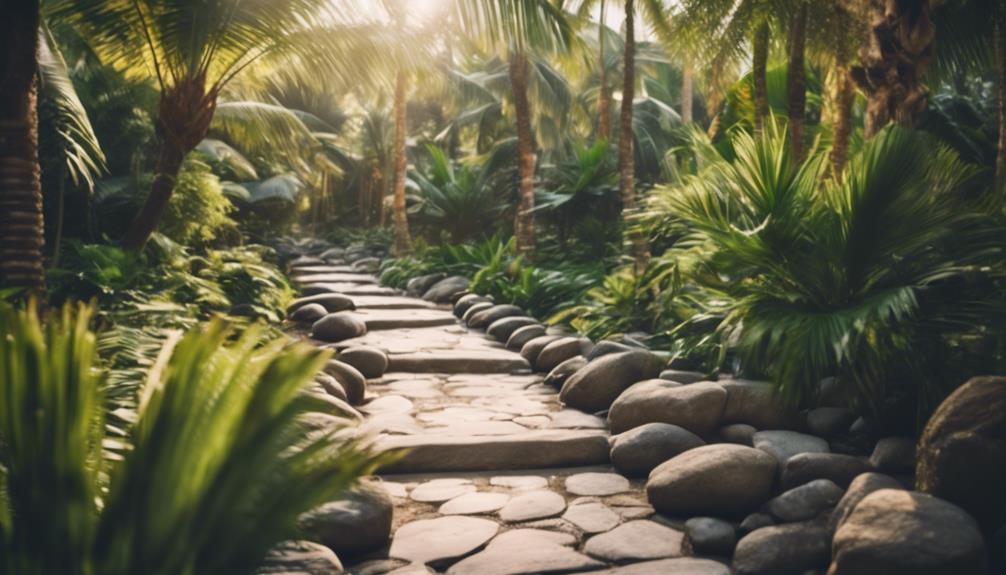
As we've crafted our focal point, let's now create inviting pathways that weave our tropical escape together, drawing visitors seamlessly from one enchanting area to the next.

To achieve this, we'll incorporate natural stone pathways that exude a magical and authentic tropical feel in our backyard. By leading these pathways to focal points like a Tiki bar or pool, we'll create a sense of unity and flow in our outdoor space.

Advertisement

To take it to the next level, we can:

  • Use native stones for our pathways to enhance the authenticity of our tropical oasis
  • Press coarse rock salt into wet concrete for a weathered look that adds character to our stone pathways
  • Link different areas of our yard with stone pathways to create a cohesive and inviting tropical escape

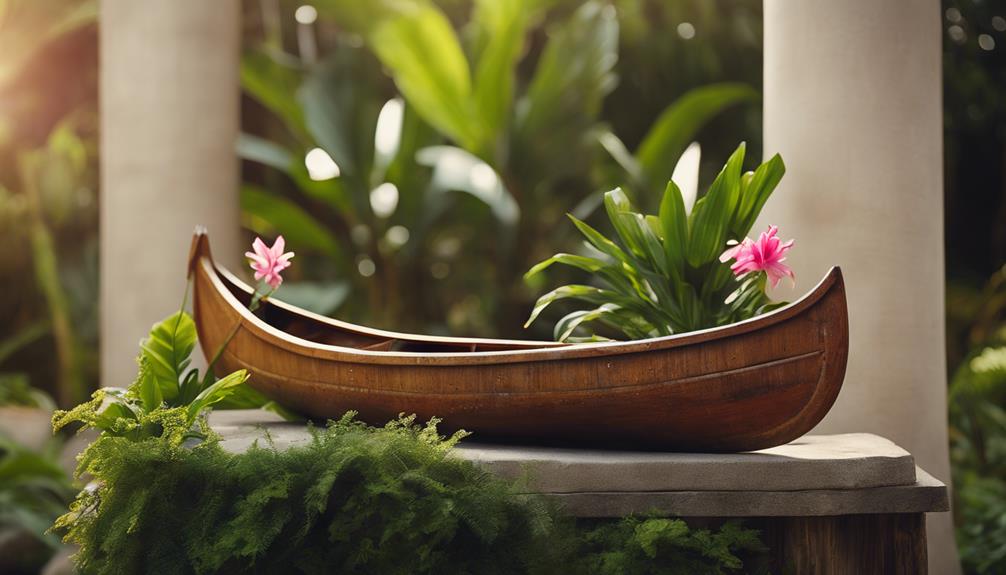
Completing the Paradise Look

creating a tropical paradise

To complete the transformation of our backyard into a tropical oasis, let's infuse it with the vibrant spirit of the islands by incorporating accents, décor, and unique elements that evoke a sense of paradise. We can create cozy seating areas with rattan furniture and vibrant accent pillows, perfect for a relaxing tropical retreat. To elevate the tropical oasis feel, we can incorporate tropical accents and décor like water features and tiki torches. For a more personalized touch, we can craft our own tropical décor, such as hand-carved masks and bamboo wind chimes, to create a festive atmosphere.

Element Description Benefit
Water Features Add a soothing sound to your oasis Creates a calming ambiance
Tiki Torches Illuminate your outdoor space Adds a warm, tropical glow
Rattan Furniture Comfortable seating for relaxation Defines cozy seating areas

Frequently Asked Questions

How to Create a Tropical Environment in Your Home?

"We're often asked how to create a tropical environment in our homes, and we're excited to share our tips, from choosing the right plants to incorporating natural materials and warm lighting, to transport ourselves to a tropical oasis."

How to Make Your Home Feel Tropical?

"We're craving a tropical vibe, so we're swapping heavy drapes for light, airy curtains and trading dark colors for bright hues to make our home feel like a sunny island getaway."

How to Make Your Backyard a Tropical Paradise?

We're turning our backyard into a tropical paradise by incorporating lush foliage, vibrant blooms, and soothing water features, creating an authentic oasis that's perfect for relaxation and attracting local wildlife.

How to Turn Your Backyard Into Paradise?

As we envision our backyard transforming into a haven, we'll turn it into a paradise by incorporating lush greenery, soothing water features, and cozy nooks, transporting us to a serene oasis, where our worries fade like morning dew.

Advertisement

Conclusion

As we conclude our journey to create a tropical escape at home, we've woven together the essential elements: lush plants, soothing water features, cozy seating areas, and meandering pathways.

By incorporating these design elements, we've crafted an oasis that transports us to a tranquil world. 'The key to a successful tropical garden is to create a sense of layers and textures,' notes landscape designer, Jamie Durie.

With these expert tips and a dash of creativity, our indoor or outdoor space has transformed into a serene retreat, perfect for relaxation and rejuvenation.

Continue Reading
Advertisement

Home Decor

How to Paint a Plastic Frame in 3 Easy Steps

Learn the simple yet crucial steps to achieve a professional-looking finish on your plastic frame, and transform it into a stunning work of art.

Published

on

painting plastic frames effortlessly

You can paint a plastic frame in 3 easy steps. First, prepare the surface by cleaning the frame with mild soap and water, lightly sanding it with 220-300 grit sandpaper, and wiping it down with rubbing alcohol. Next, prime the frame with a thin, even coat of plastic primer, letting it dry completely between coats. Finally, apply acrylic or enamel paint designed for plastic surfaces, using thin, even coats and letting it dry completely between coats. With these steps, you'll have a beautifully painted plastic frame; and by following these details, you'll uncover the secrets to a professional-looking finish.

Key Takeaways

• Clean the plastic frame with mild soap and water, then lightly sand it with 220-300 grit sandpaper to prepare the surface.

• Apply a thin, even coat of plastic primer to the entire frame, allowing it to dry completely before applying additional coats.

• Use acrylic or enamel paint specifically designed for plastic surfaces, applying thin, even coats to prevent drips and ensure a smooth finish.

• Let each coat of paint dry completely before applying additional coats, and gently wipe away dust or debris after achieving the desired color and finish.

Advertisement

• Regularly clean the painted frame with mild soap and water to maintain its appearance, and touch up any chipped areas with matching paint.

Prepare the Plastic Surface

Clean your plastic frame thoroughly with mild dish soap and warm water to remove dirt and oils, ensuring an important bond between the plastic and paint. This essential step will help the paint adhere evenly and prevent peeling.

Once clean, lightly sand the surface with 220 to 300-grit sandpaper in a circular motion to further enhance paint adhesion. This will create a smooth surface for painting.

Next, wipe down the plastic frame with rubbing alcohol to remove any remaining impurities. This step is vital in ensuring a strong bond between the plastic and paint.

After cleaning and sanding, your plastic picture frame is ready for painting. Remember to choose a spray paint specifically designed for plastic surfaces, and make sure the primer is dry before applying the paint.

Advertisement

With these steps, you'll be well on your way to creating a beautifully painted plastic frame that will last.

Prime the Frame for Painting

prepare canvas for art

Now that your plastic frame is prepped and ready, it's time to prime it with a plastic-specific primer to establish a strong bond between the paint and the frame. This critical step guarantees a durable and long-lasting paint job.

To prime your frame effectively, follow these essential steps:

  • Apply a thin, even coat of plastic primer to the entire frame, making sure to cover all surfaces.
  • Allow the primer to dry completely, following the manufacturer's instructions, before applying additional coats.
  • For best results, apply two coats of primer, allowing each coat to dry before applying the next.
  • Work in a well-ventilated area, and avoid applying primer in direct sunlight or extreme temperatures.

Apply Paint and Finish

paint and finish application

With your plastic frame properly primed, you're ready to apply a durable and visually appealing paint job that will enhance its overall appearance. Use acrylic or enamel paint specifically designed for plastic surfaces for best adhesion and durability.

Apply thin, even coats of paint to prevent drips and guarantee smooth coverage on the plastic frame. Consider adding decorative touches like stencils or weathering effects for a personalized look. Allow each coat of paint to dry completely before applying the next layer to avoid smudges or uneven finish.

Don't rush the process – let the paint dry completely between coats to achieve a smooth, orange peel-free finish. Once you've achieved the desired color and finish, use a soft cloth to gently wipe away any dust or debris that may have settled on the frame.

Frequently Asked Questions

How to Paint a Plastic Frame?

When you're wondering how to paint a plastic frame, you'll want to start by cleaning it thoroughly with mild soap and water to remove dirt and debris.

Advertisement

A plastic-specific primer is essential for better paint adhesion and a smoother finish.

Then, apply 2-3 coats of plastic-friendly paint, allowing each coat to dry before adding the next.

How Do You Paint Plastic Easily?

As you begin painting plastic, envision a blank canvas waiting for your creative touch.

To paint plastic easily, start by preparing the surface with a gentle sanding and a wipe-down with rubbing alcohol. This essential step guarantees a strong bond between the plastic and paint.

Next, apply a primer specifically designed for plastic surfaces, followed by 2-3 coats of plastic-friendly paint.

Advertisement

What Kind of Paint Will Stick to Plastic?

When it comes to painting plastic, you'll need a specialized paint that adheres well to plastic surfaces. Look for acrylic, enamel, or spray paint specifically labeled for multi-surface use or plastic surfaces. These paints are formulated to bond with plastic, ensuring a durable and long-lasting finish.

Remember to always prepare the surface by sanding and cleaning, and consider applying a primer designed for plastic surfaces for best results.

What Do You Use Before Painting Plastic?

Before you start painting plastic, you'll need to prepare the surface. Unlike wood or metal, plastic requires a special primer to guarantee a strong bond between the paint and the surface.

You'll want to use a primer specifically designed for plastic surfaces, which helps the paint adhere better and provides a smooth base for painting. This vital step is often overlooked, but it's essential for a durable and long-lasting finish.

Conclusion

As you step back to admire your handiwork, the newly painted plastic frame stands before you, reborn. The once-dull surface now radiates with vibrant color, its transformation a tribute to your creativity and perseverance.

Advertisement

Like a phoenix rising from the ashes, your frame has emerged from its former mediocrity, ready to showcase your favorite memories with renewed elegance and sophistication.

Continue Reading

Home Decor

DIY Mirror Painting Guide

Give your mirror a personalized makeover with this step-by-step guide, and uncover the secrets to a professional-looking finish.

Published

on

diy mirror painting tips

You're ready to give your mirror a personalized touch without breaking the bank. Start by preparing the surface with a damp microfiber cloth and sketching your design with a water-soluble pencil. Prime with white gesso and let it dry for 24 hours. Choose between enamel and acrylic paint for durability or vibrancy, and apply a sealant for long-lasting results. Masking supplies and spray primer will give you a professional finish. From there, you'll learn how to remove old paint and grime, prime and paint the frame, and add a protective finish. The best part? You're just getting started.

Key Takeaways

• Clean the mirror thoroughly with a damp microfiber cloth before starting your DIY project.

• Use a water-soluble pencil to sketch your design, and prime with white gesso for better paint adhesion.

• Apply a light coat of primer, let it dry, and then paint with enamel or acrylic paint for durability and vibrancy.

• Mask off mirror edges with painter's tape, applying moderate pressure, and inspect for wrinkles or creases before painting.

Advertisement

• Remove masking tape gently at a 45-degree angle, and clean up residue with a damp cloth or rubbing alcohol.

Preparing the Mirror Surface

Before you start painting, clean the mirror thoroughly using a damp microfiber cloth to remove dust and grime, guaranteeing a smooth surface for your design. This step is essential in preventing any imperfections from affecting your paint job.

Next, use a water-soluble pencil to sketch your design onto the mirror surface. This will give you a clear guide for when you start painting.

Now, it's time to prime your mirror. Apply a coat of white gesso to the mirrored areas, allowing it to dry for 24 hours. This will provide a smooth surface for painting and ensure the best paint adhesion.

If you want to add an extra layer of vibrancy to your design, consider using a white acrylic base coat before applying your colors. This will help your paint pop and guarantee better coverage.

Advertisement

Essential Supplies and Tools

diy home renovation guide

To guarantee a professional-looking finish, you'll need the right supplies and tools, including masking supplies, spray primer, and Valspar Silver Spray paint. When it comes to painting on mirrors, it's important to use the correct primer to prevent peeling. White gesso is a great option, as it provides a strong bond between the paint and the mirror.

For the paint itself, you can choose between Enamel and acrylic paint. Enamel paint is more durable and resistant to scratches, while acrylic paint offers a bolder, more vibrant look. Regardless of which paint you choose, make sure to apply a sealant after painting to protect the mirror and ensure long-lasting results.

With the right supplies and tools, you'll be well on your way to creating a beautifully painted mirror that will add a touch of elegance to any room. Remember, proper preparation and painting techniques are important for achieving a professional-looking finish.

Removing Old Paint and Grime

refinishing worn furniture meticulously

Now that you've gathered your essential supplies and tools, it's time to tackle the task of removing old paint and grime from your mirror frame. This vital step will guarantee a smooth, even surface for your new paint job.

You can use a paint stripper or sandpaper to remove old paint and grime from the mirror frame. If you choose to use a paint stripper, be sure to follow the manufacturer's instructions and take necessary safety precautions. If you opt for sandpaper, start with a coarse grit and work your way up to a finer grit for a smoother finish.

After stripping or sanding, wipe down the frame with a damp cloth to remove any remaining residue. Make sure the frame is completely dry before moving forward. Sand any rough spots on the frame to create a smooth surface for the new paint to adhere to.

Priming the Mirror Frame

priming for mirror painting

With your mirror frame stripped and sanded, you're ready to apply a light coat of primer to guarantee a smooth, even finish. This critical step ensures that your paint adheres well and prevents oils from bleeding through, which can cause chipping or unevenness. For best results, choose a high-quality primer like Colourtrend Prime 2, specifically designed for this purpose.

Primer Benefits Why It Matters Tips
Prevents bleeding Ensures a smooth finish Apply a light coat
Enhances paint adhesion Reduces chipping Choose a quality primer
Provides a uniform base Improves color coverage Allow primer to dry completely

Painting the Mirror Frame

reflective frame gets makeover

You're ready to add color and personality to your mirror frame by applying a fresh coat of paint. Before you start, make sure the surface is clean and lightly sanded to guarantee better paint adhesion.

Use painter's tape to mask off areas you don't want to paint, guaranteeing a crisp, clean finish. Now, it's time to spray paint your mirror frame. Apply light coats, allowing each one to dry completely before adding the next. This will prevent drips and unevenness, resulting in a smooth, professional paint finish.

Advertisement

Remember, patience is key – multiple thin coats are better than one thick, gloopy one. As you work, keep in mind that you're not just giving your mirror a makeover, you're also protecting the frame with a durable paint job. Consider adding a protective finish or sealant to really make your hard work last.

With these tips, you'll be enjoying your beautifully painted mirror frame in no time.

Masking the Mirror Edges

reflective surfaces and protection

Now that you've prepared your mirror frame for painting, it's time to focus on protecting the edges of the mirror itself.

You'll want to use painter's tape to carefully mask off these areas, ensuring a crisp, clean paint line and preventing any unwanted paint seepage onto the glass.

Edge Protection Methods

To prevent paint from seeping onto the mirror's surface, carefully apply painter's tape along the edges, making sure a secure bond to create a clean, precise border. This important step in the DIY mirror painting process helps protect the mirror surface and prevent paint from peeling off over time.

When using painters tape, keep in mind the following key considerations:

Advertisement
  • Apply moderate pressure to make sure the tape adheres securely, avoiding air pockets or bubbles that can compromise the seal.
  • Avoid using excessive pressure, which can damage the mirror edges or cause the tape to lift off.
  • Inspect the tape for any wrinkles or creases, smoothing them out to create a clean, even surface.

Tape Application Tips

Applying painter's tape with precision guarantees a crisp, clean edge around the mirror frame. When masking the mirror for painting, it's crucial to use painter's tape to create clean edges.

To make sure of a smooth paint line, apply the tape along the edges of the mirror frame, ensuring it's firmly pressed down to prevent paint seepage. As you apply the tape, remove any air bubbles or creases that may form, as these can create imperfections in the paint job.

Double-check the tape placement before starting to paint to avoid any mistakes. A well-executed tape application will result in a professional-looking finish. By taking the time to meticulously apply the tape, you'll be rewarded with a beautifully painted mirror that showcases your attention to detail.

Removing Masking Tape

unveiling clean paint job

With precision, you'll carefully remove the masking tape to reveal crisp, paint-free edges. Removing the tape is an essential step in achieving a professional-looking finish.

To do it right, gently peel off the masking tape at a 45-degree angle to prevent paint from lifting. If some paint does lift, don't panic – just use a craft knife to score along the edge of the tape for clean removal.

Here are some additional tips to keep in mind:

  • Remove the tape while the paint is still slightly tacky for sharp lines.
  • Avoid leaving the tape on for too long to prevent it from bonding with the paint.
  • Clean up any residue left by the tape with a damp cloth or rubbing alcohol.

Finishing Touches and Styling

perfecting the final details

Now that your mirror is painted and ready, it's time to hang it in a spot that showcases its unique style and adds visual interest to the room.

You've invested time and effort into creating a one-of-a-kind painting mirror, so make sure it takes center stage. Secure it on the chosen wall, and style it with complementary decor such as candles, vases, or picture frames that complement its frame and overall aesthetic.

Advertisement

When arranging items around the mirror, consider its reflection and aim for visual balance. Don't forget to use the mirror to amplify natural light in the room, creating a sense of spaciousness.

Experiment with different angles and heights to find the perfect placement for your painted mirror. By doing so, you'll create a stunning focal point that draws the eye and elevates the entire space.

Hanging and Displaying

hanging and displaying textiles

You've carefully crafted your one-of-a-kind painted mirror, and it's time to showcase it in a way that maximizes its visual impact. Hanging and displaying your masterpiece is an art in itself, and with a few tips and tricks, you can create a stunning display that draws the eye.

When it comes to hanging your painted mirror, remember to use heavy-duty picture hanging hardware that can support the weight of the mirror. This will guarantee that your mirror hangs securely and doesn't come crashing down.

Here are a few more tips to keep in mind:

  • Hang your mirror in a well-lit area to enhance its visual impact.
  • Experiment with different hanging orientations, such as vertical or horizontal, for a unique look.
  • Consider incorporating your painted mirror into a gallery wall for a stylish and cohesive display.

Frequently Asked Questions

What Kind of Paint Will Stick to a Mirror?

When it comes to painting a mirror, you're likely wondering what kind of paint will stick to the surface. You'll be happy to know that acrylic paint is an excellent choice, as it adheres well to glass surfaces.

Additionally, enamel paint is another option that provides a smooth finish.

Advertisement

If you want vibrant colors, consider specialty glass paints like Deco Art.

Do I Need to Prime a Mirror Before Painting?

As you prepare to paint your mirror, you're likely wondering: do I need to prime it first?

The answer is a resounding yes! Priming is crucial to guarantee the paint adheres properly and lasts longer. Without primer, the paint may peel or chip off the mirror frame, ruining your design.

By applying a suitable primer, like white gesso or specialized mirror primer, you'll create a smooth surface for painting and prevent future headaches.

How to Seal Paint on a Mirror?

Now that you've painted your mirror, it's time to seal the deal – literally! To protect your handiwork from wear and tear, you'll need to apply a clear varnish or sealant specifically designed for painted surfaces.

Advertisement

Use thin, even coats, allowing each layer to dry completely before adding the next. This guarantees proper coverage and a durable finish.

Can I Use Acrylic Paint on a Mirror?

You're wondering if you can use acrylic paint on a mirror, and the answer is a resounding yes! In fact, acrylic paint is a great choice due to its quick-drying properties, making it ideal for mirror painting.

Just remember to apply thin coats for better adhesion and coverage, and consider using a white acrylic base to enhance color vibrancy.

Conclusion

As you step back to admire your handiwork, the newly painted mirror frame seems to magically transform the entire space. It's as if the room's energy has shifted, and the once-bland mirror now radiates a fresh, personalized charm.

Coincidence or not, your DIY skills have breathed new life into a forgotten piece, and you can't help but feel a sense of pride and accomplishment. With your creativity and resourcefulness, you've turned an ordinary mirror into an extraordinary focal point that reflects your unique style.

Advertisement

Continue Reading

Home Decor

How to Create Empty Frame Wall Decor Ideas

Ignite your creativity and discover the art of transforming blank walls into stunning focal points with these innovative empty frame decor ideas.

Published

on

diy empty frame decor

You can transform any blank wall into a visually stunning focal point by creatively arranging empty frames in a way that reflects your personal style. Mix and match frame sizes, styles, and colors to add depth and visual interest. Strategically place statement pieces or groupings to direct attention and create balance. Experiment with overlapping frames, layering, and clustering to add texture and dimension. Combine ornate and simple frames, or mix circular, hexagonal, and rectangular shapes to create a unique display. As you explore these techniques, you'll uncover even more ways to make your empty frame wall decor truly unforgettable.

Key Takeaways

• Combine ornate and simple empty frames in varied sizes and styles for a dynamic, eclectic look.

• Experiment with layering frames of different textures, like wood, metal, and distressed finishes, for added depth.

• Strategically place empty frames to create focal points, directing attention to specific areas of the wall.

• Cluster empty frames of varying sizes and shapes to create a visually appealing display with texture and depth.

Advertisement

• Alternate large and small frames, and experiment with orientations, to create a unique and striking display.

Mixing Frame Sizes and Styles

As you start arranging your empty frame wall decor, consider mixing and matching different frame sizes and styles to add visual interest and dimension to your display.

Combining ornate and simple frames creates a dynamic and eclectic look on the wall. You can find unique picture frames at thrift stores or scour antique shops to add character to your display.

Varied frame sizes can help fill up larger wall spaces effectively, creating a visually appealing arrangement. Experimenting with frames of different colors and finishes can add a pop of personality to the decor.

Empty frames in different shapes, such as circular or hexagonal, can add an extra layer of interest. Mixing frame styles allows for a customizable and unique display that reflects your individual taste and creativity.

Advertisement

Creating Focal Points With Frames

framing your art beautifully

By strategically placing a single statement piece or a grouping of empty frames, you can create a striking focal point that draws the eye and adds visual interest to any room.

Using empty frames, you can thoughtfully direct attention to a specific area of the room, creating a sense of balance and harmony. One way to do this is by grouping frames of varying sizes and shapes, creating a visually appealing arrangement that adds depth and interest to the space.

Alternatively, you could use a single large frame as a statement piece, drawing the eye to a particular area of the room. By placing empty frames thoughtfully, you can create a unique and compelling focal point that complements the room's decor.

For instance, you could place a large frame around a stunning piece of artwork or a cherished photograph, highlighting its importance and adding emotional resonance to the space. By incorporating empty frames as focal points, you can add a touch of sophistication and elegance to your room's decor.

Adding Depth With Overlapping Frames

exploring artistic techniques visually

You can add an extra layer of sophistication to your empty frame wall decor by overlapping frames, creating a visually intriguing display that draws the eye and invites exploration. By layering frames of varying sizes, shapes, and colors, you can create a dynamic visual effect that adds depth and complexity to your wall decor. To take it to the next level, try mixing and matching different frame colors or finishes to enhance the overall aesthetic.

Here are some tips for creating a stunning overlapping frame display:

Technique Description Visual Effect
Cascading Frames are arranged in a flowing, staggered pattern Creates a sense of movement and energy
Staggered Frames are placed at varying heights and widths Adds visual interest and depth
Mismatched Frames of different sizes and shapes are used Creates a playful, eclectic look

Using Frames to Display Personal Items

showcasing personal items creatively

As you explore using frames to display personal items, you'll discover the unique opportunity to showcase your most treasured possessions in a creative and visually appealing way.

By framing family photos, personal treasures, and memories, you can create a meaningful and customized display that reflects your personality and style.

Advertisement

Through this approach, you'll be able to curate a beautiful and nostalgic arrangement that tells your story and adds a touch of warmth to any room.

Family Photos Showcase

Transform your empty frames into a heartwarming family photos showcase by displaying cherished memories and personal items in a unique and visually appealing way. By creatively arranging your frames, you can create a stunning gallery wall that tells your family's story.

Here are some ideas to get you started:

  • Mix and match frame sizes and styles to add visual interest and depth to your display.
  • Incorporate special mementos like tickets, letters, or small objects within the frames for a unique touch.
  • Experiment with hanging techniques, such as using wire or ledges, to create a dynamic and engaging presentation of your family memories.
  • Arrange the frames in a cohesive layout or mix and match for an eclectic look that tells your family's story.

Personal Treasures Display

Fill empty frames with personal treasures like vintage keys, postcards, or small collectibles to create a unique and personalized gallery wall that tells your story. You can showcase sentimental items within frames, adding a personal touch to your decor. Empty frames can become a showcase for cherished items, telling a story or reflecting your interests. By incorporating personal treasures in frames, you'll add a meaningful and decorative element to your space.

Here are some ideas to get you started:

Treasure Frame Style Wall Layout
Vintage keys Distressed wood Random pattern
Postcards White minimalist Grid pattern
Small collectibles Ornate gold Symmetrical layout
Coins Modern black Asymmetrical design

Memories on Display

You can bring your favorite memories to life by showcasing personal items like photos, tickets, and postcards in frames, creating a unique display that tells your story. This is a great way to add a personal touch to your decor and make your space truly special.

Advertisement

By using frames to display your personal items, you can create a one-of-a-kind display that reflects your personality and style.

Here are some ideas to get you started:

  • Use a mix of frame sizes and shapes to add visual interest to your display.
  • Arrange your frames in a grid or gallery style to create a cohesive look.
  • Choose frames that complement the colors and style of your personal items.
  • Experiment with different frame materials, such as wood, metal, or glass, to add texture and depth to your display.

Creating a Gallery Wall With Frames

displaying artwork with style

When starting to create a gallery wall with frames, you'll want to take into account the size and shape of the frames, as well as how you'll balance their placement on the wall.

By selecting frames that vary in size, shape, and style, you'll add visual interest to your gallery wall.

Next, you'll need to ponder how to arrange the frames in a way that creates a sense of harmony and balance.

Frame Size and Shape

To create a visually striking gallery wall, combine frames of varying sizes and shapes to add depth and visual interest to your empty frame wall decor. This mix-and-match approach will keep your arrangement from feeling too uniform or boring.

Advertisement

When selecting frames, consider the following tips to create a dynamic display:

  • Mix rectangular, square, and circular frames for visual interest
  • Create a balanced arrangement by alternating large and small frames
  • Experiment with different frame orientations (portrait vs. landscape) for a unique layout
  • Use templates or mock-ups to plan the placement of frames on the wall before hanging

Balancing Frame Placement

With your frame selection in hand, start visualizing the overall aesthetic you want to achieve by arranging your frames in a way that creates balance and harmony on your wall. Aim for a balanced arrangement by mixing frame sizes and shapes to add visual interest to your gallery wall.

Consider using a grid layout or a symmetrical arrangement for a cohesive look with your empty frame wall decor. Don't be afraid to experiment with different frame orientations, such as landscape and portrait, to create a dynamic display.

To add an extra layer of personalization, incorporate a mix of empty frames and artwork to create a unique and eye-catching arrangement. Before you start hammering nails, use templates or paper cutouts to plan the placement of your frames. This will help you achieve a polished and professional look, ensuring your gallery wall is a stunning focal point in your room.

Adding Texture With Frame Groupings

enhancing walls with art

By clustering empty frames of varying sizes, shapes, and styles, you create a visually appealing display that adds texture and depth to your wall decor. This technique is particularly effective in adding visual interest to a room, as the mix of frames creates a dynamic display that draws the eye.

To take your frame grouping to the next level, consider these tips:

  • Mix and match frames with different textures, such as wood, metal, and distressed finishes, to add depth to the arrangement.
  • Experiment with layering frames of varying depths to create a three-dimensional effect on your wall.
  • Combine empty frames with other decor elements, like mirrors or artwork, to enhance the overall aesthetic.
  • Don't be afraid to get creative with frame placement – asymmetrical arrangements can be just as striking as symmetrical ones.

Frequently Asked Questions

How to Decorate With an Empty Frame on a Wall?

When you're looking to decorate with an empty frame on a wall, you're opening yourself up to a world of creative possibilities.

You can use it to highlight a small decorative piece, like a Putz house, or create a unique display by suspending photos with string and clothespins.

Advertisement

You can also customize the frame to match your room's decor by painting it, allowing you to seamlessly integrate it into your overall aesthetic.

How to Style an Empty Wall?

You're staring at a blank wall, wondering how to style it. Start by considering the room's purpose and your personal taste.

Think about the colors, textures, and patterns you want to incorporate. Do you prefer a minimalist or eclectic look? Will you use a single statement piece or create a gallery wall?

Take a step back, envision the space, and let your creativity flow. You'll be surprised at how easily your vision takes shape.

How Do You Decorate a Wall With Frames?

You're looking to decorate a wall with frames, but before you start, let's debunk the myth that empty frames are just for filling gaps. In reality, they can be a stylish focal point.

Advertisement

By mixing frame sizes, colors, and styles, you can create a visually appealing display that adds depth and interest to your wall.

How Do You Decorate a Plain Frame?

You can elevate a plain frame by adding a personal touch. Start by painting it a color that resonates with your decor style, such as a crisp white or a sophisticated gold.

Next, embellish it with decorative elements like beads, ribbons, or trims to add visual interest.

You can also repurpose the frame to hold a small mirror, unique print, or sentimental photo, giving it a personalized flair.

Conclusion

As you step back to admire your handiwork, the empty frames come alive, a symphony of shapes, sizes, and textures dancing across the wall.

Advertisement

The empty spaces within seem to pulse with possibility, inviting the eye to linger and explore.

Your carefully crafted collage is more than just a decorative flourish – it's a reflection of your unique perspective, a celebration of the beauty in the blank.

Continue Reading

Trending