To make a bird nest in 5 easy steps, you'll need a sturdy cardboard box, some basic DIY skills, and attention to detail. Start by preparing your box, ensuring it's clean, dry, and reinforced with secure edges. Next, cut two entrances for sparrows and add ventilation holes to provide airflow. Secure the box sides, attach tape, and position the nest under a lintel for shade and protection. Finally, install the nest in a suitable location, considering height, flight path, and nearby food sources. By following these simple steps, you'll create a cozy haven for birds to thrive – and that's just the beginning.
Key Takeaways
• Select a sturdy cardboard box, ensuring it's clean and dry, and secure the edges to create a cozy space for the birds.
• Cut two 3' x 3' entrances for sparrows, adding air ventilation holes on both sides to provide proper airflow and prevent larger birds and predators from entering.
• Fold the box sides inward to form a nest shape, reinforcing the seams with tape to create a sturdy foundation.
• Attach the nest to a suitable location, such as below a lintel, using double-sided tape, to provide shade, protection, and a safe haven for the birds.
• Install the nest in a suitable location, considering factors like height, clear flight paths, nearby food sources, and a stable structure.

SISTERBIRD 2 Pack Bird Houses for Outside Clearance with Copper Guard, Cedar Bird House Outdoor, Bluebird Finch Swallow Wren Chickadee Assembly Required
- Entrance Hole Size: 1-1/2 inch for attracting specific species
- Premium Materials: Unpainted cedar for durability and safety
- Predator Protection: Copper guard around entrance for safety
As an affiliate, we earn on qualifying purchases.
As an affiliate, we earn on qualifying purchases.
Gather Materials and Prepare Box
When beginning the journey of creating a bird nest, start by selecting a sturdy cardboard box that's large enough to comfortably accommodate your feathered friends. The box will serve as the foundation of your bird nest, so it's crucial to choose one that's durable and the right size.
When preparing the box, make sure it's clean and dry, as a dirty or damp environment can be detrimental to the health of the birds. Next, take some time to prepare the box by securing and reinforcing its edges with paper or plastic tape. This will help prevent the box from collapsing or tearing, ensuring a safe and cozy space for the birds.
Cut Entrances and Add Ventilation
You'll need to cut two 3' x 3' entrances in the cardboard box to allow sparrows to enter comfortably. This will guarantee that the birds can easily access their new home without any difficulties. When cutting the entrances, make sure they're large enough for the sparrows to fit through comfortably, but not so large that larger birds can enter. You want to create a cozy space for your feathered friends, not an open invitation for predators.
In addition to cutting the entrances, you'll also need to add air ventilation holes on both sides of the box. This will provide proper airflow and keep the bird nest fresh and clean. You can use a sharp object or a drill to create small holes on either side of the box. Just be sure to space them out evenly to guarantee good airflow.
Secure Box Sides and Add Tape

Secure the box sides by folding them inward and creasing them to form a sturdy nest shape, making sure they're tightly closed to prevent any gaps or openings. This will provide a solid foundation for your bird nest.
You'll want to guarantee that the cardboard boxes you're using are sturdy enough to support the weight of the nest and any birds that will inhabit it.
Next, take some transparent or paper tape and reinforce the seams of the nest, making sure everything is securely in place. This will prevent any weak points in the nest from giving way.
You can also use double-sided tape to attach the nest to a suitable location, such as a lintel or a branch, later on. Remember to add some ventilation holes to provide airflow and keep the nest comfortable for its future inhabitants.
Attach Nest to Lintel and Protect
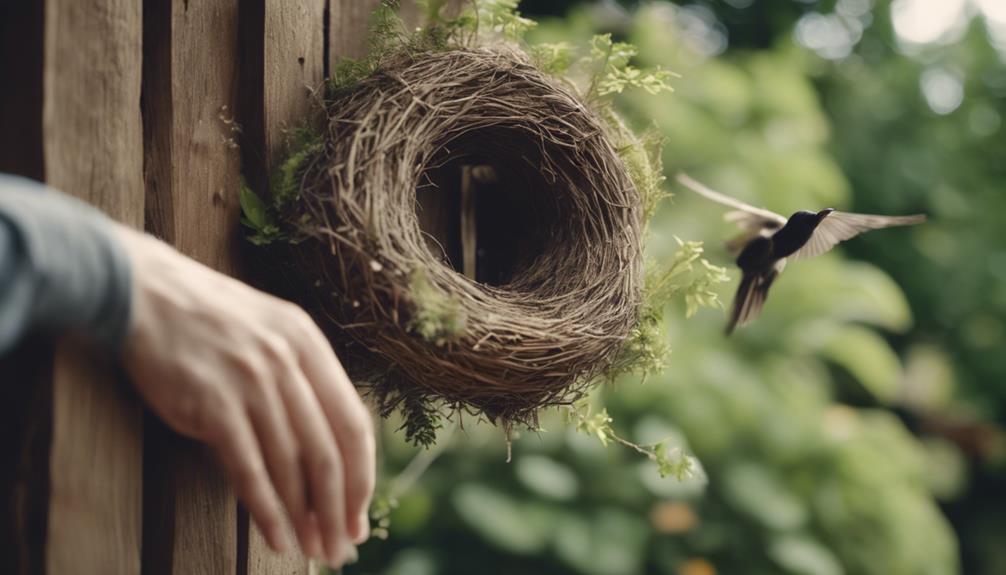
Now that your nest is built and reinforced, position it below a lintel to provide shade and protection from heat and rain. This strategic placement will guarantee your bird nest remains cool and dry, creating a comfortable habitat for the sparrows.
To securely attach your nest to the lintel, use 3M double-sided tape, which will establish a strong bond to a smooth surface. Make sure the nest has adequate air ventilation holes and entrances for the sparrows to access comfortably.
By attaching your nest to a lintel, you'll establish a safe haven for the birds, shielding them from harsh weather conditions. As you finalize the installation, remember to maintain a clean and dry environment, which is essential for the well-being of the birds.
With your bird nest securely attached to the lintel, you've successfully created a cozy habitat for your feathered friends to thrive.
Install Nest in Suitable Location
When installing your bird nest, choose a location that provides shelter from extreme weather conditions, such as rain and direct sunlight, to guarantee a safe and cozy habitat for your feathered friends. You'll want to make sure the nest is protected from harsh elements to encourage birds to make it their home.
Here are some key considerations for installing your bird nest in a suitable location:
| Consideration | Why It Matters |
|---|---|
| Height off the ground | Protects from predators and disturbances |
| Clear flight path | Allows easy access to the nest |
| Nearby food sources | Attracts birds to the nest |
| Stable structure | Prevents the nest from falling or getting damaged |
| Sheltered location | Protects from extreme weather conditions |
Frequently Asked Questions
Can I Use a Plastic Container Instead of a Wooden Box?
You're wondering if you can substitute a plastic container for a wooden box when creating a bird nest.
While it's technically possible, it's not the most ideal choice.
Plastic containers often lack the necessary drainage and breathability that wooden boxes provide, which can lead to moisture buildup and unhealthy conditions for the birds.
How Often Should I Clean and Maintain the Bird Nest?
As you begin this avian adventure, you'll want to keep your feathered friend's home spick and span. Think of starting the bird nest cleaning as a seasonal ritual, ideally done every 2-3 months.
Remove any debris, dirt, or droppings, and gently rinse the nest with mild soap and water. Dry it thoroughly to prevent mold growth. By doing so, you'll create a safe and healthy environment for your bird to thrive.
Will the Birds Be Disturbed by the Tape Used to Secure the Nest?
As you're preparing the nest, you're probably wondering if the tape used to secure it will disturb the birds. Fortunately, the answer is no, the birds won't be bothered by the tape.
Since birds primarily rely on visual cues, the tape's presence won't affect them. In fact, many bird species are accustomed to encountering human-made materials in their natural habitats, so they'll likely ignore the tape altogether.
Can I Install the Nest in a Tree or on a Fence Post?
You're probably wondering if you can install the bird nest in a tree or on a fence post – and the answer is a resounding yes!
In fact, you'll have a million options to choose from, but don't worry, I'll narrow it down for you. Trees with sturdy branches and a clear flight path are ideal, while fence posts near vegetation can also work well. Just make sure the nest is at least three to five feet off the ground to protect it from predators.
How Long Does It Take for Birds to Occupy the New Nest?
You're probably wondering how long it takes for birds to occupy the new nest you've carefully crafted.
The answer depends on various factors, including the species, time of year, and availability of food and shelter.
Generally, it can take anywhere from a few days to several weeks for birds to discover and occupy a new nest.
Keep in mind that some birds, like robins and blue jays, are more likely to adopt a new nest quickly, while others may take longer.
Conclusion
As you've woven together the twigs of your creation, a haven takes shape, much like the intricate patterns of life itself.
This bird nest, carefully crafted by your hands, now awaits its new inhabitants. Just as a mother's love nurtures her young, your efforts will cradle the fragile lives that will soon call this home.
With every delicate fiber, you've woven a promise of safety, warmth, and life. As you place the nest in its new home, you've not only built a shelter, but a symbol of hope and new beginnings.