Interior
Does Interior Paint Fade Over Time
Step into the world of interior paint longevity as we unravel the mystery behind its fade over time.
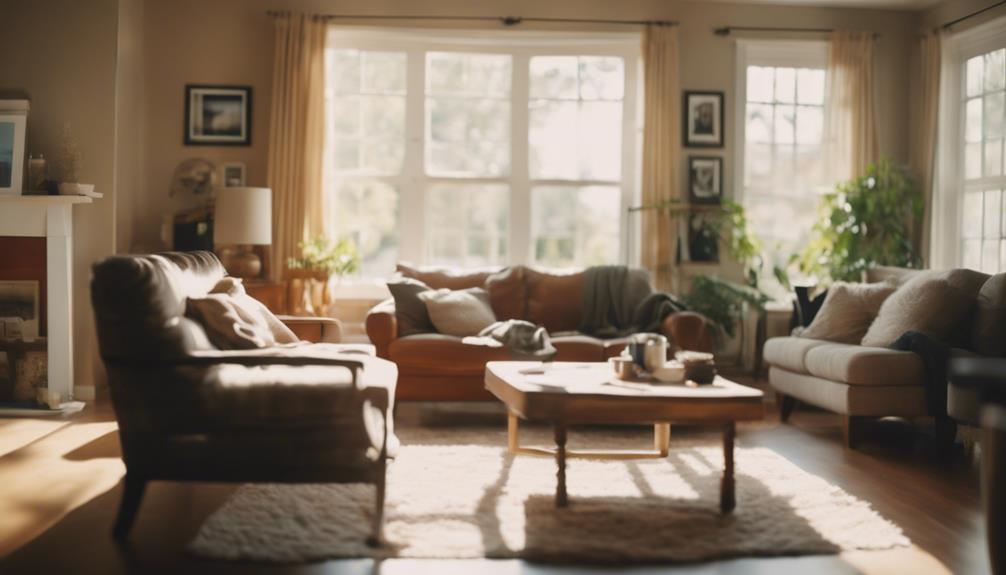
Yes, interior paint can lose its color over time. Factors like UV radiation, sunlight exposure, and paint quality all contribute to this. UV rays can break down the pigments in the paint, while sunlight can accelerate color fading. Opting for high-quality, UV-resistant paint can help prevent such fading. Adding multiple coats and using curtains to block direct sunlight can also help protect your paint. Regularly checking for fading, particularly on south-facing walls, can help maintain the vibrancy of your paint. Remember, proper paint care can play a significant role in keeping your interior looking fresh and colorful. Stay tuned for more tips on preserving your paint’s longevity.
Key Takeaways
- UV radiation accelerates paint fading over time.
- Quality paint with strong pigments resists fading.
- Multiple coats and premium paints offer better protection.
- Direct sunlight exposure speeds up color deterioration.
- Regular inspections and touch-ups maintain paint longevity.
Factors Affecting Interior Paint Fading
Interior paint fading is primarily influenced by sunlight exposure and UV radiation. When sunlight, containing UV rays, hits the painted surface, it starts a process that breaks down the pigments in the paint. These pigments are responsible for the color of the paint, so when they deteriorate, the paint fades.
The binders in the paint, which hold the pigments together and adhere them to the surface, also break down under UV exposure, further accelerating the fading process. Additionally, different paint finishes play a role in how quickly interior paint fades. Matte finishes tend to absorb more light, causing them to fade faster, while glossy finishes reflect more light and are more resistant to fading.
Choosing a quality paint with strong pigments and binders can help slow down the fading process. In addition, applying sufficient coats of paint ensures a more durable finish that resists fading over time.
Impact of Sunlight on Paint Fading
When exposed to sunlight, the breakdown of paint colors accelerates due to the deterioration of pigments, a key factor in interior paint fading over time. UV radiation from the sun plays an important role in this process, causing the pigments in the paint to deteriorate faster. Different paint finishes react diversely to sunlight exposure, impacting the rate at which fading occurs. The location of the painted surface within a room also affects the level of sunlight exposure it receives, thereby influencing the fading of the interior paint.
To prevent fading, consider using curtains to regulate the amount of sunlight that reaches the painted surfaces. Curtains can help control the intensity of sunlight exposure, protecting your interior paint from deteriorating rapidly. By managing the amount of sunlight that comes into a room, you can prolong the vibrancy of your paint colors and maintain the aesthetic appeal of your living spaces. Remember, taking small steps like using curtains can make a significant difference in preserving the beauty of your interior paint.
Role of UV Radiation in Fading
Exposure to UV radiation markedly accelerates the fading process of interior paint colors. When UV rays penetrate the surface of interior paint, they start to break down the pigments that give the paint its vibrant hue. This process leads to color deterioration over time, causing the paint to lose its original richness and intensity.
Direct sunlight, which contains high levels of UV radiation, can have a significant impact on the longevity and vibrancy of interior paint. To protect your paint from UV radiation, consider using UV-blocking curtains or blinds. These can help minimize the exposure of your interior paint to harmful UV rays, thereby extending its lifespan and maintaining its color quality.
Influence of Paint Quality on Fading
Investing in high-quality interior paint can greatly reduce fading over time. When it comes to interior paint, the quality plays a crucial role in determining how well it resists fading. Higher quality paints contain superior pigments and binders that help maintain color vibrancy for longer periods.
Premium paints are specifically formulated to have a higher resistance to fading compared to lower quality options. By choosing premium paints, you're ensuring a lasting and vibrant finish that will stand the test of time. The durability and longevity of your interior paint job are directly influenced by the paint quality you choose.
Strategies to Prevent Paint Fading
To prevent paint fading in your home, start by using curtains or blinds to shield your walls from direct sunlight.
Opt for premium paints that contain high-quality pigments and binders to guarantee long-lasting color vibrancy.
Regularly inspect your painted surfaces and consider applying multiple coats or selecting finishes with higher sheen levels for added protection against fading.
Sunlight Protection Tips
To protect your interior paint from fading due to sunlight, consider implementing these effective strategies.
Using UV-blocking curtains or blinds can shield your walls from the harmful effects of sunlight. Opt for paint with a higher sheen finish as it can reflect light, reducing the impact of sun exposure.
Choosing high-quality paint with superior pigments and binders is essential for color longevity. Additionally, applying multiple coats of paint enhances durability and helps maintain vibrancy.
If in doubt, consult a professional painter for advice on the best ways to prevent your interior paint from fading. Remember, premium paints offer superior protection against fading, ensuring long-lasting beauty for your walls.
Quality Paint Selection
For long-lasting protection against fading, prioritize selecting high-quality paint with superior pigments and binders. Premium paints are designed to offer better color retention and longevity for your interior surfaces.
Investing in quality paint guarantees that your walls maintain their vibrancy and resist fading over time. Superior paints with high-quality ingredients not only provide excellent fade resistance but also prove to be a cost-effective solution for achieving long-lasting results.
By choosing paint with strong color retention properties, you can effectively preserve the appearance of your interior walls and surfaces, keeping them looking fresh and vibrant for years to come.
Make the smart choice by opting for premium quality paint to safeguard against the effects of fading.
Regular Maintenance Checks
Regularly inspecting your painted surfaces for signs of fading is a proactive strategy to guarantee interior paint from losing its vibrancy over time. Implementing regular maintenance checks can help you identify areas prone to paint fading, especially in high-traffic or sun-exposed spots.
By addressing any signs of fading early on, you can prevent extensive paint fading and maintain the color integrity of your interior paint. Setting up a schedule for touch-ups and repainting as needed will secure that your painted surfaces stay vibrant for longer.
Don't wait for peeling, cracking, or discoloration to become noticeable; conducting frequent assessments allows for timely interventions to preserve the vibrancy of your interior paint.
Importance of Paint Finish Selection
Selecting the appropriate paint finish is essential in preventing interior paint fading over time. When choosing the right finish for your walls, consider the following:
- Matte finishes: While elegant, they can absorb more light and may fade quicker over time.
- Satin finishes: These strike a balance between durability and ease of maintenance, making them ideal for high-traffic areas.
- Semi-gloss finishes: Reflecting more light, they're more resistant to fading and easier to clean.
- Higher sheen finishes: Their reflective properties not only enhance the aesthetics but also provide better protection against fading.
- Durability and Longevity: Picking a finish based on the room's purpose can significantly impact how long your paint job lasts.
Tips for Long-Lasting Interior Paint
To guarantee long-lasting interior paint, prioritize investing in high-quality paint with superior pigments and binders. Quality paints with better pigments not only provide richer color but also resist fading over time.
When painting, consider hiring a Professional for the interior paint job. Their expertise guarantees proper application, which can greatly extend the lifespan of your paint.
Additionally, using UV-blocking curtains in rooms with direct sunlight can help prevent colors from fading faster. When choosing the paint finish, opt for one that suits the specific area of your home to ensure durability and longevity.
Regular maintenance, such as cleaning walls gently to avoid removing paint, can also help preserve the vibrancy of your interior paint.
Frequently Asked Questions
Does Interior Paint Change Color Over Time?
Yes, interior paint can indeed change color over time. Exposure to sunlight, heat, and other environmental factors can lead to fading and color shifts.
Opting for high-quality paint with strong pigments and binders can help maintain color consistency longer. Simple steps like using UV-blocking curtains and regular maintenance can slow down the color-changing process.
How Long Does Interior Paint Last on Walls?
When it comes to how long interior paint lasts on walls, several factors can influence its lifespan. Factors like sunlight exposure, room temperature fluctuations, and paint quality play a role in determining the durability of your paint job.
Does Interior Wall Paint Fade?
Interior wall paint can indeed fade over time due to various factors like sunlight exposure, temperature changes, and paint quality.
UV rays break down pigments, leading to color fading. Opt for higher sheen finishes as they resist fading better than matte ones. Blocking direct sunlight with curtains or blinds can also help.
Quality paints with superior ingredients last longer without fading. So, yes, interior wall paint can fade, but you can take steps to prevent it!
How Much Does Paint Fade Over Time?
Over time, interior paint can fade, especially if exposed to sunlight and fluctuations in temperature. Darker colors tend to fade faster due to light absorption.
Quality paint can last 5-10 years before showing signs of fading. To combat this, regular maintenance like cleaning and avoiding direct sunlight can help.
Opting for high-quality paint with better pigments and binders can greatly reduce the rate of fading.
Conclusion
To sum up, interior paint can fade over time due to factors like sunlight exposure and paint quality. Just like how a sunny day can fade a colorful beach towel left out too long, UV radiation can do the same to your walls.
By choosing high-quality paint, selecting the right finish, and taking steps to protect your walls, you can keep your interior looking fresh and vibrant for years to come. Remember, a little prevention goes a long way in preserving your paint job!
Interior
Can You Use All Purpose Cleaner on Car Interior
Try using all-purpose cleaner on your car interior for a versatile cleaning solution that simplifies your routine – find out how!
You can certainly utilize all-purpose cleaner on your car interior! It’s a convenient solution for various cleaning tasks such as leather and cloth seats, door panels, and dashboards. This versatile cleaner is cost-effective and streamlines your cleaning routine by performing well on multiple surfaces in your vehicle. Just be sure to test it first on a small hidden spot to confirm compatibility. Applying the cleaner gently with a soft brush or cloth, following dilution instructions, and cleaning in small sections will provide you with the best results. Exercise caution with dilution ratios, conduct test areas first, and ensure good ventilation. Explore more benefits and application tips for a spotless car interior.
Key Takeaways
- All-purpose cleaner is safe for various car interior surfaces like leather, cloth, vinyl, and plastic.
- Test compatibility with materials by spot testing in inconspicuous areas and following manufacturer guidelines.
- Apply cleaner gently with a soft brush or cloth, diluting as per instructions, and cleaning in small sections.
- Use proper precautions like following dilution ratios, testing in hidden areas, and ensuring good ventilation.
- Seek professional advice for thorough cleaning or specific material recommendations when in doubt.
Benefits of Using All-Purpose Cleaner
By using an all-purpose cleaner, you can efficiently tackle various car interior cleaning tasks with ease. This versatile Car Interior Cleaner is a fantastic choice for keeping your vehicle looking fresh and clean.
Whether you need to clean leather and cloth seats or wipe dust off door panels and dashboards, an All-Purpose Cleaner is your go-to solution for Interior and Exterior cleaning needs. The convenience of having one cleaner that can handle multiple surfaces not only saves you money but also streamlines your cleaning routine.
Say goodbye to the hassle of switching between different products for different areas of your car – the All-Purpose Cleaner does it all! Its effectiveness in removing dirt and grime from most interior surfaces makes it a must-have for any car owner looking for a versatile cleaning solution.
Make your cleaning process more efficient and enjoyable by incorporating this all-purpose gem into your car care routine.
Types of Surfaces You Can Safely Clean
Safely clean various car interior surfaces like leather, cloth, vinyl, plastic, and carpet using all-purpose cleaners.
- Leather: All-purpose cleaners effectively remove dirt and stains from leather seats without causing damage.
- Cloth: Use these cleaners to tackle spills and general soiling on cloth seats and upholstery.
- Vinyl: Keep your vinyl surfaces clean and fresh by using all-purpose cleaners to wipe away grime and spills.
- Plastic: Easily clean plastic components such as dashboards and door panels with the versatility of all-purpose cleaners.
These cleaners offer a cost-effective solution for maintaining a spotless car interior. Whether it's your dashboard, seats, headliners, or other interior components, all-purpose cleaners are up to the task. Say goodbye to dirt, grime, spills, and stains as you revitalize your car's interior surfaces with the power of these versatile cleaners.
How to Test Compatibility With Materials
To verify that the all-purpose cleaner is safe for use on your car's interior materials, test its compatibility by checking manufacturer recommendations and conducting a spot test in an inconspicuous area.
Start by reviewing the manufacturer's guidelines to see if the cleaner is suitable for various interior materials like leather, vinyl, plastics, and fabrics. Then, select a hidden area in your car, such as under the seats or inside a door panel, to perform a spot test. Apply a small amount of the cleaner and observe for any adverse reactions like discoloration, fading, or changes in texture. Take note of the material's age and condition as this can impact how it reacts to the cleaner.
If unsure, seek advice from professionals or online forums for recommendations tailored to your specific car interior surfaces. Testing for compatibility ensures that the cleaner won't harm your car's interior and helps maintain its appearance for the long term.
Proper Application Techniques
For effective application of the all-purpose cleaner on your car's interior, remember to use a microfiber cloth or soft brush to gently apply the solution and avoid excessive scrubbing. When cleaning your car's interior surfaces with the all-purpose cleaner, follow these tips for the best results:
- Test First: Always test the cleaner on a small area to confirm compatibility with the material.
- Gentle Application: Use a soft brush or microfiber cloth to apply the cleaner gently.
- Follow Instructions: Dilute the cleaner as per the manufacturer's recommendations to prevent residue buildup.
- Work in Sections: Clean the interior in small sections to ensure thorough cleaning without missing spots or causing streaks.
Precautions When Using All-Purpose Cleaner
When using all-purpose cleaner on your car interior, make sure to follow proper dilution ratios to avoid damaging surfaces.
Always test the cleaner on a small, hidden area first to confirm compatibility.
Additionally, maintain good ventilation to prevent inhaling fumes while cleaning.
Proper Dilution Ratios
Achieving the accurate dilution ratios is crucial for the effective and safe use of all-purpose cleaner on car interiors. To guarantee you're using the right amount of cleaner, follow these tips:
- Always adhere to the manufacturer's recommendations for dilution ratios to prevent damage to surfaces.
- Incorrect dilution ratios can lead to ineffective cleaning or potential harm to interior materials.
- Using too much concentrate might result in streaking or residue on surfaces.
- Conversely, using too little cleaner may not clean effectively, leaving behind dirt and grime.
Test on Small Area
To guarantee the safety of your car interior surfaces, always conduct a small area test before applying all-purpose cleaner. Testing on a small area allows you to check for any adverse reactions that could potentially damage the overall interior surfaces.
Look out for signs like discoloration, staining, or any other adverse effects before proceeding with a full interior cleaning. Different materials such as leather, vinyl, fabric, and plastics may react differently to the cleaner, so it's important to exercise caution.
This precautionary step ensures that the all-purpose cleaner is both safe and effective for the specific surfaces within your car interior. By testing on a small area first, you can avoid any potential mishaps and keep your car interior looking its best.
Ventilation While Cleaning
Guaranteeing proper ventilation while using all-purpose cleaner on your car interior is essential to safeguard against inhaling harmful fumes. Remember these precautions when cleaning your car's interior surfaces:
- Open doors and windows to allow fresh air circulation.
- Use a fan or work in a well-ventilated area to reduce fume concentration.
- Avoid confined spaces and consider wearing a mask for added protection.
- Follow safety guidelines on the cleaner's label to ensure a safe cleaning environment.
Maintenance Tips for Car Interiors
For keeping your car interior in top condition, regular maintenance is key. To help you maintain a clean and fresh interior, here are some maintenance tips for car interiors:
Maintenance Tips | Description |
---|---|
Use All-Purpose Cleaner | Effectively cleans dirt, dust, and grime from various surfaces like dashboards, door panels, and seats. |
Vacuum Regularly | After using an all-purpose cleaner, vacuuming helps remove remaining dirt and debris for a spotless look. |
Apply Interior Dressing | Protects surfaces and maintains a polished look in car interiors, enhancing their longevity and appeal. |
Seek Car Detailer Help | For a thorough clean, consider professional car detailers who use specialized tools and techniques. |
Frequently Asked Questions
Can All-Purpose Cleaner Be Used on a Car?
Yes, you can use all-purpose cleaner on a car! It's a versatile solution for cleaning various interior surfaces like dashboards, door panels, and seats. This cost-effective cleaner effectively removes dust, dirt, and grime, saving you from buying multiple specialized cleaners.
Keeping your car interior clean and fresh is easy with all-purpose cleaner. So go ahead, spruce up your ride with this convenient and efficient cleaning solution.
What Can I Use to Clean the Interior of My Car?
When it comes to cleaning your car's interior, you've got options! All-purpose cleaner is a versatile superhero, tackling dashboards, door panels, and seats with ease.
Grab a trusty microfiber cloth to wipe away dirt and grime, and don't forget those nooks and crannies; detailing brushes are your sidekicks for hard-to-reach spots.
Finish off with a protective dressing to keep your interior looking its best. Time to give your car a spa day!
Can You Use All-Purpose Cleaner on Car Plastic?
You can absolutely use all-purpose cleaner on your car's plastic surfaces! It's a versatile solution that effectively tackles dirt and stains on plastic dashboards, door panels, and trim pieces.
These cleaners are gentle yet powerful, designed to maintain the appearance of car interiors without causing damage. By using an all-purpose cleaner, you can keep your car looking clean and fresh, restoring its plastic components to their former glory with ease.
What Can I Use Instead of Car Interior Cleaner?
When looking for alternatives to car interior cleaner, you have various options.
Try using mild dish soap diluted in water, vinegar mixed with water, or a baking soda paste for natural cleaning.
Rubbing alcohol can tackle tough stains, while a mixture of water and essential oils can add a pleasant scent.
These substitutes are effective and safe for cleaning surfaces like leather, vinyl, and plastic in your car.
Conclusion
So, next time you're cleaning your car interior, remember that all-purpose cleaner can be a versatile and effective option for a variety of surfaces.
From plastic to upholstery, it can help you achieve a fresh and clean look.
Just be sure to test it first, use proper techniques, and take necessary precautions.
With a little maintenance, your car interior will be looking spick and span in no time!
Interior
Does Replacing Windows Damage Interior Walls
Tread carefully when replacing windows to avoid potential damage to your interior walls – learn how to protect your home!
When replacing windows, it is crucial to proceed with caution! Incorrect installation can result in damage to interior walls, such as weakened structure, water damage, mold, and drafts. Improper measurements can lead to gaps that cause drafts and leaks. Improper removal of windows may cause cracks, dents, or debris on walls. Careful installation is essential for wall protection. Look out for signs like cracks or discoloration and seek professional help to prevent issues. Ensure proper sealing to avoid damage. For more information on safeguarding your walls during window replacement, continue exploring the potential risks and ways to minimize them!
Key Takeaways
- Improper removal can cause cracks, dents, or scratches on interior walls.
- Dust and debris from removal can settle on walls, causing damage.
- Vibrations during removal may lead to peeling paint or wallpaper.
- Careful installation is crucial to protect wall integrity and aesthetics.
- Signs of wall damage include cracks, chips, discoloration, or bulges.
Potential Risks During Window Replacement
During window replacement, improper procedures can pose significant risks to the structural integrity of your interior walls. When replacing windows, it's important to be mindful of the potential dangers that could arise.
One major risk is the possibility of damaging your interior walls during the installation process. Cutting into walls or removing structural support incorrectly can weaken the overall stability of your walls. Additionally, if proper sealing and insulation measures aren't taken, your walls may be vulnerable to leaks. This can lead to water damage, mold growth, and decreased energy efficiency.
Furthermore, gaps and drafts resulting from inadequate sealing can increase the risk of air infiltration, causing discomfort and higher energy bills. It's essential to make sure that the new windows are installed correctly to prevent any harm to your interior walls and maintain a safe and efficient home environment.
Impact of Incorrect Measurements
Incorrect measurements during window replacement can have detrimental effects on the overall integrity and efficiency of the installation. When the opening size doesn't match the window frame due to inaccurate measurements, gaps can form. These gaps can lead to issues such as drafts, energy loss, and even water leakage, potentially damaging your interior walls.
Additionally, improperly sized windows can compromise the structural integrity of the wall, affecting the stability of the entire setup.
To prevent these problems, it's vital to guarantee accurate measurements before replacing your windows. Accurate measurements ensure a secure fit, proper alignment, and protection against damage to your interior walls. Hiring experienced professionals like Utah Window Experts can help you avoid the consequences of inaccurate measurements during window replacement.
Consequences of Improper Removal
Improper removal of windows can result in various damages to your interior walls. When windows aren't removed carefully, it can cause cracks, dents, or scratches on your walls.
If the removal process lacks adequate support, it may lead to structural damage like weakening of the walls or displacement of the studs.
Additionally, the dust and debris generated during window removal can settle on your walls, necessitating extra cleaning and maintenance efforts. Vibrations and hammering can potentially cause your wall paint or wallpaper to peel off, further adding to the damage.
Improper handling of old windows can also result in harm to surrounding wall surfaces such as drywall or plaster. To avoid these consequences, it's important to make sure that windows are removed with care and precision to protect the integrity of your interior walls and maintain the aesthetics of your living space.
Importance of Careful Installation
When replacing windows, remember that proper sealing techniques and wall protection methods are essential.
Ensuring a secure fit and using insulation can safeguard your interior walls.
Professional installation experts prioritize these steps to minimize any potential damage during the process.
Proper Sealing Techniques
To safeguard the integrity of your interior walls during window replacement, prioritize employing meticulous sealing techniques. Proper sealing plays an essential role in preventing damage and maintaining the structural soundness of your walls. Here are some key points to keep in mind:
- Seal all gaps and joints thoroughly to prevent air infiltration and moisture damage.
- Utilize quality sealing materials such as silicone or mastic for long-lasting protection.
- Hiring professional installers who are skilled in precise sealing methods can guarantee the job is done correctly and your walls remain intact.
Wall Protection Methods
To guarantee the protection of your interior walls during window replacement, it is essential to prioritize careful installation methods.
When installing new windows, make sure that professional installers handle tools like reciprocator saws and cutters with caution to prevent any damage to your walls.
Two-stage weatherproofing methods are vital for maintaining the integrity of your interior walls during the installation process. Utilizing expansion foam and aluminum capping can provide an extra layer of protection against potential damage.
By hiring skilled professionals, you can rest assured that your windows will be fitted precisely, minimizing the risk of any harm to your interior walls.
Signs of Wall Damage
If you notice cracks, chips, or dents in your interior walls, these could be clear signs of damage that occurred during window replacement. Such wall damage might result from improper window installation or structural issues. Signs of wall damage to watch out for include:
- Discoloration, peeling paint, or wallpaper damage
- Uneven surfaces, bulges, or gaps in the walls
- Water stains, dampness, or mold growth
These indicators can point to issues caused by window replacement procedures. Keep an eye out for any warped or misaligned windows, as they may also suggest underlying structural problems or damage to your interior walls during the replacement process.
Minimizing Risks Through Proper Procedures
When safeguarding the integrity of your interior walls during window replacement, proper procedures play a significant role in minimizing risks. Professional installers are trained to take precautions to avoid potential damage to your walls. They understand the importance of protecting your home during the window replacement process. Fragile items should be moved away from the work area to prevent any accidents. Additionally, covering furniture and floors can help shield them from dust and debris that may arise during the installation.
To minimize risks, professional installers also implement precautions to contain inconveniences like vibrations, noise, and dust that can occur when replacing windows. By following these procedures, you can help safeguard your interior walls and ensure a smooth window replacement process. Remember, working with experienced professionals who prioritize these precautions can make a significant difference in maintaining the condition of your home while upgrading your windows.
Frequently Asked Questions
Does Installing New Windows Damage Walls?
When you install new windows, the chances of damaging your walls are low if you hire professionals. They take precautions to protect your interior walls during the process.
It's a good idea to move fragile items away from the work area and cover furniture to prevent dust and debris. Trust in proper containment measures to minimize disruptions caused by the installation.
Hiring experts guarantees a smooth window replacement with minimal impact on your walls.
Does Replacing Windows Damage Interior Trim?
When replacing windows, interior trim can be at risk of damage. The process involves tools like reciprocator saws, which may inadvertently harm the trim. Professionals take care to reduce such risks, especially with delicate trims.
Inspecting the trim before and after the replacement is vital to catch any damage early. Remember, handling fragile trim with care is key to preventing breakage or dents.
Be vigilant and address any issues promptly for a smooth window replacement experience.
Does Window Replacement Damage Drywall?
When replacing windows, potential damage to drywall is minimal. Professional installers take care to minimize harm to interior walls by using precautions such as moving fragile items away from the work area. Furniture and floors can be covered to protect against dust and debris.
Precautions like containing noise, dust, and vibrations are taken during the process. Overall, window replacement can be done with care to avoid significant damage to drywall.
Can You Replace Windows Without Removing Interior Trim?
You can indeed replace windows without removing interior trim by opting for retrofit or insert replacement windows. Retrofit windows fit snugly into the existing frame, keeping your trim intact.
Insert replacement windows are installed within the current frame, leaving your interior trim undisturbed. This approach saves both time and money compared to full frame replacements.
Consult a professional installer to find the best window replacement option for your home's interior.
Conclusion
To sum up, replacing windows can potentially damage interior walls if not done carefully.
For instance, a family in a rush to finish a DIY project ended up damaging their walls due to improper removal of the old windows.
By taking accurate measurements, removing old windows correctly, and ensuring careful installation, you can minimize the risks of damaging your walls during window replacement.
Remember, a little extra care and attention can save you from costly repairs in the long run.
Interior
When Is Best to Paint Interior
Discover the best time to paint interior spaces for a flawless finish and efficient results – it might not be when you think!
When you are prepared to paint the inside of your home, think about taking on the project in the winter for optimal outcomes. The cooler temperatures during the winter months assist the paint in drying effectively, saving you time and guaranteeing a flawless finish. Additionally, with more flexible scheduling and lower professional rates in the winter, it is the perfect time to give your home a rejuvenated appearance. Get prepared to revamp your space effortlessly and efficiently by selecting the best season for your interior painting project.
Key Takeaways
- Winter is ideal due to cooler temperatures for efficient drying.
- Low humidity in winter prevents adhesion and drying issues.
- Professional rates are more affordable in the off-peak season.
- Cool temperatures lead to faster drying and a smoother finish.
- Consider season impact for a stress-free, efficient painting project.
Optimal Temperature for Interior Painting
To achieve the best results when painting indoors, aim to work within the temperature range of 60-80°F for ideal drying times and a flawless finish. Painting in this temperature sweet spot guarantees that the paint dries efficiently, leading to a smooth and professional-looking outcome.
When tackling interior painting projects, especially in colder weather, it's important to pay attention to the temperature. Cold weather can prolong drying times, making it challenging to achieve that perfect finish you desire. Similarly, high humidity levels can also impede the drying process, affecting the overall quality and durability of your paint job.
Maintaining the right temperature while painting indoors isn't just about comfort but also about ensuring the paint adheres well and dries properly on your walls. By painting within the recommended temperature range, you set yourself up for success, improving the longevity and appearance of your paint job.
Impact of Humidity on Painting Process
High humidity levels can impact your painting process in several ways. It can cause paint to dry slowly and affect its adhesion. This, in turn, may lead to issues like dripping, streaking, and an overall poor finish. Ensuring the humidity levels are between 40% to 70% can help you achieve the best results when painting your interior walls.
Having the right humidity level is crucial for a successful paint job. Incorrect humidity can lead to various problems, from slow drying times to poor adhesion. Maintaining a humidity level between 40% and 70% is ideal for achieving a smooth and flawless finish on your painted walls.
Humidity and Paint Adhesion
When painting indoors, it's vital to take into consideration how humidity levels can affect the adhesion of the paint. High humidity can slow down the drying process, leading to issues like blistering, cracking, or peeling of the paint. Excess moisture in the air hinders proper curing of the paint, impacting its finish. In humid conditions, paint may take longer to dry, affecting its overall adhesion. Proper ventilation is essential in such environments to make sure that the paint adheres effectively. Here's a table to highlight the impact of humidity on paint adhesion:
Aspect | Impact |
---|---|
Humidity Levels | Above 70% can cause blistering, cracking, or peeling |
Drying Process | Slowed down due to high moisture content |
Ventilation | Critical for ensuring effective adhesion |
Drying Time Affected
Considering the impact of humidity on the painting process, the drying time is greatly impacted by high moisture levels in the air. High humidity can greatly slow down paint drying times, as moisture in the air interferes with the evaporation process, leading to longer wait times.
To guarantee best results, aim for low humidity levels, especially in cold weather, as this can help speed up the drying process. Proper ventilation plays a key role in controlling humidity levels during interior painting, facilitating a smoother and faster finish.
Best Season for Interior House Painting
Winter is the ideal season for interior house painting because the cooler temperatures help paint dry efficiently, saving you time and money.
With more scheduling availability and lower professional rates during the off-peak season, completing painting projects in winter is both productive and cost-effective.
Take advantage of the benefits of winter painting, like faster drying times and discounts, to transform your home into a cozy haven with a fresh coat of paint.
Ideal Painting Temperatures
For essential paint drying and finish quality, interior house painting is best done in temperatures ranging between 60-80°F. This perfect temperature range guarantees ideal paint drying, leading to a smooth finish that enhances the overall look of your space.
Cold weather can prolong drying times, while high humidity can hinder the drying process, affecting the quality of the paint job. Moisture in the air also plays a role, impacting paint evaporation and potentially causing issues with application and drying.
Hence, choosing the right season for your interior painting project is vital. By maintaining proper indoor temperatures and humidity levels, you set yourself up for success in achieving the best results when painting the interior of your house.
Weather Impact on Paint
To achieve the best results in your interior house painting project, timing your paint job according to the weather conditions is essential. Winter is the ideal season for interior painting due to low humidity, faster drying times, and cost savings. The cooler temperatures help the paint dry more efficiently, resulting in a smoother finish. Additionally, winter is an off-peak season for painters, meaning you may benefit from reduced professional rates and increased scheduling availability. Choosing to paint your interiors in winter can make the process less stressful and more cost-effective. Embrace the season and transform your home with a fresh coat of paint that not only looks great but also saves you time and money.
Benefits of Winter Interior Painting | |
---|---|
Low Humidity | Faster Drying |
Cost Savings | Smoother Finish |
Choosing the Right Interior Paint
When selecting the right interior paint for your project, prioritize low-to-zero VOC options to maintain healthier indoor air quality. Opt for 100% acrylic latex paints like Benjamin Moore for a durable and long-lasting finish on your walls.
Quality Painting is essential for a professional look; choose reputable brands known for their coverage, durability, and drying times. Using low-to-zero VOC paints not only benefits your health but also the environment. These paints emit fewer harmful chemicals, making them ideal for your home.
Benjamin Moore and Behr are trusted brands that offer a wide range of colors and finishes to suit your preferences. Make sure to check the paint labels for recommended drying times and temperature thresholds for the best application.
Proper Techniques for Interior Painting
Utilize high-quality brushes and rollers to achieve a smooth and professional finish when painting interiors. When tackling interior house painting, it's important to master proper techniques to guarantee a flawless result. Start by selecting excellent paint brushes and rollers that will make the application process easier and provide a clean outcome. Practice different painting techniques such as cutting in for edges, rolling for larger surfaces, and spraying for a more even coat.
Remember to follow a sequence of painting, typically starting from the ceiling, then moving to the walls, and finishing with the trim, for the best efficiency.
Allow sufficient drying time between coats to prevent smudges or imperfections, ultimately leading to a durable and even finish. Once the job is complete, don't forget the importance of proper clean-up. Wash your tools thoroughly, store any leftover paint appropriately, and dispose of waste responsibly to maintain a tidy workspace and prolong the life of your equipment.
Factors to Consider Before Painting
Taking into account the season before painting can greatly impact the overall process and outcome of your interior painting project. Winter months, surprisingly, can be the best time to paint your interiors. During winter, the low humidity prevents drying issues and enhances paint adhesion, leading to a smoother finish. Professional rates are often reduced during this off-peak season, making it a cost-effective time to hire contractors for your project. Additionally, cooler temperatures in winter help paint dry faster, resulting in quicker completion times. To help you understand the benefits of painting during the winter months, here is a table summarizing the key factors to contemplate before starting your interior painting project:
Factors to Contemplate | Benefits |
---|---|
Low Humidity | Prevents drying issues and enhances paint adhesion |
Professional Rates | Cost-effective bids from contractors |
Cool Temperatures | Faster drying times and smoother finish |
Off-Peak Season | Reduced stress and more scheduling availability |
Paint Adhesion | Better adherence to surfaces for long-lasting results |
Frequently Asked Questions
What Is the Best Weather to Paint Interior?
For painting interior spaces, the best weather is between 60-80°F with low humidity levels. This range allows for ideal drying times and smooth paint application.
Winter's lower humidity and cooler temperatures can expedite drying, making it a favorable time to paint.
In summer, guarantee proper ventilation to prevent rapid drying and achieve a flawless finish. Extreme heat or humidity can impact the quality of your paint job, so choose your painting days wisely.
When Should You Not Paint Your House?
When deciding when not to paint your house, consider avoiding extreme temperatures, high humidity, rainy conditions, direct sunlight, and strong winds. These factors can affect paint application, drying times, adhesion, and overall finish.
Ideal conditions include moderate temperatures, low humidity, dry weather, shaded areas, and calm winds.
Is It Okay to Paint Interior Walls in the Winter?
Yes, it's definitely okay to paint interior walls in the winter! Lower humidity levels speed up drying times, and cooler temperatures help paint stick better.
You can save money too, as contractors offer reduced rates during the off-peak season. Winter's low humidity also prevents paint issues like blistering.
Plus, with faster drying times and more scheduling availability, winter painting can be less stressful for you as a homeowner.
Which Month Is Best for Painting a House?
When it comes to painting your house, the best month can be a tough nut to crack. But fear not! Consider the benefits of tackling this task in the winter months.
With cooler temps aiding in paint drying and pro painters having more availability, you're in for a smooth ride. Plus, cost savings are always a win! So, go ahead, embrace the winter wonderland and give your home a fresh coat of paint.
Conclusion
To wrap up, when painting the interior of your home, it's crucial to take into account factors like temperature, humidity, and paint quality. Some may argue that painting can be done at any time, but selecting the right conditions can make a significant difference in the final result.
By taking these factors into consideration and following proper techniques, you can guarantee a smooth and successful painting project that will leave your home looking fresh and vibrant.
-
Vetted8 months ago
15 Best EMS Foot Massagers for Neuropathy to Soothe Your Feet
-
Vetted7 months ago
14 Best Personalized Father's Day Gifts for Your Husband – Show Him You Care
-
Alfresco7 months ago
Alfresco Stacker Doors: Seamless Indoor-Outdoor Living!
-
Tableware and Dining Accessories3 weeks ago
What Is the Meaning of the Word Tableware
-
Tableware and Dining Accessories3 weeks ago
When Is Tableware on Sale at Hobby Lobby
-
Vetted4 days ago
15 Best Detergents for Wool: Keep Your Woolens Looking Fresh and Fabulous
-
Tableware and Dining Accessories3 weeks ago
Which of the Following Is Not Classified as Tableware
-
Vetted2 months ago
15 Best Home Water Filtration Systems of 2025: A Comprehensive Comparison Guide