Connect with us

Home Decor

Mirror Painting Techniques

Harness the art of mirror painting with expert techniques to transform ordinary glass into a stunning, one-of-a-kind masterpiece.

Published

on

mirror reflection painting techniques

When it comes to mirror painting techniques, preparing the mirrored surface is crucial. Clean the mirror with a damp microfiber cloth, then prime it with white gesso to guarantee paint adhesion. Gather essential tools like acrylic paint, water-soluble pencils, and painter's tape. Apply a base coat of gesso, followed by thin, even layers of acrylic paint. Use water-soluble pencils to sketch designs, and add texture with a spray bottle. Remember to seal your masterpiece with a clear coat to maintain its beauty and extend its lifespan. With these techniques, you'll be well on your way to creating a stunning, one-of-a-kind mirror – and there's more to explore when you're ready to take your skills to the next level.

Key Takeaways

• Clean and prime the mirror surface with white gesso to ensure smooth paint adhesion and a strong bond.

• Apply acrylic paint in thin, even layers, allowing each layer to dry for a flawless finish.

• Use water-soluble pencils to sketch designs and add texture with a spray bottle for visual interest.

• Seal the painted mirror with a clear sealer in thin, even coats to maintain beauty and extend lifespan.

Advertisement

• Adapt painting techniques to the mirror's shape, considering angles and curves for a professional finish.

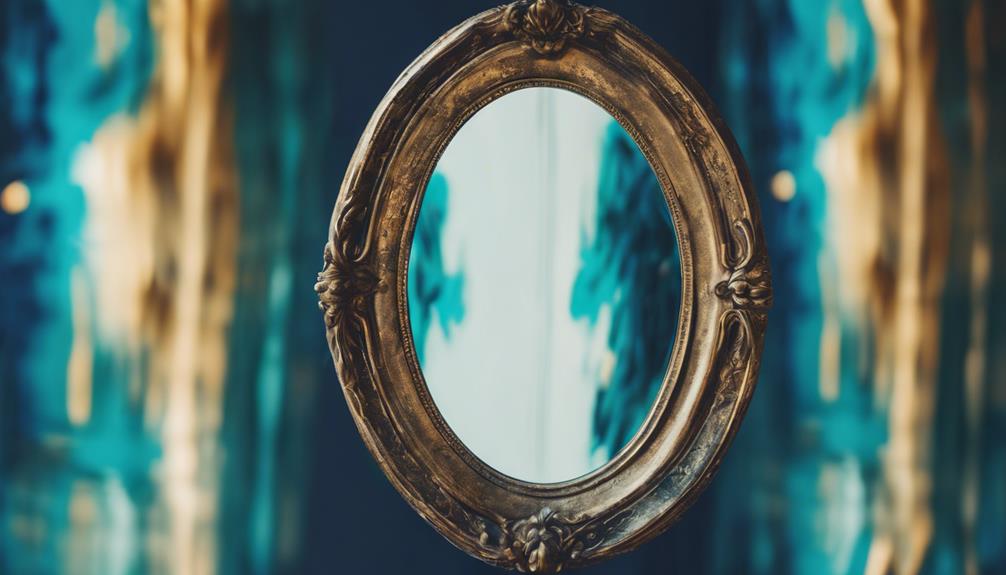
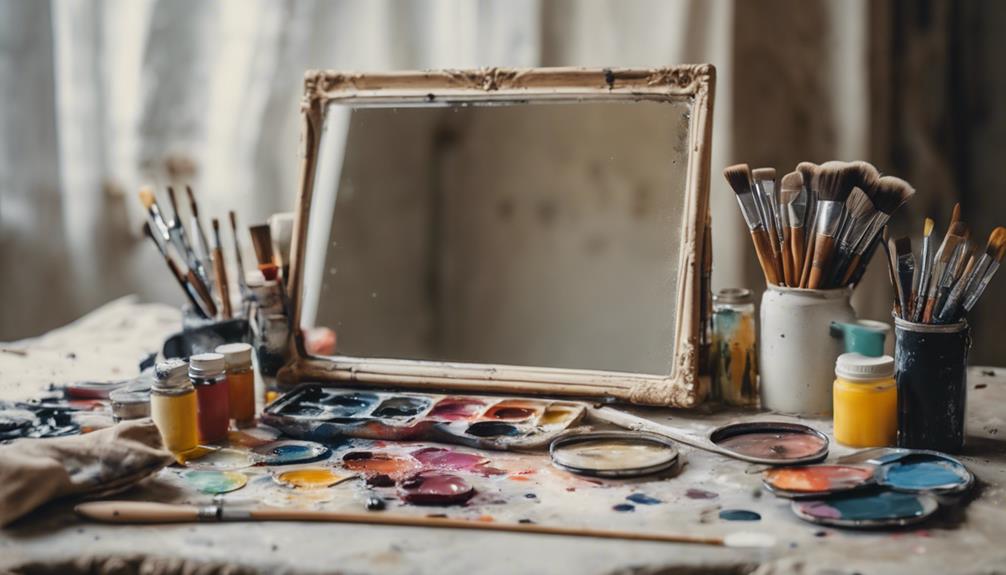
Preparing the Mirrored Surface

Before you begin creating your mirror masterpiece, thoroughly clean the mirror's surface with a dampened microfiber cloth to remove dirt and debris that may interfere with the painting process. This vital step guarantees a smooth, even surface for your paint to adhere to. Failure to clean the mirror properly can lead to uneven paint distribution, ruining the overall aesthetic of your artwork.

Once the mirror is clean, you're ready to prime the surface for painting. Applying a layer of white gesso to the areas you plan to paint creates a smooth, primed surface for your artwork. Let the gesso dry for 24 hours to ensure proper adhesion of the paint. This step is crucial, as it allows the paint to bond with the mirror's surface, creating a durable, long-lasting finish.

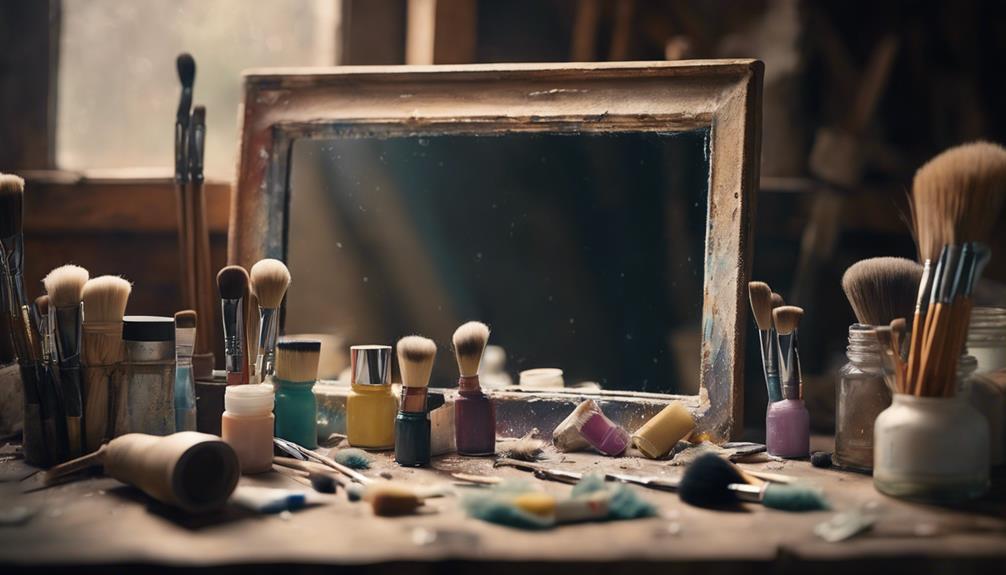
Essential Painting Tools Needed

essential painting tools discussed

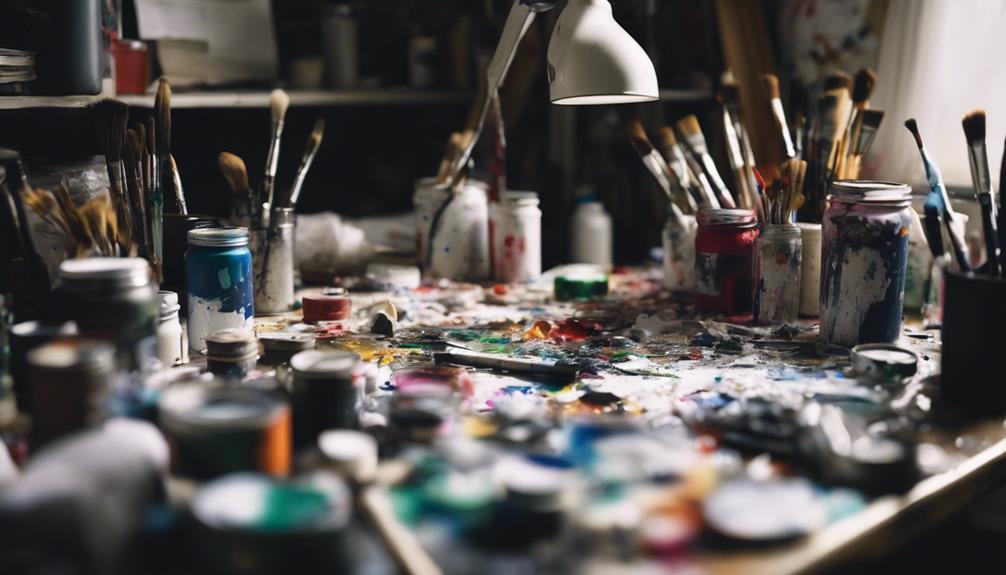
Gather the essential tools of the trade, including acrylic paint, water-soluble pencils, gesso, brushes of various sizes, and painter's tape, to guarantee a successful mirror painting experience. You'll be amazed at how these tools come together to create a stunning masterpiece.

Acrylic paint, with its quick-drying properties and vibrant colors, is the perfect choice for mirror painting. Water-soluble pencils are ideal for sketching designs on mirrors before painting, allowing you to visualize your design.

Gesso, used as a base coat, helps the acrylic paint adhere better and enhances the final colors. Don't forget painter's tape, which is essential for masking off areas on the mirror frame to prevent paint seepage and ensure clean edges.

Advertisement

Applying Primer for Adhesion

preparing surface for paint

With your tools in hand, you're ready to take the next step in creating a stunning mirror painting: applying primer to guarantee a strong bond between the paint and the mirrored surface. This vital step guarantees that your paint adheres properly, preventing peeling or flaking over time.

By applying primer, you create a smooth and even base for the paint to adhere to, which is essential for a long-lasting finish. Proper adhesion is essential, as it prevents the paint from chipping or cracking, and primer helps achieve this. Additionally, primer improves the durability of the paint job, resulting in a professional and polished finish.

In addition, it enhances the vibrancy and richness of the paint colors, making your mirror painting truly stand out. By taking the time to apply primer, you'll be rewarded with a beautiful, long-lasting finish that will make your mirror painting a true masterpiece.

Painting Techniques for a Flawless Finish

perfecting painting skills effectively

Now that your primer is fully dry, you're prepared to ignite your creativity and start painting, using techniques that will guarantee a flawless finish and make your mirror artwork truly shine.

To achieve a professional-looking frame, begin by applying a base coat of gesso to enhance paint adhesion and color intensity. Next, use acrylic paint to add thin, even layers, starting with darker areas to create depth and dimension. Consider using water-soluble pencils to sketch your design onto the mirror, allowing for precise lines and details.

As you work, remember to allow each layer to dry completely before applying the next, ensuring a smooth, even finish. To add texture and visual interest, you can use a spray bottle to create subtle, mottled effects.

Removing Excess Paint Safely

As you move forward with removing excess paint from your mirror, it's important to do so safely and effectively.

Advertisement

You'll want to think about the best paint removal methods, such as using a razor blade or craft knife, and implement safe cleaning practices to avoid damaging the mirror.

Paint Removal Methods

By the time you're ready to remove excess paint, you'll need to exercise caution to avoid damaging the mirror surface. Removing excess paint safely is important to achieving a professional-looking finish. You'll want to take your time and work carefully to avoid scratching or damaging the mirror.

To remove excess paint, you can use a razor blade or craft knife with Windex to gently scrape off the residue. Be careful not to apply too much pressure, as this can scratch the mirror.

Here are some tips to keep in mind:

  • Use a razor blade or craft knife with Windex to carefully remove excess paint
  • Gently scrape off excess paint residue from the mirror to ensure a clean finish
  • Take care when removing excess paint to avoid scratching or damaging the mirror

After removing excess paint, clean the mirror surface thoroughly to achieve a polished look. Properly removing excess paint ensures a professional and flawless mirror painting outcome.

Safe Cleaning Practices

When removing excess paint from a mirror, you'll need to employ safe cleaning practices to avoid damaging the surface. To do this, you'll want to use a razor blade or craft knife, along with a gentle glass cleaner like Windex. This combination will allow you to carefully scrape off the excess paint without applying too much pressure, which can scratch or damage the mirror.

Advertisement

Work in small, controlled motions to gradually lift off the excess paint, taking care not to harm the mirror underneath. Remember to wipe the mirror surface clean with a soft cloth after removing the excess paint to maintain a smooth and clear finish.

Taking your time and being patient during the removal process is crucial, as this will help preserve the integrity and appearance of the mirror. By following these safe cleaning practices, you'll be able to remove excess paint effectively without damaging your mirror.

Minimizing Messy Spills

Scrape off excess paint immediately to prevent it from drying and setting on the mirror surface, making removal more difficult. When working on your mirror painting project, it's crucial to minimize messy spills to achieve a professional-looking finish.

To remove excess paint safely, you'll need a few tools.

  • Use a razor blade or craft knife along with Windex to carefully remove excess paint from the mirror surface without causing damage.
  • Gently scrape off any spilled paint on the mirror using the razor blade while being cautious not to scratch the glass.
  • Wipe the mirror clean with a soft cloth or paper towel after removing excess paint to guarantee a clear and streak-free finish.

Remember to take your time and work slowly when removing excess paint to achieve a clean and polished look on the mirror surface. If you need to remove the mirror from the mirror frame, do so carefully to avoid damaging the frame or the mirror.

Distressing for a Vintage Look

vintage distressing adds character

As you explore the art of distressing, you'll discover that it's all about creating a soft, worn look that exudes faded beauty.

To achieve this, you'll focus on softening the edges, which involves subtly blending the paint to create a gentle, aged appearance.

Advertisement

Softening the Edges

To achieve a genuinely vintage look, you'll want to soften the edges of your mirror frame by distressing them, a technique that creates a beautifully worn, aged appearance. This process, known as distressing, involves using sandpaper or a sanding block to wear down the edges, revealing the underlying layers of paint or wood.

Here are some tips to keep in mind:

  • Focus on corners and high-contact areas for a natural distressed effect.
  • Lightly sand along the edges to reveal the underlying layers of paint or wood.
  • Use a variety of grits to achieve the desired level of distressing, from coarse to fine.

Worn, Faded Beauty

With a little creativity and some clever techniques, you can distress your mirror frame to achieve a beautifully worn, faded beauty that exudes vintage charm. One of the most effective distressing techniques is to apply Vaseline to specific areas of the frame before painting.

Once the paint dries, use sandpaper to gently rub off the areas with Vaseline, revealing the underlying surface and creating a worn, faded effect. This technique adds character to your mirror frame, giving it a unique, weathered finish that's perfect for a vintage look.

By experimenting with different distressing methods, you can achieve a one-of-a-kind, aged appearance that adds depth and personality to your mirror. Remember, the key to achieving a truly vintage look is to embrace imperfection and irregularity. Don't be afraid to get creative and try new things – after all, it's the imperfections that make a piece truly unique.

With practice and patience, you can master the art of distressing and create a stunning, one-of-a-kind mirror that's full of character.

Advertisement

Sealing Your Masterpiece

protecting your artwork securely

You've invested time and creativity into transforming a plain mirror into a stunning piece of art, and now it's important to seal your masterpiece to protect it from wear and tear.

Sealing your painted mirror is vital to maintain its beauty and extend its lifespan.

To guarantee a professional finish, follow these essential steps:

  • Choose a clear sealer to maintain the mirror's reflective surface, allowing your artwork to shine.
  • Apply the sealer in thin, even coats for best results, ensuring a smooth, uniform finish.
  • Consider using polyurethane or wax to seal the painted frame, adding an extra layer of protection and durability.

Painting Different Mirror Shapes

creating unique mirror shapes

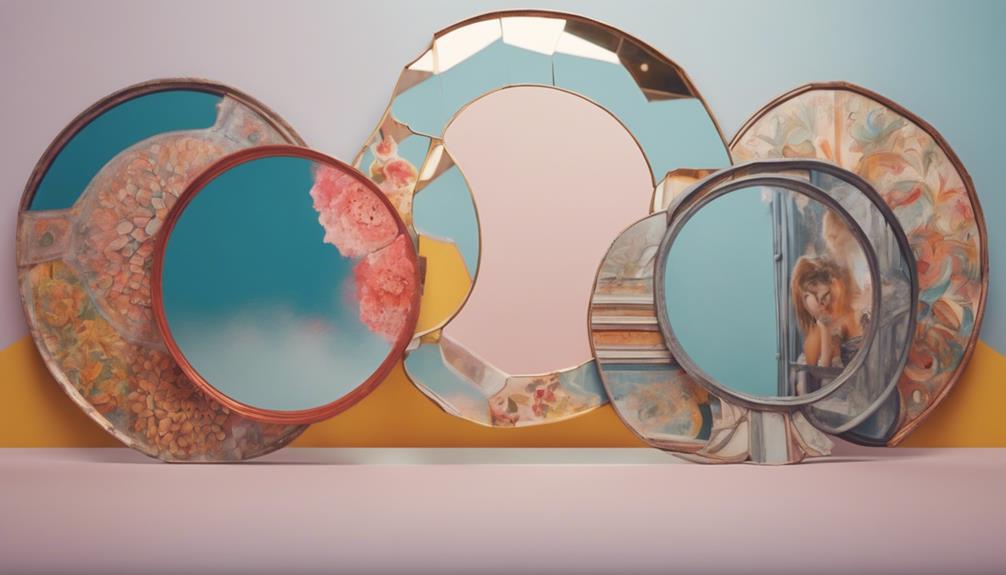
When tackling unique mirror shapes, begin by evaluating the frame's angles and curves to determine the best approach for painting. You'll need to adapt your technique to suit the mirror's shape, ensuring a flawless finish.

Circular mirrors, for instance, require a steady hand and attention to detail to maintain symmetry and smooth edges. Spray painting a mirror of this shape can be challenging, but the result is worth the effort.

Rectangular mirrors, on the other hand, offer straight lines that can be easily painted with clean, crisp edges for a polished look.

Oval mirrors provide a unique challenge, requiring careful brushwork for a smooth finish.

Advertisement

And if you're feeling adventurous, irregularly shaped mirrors offer creative opportunities to experiment with patterns, designs, and colors for a custom look.

Whatever shape you're working with, remember to prepare the mirrored surface carefully before you paint a mirror, and be patient – the end result will be a stunning work of art.

Common Mistakes to Avoid

education on common errors

Painting a mirror can be a delicate process, and neglecting essential steps or using the wrong techniques can lead to disappointing results. To achieve a beautiful, professional-looking finish, it's important to avoid common mistakes that can ruin your mirrored masterpiece.

Here are some common mistakes to steer clear of:

  • Don't apply painter's tape directly to the mirror's surface, as this can damage the mirror or leave residue.
  • Always make sure the mirror is clean and dry before painting to prevent dirt and moisture from affecting the paint's adhesion.
  • Apply thin layers of paint to prevent drips and achieve a smooth finish on the mirrored surface.

Maintaining Your Newly Painted Mirror

mirror care and maintenance

As you enjoy your newly painted mirror, remember that regular maintenance is important to preserving its beauty and longevity.

To keep your mirror looking its best, you'll want to establish a daily cleaning routine.

Learn effective mirror protection methods, and know how to avoid common mistakes that can damage your mirror's finish.

Advertisement

Daily Cleaning Routine

To maintain the beauty and longevity of your newly painted mirror, you should establish a daily cleaning routine that includes wiping it down with a damp microfiber cloth to remove dust and smudges. This simple yet effective habit will help preserve the quality of your painted mirror and prevent damage to the painted surface.

Here are some additional tips to keep in mind:

Avoid using harsh chemicals or abrasive cleaners that can damage the painted surface of the mirror.

Regularly inspect the painted area for any signs of wear or chipping to address any maintenance needs promptly.

Gently dust the painted mirror frame with a soft brush or cloth to maintain its appearance and cleanliness.

Advertisement

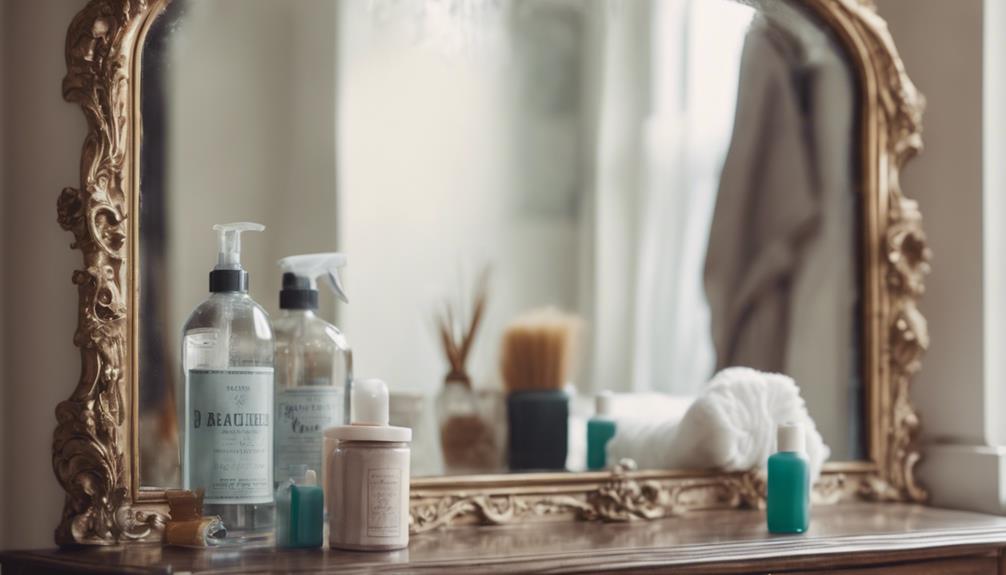
Mirror Protection Methods

You've taken the first step in preserving your mirror's beauty by establishing a daily cleaning routine, and now it's time to implement additional measures to safeguard your newly painted mirror from damage.

To guarantee your mirror remains in pristine condition, consider applying a clear sealant or wax to protect the painted surface from scratches and moisture. This extra layer of protection will provide peace of mind and maintain the mirror's appearance.

When hanging your mirror, use felt pads or bumpers on the back to prevent it from scratching against the wall. Regularly dust the painted mirror with a soft cloth to maintain its cleanliness and appearance.

You can also use painters tape to mask off areas you don't want to paint, ensuring a crisp, clean finish. By taking these precautions, you'll be able to enjoy your beautifully painted mirror for years to come.

Avoiding Damage Tips

When handling your newly painted mirror, exercise extreme care to prevent damage, as even the slightest mishap can ruin the entire piece. You've invested time and effort into creating a beautiful, one-of-a-kind mirror, so it's crucial to take the necessary steps to maintain its appearance.

Advertisement

To keep your mirror looking its best, remember:

  • Avoid using abrasive cleaners or tools on the surface of the mirror, as they can scratch or damage the paint.
  • Remove any dust or debris that accumulates on the surface of the mirror using a soft, dry cloth, and gently wipe it clean.
  • Handle the mirror with care when moving or hanging it, as bumps or knocks can cause chipping or scratching.

Frequently Asked Questions

How to Do Mirror Painting?

When you want to try mirror painting, start by prepping the surface – clean the mirror thoroughly with a damp cloth to guarantee paint adhesion.

Sketch your design with a water-soluble pencil, then apply gesso as a base for acrylic paint. Use thin coats, starting with darker areas, and let each layer dry completely.

What Kind of Paint Do You Use on a Mirror?

As you stand in front of your blank mirror, brush poised, you wonder what kind of paint to use. You imagine the vibrant colors and glossy finish you want to achieve.

To bring your vision to life, you'll need the right paint. Acrylic paint is a top choice, offering quick drying times and rich colors. Alternatively, enamel craft paints provide a durable, glossy finish.

How Do You Paint and Distress a Mirror?

When painting and distressing a mirror, you'll want to start with a clean slate, literally. Clean the mirror thoroughly to make sure the paint adheres properly.

Advertisement

Apply Vaseline to areas you want to distress, then paint and let it dry. Use a dark wax and a rag to add an aged look.

You can also experiment with overlay painting techniques for a unique, two-tone effect. Remember to be patient and gentle when handling the mirror to avoid scratches or breaks.

Can I Use Acrylic Paint on a Mirror?

You're wondering if you can use acrylic paint on a mirror. The answer is yes, you can! Acrylic paint is a great choice for mirror painting projects due to its quick drying time and versatility.

Just remember to apply thin coats, starting with darker areas for better coverage, and allow each layer to dry completely before adding more.

Conclusion

As you now possess the skills to transform mirrors into stunning works of art, remember that patience and attention to detail are key.

Advertisement

Did you know that, according to a study, a well-placed mirror can make a room appear 10% larger?

With your newfound expertise, you can create a masterpiece that not only adds aesthetic value but also creates an optical illusion, making your space feel more expansive.

Continue Reading
Advertisement

Home Decor

Ways to Incorporate Handmade Crafts Into Your Country Home Decor

Find inspiration in unique handmade crafts that will transform your country home decor into a cozy haven—discover the endless possibilities!

Published

on

By

handmade crafts for country decor

Incorporating handmade crafts into your country home decor adds a personal touch that enhances its cozy, rustic vibe. Start with thrifted items like wooden trays or vintage dishes to infuse character. Use natural elements, such as grapevine or jute ribbons, to layer textures. Adorn your dining table with burlap runners and mason jar centerpieces full of seasonal flowers. For lighting, try handcrafted pendant lights or rustic lanterns draped with twinkling fairy lights. Don't forget the walls; personalize with hand-painted frames or quilted fabric wall art for extra charm. Keep exploring to discover even more creative ideas!

Key Elements

essential components overview

When it comes to crafting for your country home, the right color scheme, materials, and textures can make all the difference.

You'll want to choose warm, earthy tones that reflect the natural beauty of the countryside.

Incorporating these elements will help create a cohesive and inviting atmosphere in your decor.

Color Scheme

How can you achieve a warm and inviting color scheme in your country home decor?

Start by embracing earthy tones like cashew and moss chalk paint. These colors can breathe new life into thrifted items, giving them a rustic touch that fits perfectly in a country setting.

Advertisement

Make sure to incorporate vintage-inspired colors such as yellow maze and night sky to create visual interest and depth in your handmade crafts.

To balance your decor, select floral arrangements featuring a mix of colors. Elements like blueberries, white flowers, and greenery should complement each other harmoniously, enhancing the overall aesthetic.

You can also implement natural elements and textures, like jute ribbon and grapevine, to add warmth and character while sticking to a cohesive color palette.

Materials

To create a truly authentic country home decor, select materials that reflect the rustic charm and warmth of your space. Start by incorporating thrifted items like wooden caddies, tin buckets, and vintage dishes. These unique finds add character and charm, making your decor feel lived-in and inviting.

Utilize natural elements, such as grapevine and faux greenery, to enhance your arrangements. These materials help create a cohesive, rustic aesthetic that emphasizes the beauty of nature.

Advertisement

Don't forget to add a personal touch with handmade tags made from coffee-stained manila paper. Use hand lettering and distressing techniques to elevate your decor further.

Experiment with floral arrangements, incorporating elements like blueberries and white flowers for whimsical accents. Remember to maintain visual balance by using odd numbers in groupings, which naturally draws the eye.

Finally, consider employing creative finishing techniques on thrifted wood items. A dry brushing of chalk paint or a touch of antique wax can give these pieces a vintage appearance, seamlessly blending them into your country decor.

Textures

Incorporating a variety of textures, like the roughness of distressed wood and the softness of jute, creates a warm and inviting atmosphere in your country home decor. You can easily find thrifted items that embody that rustic charm, enhancing the overall depth of your space. Natural elements, such as grapevine and faux greenery, not only add tactile appeal but also help unify your aesthetic.

To introduce softness, consider using jute ribbon or bows made from gingham or denim. These elements not only complement the country style but also add layers of interest. Mixing smooth surfaces, like painted jars, with the rough textures of sanded wood allows for striking contrasts in your decor.

Advertisement

Don't forget to layer materials for added richness. Think coffee-stained manila tags paired with antique wax finishes to achieve a vintage look that enhances your home's texture. By thoughtfully selecting and combining these various textures, you'll create an inviting space that reflects your personality and love for handmade crafts.

Embrace the beauty of these elements, and watch as your country home decor transforms into a cozy haven.

Essential Fixtures and Furniture

necessary items for living

When you think about essential fixtures and furniture for your country home, consider how a rustic wooden dining table can serve as the heart of your space.

An antique mason jar chandelier adds a unique touch, illuminating your gatherings with charm.

Don't forget woven basket wall hangings; they not only provide storage but also enhance the cozy, handcrafted vibe you're aiming for.

Rustic Wooden Dining Table

A rustic wooden dining table acts as the heart of country home decor, showcasing unique wood grains and imperfections that enhance its charm. This central piece invites family and friends to gather, infusing warmth and character into your space.

Advertisement

To personalize your table, incorporate handmade crafts like hand-carved wooden serving trays or custom burlap table runners. These additions not only complement the rustic aesthetic but also reflect your unique style.

Surrounding your dining table with antique or vintage chairs can create a cohesive look, which you can often find at thrift stores or flea markets. This combination reinforces the country theme and adds layers of history to your dining experience.

For an extra touch, decorate with mason jars filled with wildflowers or hand-painted wooden centerpieces. These elements elevate your table's visual appeal while maintaining a rustic feel.

Antique Mason Jar Chandelier

An antique mason jar chandelier not only illuminates your space but also enhances the rustic charm established by your wooden dining table. It serves as a stunning centerpiece, blending functional lighting with delightful vintage aesthetics. To create your chandelier, source vintage mason jars from thrift stores or flea markets; these can be repurposed as shades for light bulbs, casting a warm, inviting glow.

Mixing different sizes and styles of mason jars adds visual interest and unique character to your chandelier design. Consider using jute or hemp rope to hang the jars, which enhances the natural, rustic aesthetic that complements your country home decor beautifully. This approach not only keeps the look cohesive but also adds a touch of earthy texture.

Advertisement

For a personalized touch, you can embellish the jars with hand-painted designs or distressed finishes, reflecting your individual style and creativity. Crafting this chandelier becomes a rewarding project that showcases your handmade spirit while providing essential lighting.

Woven Basket Wall Hanging

Woven basket wall hangings add both charm and functionality to your country home decor, creating a striking focal point while providing storage solutions. These handcrafted pieces bring texture and warmth, enhancing the rustic feel of your space. By incorporating different sizes and shapes of woven baskets, you can create visual interest and depth on your walls.

To make the most of your woven baskets, consider layering them against a backdrop of farmhouse-style shiplap or muted paint colors. This contrast highlights their natural materials and craftsmanship beautifully. For an extra personal touch, combine the baskets with handmade tags or embellishments, like jute ribbon, to achieve a cohesive and charming aesthetic.

Don't forget to integrate faux greenery or florals within the baskets to introduce a splash of nature and color. This simple addition transforms your wall hanging into a dynamic element that breathes life into your decor.

Lighting Ideas

creative illumination concepts

When it comes to lighting your country home, you've got plenty of creative options to contemplate.

Rustic lantern string lights can set a cozy mood, while a vintage table lamp trio adds character to your space.

Advertisement

Don't forget about handcrafted ceramic pendant lights and rustic iron wall sconces, which can beautifully enhance your decor.

Rustic Lantern String Lights

Rustic lantern string lights add a warm, inviting glow to your country home decor, transforming any space into a cozy retreat. You can create these charming lights by repurposing thrifted lanterns, often found at second-hand stores for as low as $1.99. Simply fill them with fairy lights to achieve that perfect ambiance.

If you don't have lanterns, mason jars work just as well. Painting them with chalk paint gives them a distressed look, and adding LED string lights inside will enhance their appeal.

To further embrace the rustic aesthetic, wrap twine or jute ribbon around your lanterns or jars. This small detail ties your decor back to the country theme. Hang your handmade lantern string lights along porches, patios, or even inside your living spaces to create a cozy atmosphere, ideal for gatherings or quiet evenings.

Don't hesitate to experiment with different heights and arrangements. Cluster lanterns or jars together on a table or shelf, mixing them with floral arrangements for added visual interest.

Advertisement

With these simple touches, your country home will radiate warmth and charm, making it an inviting space for everyone.

Vintage Table Lamp Trio

Adding a vintage table lamp trio to your decor not only enhances the lighting but also brings a unique charm that complements your handmade crafts. Sourcing these lamps from thrift stores or flea markets can lead you to one-of-a-kind designs that encapsulate the essence of country decor.

Consider mixing styles, such as ceramic, metal, and glass, to create a visually interesting arrangement that adds depth to your lighting scheme.

To refresh old lamp bases, use cashew chalk paint or other soft hues that blend seamlessly with your rustic aesthetic. This simple update keeps the vintage feel while ensuring the lamps fit your overall decor.

You can further enhance their appeal by adding decorative elements like jute ribbon or distressed tags to the shades, tying them in with other handmade items in your home.

Advertisement

Position your trio strategically, whether on side tables or mantels, to create warm, inviting light. This setup not only illuminates your space but also highlights the beauty of your handmade crafts, making your country home feel cozy and welcoming.

With these lamps, you'll see how lighting can be both functional and a stylish statement.

Handcrafted Ceramic Pendant Lights

Handcrafted ceramic pendant lights bring a unique charm to your country home decor, showcasing artisanal craftsmanship through their distinct glazes and textures. These lights not only illuminate your space but also serve as stunning decorative pieces that reflect your personal style. You can choose from a variety of shapes and sizes, allowing for a customized look that complements your existing decor while adding a personal touch.

The natural materials used in these pendant lights, such as clay, resonate beautifully with the rustic aesthetic of country homes. They create a warm and inviting atmosphere, perfect for cozy gatherings with family and friends. To enhance your lighting's functionality and sustainability, consider incorporating energy-efficient LED bulbs, which work seamlessly with ceramic designs.

Position your ceramic pendant lights over key areas like kitchen islands or dining tables. This practical placement not only provides essential illumination but also establishes a focal point that elevates your overall design.

Advertisement

With their artisanal qualities and versatility, handcrafted ceramic pendant lights can transform any space, making them an essential addition to your country home decor.

Rustic Iron Wall Sconces

Iron wall sconces offer a perfect way to enhance your country home decor, providing ambient lighting while adding a vintage touch that complements your handcrafted ceramic pendant lights. These rustic sconces often come with intricate designs and a sturdy construction, making them ideal for showcasing your handmade crafts, like mason jar candle holders or floral arrangements.

When selecting wall sconces, consider pieces with a distressed finish, as they harmonize beautifully with other rustic elements, such as reclaimed wood furniture and vintage decor. You can also pair your sconces with natural materials like jute or burlap to add an inviting texture that emphasizes the handmade aesthetic.

Utilizing wall sconces to display seasonal decor, such as small wreaths or greenery, allows you to create a versatile styling option that can change with the seasons. This flexibility adds a dynamic element to your decor while maintaining a cohesive look throughout your home.

Incorporating rustic iron wall sconces not only illuminates your space but also serves as a stylish backdrop for showcasing your cherished handmade crafts, enhancing the overall charm of your country home.

Advertisement

Decorative Elements

artistic design features

When it comes to decorative elements, hand-painted wooden picture frames can add a personal touch to your walls.

You'll love the warmth of quilted fabric wall art, which brings a cozy, inviting feel to any room.

A rustic clay pot centerpiece can tie everything together, offering an earthy charm that perfectly complements your country home decor.

Hand-Painted Wooden Picture Frames

Customizing hand-painted wooden picture frames with chalk paint or acrylics adds a personal touch that beautifully complements your country home decor style. You can choose colors that match your existing palette or add a pop of vibrancy to your space. To achieve a rustic, vintage appearance, consider using distressing techniques like sanding and applying antique wax. This approach not only enhances the frame's character but also fits seamlessly into a country-themed aesthetic.

To further elevate your frames, you might add decorative elements such as jute ribbon, faux greenery, or small floral accents. These details can tie the frames into your overall decor theme and create a cohesive look throughout your home. For an extra layer of personalization, think about using manila tags with hand lettering or coffee staining. These charming labels can give each frame a unique story.

When arranging multiple frames on a wall, try incorporating a triangle pattern. This technique establishes visual balance and enhances the overall look of your decor, making your hand-painted frames a stunning focal point in your country home.

Advertisement

Quilted Fabric Wall Art

Handmade quilted fabric wall art beautifully complements hand-painted picture frames, adding warmth and texture that enhances the rustic charm of your country home decor. You can choose from various fabric patterns and colors to create a cohesive aesthetic that reflects your personal style. Incorporating patchwork designs not only evokes nostalgia but also connects to heritage, making these pieces meaningful focal points in your living spaces.

Using natural fibers like cotton or linen for your quilted wall art enhances its rustic appeal while ensuring durability and easy care. You can display quilted pieces in several ways, whether framed or hung as standalone art. This versatility allows you to mix and match with other decorative elements in your home.

To make your quilted fabric wall art truly unique, consider adding embellishments such as buttons, lace, or embroidery. These personal touches will express your creativity and elevate your decor. Overall, quilted fabric wall art serves as an inviting and beautiful addition to your country home, making it feel warm, welcoming, and full of character.

Rustic Clay Pot Centerpiece

A rustic clay pot makes a stunning centerpiece that effortlessly showcases seasonal floral arrangements and natural elements, enhancing the charm of your country home decor. You can fill the pot with a delightful mix of faux berries, white flowers, and greenery to create a lively, whimsical look that reflects nature's beauty.

To add visual interest, arrange your flowers using a triangle pattern, ensuring balance and symmetry within the display. This approach draws the eye and makes the centerpiece more appealing. For an extra touch of texture, consider wrapping jute ribbon or gingham fabric around the rim of the clay pot, perfectly complementing the rustic aesthetic.

Advertisement

Don't forget to personalize your centerpiece! Attaching handmade tags with hand-lettered messages can evoke a warm, inviting atmosphere, making your guests feel right at home. You might also incorporate natural elements like grapevine or faux greenery for a cohesive look that ties everything together.

Flooring

flooring installation and options

When it comes to flooring in your country home, you've got some charming options to contemplate.

Reclaimed barn wood planks can add a warm, rustic feel, while natural stone tile offers durability and elegance.

If you're looking for a unique touch, a cottage-style painted concrete floor might just be the creative expression your space needs.

Reclaimed Barn Wood Planks

Reclaimed barn wood planks bring unique character and history to your home, making them an ideal choice for rustic flooring. Sourced from old barns, these planks offer not just aesthetic appeal but also a sustainable option for your flooring needs. By repurposing materials that might otherwise end up in a landfill, you're making an environmentally friendly choice that aligns with sustainable building practices.

The rich grain patterns and color variations in reclaimed wood add warmth and charm, creating a cozy atmosphere that complements your country home decor. Plus, many of these planks undergo treatment to eliminate pests and enhance durability, ensuring they can handle daily wear while maintaining their natural beauty.

Advertisement

Installing reclaimed barn wood flooring can also boost your property value. It's often viewed as a high-quality feature by potential buyers who appreciate a rustic aesthetic. So, when you choose reclaimed barn wood, you're not just investing in flooring; you're enhancing the character of your home while making a smart investment.

Embrace the charm and sustainability of reclaimed barn wood planks, and watch your country home transform into a warm, inviting space.

Natural Stone Tile Flooring

Natural stone tile flooring complements the rustic elegance of reclaimed barn wood planks while adding durability and a timeless aesthetic to your country home decor. Each piece of natural stone is unique in color and texture, allowing you to create a personalized and visually appealing foundation for your living spaces. This flooring option not only enhances the charm of your home, but it also provides excellent resistance to wear and tear, ensuring it stands the test of time.

One of the practical benefits of natural stone tiles is their ability to improve indoor air quality. They help reduce allergens and dust accumulation, contributing to a healthier living environment for you and your family. With proper sealing, maintaining your natural stone tile flooring is relatively easy; regular sweeping and occasional mopping will keep it looking its best.

Available in various finishes like honed or polished, natural stone tiles can complement different styles of country decor, from farmhouse elegance to rugged lodge aesthetics. By incorporating natural stone tile flooring into your home, you'll create a beautiful and functional space that embodies the charm of country living.

Advertisement

Cottage-Style Painted Concrete Floor

A cottage-style painted concrete floor adds a charming and personalized touch to your country home, transforming a plain surface into a delightful centerpiece.

To achieve this look, start by cleaning and prepping the concrete, ensuring it's free from dirt and debris for ideal paint adhesion. Using chalk paint is an excellent choice, as it provides a matte finish and great coverage, allowing you to customize colors that complement your decor.

Begin with a primer coat in a neutral shade, then apply multiple coats of your chosen color for durability. This process helps prevent chipping and fading over time.

To enhance the rustic charm, consider using a dry brushing technique with a lighter shade. This creates a distressed effect that mimics aged wood or worn flooring, adding depth to your space.

Conclusion

Incorporating handmade crafts into your country home decor adds warmth and character that store-bought items just can't match.

Advertisement

By focusing on key elements like essential fixtures, unique lighting, and decorative accents, you can create a cozy, inviting space that reflects your personal style.

Don't forget about the flooring—natural materials can enhance the rustic feel.

Embrace your creativity, and let your handmade pieces shine, turning your home into a true expression of who you are.

Continue Reading

Home Decor

Refresh Your Bedroom for Late Summer – The Before and After Will Shock You!

Feel the transformation as you refresh your bedroom for late summer—discover the simple changes that will leave you in awe!

Published

on

By

stunning bedroom makeover reveal

You can refresh your bedroom for late summer with just a few simple changes that'll leave you amazed at the transformation. Start by swapping heavy bedding for lighter materials and choose soothing pastel colors like blush pink or mint green for a calming vibe. Incorporate vibrant throw pillows and indoor plants for a lively touch. Brighten the space with dimmable lighting. Don't forget personal touches, like family photos or seasonal decor, to enhance your space. These updates can turn your bedroom into a serene retreat. Discover even more tips for an incredible makeover you won't want to miss!

Key Takeaways

  • Choose a soothing color palette of muted pastels to create a calming ambiance in your bedroom for late summer.
  • Swap out heavy bedding for lighter materials like linen or cotton to enhance comfort and airflow.
  • Incorporate plants and greenery to improve air quality and bring a refreshing summer vibe indoors.
  • Utilize functional storage solutions, such as decorative baskets and multi-functional furniture, to keep your space organized and clutter-free.

Importance of a Bedroom Refresh

Revitalizing your bedroom isn't just about aesthetics; it's an essential step to enhance your space's functionality and create a serene retreat that boosts your well-being.

The importance of a bedroom makeover lies in its ability to transform your environment, making it more inviting and reflective of your personal style. Small changes can make a significant difference, such as swapping out bedding or introducing new decor that aligns with the season.

Incorporating elements like plants or updated lighting can dramatically improve the ambiance without requiring extensive renovations. These updates not only rejuvenate the space but also foster a connection to the changing seasons, keeping your bedroom feeling alive and vibrant.

Regularly updating your bedroom maintains its role as your personal retreat, ensuring it remains a place for relaxation and rest. Opting for soft color palettes and natural materials helps create a calming atmosphere that promotes restful sleep.

Key Design Elements for Late Summer

late summer design essentials

As you refresh your bedroom for late summer, choosing the right color palette is essential for creating a soothing atmosphere.

Consider making functional decor updates that enhance both comfort and style, ensuring your space feels inviting.

Advertisement

With these key design elements, you can effortlessly shift your bedroom into a late summer retreat.

Color Palette Selection

A soothing color palette featuring muted pastels like blush pink, mint green, and light lavender sets the perfect backdrop for a late summer bedroom revitalization. This color palette selection not only evokes a calming atmosphere but also reflects the warmth of the season.

To enhance your space, consider these four key elements:

  1. Natural Fibers: Use linen and cotton for your bedding to promote comfort and align with the airy feel of late summer aesthetics.
  2. Vibrant Accents: Add pops of color through throw pillows and artwork to create a lively contrast against your neutral backdrop.
  3. Greenery Touch: Incorporate plants or faux greenery to improve air quality and bring a rejuvenating essence of summer indoors.
  4. Layered Textures: Introduce cotton velvet throw blankets and woven baskets to enhance visual interest and depth, making the room feel cozy yet sophisticated.

Functional Decor Updates

Functional decor updates can greatly enhance your late summer bedroom by combining style and practicality to create a revitalizing atmosphere.

Start by swapping out your heavy bedding for lighter materials like 100% cotton or linen. This won't only improve your comfort but also enhance airflow during those warm summer nights.

Next, consider incorporating soft color palettes, such as light blues and pastel pinks. These colors create a calming ambiance that reflects the vitality of the season. To promote sustainability and a connection with nature, opt for natural decor elements like wooden furniture and cotton accessories.

Advertisement

Don't forget about organization! Practical storage solutions, such as decorative baskets or demilune bedside tables, can keep your space clutter-free without sacrificing aesthetic appeal.

Lastly, implement dimmable lighting options, like adjustable wall sconces or bedside lamps. This allows you to control the room's mood, making it easy to adapt from relaxation to activity.

Functional Storage Solutions

efficient organizing and space saving

Maximizing your bedroom's storage options can create a more organized and serene space, perfect for late summer relaxation. To help you achieve that, consider these functional storage solutions that can replace your old one and provide a fresh feel:

  1. Demilune Bedside Tables: These stylish tables offer ample closed storage while keeping your space looking sleek.
  2. Baskets or Bins: Use them for frequently accessed items like books or chargers. They keep everything tidy and easily accessible.
  3. Multi-functional Furniture: Invest in ottomans that double as storage. They're perfect for smaller bedrooms, offering seating and space-saving solutions.
  4. Designated Spots: Create specific areas for everyday items to minimize clutter. This promotes a polished appearance and simplifies your nighttime routine.

Make sure to regularly assess and declutter your storage solutions. This little tour of your bedroom's functionality can enhance not only the organization but also your overall tranquility.

Embrace these smart strategies, and you'll transform your bedroom into a peaceful retreat just in time for late summer!

Lighting for Ambiance and Style

ambiance enhancing lighting design

Creating a serene and inviting atmosphere in your bedroom is just as important as having effective storage solutions, and lighting plays a key role in achieving that ambiance. For your bedroom refresh, consider incorporating dimmable lighting options that let you easily adjust the mood, whether you want a cozy setting for relaxation or a brighter space for activities.

Layered lighting is essential; mix ambient, task, and accent types to enhance versatility throughout the day. Adjustable wall sconces can add charm while providing focused light for reading, doubling as decorative elements. When you choose lighting for ambiance and style, think about the thoughtful placement of fixtures. Verify bedside tables are well-lit for nighttime reading and easy access to essentials.

Don't overlook the impact of window treatments and a stylish curtain rod, which can complement your lighting choices and enhance the overall aesthetic. With summer winding down, now's the perfect time to revamp your bedroom. Let the right lighting transform your space into a tranquil haven that reflects your unique style, making each moment in your bedroom feel special.

Advertisement

Personal Touches to Enhance Decor

enhancing decor with personalization

Incorporating personal touches into your bedroom decor not only reflects your unique style but also fosters a warm and inviting atmosphere. By integrating meaningful elements, you can create a space that resonates with who you are.

Here are some easy ways to enhance your decor:

  1. Family Photos: Display framed pictures of loved ones to keep cherished memories close at hand.
  2. Artwork: Choose pieces that inspire you, like a motivational print that aligns with your values, such as “Be Your Own Hero.”
  3. Seasonal Decor: Update throw pillows or add fresh floral arrangements to keep your space feeling connected to the changing seasons.
  4. Functional Decor: Incorporate wall hooks for jackets or bags, blending practicality with style.

These personal touches not only beautify your space but also enhance your emotional connection to it.

Engaging in DIY projects, like creating a cozy reading nook, allows for further customization. By making these small changes, you'll transform your bedroom into a true reflection of your personality, making it a sanctuary you love to retreat to.

Safety Considerations for Newborns

newborn safety precautions essential

When you're setting up your nursery, safety should be your top priority.

Make sure to secure furniture, choose non-toxic paints, and tackle baby-proofing essentials to create a safe environment for your little one.

Let's go over some key considerations to keep your newborn safe as they start to explore.

Furniture Securing Methods

Securing heavy furniture to the wall is vital for preventing dangerous tipping accidents in homes with newborns. When you're setting up your nursery or bedroom, it's important to implement proper furniture securing methods. Here are four effective ways to guarantee safety:

Advertisement
  1. Use Anti-Tip Straps: Attach these straps to heavy pieces like dressers and bookshelves. They anchor the furniture to the wall, greatly reducing the risk of tipping.
  2. Install Corner Guards: For furniture with sharp edges, corner guards and edge bumpers can help minimize injury risks as your baby begins to crawl or walk.
  3. Manage Cords and Blinds: Regularly inspect and secure any cords and blinds in the nursery. Keeping these out of reach prevents strangulation hazards.
  4. Check Detectors Monthly: Install smoke and carbon monoxide detectors in the bedroom, and remember to check them monthly to maintain a safe environment for your newborn.

Non-Toxic Paint Options

Choosing non-toxic paint for your nursery not only enhances the room's aesthetic but also guarantees a safer environment for your newborn. Non-toxic paints are formulated without harmful chemicals like volatile organic compounds (VOCs), making them a smart choice for improving indoor air quality. Brands like Benjamin Moore and Sherwin-Williams offer excellent zero-VOC and low-VOC options that maintain durability and color richness while prioritizing health.

When selecting non-toxic paint, pay attention to certifications such as Green Seal or Greenguard. These labels indicate that the product meets strict chemical emissions limits and safety standards, ensuring peace of mind as you create your baby's space.

Using non-toxic paints not only beautifies the nursery but also helps reduce the risk of respiratory issues and chemical exposure for your sensitive infant.

Baby-Proofing Essentials Checklist

Creating a safe environment for your newborn involves a thorough baby-proofing essentials checklist that addresses potential hazards throughout your home. You want to guarantee every space is secure, allowing your little one to explore safely. Here's a quick checklist to help you get started:

  1. Outlet Covers & Corner Guards: Install these to prevent electrical accidents and injuries from sharp furniture edges, especially in areas your baby frequents.
  2. Secure Furniture: Anchor all furniture to walls to avoid tipping hazards, particularly where your baby will be crawling or starting to walk.
  3. Baby Gates: Use baby gates to restrict access to unsafe areas in your home, guaranteeing a safe environment as your little one begins to explore.
  4. Inspect Cords & Blinds: Regularly check cords and blinds for strangulation hazards. Keep them out of reach or use cord shorteners and cleats.

Additionally, equip your home with smoke and carbon monoxide detectors, testing them regularly.

Creating a Cozy Reading Nook

cozy reading nook setup

Transform your bedroom into a cozy reading nook where children can immerse themselves in bedtime stories and enjoy casual reading. Start by making a new bookshelf the centerpiece, ideally filled with a variety of children's books for organized storage and easy access. This not only keeps the area tidy but also encourages a love for reading.

Next, add a soft and comfortable hanging chair. This inviting space complements the room's decor and becomes the perfect spot for snuggling up with a good book. To make it even more engaging, incorporate decorative elements like letter boards, artwork, and globes. These personal touches spark creativity and make the nook uniquely theirs.

Don't forget to establish a dedicated coloring area alongside the reading nook. This multifunctional space fosters creativity and play, making reading even more enjoyable. Utilize simple organizational tools like bins for craft supplies, ensuring everything has its place.

Advertisement

Upgrading Bedding and Accessories

bedding and accessories upgrade

Upgrading your bedding and accessories can instantly elevate the comfort and style of your bedroom, making it a perfect retreat for late summer evenings. With just a little effort, you can create a serene atmosphere that invites relaxation.

Here are four simple ways to refresh your space:

  1. Choose Luxe Fabrics: Opt for 100% cotton or linen bedding. Not only do they feel incredible against your skin, but they also promote sustainability in your decor.
  2. Soft Color Palettes: Integrate calming colors in your bedding. Shades like soft blues or muted pastels can transform your bedroom into a tranquil oasis.
  3. Decorative Touches: Add little elements like cotton velvet throw pillow covers. They provide a stylish upgrade and a hint of luxury without overwhelming your space.
  4. Adjustable Lighting: Install dimmable lighting options. They allow you to set the perfect ambiance, enhancing the overall feel of your upgraded bedding and accessories.

Community Engagement and Inspiration

empowering local voices together

Engaging with your audience not only fosters a supportive community around home decor but also sparks inspiration for revitalizing your spaces. When you encourage comments and feedback, you create a platform for exchanging ideas, allowing everyone to share their unique perspectives and insights. Highlighting specific design elements and their impact helps viewers appreciate the thoughtfulness behind each choice, prompting them to reflect on similar updates in their own homes.

By sharing DIY insights and project goals, you invite readers to participate actively in their own decor journeys. This not only strengthens their connection to your content but also cultivates a sense of belonging within the community. Regular updates on popular posts and upcoming projects keep the excitement alive, showcasing your commitment to creativity and continuous improvement.

Encouraging viewers to share their own bedroom refresh experiences can be incredibly motivating. When people see others commence their decor adventures, it inspires them to take action in their spaces. Your community engagement becomes a powerful catalyst for transformation, turning simple ideas into beautiful realities that everyone can appreciate.

Frequently Asked Questions

How to Rejuvenate Your Bedroom?

To rejuvenate your bedroom, choose soft pastel colors, upgrade to natural fiber bedding, add greenery for freshness, use dimmable lighting for ambiance, and utilize smart storage solutions to keep the space organized and inviting.

How to Update a Bedroom?

To update your bedroom, incorporate soft colors and natural materials, swap mismatched furniture for cohesive pieces, layer lighting for versatility, invest in smart storage, and refresh decor with personal touches that reflect your unique style.

Advertisement

Conclusion

As you immerse yourself in your bedroom refresh, think of it as painting a vibrant sunset on a blank canvas.

With each thoughtful design choice, you're not just changing a space, you're inviting warmth and serenity to your sanctuary.

Embrace the playful dance of light and texture, and let your personal touches sing.

This late summer transformation will cradle you in comfort, turning your bedroom into a dreamy retreat that whispers, “Welcome home.”

Advertisement

Continue Reading

Home Decor

Instantly Add Depth and Interest to Any Room With These Texture Tips!

Instantly transform your space with these texture tips that will leave your room inviting and visually striking—discover how to elevate your design!

Published

on

By

enhance room texture tips

Texturing your space transforms it from mundane to memorable. Start by layering diverse materials like plush rugs with sleek furniture to enhance depth. Mix soft fabrics with natural wood and metallic finishes for added complexity. Incorporate decorative items, such as patterned pillows or textured throws, to serve as focal points. Don't forget about lighting—ambient and accent lights can highlight key textures and create warmth. Also, consider natural elements, like plants or woven rugs, to bring life to your room. With simple adjustments, your space can become more inviting and visually striking. Keep going for more tips to elevate your design!

Key Takeaways

  • Layer different materials, such as plush textiles with rough surfaces, to create visual intrigue and depth in your space.
  • Incorporate natural elements like wooden furniture and greenery to enhance warmth and add varied heights for interest.
  • Use a mix of textures, such as soft fabrics and shiny metals, to enrich the tactile experience and prevent a flat appearance.
  • Strategically select a color palette that complements your textures, using bold colors to highlight depth and neutral tones to unify the design.

Importance of Texture in Design

Texture plays an essential role in design, as it adds depth and invites you to engage with your space on a deeper level. When you incorporate different textures, you can create visual interest that transforms an ordinary room into something special. A textured wall, for instance, can define the style and mood of your space, setting the tone for the entire decor.

Texture can help unify diverse decor elements, making your design feel cohesive and well thought-out. Whether you choose fluted paneling or scalloped designs, these textured features create a cozy atmosphere that draws people in. By strategically placing textured elements, you can elevate your interior design, turning plain walls into focal points that captivate the eye.

Incorporating texture doesn't have to be an expensive endeavor. Simple materials like fabric, wood, or stone can enhance the ambiance of your room without overwhelming it.

Understanding Texture and Its Impact

exploring texture s influential effects

The feel and visual appearance of surfaces can dramatically influence how you experience a room, making it essential to understand texture's impact on interior design. Texture adds depth and interest, engaging your senses in ways that color and shape alone cannot. By incorporating various materials and textures, you can create a dynamic environment that feels inviting and well-curated.

Layering textures is key to achieving this effect. For example, combining plush rugs with rough wooden furniture not only promotes visual interest but also encourages tactile experiences that draw you in. Each textural element contributes its own visual weight, guiding the eye and enhancing the overall complexity of the space.

When you thoughtfully mix natural fibers like jute with soft fabrics such as cushions, you create a harmonious balance that unifies diverse decor elements. On the flip side, a lack of texture can lead to flat, uninteresting rooms.

Advertisement

Techniques for Mixing Textures

mixing textures techniques guide

Mixing textures can transform your space into a vibrant and inviting environment.

By layering diverse materials and contrasting textural elements, you create visual interest that captures attention.

Let's explore some effective techniques to achieve this dynamic look in your home.

Layering Diverse Materials

Layering diverse materials not only creates visual intrigue but also invites a sensory experience that transforms your space into a cozy retreat.

By combining textures like plush textiles with rough surfaces such as wood or stone, you can add depth and dimension to any room. Think about mixing soft cushions with sleek glass elements or textured wall treatments to guide the viewer's eye throughout the space, enhancing the overall visual interest.

Don't shy away from experimenting with textiles. Pairing velvet pillows with knitted throws enriches the tactile experience, contributing to an inviting atmosphere that makes people feel at home.

Advertisement

Decorative items can further elevate your design; for instance, a marble table topped with a woven basket introduces diverse textures that serve as focal points while maintaining harmony.

Additionally, consider layering different finishes, like matte and glossy surfaces, to enhance the dynamic quality of your room. This not only adds texture but also creates a more luxurious feel.

Contrasting Textural Elements

Contrasting textural elements can breathe life into your space, inviting curiosity and creating a more engaging environment. By mixing different materials and textures, you can add visual interest and create focal points that draw the eye. For instance, combining plush velvet cushions with rough reclaimed wood not only adds depth but also enriches the overall aesthetic.

Here's a quick guide to help you explore contrasting textures:

Material Type Texture Description
Plush Textures Velvet cushions, soft rugs
Rough Textures Reclaimed wood, stone walls
Smooth Surfaces Glass tables, polished stone
Textured Fabrics Linen curtains, wool throws
Metallic Accents Brass fixtures, steel decor

Using these varying textures can create a visually stimulating environment, making your space feel lively and inviting. Experimenting with sleek leather sofas paired with chunky knit throws is another way to add complexity and character. Remember, adding depth through contrasting textures not only enhances the design but also makes the room feel more cohesive and well-rounded. So, don't shy away from mixing materials to achieve that perfect balance!

Advertisement

Common Texture Application Mistakes

texture application mistakes overview

When it comes to texture application, many people overlook scale and layering, which can really impact the look of your space.

If you pair large textures with smaller elements without considering balance, it can feel overwhelming.

Plus, skipping the layering process might leave your design flat and uninspiring instead of rich and engaging.

Ignoring Scale Considerations

Ignoring scale considerations can throw your design off balance, making large textures overpower small spaces or creating discord between mismatched decor. When you're adding texture to a room, it's vital to assess the scale of each element.

For instance, mixing oversized rugs or wall panels with smaller decor can create visual chaos rather than a harmonious setting. To help you create an inviting atmosphere, choose textures that complement the room's dimensions. A textured wall can add dimension to a room, but it should be paired with appropriately scaled furniture.

If you're working with neutral colors, this can be especially effective, as they don't compete with bold textures but rather enhance them. Regularly evaluating how textures interact with your space is fundamental. Keep in mind that textures should work together to create a cohesive look.

Advertisement

Overlooking Texture Layering

Overlooking texture layering can leave your space feeling flat and uninviting, as diverse textures are vital for creating visual interest and depth. When you layer different textures, you not only add depth but also create a sense of balance in a room. Without this careful consideration, your design may end up feeling cluttered and chaotic, rather than cohesive.

It's essential to assess how textures interact with colors to avoid discordant aesthetics. Certain combinations can clash, detracting from the inviting quality of your space. Regularly evaluating your decor helps you identify any mistakes in texture layering, ensuring that your chosen materials continue to foster a dynamic environment.

For instance, combining soft fabrics with sleek surfaces can enhance the overall atmosphere, while rough and smooth textures together can create an engaging visual narrative.

Choosing the Right Color Palette

selecting ideal color combinations

Choosing the right color palette is essential, as it not only influences the mood of your space but also affects how textures and furnishings interact within the room. To create a cozy atmosphere, consider using richly-pigmented tones like deep greens or warm burgundies. These colors can evoke feelings of comfort and intimacy, making your space feel more inviting.

When selecting colors, think about using a similar palette to create harmony. Neutral tones can serve as a solid foundation, allowing your textures and furnishings to stand out without overwhelming the space. This strategic color selection plays a significant role in achieving a cohesive design, enhancing the overall ambiance.

Bold colors can also be effective, as they highlight texture to create depth and visual interest. By adding interest with contrasting hues, you can bring sophistication to the room while maintaining balance.

Advertisement

Layering Textures for Depth

textural layering for depth

To create a visually dynamic space, layer different textures by combining plush rugs with sleek furniture, enhancing both richness and comfort in the room. Layering textures is key to achieving depth and visual interest. By mixing various materials—think soft fabrics, natural wood, and shiny metals—you can add interest and complexity that invites curiosity.

Consider incorporating decorative items like textured throws draped over a smooth sofa or a mix of patterned pillows. These elements not only elevate the overall aesthetic but also enhance comfort. Effective layering of contrasting elements, such as rough stone paired with soft textiles, prevents a flat appearance and encourages an engaging atmosphere.

Regularly assess your choices and experiment with different textures to find what resonates. This approach can lead to a cohesive design that feels curated and luxurious. Remember, the goal is to create a harmonious blend that showcases your style while providing tactile experiences.

Embrace the art of layering textures, and watch as your space transforms into an inviting haven full of depth and visual richness.

Incorporating Natural Elements

nature inspired design integration

Incorporating natural elements like wood, stone, and plants instantly breathes life into your space, adding warmth and a touch of rustic charm. When you bring these textures in, you're not just decorating; you're creating a more inviting room feel that enhances your overall ambiance.

Here are some effective ways to add these natural textures:

  • Use wooden furniture: A reclaimed wood table or shelving can serve as a stunning focal point.
  • Add plants: Incorporating greenery not only introduces color but also creates visual interest with varying heights and leaf shapes.
  • Layer with natural fibers: Rugs made of jute or sisal can add tactile warmth and comfort, making your room feel cozy.

Role of Lighting in Texture

illumination enhances surface detail

Lighting dramatically influences how textures appear in your space, enhancing their depth and character while creating a warm and inviting atmosphere. Different types of lighting can considerably alter the visual interest of textured surfaces.

By using a combination of ambient, task, and accent lighting, you can create layers that highlight various textures throughout the room. For instance, ambient lighting provides overall illumination, while task lighting focuses on specific areas, such as reading nooks or workspaces. Accent lighting, on the other hand, draws attention to key textural elements, like an accent wall or decorative textiles.

Advertisement

This strategic placement allows you to showcase the intricate details of your textures, making them more pronounced and inviting. Textured light fixtures made from glass or metal can also add another layer of visual dimension, reflecting and refracting light to create dynamic interactions with your decor.

Frequently Asked Questions

How Can Texture Add Depth and Interest to a Design?

Texture adds depth and interest to your design by creating contrasts that catch the eye. Mixing soft and hard materials, like plush pillows and wooden surfaces, invites curiosity and makes your space feel more dynamic and cozy.

How Do You Add Depth to a Room?

To add depth to a room, you've gotta transform it into a visual wonderland. Mix materials, layer textures, and play with lighting. Use accent pieces to create focal points that draw the eye and elevate the space.

What Does It Mean to Add Texture to a Room?

Adding texture to a room means incorporating different materials and surfaces, like soft fabrics or hard elements. It creates visual interest, enhances depth, and makes the space feel inviting and dynamic, enriching your overall atmosphere.

What Does Texture Visually Add to a Room?

Ever wondered how texture can transform your space? It visually adds depth and contrast, making your room dynamic. Mixing soft and hard textures invites exploration, creating an engaging, cozy atmosphere that feels intimately inviting.

Advertisement

Conclusion

Incorporating texture into your space is like weaving a vibrant tapestry; it adds richness and character to your home.

By being mindful of your choices and layering different materials, you can create a dynamic environment that invites warmth and interest.

Remember, lighting plays an essential role in highlighting these textures, so don't overlook it.

Embrace these tips, and watch your room transform into a cozy sanctuary that reflects your unique style and personality.

Advertisement

Continue Reading

Trending