Connect with us

Home Decor

How to Make a Navy Bedroom Accent Wall Pop

Amplify the drama in your bedroom with a navy accent wall that exudes sophistication and glamour, but only if you follow these expert tips.

Published

on

navy bedroom accent wall

To create a show-stopping navy bedroom accent wall, you'll need to combine contrasting textures, metallic accents, and clever lighting placement. Boost visual interest with velvet, linen, or fur textures, and add metallic accents like gold or silver to complement the navy hue. Strategically place lighting fixtures to create pools of light that highlight the wall's richness. Balance the navy with neutrals like white, beige, or gray, and incorporate statement furniture pieces for added visual interest. With these tips, you'll be well on your way to creating a dramatic and inviting ambiance – and there's even more to explore to take your accent wall to the next level.

Key Takeaways

• Boost visual interest by incorporating contrasting textures like velvet, linen, or fur, and metallic accents like gold or silver.

• Strategically place metallic decor pieces, such as frames, mirrors, or light fixtures, to enhance the navy accent wall's aesthetic.

• Balance the navy accent wall with neutrals like white, beige, or gray, and add light-colored furniture to make it pop.

• Create depth and dimension by mixing textures, patterns, and materials, including rough, smooth, and natural elements.

Advertisement

• Use strategic lighting placement, such as above or beside the accent wall, to create dramatic effects and make the navy color pop.

Boosting Visual Interest

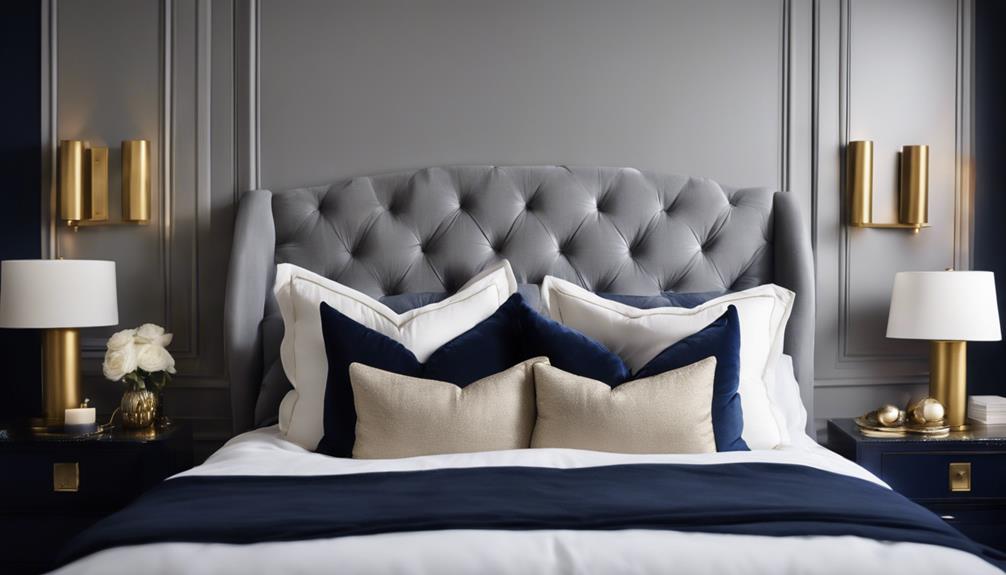
To take your navy accent wall to the next level, incorporate a mix of contrasting textures, metallic accents, bold colors, statement furniture, and strategic lighting to create a visually stunning focal point in your bedroom. By combining these elements, you'll create a visually appealing space that draws the eye to your navy accent wall.

Start by introducing contrasting textures like velvet, linen, or fur to add depth to the wall. Next, incorporate metallic accents such as gold or silver to create a glamorous and sophisticated look against the navy backdrop. You can also introduce pops of color like mustard yellow, blush pink, or emerald green to make the navy accent wall stand out even more.

To further enhance the visual interest, include statement furniture pieces like a bold headboard or a unique dresser that draw attention to the navy accent wall. By incorporating these elements, you'll create a stunning focal point in your bedroom that showcases your navy accent wall in the best possible light.
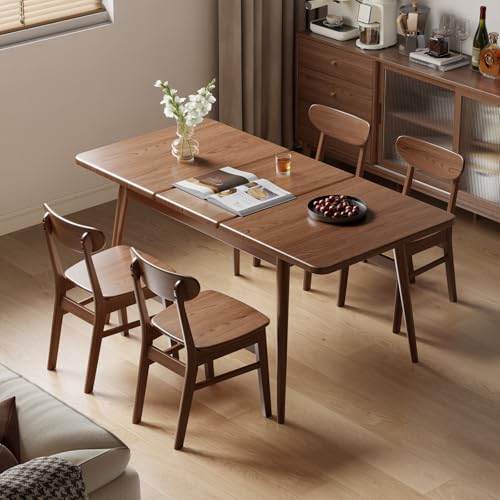
Adding Metallic Accents Wisely

incorporating metallic elements stylishly

Now that you've boosted the visual interest of your navy accent wall, it's time to add some metallic flair to really make it pop.

You'll want to choose metallic accents that complement the navy hue, and that's where your personal style comes in – will you opt for classic gold, trendy rose gold, or something entirely different?

Advertisement

Metallic Mates for Navy

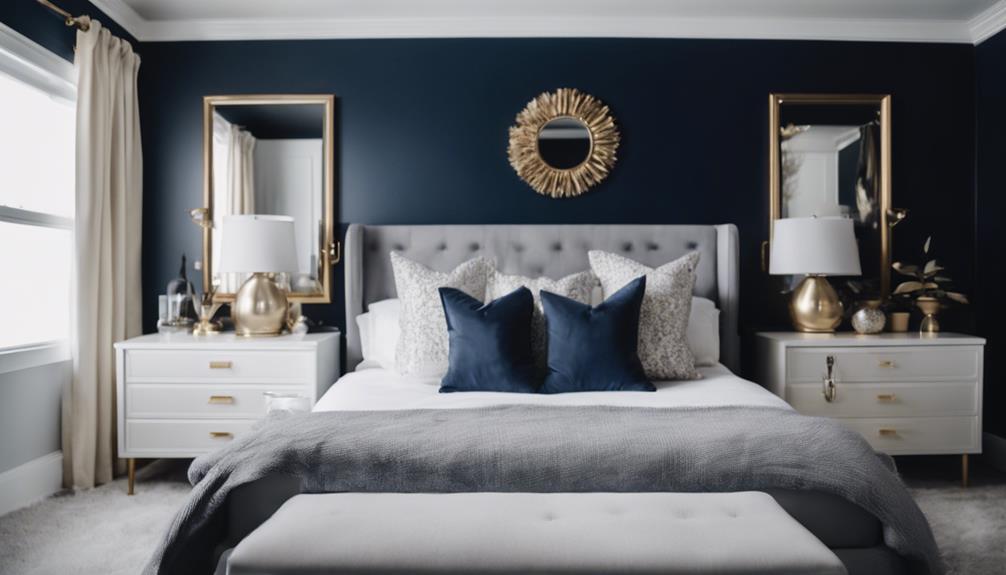
By pairing navy with metallic accents like gold, silver, or bronze, you can create a sophisticated and luxurious atmosphere in your bedroom. When choosing metallic accents to complement your navy blue paint, remember that balance is key. You don't want the metallic elements to overpower the richness of the navy color. Instead, strategically place metallic decor pieces to enhance the overall aesthetic.

Metallic accents can add a touch of luxury and sophistication to a navy bedroom accent wall, so choose wisely. Consider metallic frames, mirrors, light fixtures, or decorative items to make your navy accent wall pop. The contrast between the deep tones of navy and the shimmering metallic elements will create a visually appealing effect. Gold, silver, and bronze are all excellent options to pair with navy, as they add a touch of glamour and sophistication to the space.
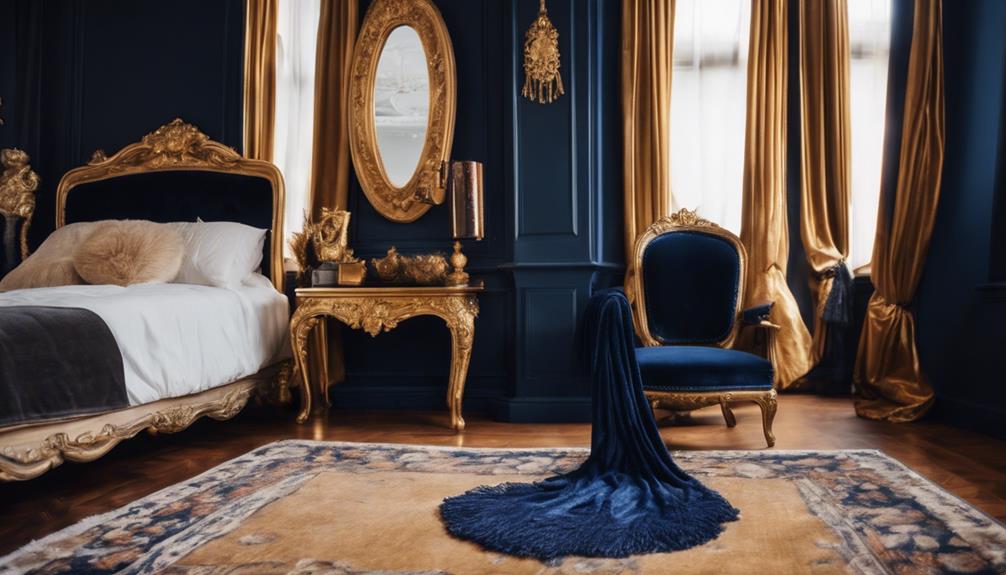
Accenting With Gold

As you consider adding metallic accents to your navy bedroom accent wall, you'll find that incorporating gold elements is an excellent way to introduce a touch of luxury and sophistication, especially when done thoughtfully.

The combination of navy blue and gold creates a warm and inviting atmosphere in the bedroom, making it perfect for a relaxing retreat. By wisely adding metallic gold elements to the navy accent wall, you'll enhance the overall design aesthetic, creating a chic and elegant look in the room.

The richness of navy blue is beautifully complemented by gold accents, which elevate the room's style and create a cohesive design scheme. To achieve a sophisticated look, balance gold accents with navy blue to avoid overwhelming the space. By doing so, you'll create a beautiful, harmonious atmosphere that exudes elegance and refinement.

Advertisement

Rose Gold Delight

When incorporating metallic accents into your navy bedroom accent wall, you'll find that rose gold adds a touch of luxury and sophistication, elevating the overall aesthetic with its warm, subtle tones.

To achieve a balanced look, consider incorporating rose gold decor items like lamps, frames, or vases that complement the cool tones of navy blue. The result is a harmonious blend of warm and cool tones that creates a visually appealing contrast.

Additionally, using rose gold hardware on furniture or light fixtures can tie the room together, adding a subtle pop of color and visual interest to your navy accent wall without overwhelming the space.
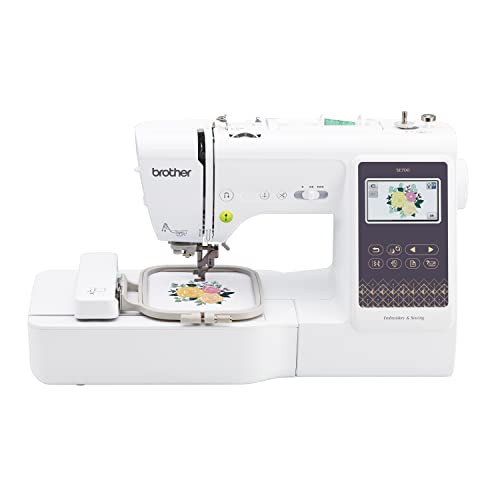
Mixing Textures for Depth

creating visual interest through a combination of various textures

As you continue to elevate your navy accent wall, it's time to explore the domain of textures – and we're not just talking about visual interest, but a multi-sensory experience that invites touch and exploration.

By incorporating a mix of textures, you'll create a space that's not only visually appealing but also tactilely engaging.

Now, let's examine the key points to contemplate when mixing textures, including rough texture contrasts, smooth surfaces, and natural elements that shine.

Advertisement

Rough Texture Contrasts

By pairing a rough-textured navy accent wall with smooth furnishings, you create a striking contrast that immediately grabs attention. This contrast adds depth to the room and makes the accent wall a focal point.

To take it to the next level, incorporate elements that enhance the textured look:

  1. Add a shaggy rug: The soft, plush texture of the rug will provide a cozy feel and create an interesting contrast with the rough wall.
  2. Incorporate woven baskets: The natural texture of the baskets will add warmth and depth to the room.
  3. Mix materials: Combine velvet, wood, and metal with the rough texture of the wall for a visually appealing contrast.
  4. Add textured throw pillows: These will enhance the cozy feel of the navy accent wall and create an inviting atmosphere.

Smooth Surfaces Matter

You can create a sophisticated and inviting atmosphere in your bedroom by incorporating smooth surfaces into your navy accent wall design, which provides a striking contrast to the rough textures explored earlier.

By mixing textures, you can add depth and visual interest to your navy accent wall. Smooth surfaces, such as velvets, linens, and metallics, reflect light differently, creating a dynamic play of shadows on the navy wall.

This textural contrast prevents the navy accent wall from appearing flat and one-dimensional, instead, creating a luxurious and inviting atmosphere in the bedroom. Consider adding elements like mirrors, metallic accents, or glossy finishes to enhance the smooth surface of the navy accent wall.

By incorporating a variety of textures, you can create a visually appealing contrast that draws the eye to the navy accent wall. The key is to balance smooth surfaces with rough textures to achieve a harmonious and sophisticated look.

Advertisement

With smooth surfaces, you can add a touch of elegance and sophistication to your bedroom, making it a relaxing retreat.

Natural Elements Shine

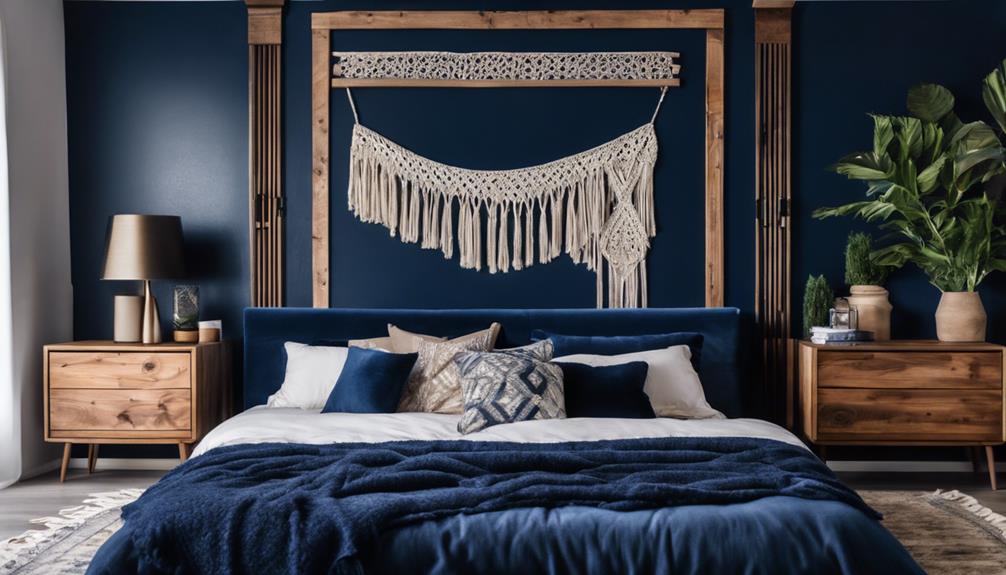
Incorporate natural elements like wood, metal, and natural fibers to add depth and visual interest to your navy bedroom accent wall. By mixing materials, you'll create a visually appealing space that's full of texture and dimension.

Here are some ways to incorporate natural elements into your design:

  1. Mix materials: Combine a jute rug, a wooden bed frame, and a metal bedside lamp to create a space that's rich in texture and visual interest.
  2. Add soft fabrics: Use velvet throw pillows or a plush rug to contrast with the boldness of the navy accent wall.
  3. Bring in greenery: Add plants or botanical prints to bring a pop of color and a natural element to the room.
  4. Incorporate stone or marble: Consider adding elements like stone or marble to complement the richness of the navy blue accent wall.

Strategic Lighting Placement

strategic lighting for ambiance

To elevate your navy accent wall, position lighting fixtures strategically to create dramatic effects and accentuate the room's ambiance.

By placing lights above or beside the accent wall, you'll create dramatic shadows and highlights that make the navy color pop.

Consider utilizing warm-toned light bulbs to complement the navy wall, adding warmth and vibrancy to the space.

Advertisement

Additionally, incorporating dimmable lighting options allows you to adjust the brightness to showcase the navy accent wall effectively.

Accent lighting can also be used to highlight artwork or decor on the navy wall, drawing attention and making it stand out in the room.

By strategically placing lighting fixtures, you'll enhance the navy accent wall's depth and richness, creating a dramatic and inviting atmosphere.

Balancing Navy With Neutrals

perfectly blending navy style

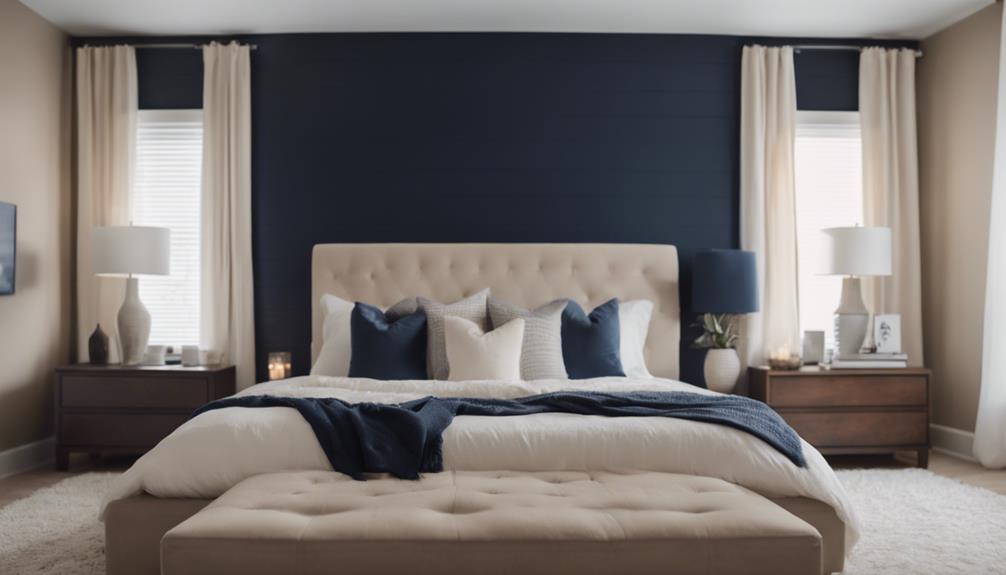
By balancing your navy accent wall with neutral colors, you can create a harmonious contrast that prevents the room from feeling overwhelming. This contrast not only adds visual appeal but also creates a sense of calmness in the bedroom.

To achieve this balance, consider the following:

  1. Pair navy with neutrals: Combine your navy paint with neutral colors like white, beige, or gray to create a soothing atmosphere.
  2. Add light-colored furniture: Incorporate light-colored furniture or decor items against your navy accent wall to make it pop.
  3. Incorporate metallic accents: Add a touch of sophistication with metallic accents like gold or silver to enhance the wall's impact.
  4. Mix textures: Opt for a mix of textures like velvet, linen, or wood in neutral tones to complement the navy wall and add depth to the space.

Creating Dimension With Patterns

dimension through intricate patterns

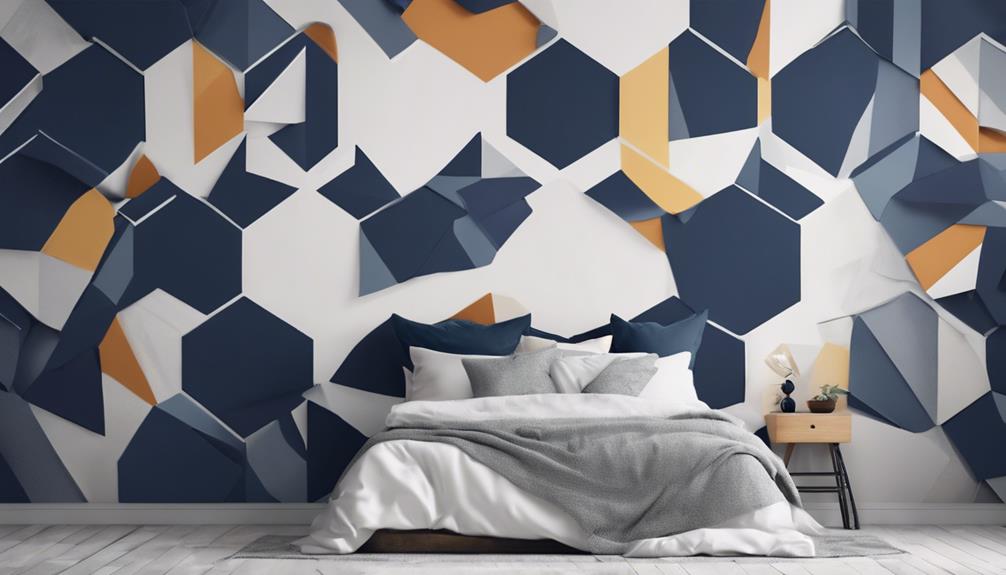
You can add depth and visual interest to your navy accent wall by introducing patterns that create a sense of dimension and style.

Geometric patterns in navy blue are a great way to achieve a modern and dynamic look. Try mixing stripes and chevron patterns to add visual interest and depth to your accent wall.

Advertisement

For a sophisticated and elegant look, consider opting for a herringbone or quatrefoil pattern. If you want to make a statement, go bold with a damask or floral print in navy blue.

Alternatively, experiment with abstract or Moroccan-inspired patterns to infuse your accent wall with personality and style. Remember, the key is to create a sense of dimension and visual interest, so don't be afraid to experiment with different patterns and combinations.

Adding Luxurious Touches

enhancing with luxurious details

Gold accents, rich textures, and high-quality materials will transform your navy accent wall into a luxurious oasis, perfect for a restful retreat. To take your bedroom to the next level, consider incorporating these luxurious touches:

  1. Gold Accents: Add frames, mirrors, or light fixtures with gold accents to create a sense of opulence.
  2. Plush Textures: Choose velvet or silk cushions and throw blankets with rich textures to enhance the luxurious feel.
  3. Luxurious Bedding: Opt for high-quality bedding with a high thread count and luxurious materials like Egyptian cotton for a sumptuous touch.
  4. Statement Lighting: Add a statement chandelier or elegant pendant lights to create a glamorous ambiance in the room.

Highlighting the Accent Wall

accentuating a vibrant feature

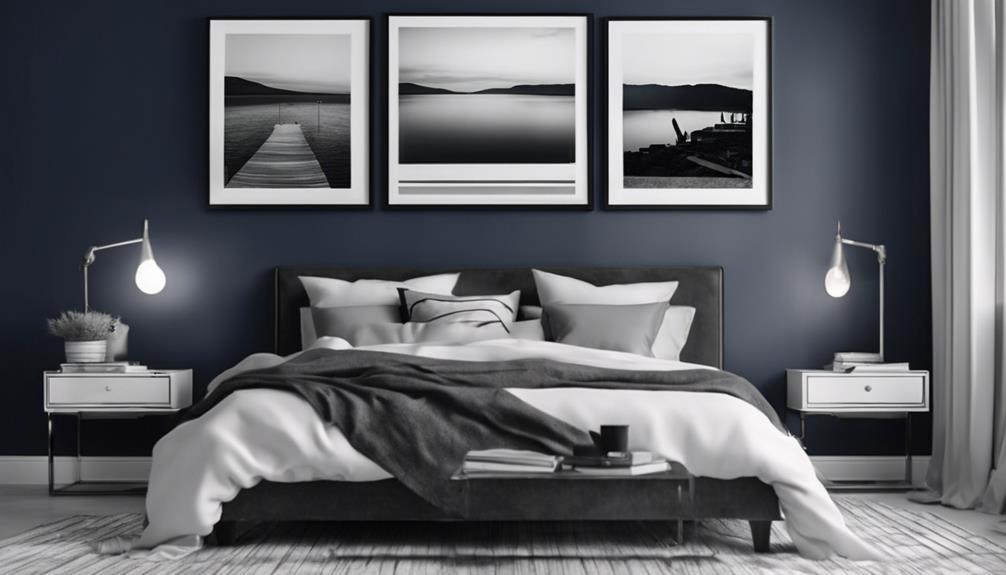
To draw attention to your navy accent wall, strategically place lighting fixtures to create pools of light that highlight its richness. This won't only create depth in the room but also make the navy hue stand out.

By incorporating contrasting decor pieces, such as white or gold frames, you can make the accent wall pop even more. For example, you could hang a white-framed mirror or a gold-framed piece of art above a navy dresser to create a striking contrast.

Additionally, choose complementary colors for your bedding and accessories to enhance the impact of the accent wall. Consider positioning furniture like a statement headboard or a bold piece of art against the navy wall for added visual interest.

Frequently Asked Questions

What Color Goes Best With a Navy Accent Wall?

When choosing a color to pair with a navy accent wall, you have plenty of options.

Advertisement

You might consider classic white, which creates a crisp, timeless look.

Gold accents can add luxury and sophistication, while light gray or silver tones offer a modern contrast.

Warm neutrals like beige or taupe create a cozy atmosphere, and bold colors like mustard yellow or emerald green make a vibrant statement.

Ultimately, the right color for you'll depend on your personal style and the overall aesthetic you want to achieve.

How to Decorate a Navy Blue Bedroom?

As you start decorating your navy blue bedroom, envision yourself walking into a serene retreat.

Advertisement

You've already mastered the accent wall, now it's time to harmonize the rest of the space.

Start by incorporating gold accents, like picture frames or lamps, to add a touch of sophistication.

Then, introduce textures with plush throw pillows, a knit blanket, or a faux fur rug to create depth and visual interest.

How Do I Make My Bedroom Accent Wall Stunning?

When creating a stunning accent wall, you'll want to start with the perfect shade of navy blue. Consider Compass from the Devine collection, which sets the tone for a sophisticated space.

Then, incorporate gold accents to add luxury and elegance. Velvet blue or deep navy walls with gold accents can create a regal ambiance.

Advertisement

What Is the Complementary Color of Navy?

As you explore the world of color theory, envision a canvas of possibilities unfolding before your eyes.

The complementary color of navy, you ask? It's a soft peach or coral, a striking contrast that will make your design pop.

This harmonious pairing will create a visual feast, with the warm, gentle hue of peach or coral beautifully offsetting the cool, dark tone of navy.

Conclusion

By incorporating these design elements, you'll create a navy bedroom accent wall that truly pops.

Did you know that a recent survey found that 65% of homeowners consider accent walls a 'must-have' feature in their ideal bedroom design?

Advertisement

By strategically balancing navy with neutrals, adding metallic accents, and incorporating textures and patterns, you'll create a visually stunning space that exudes sophistication and style.

With these expert tips, you'll be well on your way to designing a bedroom that's both beautiful and Instagram-worthy.

Continue Reading
Advertisement

Home Decor

How to Paint a Plastic Frame in 3 Easy Steps

Learn the simple yet crucial steps to achieve a professional-looking finish on your plastic frame, and transform it into a stunning work of art.

Published

on

painting plastic frames effortlessly

You can paint a plastic frame in 3 easy steps. First, prepare the surface by cleaning the frame with mild soap and water, lightly sanding it with 220-300 grit sandpaper, and wiping it down with rubbing alcohol. Next, prime the frame with a thin, even coat of plastic primer, letting it dry completely between coats. Finally, apply acrylic or enamel paint designed for plastic surfaces, using thin, even coats and letting it dry completely between coats. With these steps, you'll have a beautifully painted plastic frame; and by following these details, you'll uncover the secrets to a professional-looking finish.

Key Takeaways

• Clean the plastic frame with mild soap and water, then lightly sand it with 220-300 grit sandpaper to prepare the surface.

• Apply a thin, even coat of plastic primer to the entire frame, allowing it to dry completely before applying additional coats.

• Use acrylic or enamel paint specifically designed for plastic surfaces, applying thin, even coats to prevent drips and ensure a smooth finish.

• Let each coat of paint dry completely before applying additional coats, and gently wipe away dust or debris after achieving the desired color and finish.

Advertisement

• Regularly clean the painted frame with mild soap and water to maintain its appearance, and touch up any chipped areas with matching paint.

Prepare the Plastic Surface

Clean your plastic frame thoroughly with mild dish soap and warm water to remove dirt and oils, ensuring an important bond between the plastic and paint. This essential step will help the paint adhere evenly and prevent peeling.

Once clean, lightly sand the surface with 220 to 300-grit sandpaper in a circular motion to further enhance paint adhesion. This will create a smooth surface for painting.

Next, wipe down the plastic frame with rubbing alcohol to remove any remaining impurities. This step is vital in ensuring a strong bond between the plastic and paint.

After cleaning and sanding, your plastic picture frame is ready for painting. Remember to choose a spray paint specifically designed for plastic surfaces, and make sure the primer is dry before applying the paint.

Advertisement

With these steps, you'll be well on your way to creating a beautifully painted plastic frame that will last.

Prime the Frame for Painting

prepare canvas for art

Now that your plastic frame is prepped and ready, it's time to prime it with a plastic-specific primer to establish a strong bond between the paint and the frame. This critical step guarantees a durable and long-lasting paint job.

To prime your frame effectively, follow these essential steps:

  • Apply a thin, even coat of plastic primer to the entire frame, making sure to cover all surfaces.
  • Allow the primer to dry completely, following the manufacturer's instructions, before applying additional coats.
  • For best results, apply two coats of primer, allowing each coat to dry before applying the next.
  • Work in a well-ventilated area, and avoid applying primer in direct sunlight or extreme temperatures.

Apply Paint and Finish

paint and finish application

With your plastic frame properly primed, you're ready to apply a durable and visually appealing paint job that will enhance its overall appearance. Use acrylic or enamel paint specifically designed for plastic surfaces for best adhesion and durability.

Apply thin, even coats of paint to prevent drips and guarantee smooth coverage on the plastic frame. Consider adding decorative touches like stencils or weathering effects for a personalized look. Allow each coat of paint to dry completely before applying the next layer to avoid smudges or uneven finish.

Don't rush the process – let the paint dry completely between coats to achieve a smooth, orange peel-free finish. Once you've achieved the desired color and finish, use a soft cloth to gently wipe away any dust or debris that may have settled on the frame.

Frequently Asked Questions

How to Paint a Plastic Frame?

When you're wondering how to paint a plastic frame, you'll want to start by cleaning it thoroughly with mild soap and water to remove dirt and debris.

Advertisement

A plastic-specific primer is essential for better paint adhesion and a smoother finish.

Then, apply 2-3 coats of plastic-friendly paint, allowing each coat to dry before adding the next.

How Do You Paint Plastic Easily?

As you begin painting plastic, envision a blank canvas waiting for your creative touch.

To paint plastic easily, start by preparing the surface with a gentle sanding and a wipe-down with rubbing alcohol. This essential step guarantees a strong bond between the plastic and paint.

Next, apply a primer specifically designed for plastic surfaces, followed by 2-3 coats of plastic-friendly paint.

Advertisement

What Kind of Paint Will Stick to Plastic?

When it comes to painting plastic, you'll need a specialized paint that adheres well to plastic surfaces. Look for acrylic, enamel, or spray paint specifically labeled for multi-surface use or plastic surfaces. These paints are formulated to bond with plastic, ensuring a durable and long-lasting finish.

Remember to always prepare the surface by sanding and cleaning, and consider applying a primer designed for plastic surfaces for best results.

What Do You Use Before Painting Plastic?

Before you start painting plastic, you'll need to prepare the surface. Unlike wood or metal, plastic requires a special primer to guarantee a strong bond between the paint and the surface.

You'll want to use a primer specifically designed for plastic surfaces, which helps the paint adhere better and provides a smooth base for painting. This vital step is often overlooked, but it's essential for a durable and long-lasting finish.

Conclusion

As you step back to admire your handiwork, the newly painted plastic frame stands before you, reborn. The once-dull surface now radiates with vibrant color, its transformation a tribute to your creativity and perseverance.

Advertisement

Like a phoenix rising from the ashes, your frame has emerged from its former mediocrity, ready to showcase your favorite memories with renewed elegance and sophistication.

Continue Reading

Home Decor

DIY Mirror Painting Guide

Give your mirror a personalized makeover with this step-by-step guide, and uncover the secrets to a professional-looking finish.

Published

on

diy mirror painting tips

You're ready to give your mirror a personalized touch without breaking the bank. Start by preparing the surface with a damp microfiber cloth and sketching your design with a water-soluble pencil. Prime with white gesso and let it dry for 24 hours. Choose between enamel and acrylic paint for durability or vibrancy, and apply a sealant for long-lasting results. Masking supplies and spray primer will give you a professional finish. From there, you'll learn how to remove old paint and grime, prime and paint the frame, and add a protective finish. The best part? You're just getting started.

Key Takeaways

• Clean the mirror thoroughly with a damp microfiber cloth before starting your DIY project.

• Use a water-soluble pencil to sketch your design, and prime with white gesso for better paint adhesion.

• Apply a light coat of primer, let it dry, and then paint with enamel or acrylic paint for durability and vibrancy.

• Mask off mirror edges with painter's tape, applying moderate pressure, and inspect for wrinkles or creases before painting.

Advertisement

• Remove masking tape gently at a 45-degree angle, and clean up residue with a damp cloth or rubbing alcohol.

Preparing the Mirror Surface

Before you start painting, clean the mirror thoroughly using a damp microfiber cloth to remove dust and grime, guaranteeing a smooth surface for your design. This step is essential in preventing any imperfections from affecting your paint job.

Next, use a water-soluble pencil to sketch your design onto the mirror surface. This will give you a clear guide for when you start painting.

Now, it's time to prime your mirror. Apply a coat of white gesso to the mirrored areas, allowing it to dry for 24 hours. This will provide a smooth surface for painting and ensure the best paint adhesion.

If you want to add an extra layer of vibrancy to your design, consider using a white acrylic base coat before applying your colors. This will help your paint pop and guarantee better coverage.

Advertisement

Essential Supplies and Tools

diy home renovation guide

To guarantee a professional-looking finish, you'll need the right supplies and tools, including masking supplies, spray primer, and Valspar Silver Spray paint. When it comes to painting on mirrors, it's important to use the correct primer to prevent peeling. White gesso is a great option, as it provides a strong bond between the paint and the mirror.

For the paint itself, you can choose between Enamel and acrylic paint. Enamel paint is more durable and resistant to scratches, while acrylic paint offers a bolder, more vibrant look. Regardless of which paint you choose, make sure to apply a sealant after painting to protect the mirror and ensure long-lasting results.

With the right supplies and tools, you'll be well on your way to creating a beautifully painted mirror that will add a touch of elegance to any room. Remember, proper preparation and painting techniques are important for achieving a professional-looking finish.

Removing Old Paint and Grime

refinishing worn furniture meticulously

Now that you've gathered your essential supplies and tools, it's time to tackle the task of removing old paint and grime from your mirror frame. This vital step will guarantee a smooth, even surface for your new paint job.

You can use a paint stripper or sandpaper to remove old paint and grime from the mirror frame. If you choose to use a paint stripper, be sure to follow the manufacturer's instructions and take necessary safety precautions. If you opt for sandpaper, start with a coarse grit and work your way up to a finer grit for a smoother finish.

After stripping or sanding, wipe down the frame with a damp cloth to remove any remaining residue. Make sure the frame is completely dry before moving forward. Sand any rough spots on the frame to create a smooth surface for the new paint to adhere to.

Priming the Mirror Frame

priming for mirror painting

With your mirror frame stripped and sanded, you're ready to apply a light coat of primer to guarantee a smooth, even finish. This critical step ensures that your paint adheres well and prevents oils from bleeding through, which can cause chipping or unevenness. For best results, choose a high-quality primer like Colourtrend Prime 2, specifically designed for this purpose.

Primer Benefits Why It Matters Tips
Prevents bleeding Ensures a smooth finish Apply a light coat
Enhances paint adhesion Reduces chipping Choose a quality primer
Provides a uniform base Improves color coverage Allow primer to dry completely

Painting the Mirror Frame

reflective frame gets makeover

You're ready to add color and personality to your mirror frame by applying a fresh coat of paint. Before you start, make sure the surface is clean and lightly sanded to guarantee better paint adhesion.

Use painter's tape to mask off areas you don't want to paint, guaranteeing a crisp, clean finish. Now, it's time to spray paint your mirror frame. Apply light coats, allowing each one to dry completely before adding the next. This will prevent drips and unevenness, resulting in a smooth, professional paint finish.

Advertisement

Remember, patience is key – multiple thin coats are better than one thick, gloopy one. As you work, keep in mind that you're not just giving your mirror a makeover, you're also protecting the frame with a durable paint job. Consider adding a protective finish or sealant to really make your hard work last.

With these tips, you'll be enjoying your beautifully painted mirror frame in no time.

Masking the Mirror Edges

reflective surfaces and protection

Now that you've prepared your mirror frame for painting, it's time to focus on protecting the edges of the mirror itself.

You'll want to use painter's tape to carefully mask off these areas, ensuring a crisp, clean paint line and preventing any unwanted paint seepage onto the glass.

Edge Protection Methods

To prevent paint from seeping onto the mirror's surface, carefully apply painter's tape along the edges, making sure a secure bond to create a clean, precise border. This important step in the DIY mirror painting process helps protect the mirror surface and prevent paint from peeling off over time.

When using painters tape, keep in mind the following key considerations:

Advertisement
  • Apply moderate pressure to make sure the tape adheres securely, avoiding air pockets or bubbles that can compromise the seal.
  • Avoid using excessive pressure, which can damage the mirror edges or cause the tape to lift off.
  • Inspect the tape for any wrinkles or creases, smoothing them out to create a clean, even surface.

Tape Application Tips

Applying painter's tape with precision guarantees a crisp, clean edge around the mirror frame. When masking the mirror for painting, it's crucial to use painter's tape to create clean edges.

To make sure of a smooth paint line, apply the tape along the edges of the mirror frame, ensuring it's firmly pressed down to prevent paint seepage. As you apply the tape, remove any air bubbles or creases that may form, as these can create imperfections in the paint job.

Double-check the tape placement before starting to paint to avoid any mistakes. A well-executed tape application will result in a professional-looking finish. By taking the time to meticulously apply the tape, you'll be rewarded with a beautifully painted mirror that showcases your attention to detail.

Removing Masking Tape

unveiling clean paint job

With precision, you'll carefully remove the masking tape to reveal crisp, paint-free edges. Removing the tape is an essential step in achieving a professional-looking finish.

To do it right, gently peel off the masking tape at a 45-degree angle to prevent paint from lifting. If some paint does lift, don't panic – just use a craft knife to score along the edge of the tape for clean removal.

Here are some additional tips to keep in mind:

  • Remove the tape while the paint is still slightly tacky for sharp lines.
  • Avoid leaving the tape on for too long to prevent it from bonding with the paint.
  • Clean up any residue left by the tape with a damp cloth or rubbing alcohol.

Finishing Touches and Styling

perfecting the final details

Now that your mirror is painted and ready, it's time to hang it in a spot that showcases its unique style and adds visual interest to the room.

You've invested time and effort into creating a one-of-a-kind painting mirror, so make sure it takes center stage. Secure it on the chosen wall, and style it with complementary decor such as candles, vases, or picture frames that complement its frame and overall aesthetic.

Advertisement

When arranging items around the mirror, consider its reflection and aim for visual balance. Don't forget to use the mirror to amplify natural light in the room, creating a sense of spaciousness.

Experiment with different angles and heights to find the perfect placement for your painted mirror. By doing so, you'll create a stunning focal point that draws the eye and elevates the entire space.

Hanging and Displaying

hanging and displaying textiles

You've carefully crafted your one-of-a-kind painted mirror, and it's time to showcase it in a way that maximizes its visual impact. Hanging and displaying your masterpiece is an art in itself, and with a few tips and tricks, you can create a stunning display that draws the eye.

When it comes to hanging your painted mirror, remember to use heavy-duty picture hanging hardware that can support the weight of the mirror. This will guarantee that your mirror hangs securely and doesn't come crashing down.

Here are a few more tips to keep in mind:

  • Hang your mirror in a well-lit area to enhance its visual impact.
  • Experiment with different hanging orientations, such as vertical or horizontal, for a unique look.
  • Consider incorporating your painted mirror into a gallery wall for a stylish and cohesive display.

Frequently Asked Questions

What Kind of Paint Will Stick to a Mirror?

When it comes to painting a mirror, you're likely wondering what kind of paint will stick to the surface. You'll be happy to know that acrylic paint is an excellent choice, as it adheres well to glass surfaces.

Additionally, enamel paint is another option that provides a smooth finish.

Advertisement

If you want vibrant colors, consider specialty glass paints like Deco Art.

Do I Need to Prime a Mirror Before Painting?

As you prepare to paint your mirror, you're likely wondering: do I need to prime it first?

The answer is a resounding yes! Priming is crucial to guarantee the paint adheres properly and lasts longer. Without primer, the paint may peel or chip off the mirror frame, ruining your design.

By applying a suitable primer, like white gesso or specialized mirror primer, you'll create a smooth surface for painting and prevent future headaches.

How to Seal Paint on a Mirror?

Now that you've painted your mirror, it's time to seal the deal – literally! To protect your handiwork from wear and tear, you'll need to apply a clear varnish or sealant specifically designed for painted surfaces.

Advertisement

Use thin, even coats, allowing each layer to dry completely before adding the next. This guarantees proper coverage and a durable finish.

Can I Use Acrylic Paint on a Mirror?

You're wondering if you can use acrylic paint on a mirror, and the answer is a resounding yes! In fact, acrylic paint is a great choice due to its quick-drying properties, making it ideal for mirror painting.

Just remember to apply thin coats for better adhesion and coverage, and consider using a white acrylic base to enhance color vibrancy.

Conclusion

As you step back to admire your handiwork, the newly painted mirror frame seems to magically transform the entire space. It's as if the room's energy has shifted, and the once-bland mirror now radiates a fresh, personalized charm.

Coincidence or not, your DIY skills have breathed new life into a forgotten piece, and you can't help but feel a sense of pride and accomplishment. With your creativity and resourcefulness, you've turned an ordinary mirror into an extraordinary focal point that reflects your unique style.

Advertisement

Continue Reading

Home Decor

How to Create Empty Frame Wall Decor Ideas

Ignite your creativity and discover the art of transforming blank walls into stunning focal points with these innovative empty frame decor ideas.

Published

on

diy empty frame decor

You can transform any blank wall into a visually stunning focal point by creatively arranging empty frames in a way that reflects your personal style. Mix and match frame sizes, styles, and colors to add depth and visual interest. Strategically place statement pieces or groupings to direct attention and create balance. Experiment with overlapping frames, layering, and clustering to add texture and dimension. Combine ornate and simple frames, or mix circular, hexagonal, and rectangular shapes to create a unique display. As you explore these techniques, you'll uncover even more ways to make your empty frame wall decor truly unforgettable.

Key Takeaways

• Combine ornate and simple empty frames in varied sizes and styles for a dynamic, eclectic look.

• Experiment with layering frames of different textures, like wood, metal, and distressed finishes, for added depth.

• Strategically place empty frames to create focal points, directing attention to specific areas of the wall.

• Cluster empty frames of varying sizes and shapes to create a visually appealing display with texture and depth.

Advertisement

• Alternate large and small frames, and experiment with orientations, to create a unique and striking display.

Mixing Frame Sizes and Styles

As you start arranging your empty frame wall decor, consider mixing and matching different frame sizes and styles to add visual interest and dimension to your display.

Combining ornate and simple frames creates a dynamic and eclectic look on the wall. You can find unique picture frames at thrift stores or scour antique shops to add character to your display.

Varied frame sizes can help fill up larger wall spaces effectively, creating a visually appealing arrangement. Experimenting with frames of different colors and finishes can add a pop of personality to the decor.

Empty frames in different shapes, such as circular or hexagonal, can add an extra layer of interest. Mixing frame styles allows for a customizable and unique display that reflects your individual taste and creativity.

Advertisement

Creating Focal Points With Frames

framing your art beautifully

By strategically placing a single statement piece or a grouping of empty frames, you can create a striking focal point that draws the eye and adds visual interest to any room.

Using empty frames, you can thoughtfully direct attention to a specific area of the room, creating a sense of balance and harmony. One way to do this is by grouping frames of varying sizes and shapes, creating a visually appealing arrangement that adds depth and interest to the space.

Alternatively, you could use a single large frame as a statement piece, drawing the eye to a particular area of the room. By placing empty frames thoughtfully, you can create a unique and compelling focal point that complements the room's decor.

For instance, you could place a large frame around a stunning piece of artwork or a cherished photograph, highlighting its importance and adding emotional resonance to the space. By incorporating empty frames as focal points, you can add a touch of sophistication and elegance to your room's decor.

Adding Depth With Overlapping Frames

exploring artistic techniques visually

You can add an extra layer of sophistication to your empty frame wall decor by overlapping frames, creating a visually intriguing display that draws the eye and invites exploration. By layering frames of varying sizes, shapes, and colors, you can create a dynamic visual effect that adds depth and complexity to your wall decor. To take it to the next level, try mixing and matching different frame colors or finishes to enhance the overall aesthetic.

Here are some tips for creating a stunning overlapping frame display:

Technique Description Visual Effect
Cascading Frames are arranged in a flowing, staggered pattern Creates a sense of movement and energy
Staggered Frames are placed at varying heights and widths Adds visual interest and depth
Mismatched Frames of different sizes and shapes are used Creates a playful, eclectic look

Using Frames to Display Personal Items

showcasing personal items creatively

As you explore using frames to display personal items, you'll discover the unique opportunity to showcase your most treasured possessions in a creative and visually appealing way.

By framing family photos, personal treasures, and memories, you can create a meaningful and customized display that reflects your personality and style.

Advertisement

Through this approach, you'll be able to curate a beautiful and nostalgic arrangement that tells your story and adds a touch of warmth to any room.

Family Photos Showcase

Transform your empty frames into a heartwarming family photos showcase by displaying cherished memories and personal items in a unique and visually appealing way. By creatively arranging your frames, you can create a stunning gallery wall that tells your family's story.

Here are some ideas to get you started:

  • Mix and match frame sizes and styles to add visual interest and depth to your display.
  • Incorporate special mementos like tickets, letters, or small objects within the frames for a unique touch.
  • Experiment with hanging techniques, such as using wire or ledges, to create a dynamic and engaging presentation of your family memories.
  • Arrange the frames in a cohesive layout or mix and match for an eclectic look that tells your family's story.

Personal Treasures Display

Fill empty frames with personal treasures like vintage keys, postcards, or small collectibles to create a unique and personalized gallery wall that tells your story. You can showcase sentimental items within frames, adding a personal touch to your decor. Empty frames can become a showcase for cherished items, telling a story or reflecting your interests. By incorporating personal treasures in frames, you'll add a meaningful and decorative element to your space.

Here are some ideas to get you started:

Treasure Frame Style Wall Layout
Vintage keys Distressed wood Random pattern
Postcards White minimalist Grid pattern
Small collectibles Ornate gold Symmetrical layout
Coins Modern black Asymmetrical design

Memories on Display

You can bring your favorite memories to life by showcasing personal items like photos, tickets, and postcards in frames, creating a unique display that tells your story. This is a great way to add a personal touch to your decor and make your space truly special.

Advertisement

By using frames to display your personal items, you can create a one-of-a-kind display that reflects your personality and style.

Here are some ideas to get you started:

  • Use a mix of frame sizes and shapes to add visual interest to your display.
  • Arrange your frames in a grid or gallery style to create a cohesive look.
  • Choose frames that complement the colors and style of your personal items.
  • Experiment with different frame materials, such as wood, metal, or glass, to add texture and depth to your display.

Creating a Gallery Wall With Frames

displaying artwork with style

When starting to create a gallery wall with frames, you'll want to take into account the size and shape of the frames, as well as how you'll balance their placement on the wall.

By selecting frames that vary in size, shape, and style, you'll add visual interest to your gallery wall.

Next, you'll need to ponder how to arrange the frames in a way that creates a sense of harmony and balance.

Frame Size and Shape

To create a visually striking gallery wall, combine frames of varying sizes and shapes to add depth and visual interest to your empty frame wall decor. This mix-and-match approach will keep your arrangement from feeling too uniform or boring.

Advertisement

When selecting frames, consider the following tips to create a dynamic display:

  • Mix rectangular, square, and circular frames for visual interest
  • Create a balanced arrangement by alternating large and small frames
  • Experiment with different frame orientations (portrait vs. landscape) for a unique layout
  • Use templates or mock-ups to plan the placement of frames on the wall before hanging

Balancing Frame Placement

With your frame selection in hand, start visualizing the overall aesthetic you want to achieve by arranging your frames in a way that creates balance and harmony on your wall. Aim for a balanced arrangement by mixing frame sizes and shapes to add visual interest to your gallery wall.

Consider using a grid layout or a symmetrical arrangement for a cohesive look with your empty frame wall decor. Don't be afraid to experiment with different frame orientations, such as landscape and portrait, to create a dynamic display.

To add an extra layer of personalization, incorporate a mix of empty frames and artwork to create a unique and eye-catching arrangement. Before you start hammering nails, use templates or paper cutouts to plan the placement of your frames. This will help you achieve a polished and professional look, ensuring your gallery wall is a stunning focal point in your room.

Adding Texture With Frame Groupings

enhancing walls with art

By clustering empty frames of varying sizes, shapes, and styles, you create a visually appealing display that adds texture and depth to your wall decor. This technique is particularly effective in adding visual interest to a room, as the mix of frames creates a dynamic display that draws the eye.

To take your frame grouping to the next level, consider these tips:

  • Mix and match frames with different textures, such as wood, metal, and distressed finishes, to add depth to the arrangement.
  • Experiment with layering frames of varying depths to create a three-dimensional effect on your wall.
  • Combine empty frames with other decor elements, like mirrors or artwork, to enhance the overall aesthetic.
  • Don't be afraid to get creative with frame placement – asymmetrical arrangements can be just as striking as symmetrical ones.

Frequently Asked Questions

How to Decorate With an Empty Frame on a Wall?

When you're looking to decorate with an empty frame on a wall, you're opening yourself up to a world of creative possibilities.

You can use it to highlight a small decorative piece, like a Putz house, or create a unique display by suspending photos with string and clothespins.

Advertisement

You can also customize the frame to match your room's decor by painting it, allowing you to seamlessly integrate it into your overall aesthetic.

How to Style an Empty Wall?

You're staring at a blank wall, wondering how to style it. Start by considering the room's purpose and your personal taste.

Think about the colors, textures, and patterns you want to incorporate. Do you prefer a minimalist or eclectic look? Will you use a single statement piece or create a gallery wall?

Take a step back, envision the space, and let your creativity flow. You'll be surprised at how easily your vision takes shape.

How Do You Decorate a Wall With Frames?

You're looking to decorate a wall with frames, but before you start, let's debunk the myth that empty frames are just for filling gaps. In reality, they can be a stylish focal point.

Advertisement

By mixing frame sizes, colors, and styles, you can create a visually appealing display that adds depth and interest to your wall.

How Do You Decorate a Plain Frame?

You can elevate a plain frame by adding a personal touch. Start by painting it a color that resonates with your decor style, such as a crisp white or a sophisticated gold.

Next, embellish it with decorative elements like beads, ribbons, or trims to add visual interest.

You can also repurpose the frame to hold a small mirror, unique print, or sentimental photo, giving it a personalized flair.

Conclusion

As you step back to admire your handiwork, the empty frames come alive, a symphony of shapes, sizes, and textures dancing across the wall.

Advertisement

The empty spaces within seem to pulse with possibility, inviting the eye to linger and explore.

Your carefully crafted collage is more than just a decorative flourish – it's a reflection of your unique perspective, a celebration of the beauty in the blank.

Continue Reading

Trending