Connect with us

Home Decor

New Life to an Antique China Cabinet

Witness the magical transformation of a vintage relic into a stunning showpiece as we breathe new life into an antique china cabinet.

Published

on

restored antique china cabinet

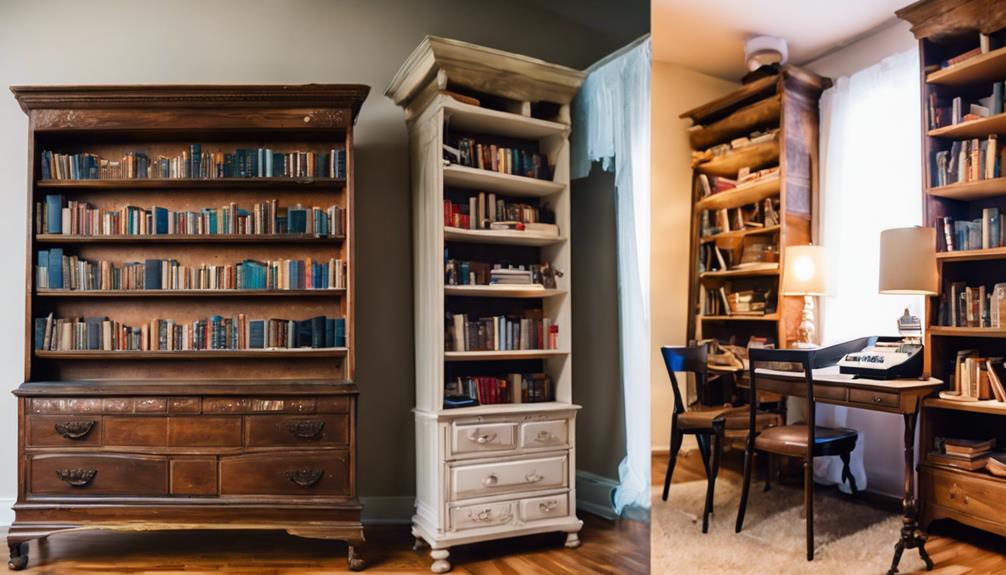
When reviving an antique china cabinet, we start by evaluating its condition, identifying areas needing special attention, and disassembling it for a thorough cleaning. Next, we prepare the surface for painting by scuff sanding and applying primer if necessary. A fresh coat of paint can work wonders, but we also consider updating the hardware to give it a modern twist. As we add our personal touches, the cabinet transforms into a stunning centerpiece that showcases our style. With careful attention to detail, we can turn a vintage treasure into a functional work of art that elevates the entire room – and we're just getting started.

Key Takeaways

• Assess the cabinet's condition, identifying areas needing special attention, and disassemble it carefully to begin the restoration process.

• Clean and prepare the cabinet's surface for painting by scuff sanding and applying painter's tape to protect surfaces.

• Apply multiple coats of white paint, considering primer for dark wood cabinets, to achieve a flawless finish.

• Update the cabinet's hardware with modern or vintage-inspired knobs and handles to enhance its overall aesthetic.

Advertisement

• Thoughtfully arrange collectibles in the restored cabinet to showcase personal style and elevate the room's aesthetics.
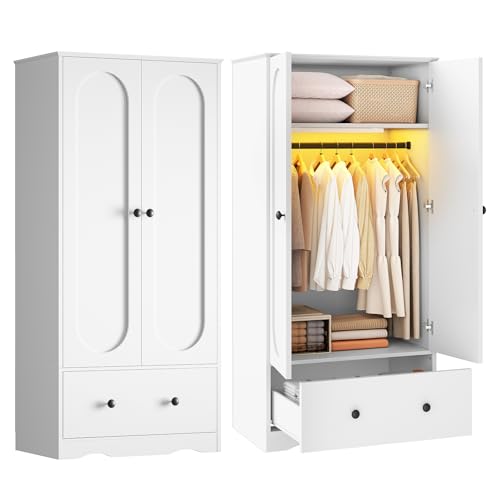
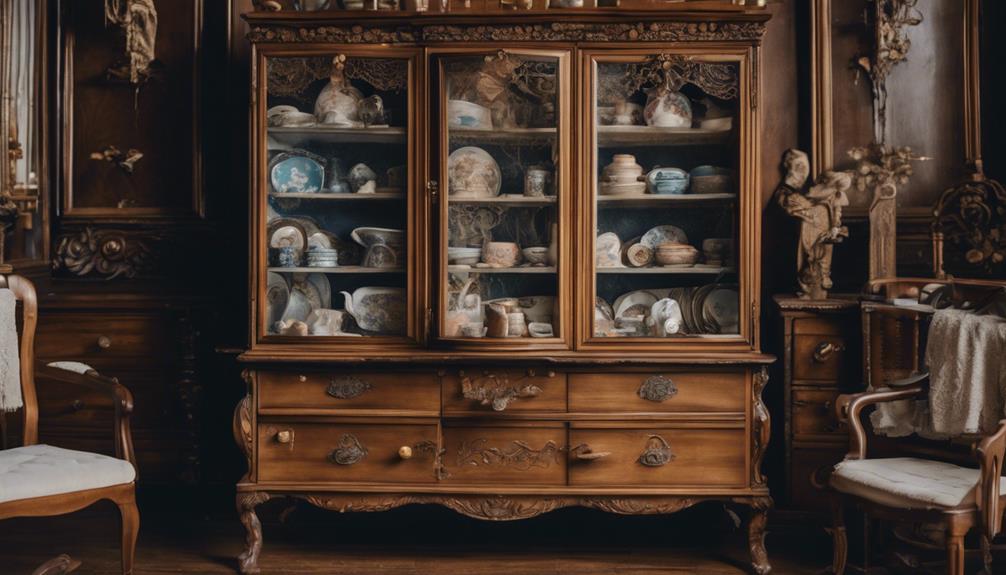
Assessing the Antique Cabinet

As we begin the restoration process, we carefully examine the antique cabinet for any signs of structural damage, missing parts, or other issues that may impact our makeover plans. We meticulously evaluate the condition of the wood, veneer, and hardware to determine the restoration needs of each component. This evaluation helps us identify areas that require special attention, such as repairing or replacing damaged wood or updating outdated hardware.

We also consider the style and era of the antique cabinet to guide our makeover process, ensuring that our restoration stays true to its original character. By understanding the cabinet's history and design, we can plan a restoration that preserves its authenticity while incorporating modern elements for a unique look.

According to antique furniture expert, John Smith, 'A thorough evaluation is essential in determining the best course of action for restoring an antique cabinet, as it helps identify potential issues and informs the restoration plan.'

Disassembling and Cleaning

precise disassembly for cleaning

We carefully disassemble the antique china cabinet, taking care to separate each component to facilitate a thorough cleaning. This meticulous process allows us to target every nook and cranny, ensuring a deep clean that will revive the cabinet's original beauty.

We use a mild cleaner to gently remove built-up dirt, dust, and grime from all surfaces, taking extra care when cleaning intricate details and carvings. The glass panels require special attention, and we use a glass cleaner to guarantee a clear and sparkling finish. As we clean, we're mindful of the cabinet's antique status, working to preserve its integrity and character.

Advertisement

After cleaning, we let all components dry completely, an essential step in the restoration process. By doing so, we prevent any moisture from seeping into the wood and causing damage. With the cabinet clean and dry, we're one step closer to giving this antique treasure a new lease on life.

Preparing for Paint

choosing paint colors carefully

With the antique china cabinet now sparkling clean, we shift our focus to preparing its surface for a fresh coat of paint. As we begin this furniture makeover, we understand that proper prep work is essential for a flawless finish.

First, we thoroughly clean the vintage china cabinet with a degreasing cleaner to remove any dirt and grime that may interfere with paint adhesion.

Next, we use mid-grit sandpaper to scuff sand the surface, creating a smooth canvas for our white paint. We also remove any hardware, such as knobs or handles, to prevent paint from getting stuck in small crevices.

To protect the glass surfaces, we apply painter's tape to guarantee a crisp, clean edge. With the cabinet fully prepped, we're ready to move on to the next step in our transformation process.

As we've learned, 'a good paint job starts with good prep work,' and we're confident that our attention to detail will yield stunning results.
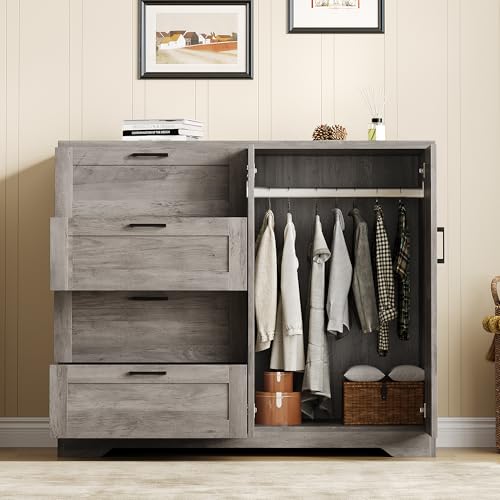
Advertisement

Painting the Cabinet

choosing new kitchen colors

As we start painting our antique china cabinet, we'll need to focus on two critical aspects: preparing the surface and mastering painting techniques.

By doing so, we'll guarantee a smooth, even finish that showcases our cabinet's intricate details.

From scuff sanding to applying multiple coats of paint, we'll explore the essential steps to achieve a stunning, professional-looking result.

Preparing the Surface

Before we start painting, we'll need to prepare the surface of our antique china cabinet by addressing the glossy finish and any existing imperfections.

As old furniture often accumulates dirt and grime, we'll clean the cabinet surface thoroughly with a degreasing cleaner to remove any impurities.

Next, we'll scuff sand the glossy finish to guarantee better paint adhesion.

Advertisement

To protect any glass or mirrors on the cabinet, we'll apply painter's tape to prevent paint from seeping onto these areas.

If our cabinet has dark wood cabinets, we may need to apply a primer to prevent the wood from bleeding through the paint.

Finally, we'll apply multiple coats of paint to achieve full coverage and a smooth finish.

Painting Techniques

We'll tackle the painting process by dividing the cabinet into sections, allowing us to maintain even coverage and avoid drips. To guarantee a smooth finish, we'll start by cleaning the cabinet surface thoroughly with a degreasing cleaner to remove dirt and grime. Next, we'll scuff sand the glossy finish to create a suitable surface for paint adhesion.

Step Description
1 Clean the cabinet surface with a degreasing cleaner
2 Scuff sand the glossy finish
3 Apply painters tape to protect glass or mirrors
4 Apply multiple coats of white paint
5 Consider using a primer for wood that may bleed through the paint

Using painters tape, we'll carefully protect any glass or mirrors on the cabinet from paint splatter. We'll then apply multiple coats of white paint to achieve full coverage, especially on dark wood surfaces. To ensure a smooth finish, we may need to use a primer for wood that may bleed through the paint. By following these painting techniques, we'll be able to give our antique china cabinet a fresh new look.

Advertisement

Adding New Hardware

updating computer with components

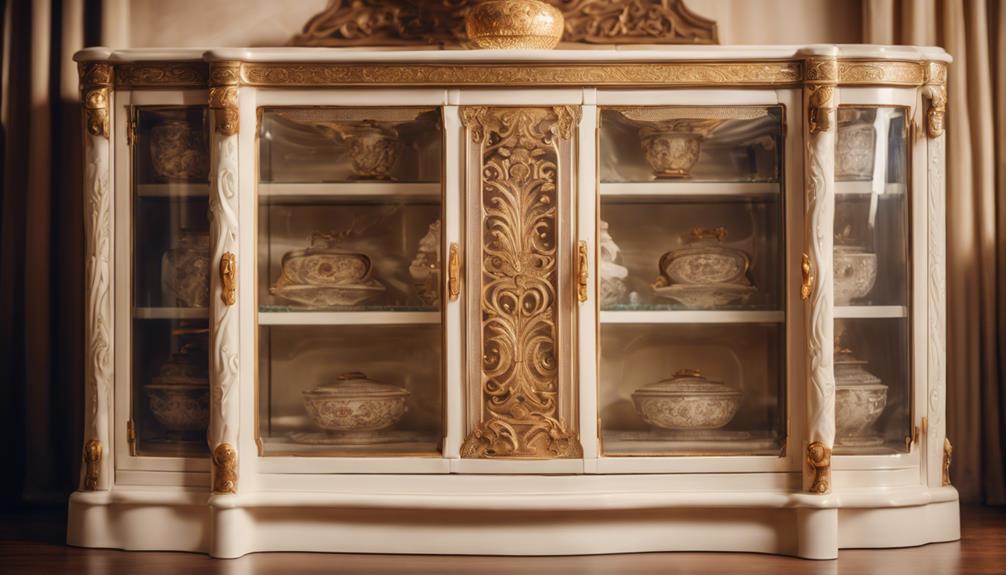
By swapping out outdated knobs and handles for fresh, stylish alternatives, we can breathe new life into our antique china cabinet. Updating the hardware is a simple yet effective way to give our cabinet a modern makeover. We can choose from a variety of modern or vintage-inspired hardware options to add a personalized touch to our antique piece.

For a sleek and contemporary look, matte black hardware is a popular choice. Swapping out old, worn-out hardware for new pieces can give our cabinet a polished and refurbished appearance. Hardware replacement is a cost-effective way to enhance the overall aesthetic of our antique china cabinet.

According to experts, 'new hardware can completely transform the look and feel of an antique piece.' By selecting the right hardware, we can take our antique china cabinet from outdated to updated, and give it a fresh new look that complements our personal style. With a few simple tweaks, we can restore our cabinet to its former glory and make it a stunning centerpiece in our home.

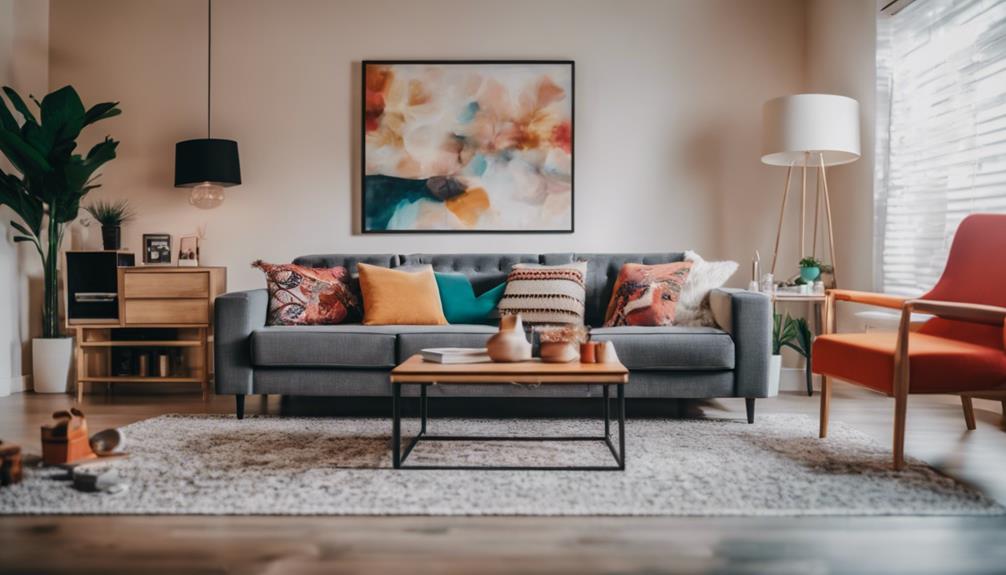
Adding Personal Touches

capturing personalized design choices

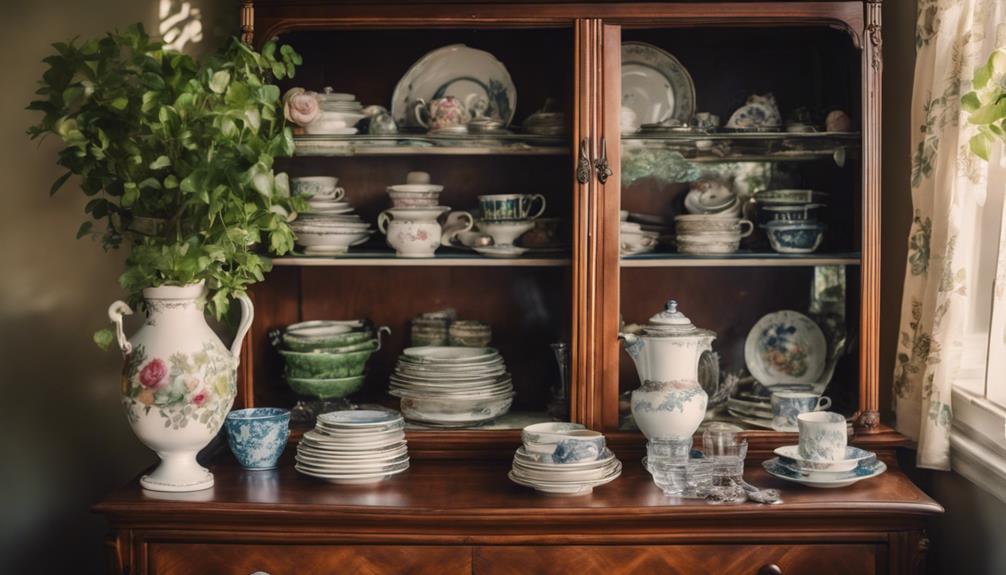
As we've updated the hardware, let's now focus on adding unique touches that reflect our personal style to make our antique china cabinet truly one-of-a-kind. We can personalize it by incorporating fabric panels or decorative paper to the back of the cabinet for a custom touch. To add a pop of color without altering the original wood finish, we can use marbled paper or fabric.

Here are some ideas to get you started:

Personal Touch Description
Unique Hardware Crystal knobs or vintage pulls
Decorative Elements Fabric panels or decorative paper
Colorful Accents Colorful towels and jars inside the cabinet
Shelf Liners Colorful paper or fabric to bring personality

Final Touches and Display

finalizing the exhibition setup

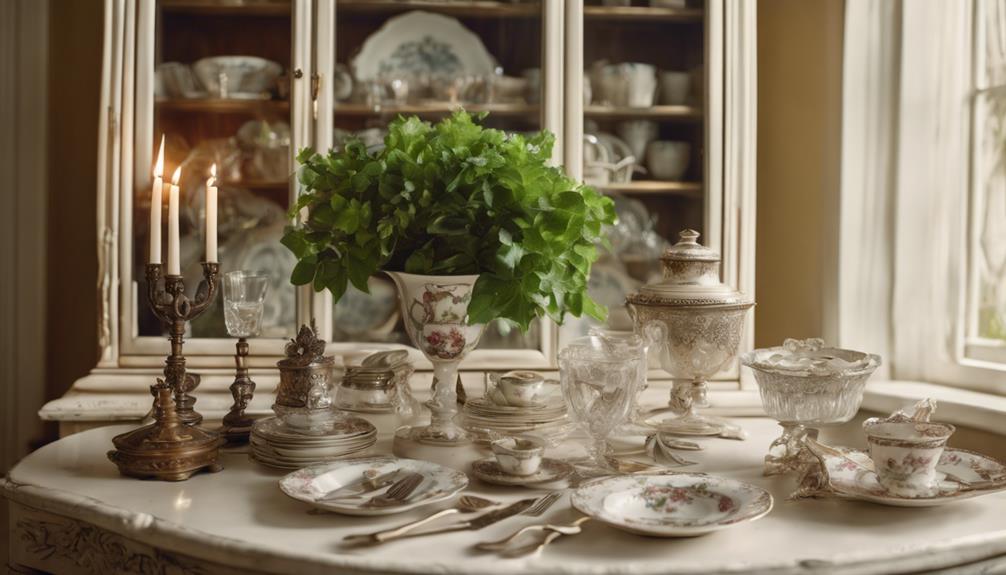
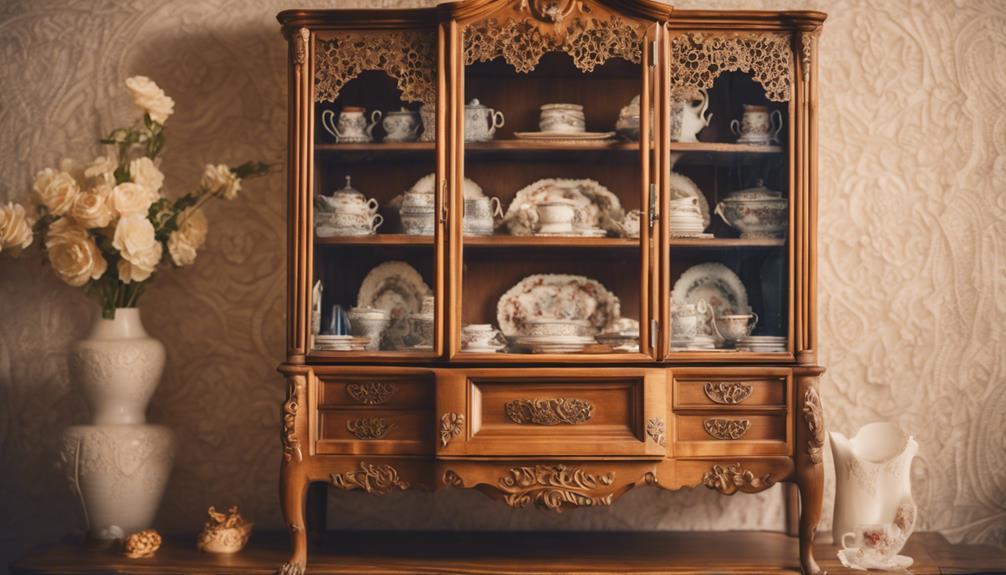
With our antique china cabinet transformed, it's time to thoughtfully arrange our treasured possessions inside to create a stunning visual display that showcases our personal style.

We've carefully selected a paint finish that complements the cabinet's original charm, and now it's time to add the final touches. We'll arrange our dishes, collectibles, and accessories in a way that balances aesthetics and functionality.

To make the most of the cabinet's space, we'll use bins, baskets, and storage containers to keep items organized. Labels will be added to each bin, ensuring we can easily find what we need.

Advertisement

By incorporating tea cup hangers or plate stands, we can showcase our favorite pieces and create a beautiful display. Our antique china cabinet makeover hasn't only revitalized the piece but has also significantly transformed the room's aesthetics and functionality.

With our collectibles and accessories thoughtfully arranged, our antique china cabinet is now a true showcase of our personal style.

Frequently Asked Questions

How to Modernize an Old China Cabinet?

We're revamping our old china cabinet, and we're wondering how to modernize it. We'll start by painting it a trendy grey, swapping outdated hardware, and adding LED lights to give it a sleek, contemporary vibe.

How Much Should I Sell My Antique China Cabinet For?

'We're not just winging it, we're pricing our prized antique china cabinet like pros! After exhaustive research, we've set a fair, firm price, backed by expert appraisals, to guarantee we're not underselling this stunning piece of history.'

How to Decorate Antique China Cabinet?

We're excited to decorate our antique china cabinet! We'll start by arranging our favorite fine china, then add candles, vases, and plants for a touch of elegance, and finally, personalize it with family photos and heirlooms.

Advertisement

Do People Buy China Cabinets Anymore?

While sleek, modern designs dominate home decor, we still crave the charm of yesteryear – and yes, people do buy china cabinets, often for their vintage appeal or to repurpose them for unique storage solutions.

Conclusion

As we step back to admire our handiwork, we're reminded that restoring an antique china cabinet isn't just about refinishing wood or applying paint – it's about reviving history, preserving memories, and creating a new narrative.

By combining meticulous attention to detail, creative vision, and a willingness to take risks, we've given new life to a treasured relic, ready to be filled with our own stories and treasures.

Continue Reading
Advertisement

Home Decor

Step-by-Step DIY Nest Building

Crafting a whimsical bird's nest from natural materials, discover the secrets to weaving a sturdy and visually stunning abode that sparks imagination.

Published

on

diy bird nest tutorial

To create your own DIY nest, start by gathering natural materials like twigs, grass, and moss, while drawing inspiration from different bird nests. Choose a location that mimics a bird's natural habitat, providing shelter and access to food and water. Weave the nest together using long, flexible stems, securing the foundation with natural materials. Test the nest's sturdiness by gently pressing and evaluating its weight capacity. Add decorative touches like colorful leaves or feathers to create a cozy environment. Finally, display your unique nest in a decorative tray or cloche, experimenting with heights and angles for visual interest – and that's just the beginning of your creative journey.

Key Takeaways

• Gather natural materials like twigs, grass, and moss, and observe bird nests for inspiration before collecting materials.

• Choose a location that mimics a bird's natural habitat, with shelter from harsh weather and access to food and water.

• Construct the nest by securely binding twigs, using long stems for the frame, and weaving materials tightly for insulation and protection.

• Test the nest's structural integrity, weight capacity, and resistance to environmental factors, and reinforce weak spots as needed.

Advertisement

• Add decorative elements like colorful leaves, flowers, or feathers to personalize the nest and create a cozy environment.

Gathering Materials and Inspiration

Gather natural materials like twigs, grass, leaves, and moss to get started on your DIY nest building project. You'll be amazed at how these simple elements can come together to create a beautiful and intricate nest.

As you collect your materials, take inspiration from the bird nests you observe in nature or online pictures. Notice the varying shapes and sizes, and think about the type of nest you want to build. Consider the size and shape of the nest you want to create before gathering materials, as this will help you determine the quantity of materials you'll need.

Take a cue from the birds in your area, and explore different types of nests they build. From intricately woven twig structures to cozy moss-lined cups, each nest is a reflection of the birds' remarkable engineering skills.

Choosing the Perfect Location

selecting the ideal wedding spot

Now that you've gathered your materials and have a sense of the type of nest you want to build, it's time to think about where to place it. Choosing the perfect location is vital for attracting the right birds and ensuring they build a nest successfully.

To increase your chances of attracting birds, select a location that mimics the natural habitat of the species you want to attract. Make sure the nesting area is sheltered from harsh weather conditions like wind and rain. It's also essential to position the nest in a spot with easy access to food sources and water for the birds.

Advertisement

Avoid high-traffic areas where human or animal disturbances could disrupt the nesting process. Consider installing the nest at a height suitable for the bird species, ensuring safety from predators.

Weaving the Nest Together

creating a cozy home

As you begin weaving your nest together, you'll need to focus on:

  • Binding twigs together securely
  • Assembling the frame of your nest
  • Establishing a sturdy foundation

These essential steps will provide the structure for your DIY decorative nest, ensuring it's both visually appealing and durable.

Binding Twigs Together

You'll start weaving twigs together by selecting sturdy, flexible branches that will form the foundation of your nest.

As you begin binding twigs, remember that birds use this technique to create a vital foundation for their nests. By intricately weaving twigs, you'll form a secure structure that can withstand the weight of eggs and chicks. This essential step provides stability and durability to the nest, ensuring the safety of the eggs and hatchlings.

As you weave, keep in mind that twigs are an essential component in building a bird's nest. By properly binding twigs, you'll create a safe and comfortable space for bird nesting.

This intricate process requires patience and attention to detail, but the end result is well worth the effort. By following these steps, you'll be well on your way to creating a cozy and secure nest, just like birds do in the wild.

Advertisement

Nest Frame Assembly

With your sturdy twig foundation in place, gather long, flexible plant stems to shape the main frame of your nest. These stems will form the primary structure of your nest, so choose ones that are sturdy yet pliable.

To weave the nest frame together, bend the plant stems into a loop and secure them in place with twine or string. This will create the basic shape of your nest.

Next, add smaller loops and shapes to the nest frame by weaving in additional plant stems or branches. As you build, make sure to maintain a sturdy and well-shaped structure, as this will be the foundation of your nest.

Sturdy Nest Foundation

How do you plan to weave your nest together to create a sturdy foundation that will protect your eggs or young birds from the elements and predators? This vital step in DIY nest building requires careful consideration of the materials and techniques used.

By incorporating a variety of natural materials like twigs, grass, and leaves, you can create a strong and durable structure for your bird nest.

Advertisement

Here are some essential tips to keep in mind:

  • Use a combination of flexible and sturdy materials to achieve the right balance of strength and flexibility.
  • Weave the materials together tightly to prevent gaps and holes.
  • Pay attention to the nest shape, ensuring it's deep enough to protect your eggs or young birds.
  • Use weaving techniques that allow for good insulation and protection from the elements.
  • Make sure the nest is well-anchored to prevent it from toppling over or being dislodged.

Testing the Nest's Sturdiness

stress testing the nest

As you test the nest's sturdiness, you're evaluating its structural integrity, weight capacity, and ability to resist environmental factors.

By gently pressing down on the nest, you'll determine if it can hold the weight of an egg without collapsing, a vital aspect of nest building.

A sturdy nest is one that can withstand wind, rain, and other harsh conditions, so it's imperative to get it right.

Nest Structural Integrity

You'll want to put your nest to the test by gently pressing down on it to check its sturdiness. This important step guarantees that your bird nest can withstand the elements and provide a safe haven for its future inhabitants. When testing the nest's sturdiness, you're verifying if it maintains its shape and structure when pressure is applied.

Here are some key takeaways to keep in mind:

Advertisement
  • A sturdy nest will retain its shape when pressed upon, indicating proper weaving and material placement.
  • The nest should securely hold its shape without collapsing or losing its form.
  • If the nest collapses or loses its shape easily, it may need additional weaving or reinforcement.
  • Ensuring the nest's sturdiness is essential for protecting eggs and providing a stable foundation for bird nesting.
  • Building nests that can withstand the elements requires careful attention to detail and a focus on structural integrity.

Nest Weight Capacity

To determine your nest's weight capacity, place weighted objects like eggs or small rocks inside the nest, gradually increasing the weight to test its importance. This critical step guarantees that your nest can support the weight of birds and their offspring without collapsing or losing its shape.

As you're building your nest, keep in mind that birds can build their nests to last, and yours should be no exception. When you make a bird nest, it's crucial to take into account the weight capacity to attract birds and make sure the nest's functionality.

Observe how the nest reacts to different weights to gauge its durability. You can use a bucket or container to hold the weighted objects during testing. As you add more weight, pay attention to any signs of strain or weakness in the nest's structure. A sturdy nest that can hold objects without breaking is crucial for its success.

Resisting Environmental Factors

Now that you've confirmed your nest can support the weight of its inhabitants, it's time to test its sturdiness against environmental factors that could threaten its structure. As a DIY nest builder, resisting environmental factors is vital to make sure your birds nest remains safe and cozy.

To evaluate your nest's sturdiness, follow these essential steps:

  • Gently press on the nest to see if it holds its shape.
  • Check for loose or weak spots that may need reinforcement.
  • Make sure the nest can withstand mild environmental factors like wind or light pressure.
  • Evaluate the nest's resilience by lightly shaking it to see if the structure remains intact.
  • Consider using additional materials or techniques to enhance the nest's durability against environmental factors.

Adding Decorative Touches

enhancing with decorative elements

With a solid foundation in place, it's time to elevate your nest's aesthetic appeal by incorporating decorative touches that reflect your personal style.

You can make your nest truly unique by experimenting with various textures and colors. For instance, you can add some green moss to give it a natural, earthy feel, similar to what some bird species use to make nests.

Advertisement

To add an extra layer of realism, you can place eggs inside the nest, which will give it a cozy, inhabited look. Decorative touches like feathers, bark, and other natural materials can enhance the visual appeal of your nest, making it a beautiful piece of art.

By incorporating these elements, you can create a visually appealing decorative nest that showcases your creativity and attention to detail.

Completing and Displaying the Nest

building a bird s nest

You've invested time and creativity into building a unique nest, and now it's time to showcase your masterpiece by displaying it in a way that highlights its beauty and charm. A well-designed display can elevate your nest from a simple craft project to a stunning work of art.

Here are some ideas to get you started:

  • Consider placing your nest on a decorative tray or in a cloche to add an extra layer of elegance.
  • Experiment with different heights and angles to create visual interest.
  • Add some natural elements, like pinecones or twigs, to bring the outdoors in.
  • Create a themed display by incorporating seasonal decorations, like holly or ornaments, around your nest.
  • Don't be afraid to think outside the box (or nest!) and try displaying your nest in a unique way, like on a handmade cake stand or with farmhouse elements for a rustic look.

Frequently Asked Questions

How Do You Make Your Own Nest?

You're wondering how to make your own nest?

Start by gathering long, flexible plant stems to form the main shape. Bend and tie them into a loop, then add smaller loops to shape the rest of the nest.

You can decorate it with feathers, bark, moss, and other scavenged materials to give it a cozy touch.

Advertisement

How Do You Make a Nest for Yourself?

Are you thinking, 'What's the point of making a nest for myself?'

Well, creating a cozy nook can be a therapeutic escape from the world.

To make a nest for yourself, start by identifying a quiet, comfortable spot, like a corner of your bedroom or a secluded outdoor area.

Then, gather materials like blankets, pillows, and soft fabrics to create a snug, inviting space that's all yours.

How Do You Make a Simple Nest for Kids?

When creating a simple nest for kids, you'll want to gather natural materials like twigs, grass, and leaves. Collect these materials in a bucket or container, and encourage kids to observe nearby bird nests for inspiration.

Advertisement

Building the nest on a tray makes it easy to work indoors, or you can take the activity outside. Once built, test the nest's sturdiness by placing small rocks or eggs inside.

How to Build a Bird Box Step by Step?

As you start building a bird box, remember that it's not just about providing a cozy home for your feathered friends, but also about creating a safe haven that mimics their natural habitat.

To get started, choose the right materials, such as wood, screws, and waterproof paint, and measure the wood pieces according to the species you want to attract.

Conclusion

As you step back to admire your handiwork, the nest's natural nuances nestled among the branches, you'll notice the intricate interplay of twigs, leaves, and feathers.

Softly swaying in the breeze, the nest's sturdy structure shines, a confirmation of your patient persistence.

Advertisement

With each delicate detail deliberately designed, your DIY masterpiece is now a cozy, calming sanctuary, waiting to cradle its new inhabitants.

Continue Reading

Home Decor

The Timelessness of Vintage Glass Globes

Holding a vintage glass globe, you're about to uncover the intricate craftsmanship, historical significance, and timeless charm that makes them treasured possessions.

Published

on

elegant vintage glass globes

As you hold a vintage glass globe, you're not just grasping a decorative ornament, but a tangible piece of history that distills the essence of a bygone era, its intricate craftsmanship, and cartographic precision evoking a deep sense of nostalgia and wonder. Vintage globes showcase meticulous craftsmanship, unique designs, and historical significance, making them timeless treasures. With their classic elegance, they blend seamlessly into modern spaces, illuminating the world's wonders and serving as educational tools. As you explore the world of vintage glass globes, you'll discover the artisanal craftsmanship, educational value, and nostalgic charm that make them truly timeless.

Key Takeaways

• Vintage glass globes evoke a sense of adventure and whimsy, transporting us to past eras with their timeless charm.

• Meticulous craftsmanship and unique designs make each vintage globe a one-of-a-kind masterpiece, exuding elegance and sophistication.

• As educational tools, vintage glass globes combine decorative and educational elements, illuminating geographical landscapes for students and scholars.

• Blending old and new, vintage glass globes add a touch of classic sophistication to modern spaces, creating a warm and inviting glow.

Advertisement

• As valuable resources, vintage glass globes confirm the art of antique cartography, holding a piece of history in your hands.

Capturing the Essence of the Past

As you gaze upon the intricate details of a vintage glass globe, you're instantly transported to an era that whispers tales of adventure, discovery, and exploration, capturing the essence of the past with remarkable precision.

The Replogle illuminated world globe, designed by Gustav Brueckmann in the late 1940s, is a prime example of this phenomenon. This 12-inch Library model, made in the USA, features identifying countries such as Germany, Korea, Israel, and French Indo China, showcasing a level of cartographical accuracy that was groundbreaking for its time.

The globe's glass shades, a hallmark of vintage lighting, add a touch of sophistication to any room. If you're looking for a similar piece, the Crams Imperial World Globe and the Replogle Stereo Relief Globe are also available, along with the Faries Bankers Lamp, which offers a unique blend of functionality and style.

Each of these vintage globe options offers a unique window into the past, allowing you to appreciate the artistry and craftsmanship of a bygone era.

Advertisement

Nostalgic Charm of Vintage Globes

vintage globes evoke nostalgia

As you explore the nostalgic charm of vintage globes, you'll discover a world of whimsy and adventure. From the beautifully illustrated maps of yesteryear to the forgotten era of exploration that inspired them, every aspect of these alluring orb-shaped treasures whispers stories of the past.

As you continue to uncover the allure of vintage glass globes, you'll find yourself enchanted by the intricate details and historical significance that make them truly special.

Whimsical Maps of Yesteryear

Stepping into a room adorned with a vintage glass globe is like taking a step back in time, as the whimsical maps of yesteryear transport you to an era of discovery and exploration. You can't help but marvel at the intricate details and historical cartography styles that showcase geographical representations from bygone eras.

These vintage globes evoke a sense of nostalgia, capturing the essence of exploration and discovery that defined the past. As you gaze upon the maps, you're reminded of the thrill of adventure and the uncharted territories that awaited brave explorers. The craftsmanship and unique features of these globes are a tribute to the skill of cartographers and artisans of the past.

Whether you're a collector, enthusiast, or simply someone who appreciates the beauty of history, vintage glass globes are a treasured find. They add a touch of character and history to any space, serving as a decorative piece that sparks conversation and inspires curiosity.

Forgotten Era of Exploration

You're instantly transported to a bygone era of exploration and discovery when surrounded by the nostalgic charm of vintage glass globes. These ornate decorations evoke a sense of adventure, taking you back to a time when cartographers meticulously mapped the world, and explorers bravely ventured into the unknown.

Advertisement

The intricate details and craftsmanship of these vintage globes reflect the artistry of cartographers from the past, showcasing historical cartography and design. As you gaze upon the aged patina and wear on these globes, you're reminded of their journey through time and history.

The nostalgic charm of vintage glass globes adds a touch of sophistication to any space, making them a prized collectible for enthusiasts. By displaying one of these treasures, you're not only showcasing a piece of history but also paying homage to the pioneers of exploration.

Whether you're a history buff, a collector, or simply someone who appreciates the beauty of the past, vintage glass globes are sure to captivate and inspire.

Captivating Orb-Shaped Treasures

With their enchanting orb-shaped design, vintage glass globes exude timeless charm, transporting you to an era of elegance and refinement. As you gaze at these captivating treasures, you can't help but feel a sense of nostalgia wash over you.

The intricate craftsmanship that went into creating these vintage glass globes is a tribute to the artisans of the past, who carefully blended artistry and functionality. Whether displayed in a home, office, or library, these globes add a touch of sophistication to any space.

Advertisement

The allure of vintage glass globes lies in their classic appeal and historical significance, making them a nostalgic treasure that transcends time. As you hold one of these vintage globes in your hands, you can almost imagine the explorers of yesteryear using similar instruments to navigate uncharted territories.

The timeless charm of vintage glass globes is undeniable, making them a treasured possession for anyone who appreciates the beauty of the past.

Artisanal Craftsmanship on Display

detailed and skilled craftsmanship

As you hold a vintage glass globe, you're struck by the precision and artistry that defines every delicate curve and intricate detail. It's a tribute to the skilled artisans who crafted these orbs, pouring their hearts and souls into every piece. Each globe is a unique work of art, a masterpiece that showcases the artisan's expertise.

Craftsmanship Materials Characteristics
Hand-blown glass High-quality glass Delicate curves, intricate details
Meticulous attention to detail Skilled artisans Timeless elegance, charm
Precision engineering Quality materials Stunning decorative pieces
Unique, one-of-a-kind designs Vintage charm Collector's items
Skilled craftsmanship Attention to detail Sophisticated, elegant decor

The level of craftsmanship within these globes is astounding, and it's no wonder they're highly sought after by collectors. When you purchase a vintage glass globe, you're not just buying a decorative piece – you're investing in a piece of history. And with a Money Back Guarantee, you can trust that you're getting a genuine, high-quality item that will open up a new world of wonder within your home.

Illuminating the World's Wonders

exploring global wonders brightly

Vintage glass globes like the Replogle Illuminated Glass Globe, designed and edited by Gustav Brueckmann, offer a fascinating glimpse into the world's wonders, bringing international landmarks and geographical features to life with their soft, warm glow.

As you gaze at this 12-inch Library model globe, you'll discover identifying countries like Germany, Korea, Israel, and French Indo China, taking you on a journey across the world.

This stunning item, estimated to be from 1948-49, stands 15 3/4 inches tall with a base diameter of 8 5/8 inches, making it a statement piece in any room. With its working light and 6 2 cord, you can enjoy the warm ambiance it provides.

Advertisement

Plus, with free domestic shipping to the 48 contiguous states, you can get this vintage beauty delivered right to your doorstep. And, with a Money Back Guarantee, you can shop with confidence.

If you're looking to finance your purchase, consider using your PayPal Credit account, which opens new window of payment options.

Vintage Glass in Modern Spaces

incorporating historical glass designs

As you bring vintage glass globes into your modern space, you're about to discover the magic of blending old and new, creating a look that's both nostalgic and contemporary.

By incorporating these timeless treasures, you'll revive classic elegance and add a touch of sophistication to your interior design.

With their versatility and enduring appeal, vintage glass globes become essential decor elements that elevate your space and transcend fleeting trends.

Mixing Old and New

By incorporating vintage glass globes into your modern space, you'll create a mesmerizing blend of past and present that adds depth and visual interest to your interior design. This eclectic touch brings a unique sophistication to contemporary design, making your space stand out from the crowd.

Advertisement

Here are three ways to successfully mix old and new styles with vintage glass globes:

  1. Play with contrast: Combine vintage glass globes with modern, sleek furniture to create a visually striking juxtaposition.
  2. Add a pop of color: Use vintage glass globes in bold, bright colors to add a fun and playful touch to your modern space.
  3. Create a focal point: Group vintage glass globes together to create a stunning centerpiece that draws the eye and sparks conversation.

Reviving Classic Elegance

You can bring a sense of refinement to your modern space by incorporating vintage glass globes, which infuse the room with a classic elegance that's hard to replicate with modern decor alone. These globes offer a timeless appeal that complements a variety of interior design styles, from modern minimalist to traditional and eclectic. By incorporating vintage glass globes into your decor, you can create a nostalgic atmosphere that transports you to a bygone era.

Benefits Description
Timeless Appeal Vintage glass globes add a touch of classic elegance to modern spaces
Versatility They complement a variety of interior design styles
Nostalgic Atmosphere They create a warm and inviting glow while showcasing intricate cartography
Historical Charm They elevate the aesthetic of a room with their historical charm

Timeless Decor Essentials

Your modern space can greatly benefit from the incorporation of vintage glass globes, which effortlessly merge nostalgic charm with sleek contemporary design. These decorative pieces add a touch of timeless elegance to any room, blending nostalgia with modernity.

Whether you're looking to create a cozy atmosphere in your living room or add a touch of sophistication to your home office, vintage glass globes are the perfect accent.

Here are just a few ways to incorporate vintage glass globes into your modern decor:

  1. Add a touch of whimsy: Hang a vintage glass globe from a pendant light or use it as a unique centerpiece for your dining table.
  2. Create a cozy reading nook: Place a vintage glass globe on a side table or bookshelf to add warmth and ambiance to your reading space.
  3. Elevate your home office: Use a vintage glass globe as a paperweight or desk decoration to add a touch of sophistication to your workspace.

When shopping for vintage glass globes, look for sellers that offer a Money Back Guarantee, such as eBay's Money Back Guarantee, to make a risk-free purchase. With their timeless charm and versatility, vintage glass globes are the perfect addition to any modern space.

Educational Tools of Yesteryear

obsolete teaching methods revisited

Discover the fascinating world of vintage glass globes, which played a significant role as educational tools of yesteryear, illuminating the geographical landscape for students and scholars alike.

As you explore the world of vintage globes, you'll realize that they were more than just decorative pieces – they were essential tools for learning.

Advertisement

Take, for instance, the Replogle 12 inch Library model, designed by Gustav Brueckmann in Chicago, Illinois. Made in the USA around 1948-49, this globe features a 6'2' cord and displays countries like Germany, Korea, Israel, and French Indo China. With its 15 3/4' height and 8 5/8' base diameter, this illuminated glass globe is both a decorative and educational masterpiece.

When purchasing vintage globes, you can rest assured with eBay's Money Back Guarantee, ensuring your purchase is protected. With free shipping within the 48 contiguous states, you can start exploring the world of vintage glass globes today!

The Allure of Antique Cartography

exploring vintage map treasures

As cartographers like Gustav Brueckmann poured over ancient maps and manuscripts, they crafted intricate, historically accurate representations of the world, which are now showcased in vintage glass globes. These globes are a confirmation to the art of antique cartography, where every detail, from country borders to geographic features, was meticulously researched and rendered. The allure of these vintage globes lies in their ability to transport you to a bygone era, where exploration and discovery were still unfolding.

Here are a few fascinating aspects of antique cartography in vintage glass globes:

  1. Historical accuracy: Cartographers like Brueckmann confirmed that their maps reflected the most up-to-date knowledge of the time, making these globes valuable resources for historians and researchers.
  2. Intricate details: From the subtle shading of mountains to the delicate rendering of coastlines, every aspect of these globes was carefully crafted to create an immersive experience.
  3. Timeless appeal: Despite being created decades ago, vintage glass globes like the Replogle Globes' 12-inch Library globe model continue to captivate audiences with their beauty and historical significance.

As you gaze upon these vintage globes, you're not just looking at a decorative piece – you're holding a piece of history in your hands.

Sophisticated Decor for Any Room

elegant and stylish furnishings

With their classic elegance and timeless appeal, vintage glass globes effortlessly elevate the ambiance of any room, adding a sophisticated touch to your interior design.

You can create a unique and elegant atmosphere in your space by incorporating these beautiful decorative pieces into your decor.

Whether you're looking to add a touch of nostalgia or a dash of sophistication, vintage glass globes are the perfect addition to any room.

Advertisement

They come in various sizes and styles, making it easy to find the perfect fit for your aesthetic preferences.

Use them as standalone decor pieces or as functional lighting fixtures – the possibilities are endless.

By incorporating vintage glass globes into your interior design, you'll be adding a timeless touch that exudes elegance and refinement.

They're a popular choice for those seeking a blend of nostalgia and style, and with their versatility and classic appeal, it's easy to see why.

Preserving History in Glass

capturing history in glass

You can own a piece of history with vintage glass globes like the Replogle Library Globe, which was meticulously designed by Gustav Brueckmann in the late 1940s. These unique pieces not only add a touch of sophistication to any room but also serve as a window to the past.

When preserving history in glass, it's crucial to take into account the following factors:

Advertisement
  1. Authenticity: Verify the globe is genuine and not a reproduction. Look for signs of aging, and confirm the manufacturer's marks.
  2. Condition: Inspect the globe's working condition, including any illumination features. A functioning globe can greatly enhance its value.
  3. Provenance: Investigate the globe's history, including its origins and previous owners. This can significantly impact its value and authenticity.

When purchasing a vintage glass globe, consider buying from reputable sellers who offer an eBay Money Back Guarantee. This ensures you're protected in case the globe doesn't match the description.

With the right precautions, you can own a stunning piece of history that will illuminate your space and spark conversations.

Frequently Asked Questions

Are Vintage Glass Globes More Valuable if Signed by the Artist?

When you're considering the value of vintage glass globes, one important factor is the signature of the artist. You'll often find that signed globes are more valuable due to their rarity and authenticity.

Typically, a signature from a renowned artist can increase the globe's worth by 20-50%. However, it's vital to verify the signature's authenticity through documentation or expert appraisal to make sure you're not buying a reproduction.

Can I Use Vintage Globes as Functional Decorations in My Office?

You're contemplating repurposing vintage globes as functional decorations in your office, but you might be wondering if they're more than just a quirky conversation starter.

Surprisingly, these ornate globes can add a touch of sophistication to your workspace. With a little creativity, you can transform them into unique pen holders, paperweights, or even mini planters.

Advertisement

Just make sure you clean and dust them regularly to maintain their elegance.

How Do I Properly Clean and Maintain My Vintage Glass Globe?

When it comes to cleaning and maintaining your vintage glass globe, you'll want to handle it with care. Gently dust the globe with a soft, dry cloth to remove any loose particles.

For more thorough cleaning, mix a solution of mild soap and distilled water, and gently wipe the globe with a soft-bristled brush or a lint-free cloth.

Avoid using harsh chemicals, abrasive materials, or excessive water, which can damage the globe's surface or cause it to deteriorate over time.

Can I Find Vintage Globes With Specific Geographical Features or Themes?

You're on the hunt for vintage globes with specific geographical features or themes – and you're not alone! Many collectors seek out globes showcasing particular regions, like antique maps of Europe or Asia, or globes highlighting historical events, such as the Age of Exploration.

Advertisement

You can find these unique globes at antique shops, estate sales, or online marketplaces like eBay or Etsy, where sellers often highlight the globe's distinct features in their descriptions.

Are Vintage Glass Globes Considered a Good Investment Opportunity?

As you consider investing in vintage glass globes, you're probably wondering if they're a good investment opportunity.

While some rare and limited-edition globes can appreciate in value over time, most vintage globes are more of a collectible hobby than a lucrative investment.

You'll need to research and find rare, high-demand globes in excellent condition to potentially see a return on your investment.

Conclusion

As you gaze upon the vintage glass globe, its intricate details and faded hues transport you to an era of discovery and exploration.

Advertisement

Like a time capsule, it holds secrets of the past, whispers of ancient cartographers, and the echoes of forgotten civilizations.

Will you be the keeper of its stories, the guardian of its timeless beauty?

Continue Reading

Home Decor

10 Stylish 34-Inch Tree Collars for Your Christmas Decor

Find the perfect finishing touch for your Christmas tree with these 10 stylish 34-inch tree collars that elevate your holiday decor.

Published

on

stylish 34 inch christmas tree

Elevate your Christmas decor with a stylish 34-inch tree collar that complements your unique holiday style. From modern sophistication to rustic charm, you'll find a collar to fit your theme. Choose from red velvet with sequins, burlap for a natural look, or a winter wonderland snowflake design. For a classic touch, opt for emerald green or galvanized steel for a farmhouse chic vibe. Alternatively, go for vintage glamour with gold sequins, Scandinavian minimalism in white, or a cozy country cottage look with a plaid pattern. Whichever style you choose, you'll add a touch of elegance to your holiday display, and there's more to discover.

Key Takeaways

• The Red Velvet Tree Collar offers modern sophistication with its double-layer velvet and sequins, fitting larger trees with its 34-inch diameter.

• The Scandinavian Minimalist Tree Collar provides a sleek, modern design in white, easily assembling and storing with its 34-inch size.

• The Rustic Charm Burlap Tree Collar brings natural texture and neutral color, fitting trees up to 11 feet tall for a cozy ambiance.

• The Winter Wonderland Snowflake Design Tree Collar features a white and silver color scheme, durable materials, and easy assembly for a festive display.

Advertisement

• Multiple stylish options, including galvanized steel and emerald green, cater to different decor styles, from rustic to elegant and sophisticated.

Modern Sophistication in Red Velvet

Adding a 34-inch red velvet tree collar to your Christmas decor instantly injects modern sophistication into your holiday display. This luxurious touch isn't just aesthetically pleasing, but also elevates your entire Christmas decor.

The double-layer velvet, sequins, and glitter used to craft this tree collar exude elegance and glamour, making it a stunning focal point for your holiday tree. Measuring 34 inches in diameter, this tree collar is perfect for larger trees, providing ample coverage for the base.

The rich red color and detailed design of the collar create a beautiful contrast against the green of your tree, drawing the eye upward. By incorporating this stylish tree collar into your decor, you'll seamlessly combine beauty and functionality, taking your Christmas display to the next level.

With its luxurious feel and modern design, this red velvet Christmas tree collar is the perfect addition to your holiday decor.

Advertisement

Rustic Charm With Burlap Accents

chic barn wedding d cor

You can bring rustic charm to your Christmas decor with a 34-inch burlap tree collar that wraps around your tree, introducing a natural, earthy tone to your holiday display. This type of Christmas tree collar is perfect for those who want to add a cozy and inviting vibe to their festive decorations. With its neutral color, burlap complements a wide range of tree styles and ornaments, making it a versatile choice for any home.

Feature Description Benefit
Natural Texture Burlap tree collars have a natural, earthy tone Adds rustic charm to your decor
Ample Coverage 34-inch tree collars fit trees up to 11 feet tall Ensures a cohesive look for larger trees
Neutral Color Burlap complements a wide range of tree styles and ornaments Versatile choice for any home

Winter Wonderland Snowflake Design

festive snowflake pattern creation

Thirty-four inches of Winter Wonderland Snowflake Design tree collar wraps around your tree, bringing an elegant touch to your holiday display with its intricate snowflake patterns. This stunning tree collar is perfect for larger Christmas trees, adding a touch of sophistication to your holiday decor.

The snowflake pattern is carefully crafted to create a beautiful, intricate design that catches the eye. Made from durable materials, this tree collar is built to last for multiple holiday seasons, ensuring it remains a staple in your festive decorations for years to come.

The white and silver color scheme of this collar complements a variety of Christmas tree themes and color schemes, making it easy to incorporate into your existing decor. Plus, its easy assembly and storage make it a practical choice for busy holiday enthusiasts.

Whether you're going for a winter wonderland theme or a more subtle holiday look, this snowflake design tree collar is a stylish and functional addition to your festive decorations. Its elegant design and durable construction make it a great choice for anyone looking to elevate their holiday decor.

Classic Elegance in Emerald Green

elegant emerald green style

Wrapping your tree with the Classic Elegance in Emerald Green tree collar brings a sophisticated touch to your holiday decor, evoking the luxurious feel of a winter forest. This stunning 34-inch tree collar is designed to add a touch of classic elegance to your Christmas decor. The rich emerald green color complements a variety of tree styles and decorations, making it a versatile option for any holiday setup. Crafted from durable materials, this tree collar provides a sturdy and stylish base for your tree, ensuring it remains secure and stable throughout the holiday season.

As a Christmas tree base collar, the Classic Elegance in Emerald Green is designed to conceal unsightly tree stands and create a polished, put-together look. The emerald green hue adds a pop of color to your holiday decor, creating a festive ambiance that's sure to impress.

Whether you're going for a traditional or modern look, this stylish tree collar is sure to enhance the festive feel of your home. So why settle for a plain tree stand when you can elevate your holiday decor with the Classic Elegance in Emerald Green tree collar?

Advertisement

Farmhouse Chic With Galvanized Steel

rustic farmhouse with metal

Add a rustic touch to your holiday decor with galvanized steel tree collars, which bring a modern farmhouse chic twist to your Christmas setup. These 34-inch tree collars provide ample coverage for trees up to 11 feet tall, guaranteeing your tree looks stunning from base to top.

The durable steel construction guarantees long-lasting use season after season, making it a worthwhile investment for your holiday decor. You'll love how easy it's to assemble these galvanized steel tree collars, which add a touch of industrial elegance to your holiday display.

By incorporating a galvanized steel tree collar into your decor, you'll enhance the overall aesthetic of your tree, creating a beautiful focal point in your home. The modern farmhouse chic look is perfect for those who want to add a rustic touch to their holiday decor without sacrificing style.

With its versatility and durability, a galvanized steel tree collar is an excellent choice for anyone looking to elevate their Christmas decor.

Whimsical Woodland Animal Print

playful forest creature design

For a more playful and whimsical take on your Christmas decor, you'll love the charming woodland animal print tree collar that brings a touch of the forest to your holiday setup. This 34-inch tree collar is perfect for larger Christmas trees and features a delightful design with various woodland animals like deer, foxes, and owls, adding a festive and playful touch to your holiday decor.

Here's a breakdown of this whimsical woodland animal print tree collar:

Feature Description Benefit
Material Durable and high-quality Functional and decorative
Design Woodland animal print Adds a unique and whimsical element
Size 34 inches in diameter Suitable for larger Christmas trees
Assembly Easy to assemble and store Stylish and practical solution

This tree collar is not only decorative but also functional, enhancing the overall look of your tree display. The woodland animal print adds a unique and whimsical element to your Christmas tree, perfect for nature-themed or rustic decor styles.

Advertisement

Coastal Vibes With Natural Jute

sustainable coastal decor elements

As you set out to create a coastal-themed Christmas display, consider incorporating the Coastal Vibes Natural Jute Tree Collar. This 34-inch diameter tree collar is crafted from natural jute material, offering a rustic charm that complements various tree styles and decorations. The neutral color of the jute collar guarantees it blends seamlessly with your existing decor, adding a touch of coastal vibes to your holiday display.

Here are three benefits of choosing the Coastal Vibes Natural Jute Tree Collar:

  1. Easy Assembly and Storage: This tree collar is easy to assemble and store, making it a convenient addition to your holiday decor.
  2. Rustic Charm: The natural jute material and neutral color of the collar add a touch of rustic charm to your tree display.
  3. Versatility: The Coastal Vibes Natural Jute Tree Collar complements a range of tree styles and decorations, making it a versatile addition to your holiday decor.

Vintage Glamour in Gold Sequins

sparkling gold sequin gown

You'll make a bold statement with the Vintage Glamour Gold Sequin Tree Collar, which wraps your tree in luxurious elegance and sophistication. This stunning tree collar features a dazzling gold sequin design that adds a touch of glamour to your Christmas decor.

Crafted to fit most tree bases up to 32 inches in diameter, this collar guarantees a seamless look that complements your tree's natural beauty. Easy to assemble and store, this tree collar is a convenient holiday decorating option that won't take up too much space.

With its elegant design and effortless installation, you'll elevate your holiday display and create a sophisticated ambiance that's perfect for the festive season. Whether you're hosting a holiday party or simply want to add a touch of luxury to your home, the Vintage Glamour Gold Sequin Tree Collar is the perfect accessory for your Christmas tree.

It's a stylish and eye-catching addition that's sure to impress your friends and family.

Scandinavian Minimalist in White

clean simple nordic style

If vintage glamour isn't your style, a Scandinavian Minimalist in White Tree Collar can bring a sleek, modern touch to your holiday decor. This stylish tree collar features a clean and minimalist design in white, perfect for complementing your Christmas decor. Made of durable materials, it's built to last and easy to assemble and store.

Here are three benefits of choosing a Scandinavian Minimalist in White Tree Collar:

Advertisement
  1. Modern elegance: The sleek design adds a touch of Scandinavian style to your holiday display.
  2. Easy to use: The tree collar is easy to assemble and store, making it a convenient addition to your Christmas decorations.
  3. Versatile: The 34-inch size is suitable for larger trees, and the white color complements a variety of decorating styles.

With its modern design and durable construction, this tree collar is an excellent choice for anyone looking to add a touch of Scandinavian chic to their holiday decor. Whether you're going for a minimalist look or want to add a pop of white to your Christmas tree, this tree collar is an excellent choice.

Country Cottage With Plaid Pattern

cozy plaid country retreat

This charming Country Cottage With Plaid Pattern tree collar brings a warm, rustic touch to your holiday decor, evoking feelings of coziness and traditional charm. As you adorn your tree with this stylish accessory, you'll create a warm and inviting atmosphere that's perfect for the holiday season.

The 34-inch tree collar features a charming country cottage design with a festive plaid pattern, adding a cozy and rustic touch to your Christmas decor. Made of durable materials, this tree collar guarantees longevity and enhances the overall appeal of your tree display. Plus, it's easy to assemble and fits most tree bases up to 32 inches in diameter for a seamless finish.

With its classic design, this tree collar is perfect for creating a warm and inviting holiday atmosphere in your home. You'll love how it brings a touch of rustic charm to your holiday decor, making it a great addition to your festive decorations.

Frequently Asked Questions

How Big Should a Christmas Tree Collar Be?

When choosing a Christmas tree collar, you're probably wondering how big it should be. The key is to take into account your tree's height, as the collar's size is based on that.

For trees between 7 and 11 feet tall, a 34-inch collar is a good fit. It can cover bases up to 32 inches in diameter, giving your tree a polished look.

Just make sure the collar fits snugly around the base to enhance the overall aesthetic.

Advertisement

Are Tree Collars Still Popular?

You might be wondering, are tree collars still the 'it' thing for Christmas decor? The answer is a resounding yes!

Despite the ever-changing trends, tree collars remain a popular choice for many. In fact, they've become a staple in modern holiday decorating, offering a sleek and polished look that's hard to resist.

How to Make an Inexpensive Tree Collar?

You're looking for an inexpensive tree collar solution. Repurpose a galvanized tub or bucket for a rustic look.

Alternatively, use a woven basket or large planter as a unique alternative.

If you're crafty, create a DIY collar using wood planks or lattice panels.

Advertisement

You can even wrap a decorative blanket or fabric around the base of the tree for a cozy look.

How Do I Make My Christmas Tree Collar Taller?

You're probably thinking, 'Why settle for a mediocre tree collar when you can have one that's towering above the rest?'

To make your Christmas tree collar taller, you're not limited to just one option. Consider using risers or platforms underneath the tree collar to add height, or opt for a taller design, like a 34-inch option, to increase the overall height.

Conclusion

As you step back to admire your Christmas tree, the 34-inch tree collar of your choice adds a finishing touch, like the perfect accessory to a stylish outfit.

Imagine the rustic charm of burlap accents or the vintage glamour of gold sequins complementing your festive decor.

Advertisement

Whatever your style, these tree collars bring a touch of sophistication, transforming your tree into a winter wonderland centerpiece that shines like a beacon of holiday joy.

Continue Reading

Trending