To illuminate artwork without glare, choose adjustable picture lights with appropriate beam angles and color temperatures. Position the fixtures slightly above or to the sides of the piece, angling them to prevent reflections. Use dimming controls to fine-tune brightness and maintain true colors. Regularly clean the lights and bulbs to reduce dust and glare, and handle bulbs carefully during replacement. For more tips on achieving perfect lighting, keep exploring how to optimize your setup effortlessly.
Key Takeaways
- Mount lights slightly above or beside artwork at an angle to reduce reflections and glare.
- Use adjustable fixtures with dimming and beam angle controls for precise illumination.
- Choose fixtures with anti-reflective coatings and proper reflective surfaces to minimize glare.
- Keep lights a few inches away from the wall and avoid direct front placement for even lighting.
- Regularly clean and handle bulbs carefully to maintain brightness and prevent glare-causing dirt or oils.
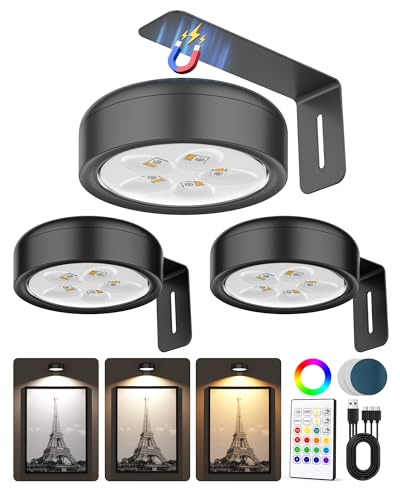
3 Pack Picture Lights for Wall,Wireless 2000mAh Rechargeable Magnetic LED Puck Lights with Remote,3 Color Temps and 12 RGB,Dimming & Timer,Art Frame Light for Painting Display,Photos,Wall Decor
- Long-Lasting 2000mAh Battery: Rechargeable with quick 2-hour charge
- Easy, Tool-Free Installation: Magnet, adhesive, or screws included
- Versatile Lighting Options: 3 color temps, 12 RGB, 2 dynamic modes
As an affiliate, we earn on qualifying purchases.
As an affiliate, we earn on qualifying purchases.
Understanding the Importance of Proper Lighting for Artwork
Proper lighting plays a critical role in how artwork is perceived and appreciated. When you choose the right lighting, you enhance the artwork’s details, colors, and textures, making it more engaging. Proper gallery lighting also protects the piece from damage caused by harsh or incorrect illumination, which can lead to fading or deterioration over time. If you neglect proper lighting, you risk compromising art conservation efforts, potentially damaging the artwork permanently. Selecting the appropriate light intensity, angle, and type ensures you showcase the piece beautifully without causing glare or shadows. Color accuracy is essential for true-to-life representation of artwork, ensuring viewers see the piece as intended. By understanding these principles, you help preserve the integrity of the artwork while offering viewers an ideal visual experience. Good lighting balances appreciation with protection, making it essential for any display.
Types of Picture Lights and Their Suitable Uses
Choosing the right type of picture light depends on the artwork’s size, location, and display environment. For smaller pieces, a picture light with a narrow beam creates focused, artistic lighting that highlights details without overwhelming the artwork. Larger pieces benefit from wider fixtures that distribute light evenly, reducing glare and shadows. Fixture styles vary from sleek, modern designs to vintage or decorative options, allowing you to match the lighting to your decor. Artistic lighting is essential for showcasing textures and colors, so select fixtures that complement your artwork’s style. Consider adjustable options for flexible illumination. Whether you prefer wall-mounted or picture-mounted fixtures, selecting the appropriate style ensures your artwork is beautifully highlighted without glare or distraction.
Key Features to Look for in Picture Lighting Fixtures
When selecting picture lighting fixtures, paying attention to key features can make a significant difference in showcasing your artwork effectively. Look for adjustable brightness and color temperature to highlight artwork framing without glare. Choose picture light styles that complement your space and artwork, such as sleek or vintage designs. Consider beam angle for even illumination and avoid harsh shadows. Look for fixtures with high CRI (Color Rendering Index) to accurately display colors. Guarantee the fixture’s size suits your artwork’s dimensions. Durability and ease of installation are also important. Additionally, selecting a fixture with proper heat management can prevent damage to your artwork over time. Below is a table highlighting essential features:
| Feature | Why It Matters |
|---|---|
| Adjustable brightness | Customizes lighting to artwork and mood |
| Color temperature | Enhances artwork details without distortion |
| Beam angle | Ensures even, glare-free illumination |
| Style options | Complements artwork framing and decor |
| CRI (Color Rendering) | Preserves true colors of your artwork |
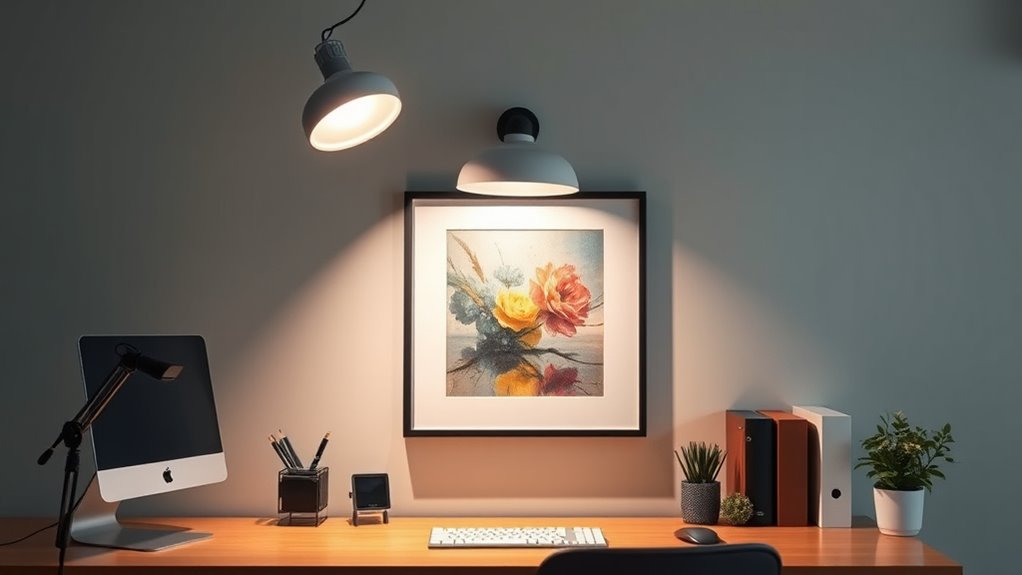
Optimal Placement Techniques to Minimize Glare

To effectively minimize glare, you need to carefully consider the placement of your picture lights. Ambient positioning is key; avoid placing lights directly in front of the artwork, as this often causes unwanted reflections. Instead, mount your lights slightly above or to the sides, so the light hits the picture at an angle. Wall mounting is ideal for precise placement, allowing you to control the height and direction of the light. Keep the fixture a few inches away from the wall to prevent glare from the bulb’s surface. Use adjustable fixtures if possible, so you can fine-tune the angle. Proper placement guarantees even illumination without harsh reflections, creating a clear, glare-free view that highlights your artwork beautifully. Additionally, understanding lighting placement techniques can help optimize your setup for the best visual effect.
How to Adjust Brightness and Focus for Best Results
Adjusting the brightness and focus of your picture light is essential for highlighting artwork effectively. Use the dimming controls to fine-tune the light intensity, ensuring the piece is illuminated without harsh glare. Focus adjustment is equally important; gently move the fixture until the light evenly covers the artwork without creating shadows. To visualize, consider:
- Turning a dial to smoothly dim the light to a softer glow
- Rotating the fixture slightly to eliminate uneven illumination
- Moving the light closer or farther to achieve the perfect focus
- Fine-tuning the angle for an even spread without glare spots
- Remember to periodically check the nail designs to see how the lighting impacts the overall appearance
These adjustments help highlight details while maintaining a natural look. Always check the light’s focus after changing the brightness to ensure your artwork is showcased beautifully.
Choosing the Right Bulb Color Temperature for Your Artwork

Choosing the right bulb color temperature directly impacts how your artwork appears under lighting. A warmer color temperature, around 2700K to 3000K, creates a cozy, inviting glow that enhances earthy tones and textures. Cooler temperatures, between 4000K and 5000K, produce a crisp, neutral light that highlights details and true colors. When selecting a bulb, consider how the color temperature complements your artwork’s palette. Additionally, look for bulbs with good bulb longevity to guarantee consistent lighting over time without frequent replacements. Longer-lasting bulbs save you money and maintain the desired lighting quality. Understanding lighting technology can help you choose the most efficient and suitable bulbs for your needs. Ultimately, choosing the right color temperature not only enhances your artwork’s appearance but also ensures your lighting setup remains efficient and reliable.
Preventing Reflections and Unwanted Shadows

To prevent reflections and unwanted shadows, you should carefully position your light at the right angle to your artwork. Using anti-reflective coatings on your glass or framing can also help minimize glare. Adjusting these elements guarantees your piece is clearly visible without distractions. Additionally, practicing attention during setup can significantly enhance the effectiveness of your lighting arrangement.
Use Proper Light Angles
When photographing objects, positioning your lights at the right angles is essential to prevent reflections and unwanted shadows. Proper angle adjustment guarantees light hits the subject evenly and reduces glare. To achieve this, consider these tips for light positioning:
- Place lights at a 45-degree angle to the object, avoiding direct reflections.
- Keep lights slightly above or below eye level for even coverage.
- Adjust the light’s angle to minimize shadows cast on the background.
- Use diffusers or bounce the light to soften harsh highlights and create a natural look.
- Understanding lighting techniques can further enhance the quality of your photos by controlling shadows and reflections more precisely.
Employ Anti-Reflective Coatings
Employing anti-reflective coatings on your camera lens or the objects you’re photographing can substantially reduce unwanted reflections and glare. These coatings help minimize light bouncing off surfaces, allowing more light to pass through smoothly. As a result, you’ll experience clearer images with better contrast, and fewer distracting reflections. Anti reflective coatings also aid in light diffusion, softening harsh light and preventing glare from creating unwanted shadows. When applied correctly, these coatings improve your overall photo quality by enhancing clarity and reducing visual noise caused by reflections. Whether you’re capturing artwork or photographing reflective surfaces, anti-reflective coatings are essential for achieving crisp, glare-free images. They’re a simple yet effective tool to help you control light, and speaks 4 Me Online can offer expert guidance on optimizing your camera setup for the best results.
Maintenance Tips for Long-Lasting, Glare-Free Illumination
To keep your picture light shining brightly and without glare, regular cleaning is essential. Handle bulbs carefully to avoid damage and guarantee they stay secure. These simple steps help maintain ideal illumination and extend the life of your lighting. Additionally, utilizing automation in business intelligence can assist in monitoring and managing lighting systems more efficiently.
Regular Cleaning Routines
Have you ever noticed how dust and fingerprints can quickly dull your picture light’s glow? Regular cleaning routines are essential to keep it shining brightly and glare-free. Establish a consistent cleaning schedule—weekly or biweekly—to prevent dust buildup. When dust removal, use a soft, lint-free cloth to gently wipe the fixture’s surface and glass. Avoid harsh chemicals that might damage finishes or reduce brightness. Check for any smudges or fingerprints, especially on reflective parts, and clean them promptly. Keep a small brush or compressed air handy for tight spots or intricate designs. By sticking to a routine, you ensure your picture light remains effective and visually appealing, providing even, glare-free illumination over time. Additionally, understanding the importance of angel numbers can inspire you to maintain a harmonious and positive environment through your lighting choices.
Proper Bulb Handling
Proper bulb handling is essential for maintaining long-lasting, glare-free illumination from your picture light. When replacing bulbs, always prioritize bulb safety by avoiding direct skin contact with the glass. Use gloves or a soft cloth to handle bulbs, preventing oils from your fingers that can cause hot spots or damage. Here are some handling tips:
| Tip | Why it Matters | Best Practice |
|---|---|---|
| Wear gloves when handling | Prevents oils and dirt transfer | Use cotton gloves or tissue |
| Turn off power before bulb change | Ensures safety and bulb longevity | Switch off and unplug |
| Avoid touching the glass | Reduces risk of damage or uneven heat | Handle by base or using tools |
Following these tips guarantees safe, effective bulb handling that prolongs bulb life and keeps your lighting glare-free.
Frequently Asked Questions
Can Picture Lights Be Installed Outdoors?
Yes, you can install picture lights outdoors if they have outdoor durability and weatherproof fixtures. Make sure to select lights specifically designed for outdoor use, as these are built to withstand moisture, temperature changes, and other weather conditions. Proper installation and choosing the right weatherproof fixtures guarantee your picture lights will last, providing excellent illumination without glare, even in harsh outdoor environments.
Are Energy-Efficient Bulbs Suitable for Artwork Lighting?
Yes, energy-efficient bulbs like LEDs are suitable for artwork lighting. They offer a variety of LED colors to enhance your artwork’s appearance and produce minimal heat, reducing damage risk. Plus, they have a longer bulb lifespan, so you won’t need frequent replacements. This makes LEDs a practical and eco-friendly choice for highlighting art, ensuring your pieces stay vibrant and well-lit without sacrificing sustainability or quality.
How Do Dimmable Picture Lights Work?
Dimmable picture lights work by using LED technology combined with dimming controls, allowing you to adjust the light intensity easily. When you turn the dimmer, it modifies the electrical current flowing to the LEDs, reducing or increasing brightness without flickering or color distortion. This gives you precise control over your artwork’s illumination, ensuring ideal viewing conditions while preserving the light’s energy efficiency and reducing glare.
What Safety Precautions Are Necessary for Electrical Fixtures?
You should prioritize electrical safety by turning off power before installation and using properly rated fixtures. Follow installation tips like securing fixtures firmly and avoiding overloading circuits. Always check for grounded outlets and avoid using damaged cords or connectors. If unsure, hire a professional. These precautions help prevent electrical hazards, protect your home, and guarantee your picture lights operate safely and effectively.
Can Picture Lights Be Mounted on Different Wall Materials?
Yes, you can mount picture lights on different wall materials. Just consider wall mounting options and surface compatibility. For drywall, use anchors or screws designed for that material. If you’re mounting on brick or concrete, choose appropriate masonry anchors and a drill. Always make certain the fixture’s weight and mounting hardware are suitable for your wall type, so it stays secure and safe. Proper installation guarantees ideal lighting and stability.
Conclusion
Think of your artwork as a delicate flower that needs just the right light to bloom. With proper picture lighting, you’ll create a gallery-worthy display that highlights every detail without glare or shadows. By choosing the right fixtures, placement, and bulbs, you’re sculpting a perfect harmony of illumination. When you master these basics, your space transforms into a sanctuary where your artwork’s true beauty flourishes—bright and clear, like a star shining through a cloudy sky.