Home Decor
What to Do With an Old Dresser
Learn how to rescue your old dresser from the landfill and transform it into a functional piece of art that's both stylish and sustainable.
You've got an old dresser that's seen better days, but instead of sending it to the landfill, you can breathe new life into it with a little creativity and some TLC. You can repurpose the drawers as a bookcase, jewelry holder, or nightstand, or add a fresh coat of paint for a new look. Alternatively, you can upcycle the entire dresser into stylish furniture like a bench, shelves, or storage units. With some imagination, you can transform it into a kitchen island, pet station, or home office desk. There's a world of possibilities waiting to be explored…
Key Takeaways
• Transform an old dresser into a functional piece, like a bookcase, jewelry holder, or nightstand, with a fresh coat of paint.
• Repurpose dresser drawers as unique storage solutions, such as a Kids Storage Bench, wall unit, or under-bed storage.
• Upcycle an old dresser into stylish and functional furniture, like a bench, shelf, or storage unit, to provide creative storage solutions.
• Give an old dresser a makeover with paint and refinishing options, like chalk paint, distressed finishes, or high-gloss paint, to update its look.
• Repurpose an old dresser for outdoor use, transforming it into a planter stand, potting bench, or functional outdoor furniture to enhance outdoor living areas.
Transforming Dresser Drawers
Transforming your old dresser drawers into functional pieces can breathe new life into discarded furniture and add a touch of creativity to your home decor. By repurposing these old furniture pieces, you can create unique and functional items that not only reduce waste but also showcase your creativity.
One of the most popular repurposed dresser ideas is to turn them into a bookcase. Simply separate and attach the front pieces vertically to create shelves, and you'll have a one-of-a-kind storage unit.
Alternatively, you can hang a drawer on the wall and add hooks to create a jewelry holder or mount the fronts on brackets to create a wall unit for kids' books. You can even transform a dresser drawer into a nightstand by splitting it, disassembling the drawers, and giving it a fresh coat of paint.
With a little creativity, you can breathe new life into old furniture and create functional pieces that reflect your personal style.
Creative Storage Solutions
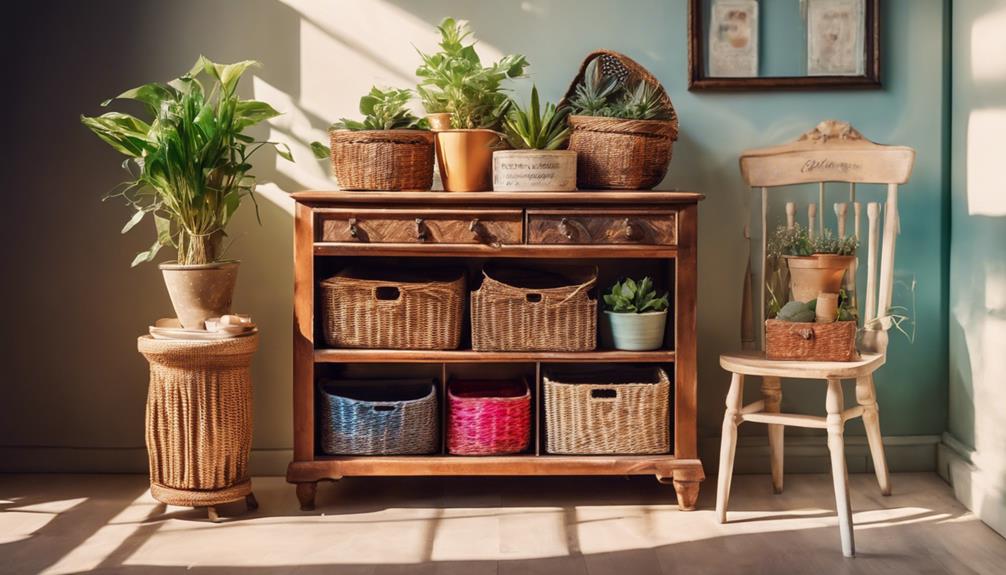
By thinking outside the box, you can repurpose old dresser drawers to create unique storage solutions that cater to your specific needs, from jewelry and book storage to clever hiding spots for kids' items.
With a little creativity, you can breathe new life into old furniture. Use those drawers to create a Kids Storage Bench, where toys and supplies are kept organized and within reach.
Consider repurposing the drawers as wall units, ottomans, or under-bed storage for practical organization. You can even turn them into functional pieces like command zones, dog beds, or dollhouses for creative storage options.
Get inspired by exploring DIY projects that transform dresser drawers into garden displays, cat condos, or headboards. By repurposing old dressers, you can find versatile storage solutions for unconventional spaces like the garage, shed, or outdoors.
With a little imagination, you can give old furniture a new purpose, making the most of your old dresser's potential.
Upcycled Furniture Projects
You can repurpose an old dresser into a stylish and functional piece of furniture, such as a bench, shelf, or storage unit, that adds a personal touch to your home decor.
Through upcycled furniture projects, you can transform an old dresser into a unique piece that not only reduces waste but also provides creative storage solutions for various spaces in your home.
Whether you're looking to create a one-of-a-kind bench or a functional storage unit, upcycling old furniture can be a fun and rewarding DIY project.
By repurposing an old dresser, you can give new life to a piece of furniture that would otherwise end up in a landfill.
Upcycled dresser projects can range from simple DIY makeovers to more complex furniture conversions, allowing you to get creative and experiment with different styles and designs.
With a little imagination and some basic DIY skills, you can turn an old dresser into a functional piece of furniture that reflects your personal style and adds character to your home.
Dresser Makeover Ideas
As you consider giving your old dresser a makeover, you're likely wondering where to start.
Two essential steps in the process are exploring paint and refinish options, which can completely transform the look and feel of your dresser, and updating hardware accents to add a touch of modernity.
Paint and Refinish Options
With a fresh coat of paint or a new finish, an old dresser can be transformed into a one-of-a-kind piece that reflects your personal style.
You can give your old furniture a Repurposed Life by exploring various paint and refinish options. Consider painting your dresser with chalk paint for a trendy, matte finish that requires minimal prep work.
Alternatively, refinish it with a distressed look by sanding edges and corners after painting for a rustic, weathered appearance. If you want a modern look, use a high-gloss paint to give your dresser a sleek finish that reflects light and adds a pop of color to a room.
For a classic, elegant look, stain your dresser to highlight the natural wood grain, which complements traditional decor. You can also experiment with different painting techniques like ombre, stenciling, or color blocking to transform your old dresser into a unique and stylish piece of furniture.
Update Hardware Accents
Swap out outdated hardware accents on your old dresser for a quick, budget-friendly facelift that can completely revamp its look and feel. By updating the hardware accents, you can give your dresser a fresh, modern look that complements your existing decor. This simple DIY project requires minimal effort and investment, making it an ideal solution for those on a budget.
When selecting new hardware accents, take into account the overall style and color scheme of your dresser. Choose hardware that complements these elements to create a cohesive and polished look.
Here are some popular hardware accent options to explore:
Hardware Accent Style | Description |
---|---|
Modern Knobs | Sleek, minimalist designs in a variety of finishes |
Vintage-Style Handles | Ornate, decorative designs with an antique flair |
Industrial-Chic Pulls | Edgy, industrial-inspired designs with an urban vibe |
Crystal Knobs | Luxurious, crystal-encrusted knobs for a touch of elegance |
Repurposing for Outdoor Use
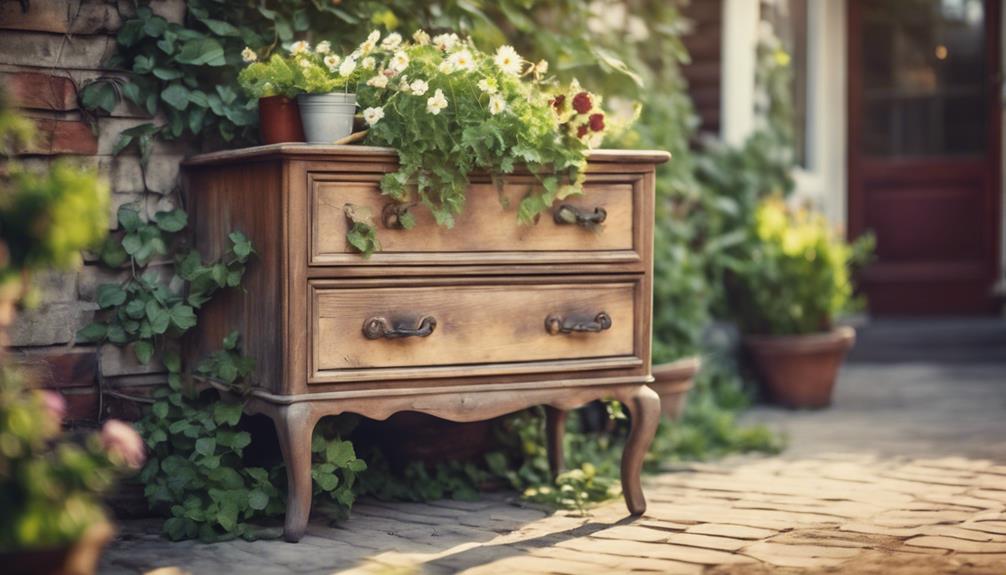
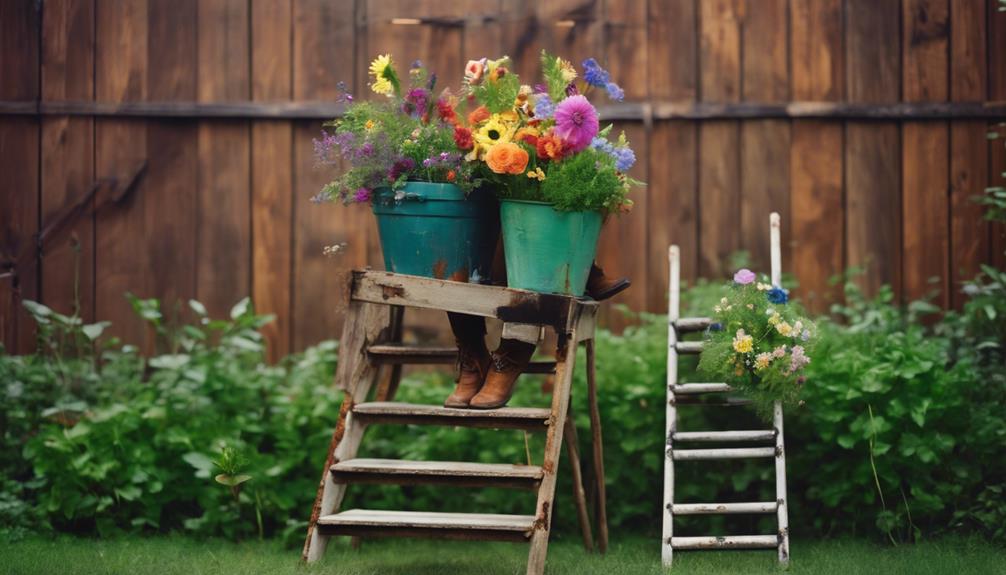
Transform your old dresser into a charming outdoor focal point by repurposing it as a unique planter stand, potting bench, or quirky outdoor bar. You can breathe new life into your old furniture by incorporating it into your garden decor.
Consider removing the drawers and adding shelves to create a functional potting bench, perfect for storing gardening supplies and tools. Alternatively, you can paint the dresser with outdoor-friendly paint and use it as a storage solution for outdoor items.
You can even repurpose the dresser as a decorative piece on your porch or patio, adding a touch of charm and functionality to your outdoor space. By repurposing your old dresser for outdoor use, you'll not only reduce waste but also add character and functionality to your garden or outdoor living area.
DIY Home Decor Inspiration
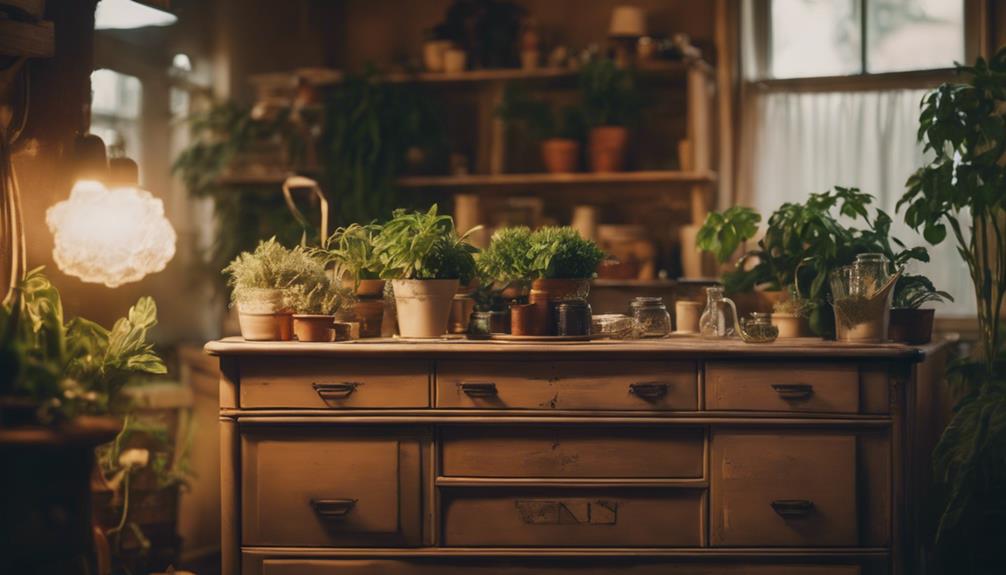
You can discover a world of creative possibilities by repurposing old dresser drawers into unique, functional pieces that add character to your home decor. With a little imagination, you can transform an old chest of drawers into a one-of-a-kind conversation starter.
Visit your local thrift store to find the perfect piece to repurpose, or breathe new life into a family heirloom.
Here are a few diy home decor inspiration ideas to get you started:
- Repurpose dresser drawers into a functional bookcase by separating and attaching front pieces vertically for shelves.
- Transform a dresser drawer into a unique jewelry holder by hanging it on the wall and adding hooks.
- Create a stylish and practical storage ladder by repurposing old drawers and attaching them securely to a small stepladder.
Giving Old Dressers New Life
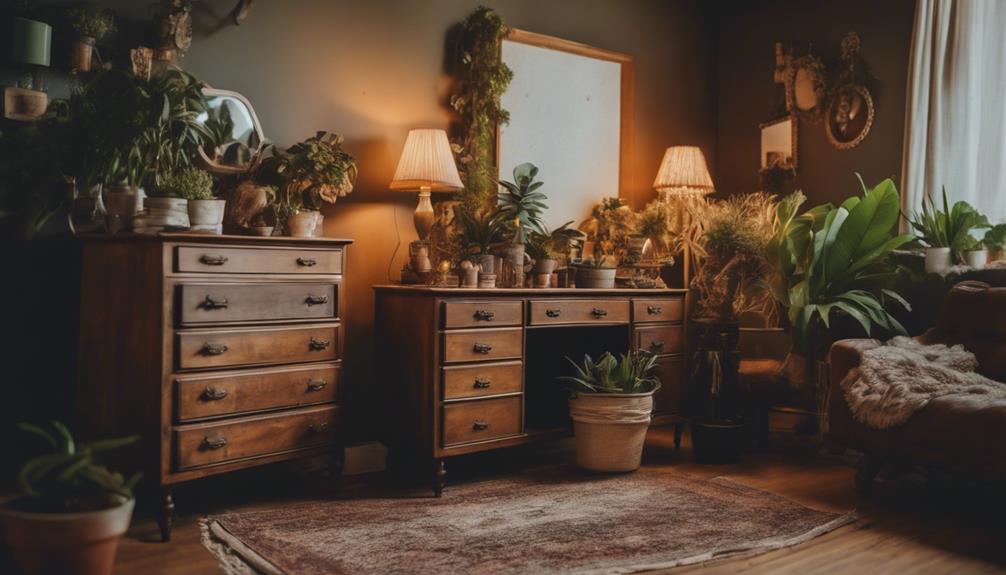
By repurposing an old dresser, you can breathe new life into a discarded piece of furniture and create a one-of-a-kind addition to your home decor. Transforming furniture through upcycling can give your old dresser a new purpose, and you can get creative with the possibilities.
You can turn it into a functional piece like a bench, shelf, or storage unit, or get more innovative and create a dollhouse, pet feeding station, or even a hidden laptop workspace. The beauty of repurposing an old dresser lies in its cost-effectiveness and the opportunity to personalize your furniture while promoting sustainability.
By taking on this DIY project, you'll not only reduce waste but also add a unique touch to your home. With a little creativity, you can turn an old dresser into a conversation starter and a demonstration of your resourcefulness.
Frequently Asked Questions
How Can I Repurpose an Old Dresser?
You're wondering how to repurpose an old dresser, and the possibilities are endless!
You can transform it into a stylish storage bench, a functional shelf for displaying decorative items, or even a unique piece of furniture like a dollhouse or pet feeding station.
Get creative with the drawers too – turn them into ottomans, jewelry holders, or wall units for extra storage.
With a little DIY magic, that old dresser can become a stunning addition to your home.
How Do You Redo an Old Wooden Dresser?
You're ready to breathe new life into that old wooden dresser. To redo it, start by sanding away the old finish and imperfections.
Next, apply a primer to prepare the surface for painting or staining.
Then, use high-quality paint or stain to give it a fresh look. Consider adding new hardware or decorative elements for a modern touch.
Can You Turn a Dresser Into a Bookshelf?
You're wondering if you can turn a dresser into a bookshelf. The answer is yes, you can!
By removing the drawers, sanding and painting the dresser, and securing the drawers in place, you can create a unique and functional bookshelf.
This repurposed piece won't only add character to your room but also provide ample storage for your books.
Can You Paint Over an Old Dresser?
As you stand before that outdated dresser, wondering what to do with it, remember that a fresh coat of paint can work wonders!
You can, in fact, paint over an old dresser to give it a brand-new look. By sanding and priming the surface, you'll guarantee a smooth finish.
Choose a high-quality paint, and consider trendy chalk paint or quick-drying spray paint for a professional-looking result.
Conclusion
As you've seen, an old dresser is like a time capsule, waiting to be rediscovered and revamped.
From transforming drawers into clever storage solutions to upcycling them into outdoor planters, the possibilities are endless.
So, don't be a Philistine and toss that vintage dresser; instead, give it a fresh coat of paint and a new lease on life.
Who knows, it might just become the crown jewel of your DIY home decor.
Vivienne – Your Content Companion Vivienne is your content companion, curating valuable tips, advice, and inspiration to guide you on your home decor journey. From insightful blog posts to informative product descriptions, she’s here to empower you with the knowledge you need to create your dream space.
Home Decor
Do It Yourself Shabby Chic Home Decor
Lure your space into a world of shabby chic charm with soft hues and vintage flair, discover how to transform your home effortlessly.
To start creating your own shabby chic home decor, begin by selecting gentle pastel colors such as light pink and mint green. Distress old furniture using sandpaper to achieve a worn appearance. Include floral designs and lace for a charming, romantic feel. Utilize distressing methods like dry brushing for a vintage aesthetic. Enhance furniture with vintage-style knobs. Add personalized images through decoupage for unique accents. Layer textures like lace and burlap for added dimension. Incorporate elements from nature like fresh flowers and reclaimed wood. By following these guidelines, your living space will exude coziness effortlessly. More tips are available for further inspiration.
Key Takeaways
- Distress furniture with sandpaper for a weathered look.
- Use chalk paint in pastel hues for a vintage feel.
- Incorporate floral patterns and lace for romantic charm.
- Enhance furniture with vintage-style knobs for elegance.
- Create unique accents with decoupage on various surfaces.
Choosing the Right Color Palette
When selecting the right color palette for your shabby chic home decor, opt for soft pastel hues like pale pink, mint green, and baby blue. These colors create a calming and soothing atmosphere, perfect for achieving that vintage and romantic shabby chic look. To make your color scheme more cohesive, consider adding touches of white throughout the decor. White helps to brighten up the space and adds a light and airy feel that goes along well with the pastel tones.
In addition to pastels, neutral tones such as beige, ivory, and soft grey can complement the color scheme beautifully. These colors provide a subtle backdrop that allows the pastels to stand out without overwhelming the space. If you want to add a touch of elegance to your shabby chic decor, consider incorporating subtle hints of metallic accents like gold or silver. These metallic touches can elevate the look and make your space feel more luxurious.
Mixing and layering different shades within the same color family can also create depth and visual interest in your shabby chic color palette. By carefully choosing and combining these colors, you can transform your space into a charming and inviting shabby chic oasis.
Upcycling Vintage Furniture
To upcycle vintage furniture for a shabby chic look, consider repurposing old or outdated pieces using techniques like distressing and painting with chalk paint. Vintage furniture pieces like dressers, tables, and chairs can be transformed into charming decor with a touch of elegance. Here are some tips to help you get started:
- Distressing: Use sandpaper or a paint scraper to create a weathered look on the furniture, focusing on edges and corners for a naturally worn appearance.
- Chalk Paint: Opt for matte chalk paint in soft pastel shades to give the furniture a vintage feel and a velvety finish.
- Vintage-Style Knobs: Replace modern knobs with antique or vintage-style hardware to enhance the shabby chic aesthetic of the piece.
Upcycling vintage furniture not only adds character to your home but also contributes to sustainability by giving new life to old items. It's a budget-friendly way to create unique pieces that reflect your personal style.
Adding Floral Patterns and Lace
Incorporate soft floral patterns and delicate lace accents to infuse a romantic charm into your shabby chic home decor. By integrating these elements, you can create a cozy and vintage-inspired look that enhances the overall aesthetic of your space. Consider using vintage fabrics or wallpaper with floral prints to add a soft and feminine touch to your decor. You can also incorporate lace trim or doilies on furniture, curtains, or cushions for a delicate and romantic feel. Mixing and matching floral and lace elements can help you achieve a harmonious and cohesive shabby chic style.
Here is a table to help you visualize how to incorporate floral patterns and lace into your home decor:
Ideas for Adding Floral Patterns and Lace |
---|
Use vintage fabrics with floral prints |
Incorporate lace trim on furniture |
Mix and match floral and lace elements |
Distressing Techniques for a Worn Look
To achieve a worn look on your furniture or decor pieces, you can explore various paint distressing techniques, such as dry brushing or layering paint.
Sanding is a common method used to create an aged effect by gently removing layers of paint or finish.
Additionally, using wax can help add a patina to your pieces, enhancing their vintage charm and giving them a weathered appearance.
Paint Distressing Techniques
For achieving a worn, vintage look in your home decor, consider utilizing paint distressing techniques that involve sandpaper to create a weathered appearance on furniture or decorative items.
When distressing with paint, different grits of sandpaper can be used to achieve varying levels of distressing, from light to heavy distressing. Chalk paint is a popular choice for distressing due to its quick drying time, making sanding and color blending easier.
Focus on distressing edges, corners, and raised areas to mimic natural wear and tear for an authentic shabby chic look. Layering different paint colors and distressing them strategically can add depth and dimension to the finished piece.
- Varying grits of sandpaper for different distressing levels
- Chalk paint for easy sanding and color blending
- Strategic distressing for an authentic worn look
Sanding for Aged Effect
Achieving an aged effect in your shabby chic decor involves skillfully sanding surfaces to create a worn look that exudes vintage charm. By using different grits of sandpaper, you can control the level of distressing, revealing underlying layers of paint or wood. Focus on sanding along edges and corners to mimic natural wear and tear, adding an authentic vintage appearance to your pieces. This process can be customized to achieve the desired level of antiquing for each project, allowing for a personalized touch. Experiment with various sanding techniques to perfect the aged effect and bring a touch of nostalgia to your home decor.
Sanding Tips | Description |
---|---|
Use Different Grits | Control distressing levels by selecting the right sandpaper |
Focus on Edges | Mimic natural wear by sanding along edges and corners |
Customize | Tailor the sanding process to achieve your desired antiquing level |
Using Wax for Patina
As you advance from sanding to distressing techniques, utilizing wax for creating a patina is a key step in achieving a worn look in shabby chic decor.
Here's why wax is essential for distressing furniture:
- Enhancing Distressed Appearance: Wax can be applied before painting to help achieve a worn look on wooden surfaces.
- Control Over Aging: By buffing or sanding wax after application, you can enhance the distressed effect while controlling the level of aging and wear.
- Creating Depth and Texture: Layering different colored waxes allows you to create depth and texture in the patina finish, adding character to your furniture piece.
Incorporating Vintage-Style Knobs
When enhancing your shabby chic home decor, consider incorporating vintage-style knobs to infuse a touch of nostalgia and elegance into your furniture pieces. Vintage knobs come in various designs such as floral, filigree, and antique finishes, allowing you to choose the ones that best complement your style.
Mixing and matching these knobs can bring a unique and personalized look to your furniture makeovers, adding character to each piece. Swapping out existing knobs with vintage-style ones is a simple and cost-effective way to update your furniture and give it a new life.
Using Chalk Paint for a Distressed Finish
Consider using chalk paint to effortlessly create a distressed finish on your furniture and decor items for that shabby chic charm you desire. Chalk paint is a versatile choice for achieving a vintage look with ease. Here's why you should give it a try:
- Matte Finish: Chalk paint offers a matte finish that adds to the antique appeal of shabby chic decor.
- Easy Distressing: Distressing chalk paint is simple with sandpaper or a damp cloth, allowing you to customize the level of distressing.
- Quick Drying: With its quick drying time, chalk paint enables efficient application and distressing techniques, perfect for DIY projects.
Chalk paint adheres well to various surfaces like wood, metal, and plastic, making it a go-to option for revamping different pieces in your home. Plus, the soft, muted colors available in chalk paint collections are ideal for achieving the signature shabby chic aesthetic effortlessly.
Decoupaging to Create Unique Accents
When decoupaging to create unique accents, you'll need to understand the basics, select suitable materials, and add finishing touches to complete your project.
Decoupage involves layering paper or fabric onto objects to personalize them, providing an opportunity to showcase your creativity.
Decoupage Basics
To create unique accents for your shabby chic home decor, mastering the basics of decoupaging is essential. Decoupage is a crafting technique where you decorate surfaces with cut-out paper designs using glue and a finishing coat.
Here are some key points to get you started:
- Decoupage can be done on various surfaces like wood, glass, metal, or plastic.
- Personalization is key as you can choose specific images, patterns, or colors to match your desired aesthetic.
- The process involves applying a base coat, arranging the paper cut-outs, and sealing with multiple layers of varnish or sealant for durability.
With these basics, you can begin transforming ordinary items into charming pieces for your shabby chic decor.
Choosing Materials
Having familiarized yourself with the basics of decoupage in creating unique accents for your shabby chic home decor, your next step is to carefully select the materials essential for this crafting technique.
Decoupaging requires a few key supplies to get started. You'll need mod podge or decoupage glue to adhere the decorative paper cutouts onto your chosen surface. Make sure to have a selection of decorative papers that resonate with the shabby chic aesthetic, such as vintage or floral patterns. Additionally, grab some paintbrushes to apply the glue smoothly and evenly.
Finishing Touches
For adding those final touches to your decoupaging projects and creating unique accents, consider incorporating small embellishments like delicate lace trims or vintage buttons. These details can elevate your DIY pieces to a whole new level, adding charm and character to your shabby chic decor.
When decoupaging, remember to pay attention to the finishing touches to achieve a polished look. Here are some ideas to inspire you:
- Use small pieces of lace to frame your decoupage design.
- Add vintage buttons in a contrasting color for a pop of personality.
- Consider incorporating tiny charms or beads for a whimsical touch.
These simple additions can make a big difference in the overall aesthetic of your shabby chic creations.
Layering Textures for Depth
Enhance your shabby chic home decor by layering textures to add depth and visual interest. To achieve this style, combine materials like lace, burlap, and distressed wood.
Mixing soft fabrics with rougher textures such as wood or metal helps create the signature shabby chic look. By incorporating layers of textures, you can craft a cozy and inviting atmosphere in your home, enhancing the shabby chic aesthetic.
This approach adds dimension and a tactile experience to your decor scheme. Effective layering of textures allows you to design a harmonious and visually appealing space that captures the essence of shabby chic design.
Experiment with different textures to find the right balance that suits your personal style. Remember, layering textures is a key element in creating a shabby chic home decor that's both charming and unique.
Enhancing Decor With Natural Elements
Enhance your shabby chic decor by incorporating eco-friendly elements like fresh flowers, greenery, or reclaimed wood.
Add a rustic touch to your home with natural fabrics such as linen, burlap, or cotton.
Integrate wooden accents and coastal treasures like seashells or stones to bring a touch of nature-inspired design to your space.
Eco-friendly Decor Elements
Incorporate natural elements such as reclaimed wood, burlap, and jute into your shabby chic decor to infuse an eco-friendly charm.
To enhance your decor sustainably, consider using repurposed items like mason jars, driftwood, and recycled glass bottles.
Integrate greenery such as succulents, air plants, and dried flowers to bring a fresh and organic feel to your shabby chic space.
- Use repurposed items like mason jars, driftwood, and recycled glass bottles
- Integrate greenery such as succulents, air plants, and dried flowers
- Opt for organic textiles like cotton, linen, and hemp
Incorporating Nature-inspired Designs
As you infuse natural elements like driftwood, seashells, and dried flowers into your shabby chic decor, you bring a rustic and organic touch to your living space. Consider using reclaimed wood or branches to create unique wall art or shelving, adding a natural and eco-friendly flair to your home. Opt for earthy tones and botanical prints in your textiles, such as floral patterns or leaf motifs, to bring the beauty of nature indoors. Integrate potted plants, succulents, or fresh flowers in vintage containers or mason jars to infuse your space with a revitalizing and lively ambiance. Enhance the natural vibe by incorporating woven baskets, rattan furniture, or jute rugs for texture and warmth in your shabby chic design scheme.
Natural Elements | Ideas | Tips |
---|---|---|
Driftwood | Create a driftwood centerpiece for your table. | Mix in some candles for a cozy feel. |
Seashells | Fill glass jars with seashells for a coastal touch. | Place them on a mantel or shelf. |
Dried Flowers | Make a dried flower wreath to hang on your wall. | Select flowers that complement your decor. |
Reclaimed Wood/ Branches | Craft a DIY branch ladder to hang blankets or towels. | Sand and varnish for a polished look. |
Finishing Touches and Styling Ideas
To elevate the shabby chic ambiance in your home, consider adding unique vintage lace doilies or crochet pieces as table runners or accents for a touch of charm. Enhance the rustic charm of your decor by incorporating distressed wooden signs with inspirational quotes or phrases.
Infuse a vintage vibe into your space by displaying antique teacups or teapots as unique planters or decorative pieces. For a simple yet elegant centerpiece that complements the shabby chic style, use mason jars filled with wildflowers or candles.
Additionally, layering different textures such as burlap, linen, and lace can create a visually interesting and cohesive look in your shabby chic decor. These finishing touches and styling ideas will help you achieve a beautifully curated shabby chic home that exudes warmth and character.
Frequently Asked Questions
How Do I Make My House Look Shabby Chic?
To make your house look shabby chic, use pastel colors for a vintage vibe. Incorporate distressed furniture for a weathered look. Mix textures like lace and rustic wood for depth.
Repurpose old items with chalk paint. Balance vintage with modern for an eclectic style.
Is Shabby Chic Still in Style in 2024?
Shabby chic remains a popular style in 2024, blending vintage charm with modern elements. Its cozy, lived-in look resonates with many homeowners.
Distressed furniture, pastel colors, and floral patterns continue to define shabby chic design. DIY enthusiasts are drawn to its versatility for creating personalized, vintage-inspired spaces.
Whether you're a fan of the trend or looking to try it out, shabby chic is still a stylish choice for home decor this year.
What Are the Key Elements of Shabby Chic?
To achieve shabby chic style, focus on distressed furniture, soft pastel colors, floral patterns, and lace accents.
Upcycling old items into new decor pieces is key.
Mix wood and fabric textures for an authentic look.
This vintage-inspired design emphasizes a worn, lived-in aesthetic that exudes charm and coziness.
What Are the Colors for Shabby Chic?
Soft pastel colors like pale pink, mint green, sky blue, and lavender are common in shabby chic decor. White is a staple color, creating a light and airy feel. Soft neutrals such as beige, ivory, and cream add warmth.
Subtle shades of grey and muted tones of blue or green enhance the vintage look. Faded hues and gentle tones create a romantic and cozy atmosphere in shabby chic interiors.
Conclusion
To sum up, by following these DIY shabby chic home decor tips, you can transform your living space into a charming and unique oasis.
Embrace the vintage look with distressed furniture, floral patterns, and lace accents. Don't forget to add personal touches with decoupaging and vintage-style knobs.
Incorporate natural elements for a touch of nature and finish off with some stylish accents for a complete look.
Get creative and let your personality shine through in every corner of your home.
Home Decor
How Is Scale/Proportion Used in Interior Decorating
Tap into the secrets of scale and proportion in interior decorating to transform your space into a harmonious haven.
Understanding scale and proportion in interior decorating is crucial for achieving a well-balanced and visually pleasing space. Scale refers to properly fitting furniture in a room to avoid overcrowding or sparse arrangements. Proportion, on the other hand, impacts the overall aesthetic appeal and helps create harmony in the design. Balancing furniture sizes, utilizing room dimensions effectively, and carefully considering artwork placement all contribute to achieving a harmonious visual effect. To improve the functionality and flow of a room, it is important to select and arrange items thoughtfully to maintain visual harmony. By mastering scale and proportion, you can create a space that feels cohesive and welcoming.
Key Takeaways
- Scale ensures furniture fits harmoniously in a space.
- Proportion creates visual balance and unity in rooms.
- Balancing furniture sizes prevents overpowering or cramped feel.
- Strategic placement enhances room openness and functionality.
- Properly scaled artwork and decor elements enhance room design.
Importance of Scale in Decorating
Maintaining proper scale in decorating is fundamental for harmoniously fitting furniture and objects within a space, enhancing both functionality and visual appeal. Scale in interior design refers to the size of items in relation to the space they occupy.
When scale is off, a room can feel overwhelmed by large furniture or sparse due to tiny pieces. It's important to carefully consider scale when selecting items for a room to achieve a balanced look. By paying attention to scale, we can create a sense of proportion and balance, contributing to a well-designed space.
When everything is in the right scale, the room feels cohesive and inviting. Proper scale ensures that furniture and decor complement each other, avoiding a cluttered or mismatched appearance. Essentially, scale plays a significant role in interior design, influencing how we perceive and interact with the spaces we inhabit.
Achieving Visual Harmony Through Proportion
Moving from discussing the Importance of Scale in Decorating to our current focus on Achieving Visual Harmony Through Proportion, we shift our attention to how proportion influences the overall aesthetic appeal of interior spaces.
Proportion in interior design plays an essential role in creating a sense of balance and unity within a room. When furniture and accessories are proportionate to the space they occupy, visual harmony is achieved. This harmony allows for a smooth flow and enhances the functionality of the room.
Balancing Furniture Sizes in Rooms
Balancing furniture sizes in rooms involves maintaining a harmonious arrangement where large pieces don't overpower the space. It's important to take into account the proportion and scale of furniture when furnishing a room, especially in small spaces. Ensuring that furniture sizes are proportionate to the room's dimensions creates a visually appealing layout. Mixing different furniture sizes can add interest and prevent a monotonous look in the space.
In smaller rooms, selecting appropriately scaled furniture is vital to avoid a cramped feel. Oversized furniture can disrupt the balance and scale of a room, negatively impacting its overall aesthetic. By carefully choosing furniture sizes that complement the room's dimensions, you can create a sense of harmony and balance. Remember that the goal is to create a space that feels comfortable and visually pleasing, so paying attention to furniture proportions is key in achieving this.
Creating a Sense of Space With Scale
When aiming to create a sense of space with scale in interior decorating, consider strategic furniture placement tricks and the use of large artwork.
Placing furniture in a way that optimizes the room's proportions can enhance the feeling of openness and airiness.
Incorporating oversized art pieces can draw the eye upward, making the room appear larger and more expansive.
Furniture Placement Tricks
Strategically placing furniture away from walls and creating pathways around them can effectively enhance the sense of space in a small room while maintaining proper scale. By optimizing furniture placement, you can guarantee that the room doesn't feel cramped.
Choosing pieces that fit the scale and proportion of the room is essential for creating a harmonious look. To add visual interest, consider using multifunctional furniture like ottomans or nesting tables that can maximize space efficiently. Opting for furniture with exposed legs can also contribute to a sense of openness and lightness, making the room feel more spacious.
Additionally, utilizing mirrors strategically to reflect light can create the illusion of more space, enhancing the overall scale. Remember, thoughtful furniture placement can transform a small room into a comfortable and visually appealing space.
Using Large Artwork
Utilizing large artwork in interior decorating can visually expand a room and evoke a sense of grandeur and spaciousness. In small rooms, strategically placing oversized art pieces can create the illusion of a larger, more open space.
The importance of the artwork scale is vital; it should complement the size of the wall and the room to guarantee a harmonious look. Large artwork can serve as a focal point, adding drama and drawing attention to a specific area. By selecting the right pieces and placing them thoughtfully, you can greatly impact the overall design aesthetic and mood of the room.
Enhancing Room Balance With Proportion
To enhance room balance with proportion, we carefully consider the sizing and placement of furniture and decor elements. By ensuring that design elements are in proportion to each other, we can achieve a harmonious and visually pleasing space. Proper proportion plays an important role in creating balance and visual unity within a room's design scheme. It guides us in determining the right scale for each object, ultimately contributing to a cohesive and well-balanced environment.
Importance of Proportion in Interior Decorating |
---|
Ensures harmonization of design elements |
Creates balance and visual unity in the room |
Enhances flow and functionality of the space |
Guides placement and sizing for cohesion |
Important for well-balanced interior decor |
Using Scale for Comfort and Functionality
Considering scale when arranging furniture and decor is essential for ensuring comfort and functionality in a room. Proper scale plays a significant role in determining how well furniture fits within a space, allowing for easy movement and enhancing usability.
When selecting seating, it's important to take scale into account to guarantee comfort and support for users. Additionally, scale influences the placement of furniture and decor to create a balanced and harmonious environment. By using appropriate scale, you can prevent overcrowding or sparse areas in a room, ultimately enhancing the overall comfort level.
Furthermore, scale considerations not only impact comfort but also play an important role in the visual appeal and practicality of a room's layout and design. Therefore, paying attention to scale when arranging elements in a room is key to achieving both comfort and functionality while maintaining visual appeal.
Harmonizing Decor Elements With Proportion
When harmonizing decor elements with proportion, it's important to balance furniture sizes, choose appropriate artwork, and utilize room dimensions effectively.
Properly sizing and placing furniture pieces can create a cohesive and visually appealing space.
Balancing Furniture Sizes
Balancing furniture sizes in interior decorating involves strategically blending large, medium, and small pieces to achieve visual harmony and interest within a room. By considering proportion, scale, and room dimensions, one can guarantee that the furniture complements the space without overwhelming it.
Matching furniture sizes to the room's layout is crucial for creating a balanced and aesthetically pleasing environment. Properly scaled furniture not only enhances the functionality and flow of a room but also contributes to a cohesive and well-designed space.
When harmonizing decor elements through balanced furniture sizes, it creates a visually appealing atmosphere and promotes a sense of balance and proportion in interior decorating. Careful consideration of furniture sizes is key to achieving a well-balanced and inviting living space.
Choosing Appropriate Artwork
To guarantee a harmonious blend of decor elements in interior decorating, one must carefully select artwork that aligns with the proportions of the wall or furniture it adorns. The scale of the artwork should be proportionate to the size of the objects it hangs above, ensuring a visually pleasing arrangement.
Larger pieces of artwork can make a bold statement in spacious rooms, enhancing the overall scale of the space. Alternatively, grouping smaller artworks together can create visual interest while maintaining proper proportion.
When selecting artwork, consider both the height and width of the wall to make sure it fits appropriately. Mixing different sizes of artwork can add dimension and balance to the room's design, creating a cohesive and visually appealing space.
Utilizing Room Dimensions
Harmonizing decor elements with proportion involves aligning furniture sizes with room dimensions to guarantee visual balance and harmony. When considering room dimensions, it's essential to match the scale of furniture to the space available.
For instance, in smaller rooms, opting for properly scaled furniture can prevent the area from feeling cramped and overcrowded. Additionally, ceiling height plays a significant role in maintaining proportion within a room.
Taller ceilings may accommodate larger decor elements to fill the vertical space effectively. Conversely, in rooms with lower ceilings, it's advisable to choose items that don't overwhelm the limited height.
Practical Tips for Scale and Proportion
When considering interior decorating, it's crucial to measure furniture and space dimensions beforehand to ensure proper scale and proportion. By taking into account the size of the room, creating a floor plan, and incorporating negative space, you can effectively manage scale and proportion in your design.
Mixing different sizes of furniture adds visual interest and dynamic scale to the room. Utilize rugs and lighting strategically to define separate areas and enhance proportion within the space.
Experiment with rearranging furniture to find the best fit for the room's scale and proportion, maintaining balance and harmony throughout. These practical tips will help you achieve a well-balanced and visually appealing interior design that maximizes the available space.
Frequently Asked Questions
Why Is Scale Important in Interior Design?
Scale is crucial in interior design since it dictates how well items fit within a space. Proper scale ensures that furniture and decor elements are appropriately sized for the room. Incorrect scale can lead to a cramped or sparse appearance, impacting both functionality and visual appeal. It affects how people interact with the space and attention to scale is key in creating a balanced, harmonious, and aesthetically pleasing design.
What Is the Application of Proportion in Interior Design?
When considering proportion in interior design, we aim to create a visual balance among various elements like furniture, decor, and architectural features. This balance guarantees that each item complements the others, leading to a harmonious and cohesive overall look.
Why Is Scale and Proportion Important in Design?
Scale and proportion are crucial in design as they establish harmony and balance in a space. They guarantee that elements complement each other and the room's dimensions. Correct scale and proportion enhance functionality, comfort, and aesthetics.
Why Is Proportion so Important in Architecture and Interior Design?
Proportion plays a crucial role in architecture and interior design by ensuring visual balance and harmony in a space. It influences how people perceive and interact with their environment, enhancing both functionality and aesthetics.
Correct proportion creates cohesion among various elements in a room, contributing to a well-designed and visually appealing interior. Without proper attention to proportion, spaces may feel disjointed and lack the desired sense of unity and coherence.
Conclusion
In the end, scale and proportion play a pivotal role in interior decorating, like a conductor orchestrating a symphony.
By carefully balancing sizes and proportions of furniture, decor elements, and space, one can achieve visual harmony and create a comfortable and functional living environment.
Remember to take into account scale and proportion when designing your space to guarantee a cohesive and balanced look that will elevate the overall aesthetic appeal of your home.
Wall Art and Decor
How Long to Paint Interior Door
Master the art of painting interior doors with expert tips on time-saving techniques and flawless finishes. Find out how long it really takes!
When painting an interior door, you should plan to spend around 2 hours on sanding and priming. The application of the top coat typically takes approximately 4.5 hours. Additionally, remember to allow an extra 20 minutes for each doorframe for a professional finish. Using a mini roller can help you work faster and achieve a more uniform appearance. Efficiency is key, especially when using gloss paint. Keep in mind that having the correct tools and following proper techniques can greatly impact the outcome. Interested in learning more expert tips to enhance your door painting abilities?
Key Takeaways
- Efficiently sand, prime, and apply top coat in 6.5 hours.
- Allocate 20 minutes per doorframe for top coat application.
- Use mini roller for faster, smoother coverage.
- Practice to minimize brush strokes and improve technique.
- Prioritize speed and quality for optimal results.
Time Estimate for Sanding and Priming
When preparing to paint an interior door, it typically takes around 2 hours to sand and prime the surface thoroughly for best results. Allocating about 10 minutes per side of the doorframe is recommended to efficiently complete the sanding and priming process.
Using a mini roller can help speed up the priming step and assist in achieving a professional finish on your interior door. Properly preparing the doorframe through sanding and priming is vital for ensuring the longevity of your paint job. Investing time in these initial steps can lead to a more durable and aesthetically pleasing painted door.
Time Estimate for Applying Top Coat
How long does it typically take to apply the top coat of paint to an interior door?
When painting the doors, it usually takes around 4.5 hours to complete the top coat application. For a more efficient process, it's advisable to allocate about 20 minutes per doorframe, spending 10 minutes on each side.
To speed up this task, consider using a mini roller, as it can help cover the surface more quickly and evenly. Efficiency in your painting techniques is essential to achieve a smooth and professional finish when applying the top coat.
Make sure to pay attention to detail and evenly distribute the paint to avoid any inconsistencies in the final result. By following these guidelines and dedicating the appropriate time per doorframe, you can successfully paint the interior doors with a high-quality finish.
Recommended Time per Doorframe
To efficiently complete the painting process, allocate approximately 20 minutes per doorframe when applying the top coat, spending 10 minutes on each side for best results.
When painting a doorframe, it's important to manage your time effectively. This timeframe allows for proper coverage and a smooth finish. To make the most of these 20 minutes, consider using a mini roller. This tool can help speed up the painting process and guarantee a more even application of the paint.
By dedicating 10 minutes to each side of the doorframe, you can work systematically and cover the entire surface evenly. Remember, speed is essential, especially when using gloss paint to prevent visible brush strokes.
Taking the recommended time per side and utilizing a mini roller won't only save you time but also result in a professional-looking finish. So, next time you tackle painting a doorframe, keep these tips in mind for a more efficient and effective painting process.
Importance of Using Mini Roller
Consider utilizing a mini roller for efficient and quick painting of flat areas on doorframes. Here are some reasons why using a mini roller is important for painting interior doorframes:
- Efficiency: Mini rollers are ideal for covering flat surfaces on doorframes swiftly, helping you complete the painting process in less time.
- Smooth Finish: Using a mini roller can assist in achieving a professional and smooth finish on doorframes, enhancing the overall look of the interior.
- Time-Saving: Investing in a mini roller can save you valuable time and effort when painting interior doorframes, making the task more manageable.
- Suitability: Mini rollers are particularly useful for applying paint to doorframes with flat surfaces, ensuring even coverage and a neat appearance.
Speeding up With Gloss Paint
To speed up your painting process with gloss paint, remember that it requires quick application to prevent brush strokes.
Using a mini roller can help you cover doorframes faster and achieve a smooth finish.
Keep in mind to work efficiently, spending about 20 minutes per doorframe to guarantee a professional result.
Gloss Paint Benefits
Opt for gloss paint to expedite the painting process of your interior door due to its quick drying nature and ability to achieve a smooth finish efficiently. Here are some benefits of using gloss paint for your interior doors:
- Quick Drying: Gloss paint dries faster than other types, reducing overall painting time.
- Efficient Application: Its quick drying time allows for a smooth finish with minimal brush strokes.
- Professional Results: Achieve a polished look for your interior doors with gloss paint.
- Time-Saving: The fast-drying properties of gloss paint make it ideal for swift completion of painting projects.
Consider using gloss paint for your interior doors to save time and achieve a professional-looking finish effortlessly.
Application Tips
Improving the efficiency of your painting process with gloss paint involves utilizing specific tools and techniques for best results. To speed up the painting of doors, consider using a small roller to apply the paint on flat areas of the doorframe. This method can help you cover more surface area quickly and achieve a smooth finish. Additionally, using Purdy man-made bristle brushes can provide professional results when working with gloss paint. Combining brush application with roller usage can enhance the finish and efficiency of painting doorframes. Remember to apply a coat of primer before starting with the finish coats to guarantee better adhesion and a more durable finish.
Tools and Techniques | Benefits |
---|---|
Small roller for flat areas | Covers more surface quickly |
Purdy man-made bristle brushes | Professional results |
Combining brush with roller | Enhanced finish and efficiency |
Applying primer before finish coats | Better adhesion and durability |
Efficiency With Practice
Consistent practice sharpens your painting skills, leading to quicker and more efficient work on interior doors. Repeating and refining techniques over time allows you to master the process, ultimately reducing the time needed for each door project.
As you develop a routine and hone your skills, you'll notice a significant improvement in the speed and quality of your door painting endeavors.
Practice Improves Speed
How can consistent practice greatly improve your efficiency in painting interior doors? By dedicating time to practice regularly, you can enhance your speed and effectiveness in this task.
Here are some key points to keep in mind:
- Repetition: The more you practice, the quicker and more precise you'll become.
- Technique Variation: Trying different painting techniques helps you find the most efficient method for you.
- Tool Familiarity: Getting comfortable with the tools you use can streamline the painting process.
- Quality Focus: Practice not only speeds up your work but also guarantees a high-quality finish.
Through practice, you can transform your painting process, making it more efficient and yielding professional results in less time.
Efficiency Through Repetition
To enhance your efficiency in painting interior doors, consistent practice is essential to achieving quicker results and mastering techniques. Repetition plays a vital role in improving your painting efficiency over time. By regularly painting interior doors, you can reduce painting time and achieve smoother finishes.
Experienced painters have shown that efficiency with practice leads to quicker completion of door painting tasks. Through repetition, you can hone your skills, work more efficiently, and produce high-quality results. Remember, the more you practice, the more proficient you'll become in painting interior doors, allowing you to complete the task in a timely manner with excellent outcomes.
Consistency Leads to Mastery
Improving your painting efficiency through regular practice is key to mastering the skill of painting interior doors efficiently. To enhance your painting skills effectively, consider the following:
- Consistent Practice: Dedicate time regularly to practice painting techniques for steady improvement.
- Minimize Brush Strokes: Practice using the right brush strokes to achieve a smoother finish in less time.
- Efficiency is Key: Work on increasing your speed without compromising quality to save painting time.
- Utilize Proper Tools: Invest in high-quality tools and learn proper painting techniques to boost efficiency and reduce painting time.
Importance of Proper Tools
Why is having the right tools essential when painting an interior door?
Using specialized tools, such as a Pelican paint pail and a brush with a magnet, can greatly enhance efficiency and make the painting process much easier.
Investing in quality brushes and rollers is vital as it can lead to a smoother finish and better coverage on door surfaces.
Proper tools like wood shims for securing doors during painting can improve precision and prevent any unwanted movement, ensuring a neat and professional result.
It's also important to wrap your paint tools in Saran Wrap for storage to maintain their condition for future use.
By selecting the right tools based on the painting method you choose, you can contribute to a successful and efficient door painting process.
Techniques for Better Results
To achieve better painting results on your interior door, start by ensuring thorough prep work, including sanding and priming.
Use a proper brush technique, applying multiple light coats of paint for a smooth finish.
Remember to secure the door in place with wood shims to prevent movement and maintain precision during painting.
Prep Work Importance
Properly preparing your interior door before painting is crucial for achieving a durable and professional finish. To guarantee your painting project goes smoothly, follow these key steps:
- Sanding: Smooth out any rough areas on the door to create a uniform surface for the paint.
- Priming: Apply a primer to help the paint adhere better and improve its longevity.
- Clean Surface: Wipe down the door to remove dust and dirt, ensuring a clean painting surface.
- Taping Off: Use painter's tape to protect areas like hinges and doorknobs for a neat and polished look.
Proper Brush Technique
For achieving a smooth and professional finish on your interior door, using a high-quality brush with fine bristles is crucial. When painting, remember to employ a light touch and steady hand to prevent brush marks and achieve an even finish.
Start at the top of the door and work your way down to avoid drips and uneven coverage. Practice feathering the brush strokes at the edges to blend the paint seamlessly for a polished appearance. Maintain a consistent pressure on the brush to control the paint application and achieve a uniform coat.
Time-Saving With Purdy Brushes
When painting interior doors, using Purdy brushes can greatly speed up the process while guaranteeing a professional finish. These high-quality brushes are specifically recommended for doorframes, thanks to their precise application capabilities.
Here are four ways Purdy brushes can save you time and help achieve that smooth, professional look:
- Efficient Coverage: Purdy brushes are designed to provide efficient and effective paint coverage, reducing the time needed to complete the painting of interior doors.
- Professional Finish: The use of Purdy brushes guarantees a professional finish, eliminating the need for extensive touch-ups and refinishing.
- Smooth Application: With their high-quality man-made bristles, Purdy brushes enable smooth and even paint application, saving you time during the painting process.
- Enhanced Process: Investing in Purdy brushes can enhance the overall painting process for interior doors, making it more efficient and leading to a professional result.
Preventing Dragging With White Spirit
To prevent dragging and achieve a smooth finish on interior doorframes, consider incorporating a small amount of white spirit into your paint mixture. Adding white spirit helps the paint flow smoothly, reducing the risk of brush strokes or uneven application.
This solvent enhances the paint's consistency, preventing it from drying out too quickly during the painting process. By using white spirit, you can improve the overall painting efficiency and quality, leading to a professional result with minimal dragging and a flawless appearance on your interior doorframes.
White spirit acts as a valuable tool in your painting arsenal, ensuring that the paint glides on evenly and dries to a beautiful finish. Next time you tackle a painting project, remember to include white spirit in your paint mixture for a more seamless application and a polished end result on your interior doorframes.
Frequently Asked Questions
How Long Does It Take to Paint Internal Doors?
To paint internal doors efficiently, consider factors like door size and design. Typically, it takes around 1.5 to 2 hours per door. Preparation, priming, and finishing can be done in a day.
Improve speed and quality by practicing with proper tools and techniques. Your door painting time can vary based on these factors, but with practice and efficiency, you can streamline the process.
Can You Paint a Door in a Day?
You can definitely paint a door in a day! With some efficient techniques, proper tools, and focused effort, you can complete the task quickly.
Factors like door size and design may influence the time needed, but with dedication, you can achieve this DIY project in a single day.
Prepare well, stay organized, and use the right approach to make painting your interior door a manageable and rewarding task.
How Many Coats of Paint Do Interior Doors Need?
To achieve a smooth and durable finish, interior doors typically need 2 coats of paint. Applying multiple coats enhances coverage and appearance.
Adequate drying time between coats is essential for a successful paint job. Properly painted doors look professional and last longer.
How Long Should You Let a Door Dry After Painting?
When painting an interior door, it's important to let it dry thoroughly before use. The recommended drying time is at least 24 hours to guarantee a durable finish. Factors like paint type and environmental conditions can impact drying time.
Conclusion
To sum up, the average time to paint an interior door is around 2-3 hours, depending on factors such as sanding, priming, and applying multiple coats.
According to a survey, 80% of DIY enthusiasts found that using a mini roller greatly hastened the painting process.
By following the recommended techniques and using the right tools, you can achieve professional-looking results in a timely manner.
Happy painting!
Mason – Your Product Expert Mason is your go-to product expert, carefully selecting each item in our collection to ensure it meets your comfort, functionality, and style needs. With his attention to detail and commitment to quality, he ensures that every product we offer enhances your home experience.
-
Vetted8 months ago
15 Best EMS Foot Massagers for Neuropathy to Soothe Your Feet
-
Vetted7 months ago
14 Best Personalized Father's Day Gifts for Your Husband – Show Him You Care
-
Alfresco6 months ago
Alfresco Stacker Doors: Seamless Indoor-Outdoor Living!
-
Tableware and Dining Accessories1 week ago
What Is the Meaning of the Word Tableware
-
Tableware and Dining Accessories1 week ago
When Is Tableware on Sale at Hobby Lobby
-
Tableware and Dining Accessories1 week ago
Which of the Following Is Not Classified as Tableware
-
Craft and Textiles8 months ago
15 Best Places to Buy Appliances for Your Home – Top Retailers Reviewed
-
Tableware and Dining Accessories1 week ago
What Is the Hindi Meaning of Tableware