Home Essentials
Home Security Cameras: Placement Strategy Guide
Unlock the secrets of effective camera placement to enhance your home security and discover the critical tips that could deter potential intruders.

To maximize your home security, focus on strategic camera placement. Position cameras at entry points like front and back doors, as these are high-risk areas for burglaries. Make certain to mount them 8-10 feet high to prevent tampering and achieve better facial recognition. Use wide-angle lenses to cover more area and reduce blind spots. Avoid placing cameras in direct sunlight or behind glass to guarantee clear footage. Finally, stay mindful of local laws regarding camera placement. There's much more to explore on improving your home security setup effectively.
Key Takeaways
- Install cameras at entry points like doors and windows, as they are common targets for burglars.
- Position cameras 8-10 feet high to enhance coverage and reduce tampering risks.
- Use wide-angle lenses to minimize blind spots and ensure maximum area surveillance.
- Ensure night vision capabilities for effective monitoring in low-light conditions.
- Regularly assess camera positioning to adapt to environmental changes and maintain optimal coverage.
Choosing the Right Cameras
When you're selecting security cameras for your home, it's essential to focus on key features that will best meet your needs. Start by considering resolution; aim for at least 1080p to guarantee clear images. Night vision capabilities are a must, allowing you to monitor your property in low-light conditions.
Additionally, consider the benefits of best exterior home security cameras of 2024 that provide durability and weather resistance, assuring reliable performance.
While you're choosing the right cameras, think about connectivity as well. Decide if you prefer Wi-Fi or wired options based on your specific camera installation requirements. Reputable brands like Reolink, ADT, and Vivint offer a variety of outdoor security cameras tailored to different functionalities and styles, enhancing your home security.
Don't forget to check compatibility with your existing security system to maximize effectiveness. Additionally, assess the number of cameras you'll need based on your property's size and verify your internet speed can support multiple Wi-Fi cameras without slowing down your network.
Best Locations for Installation
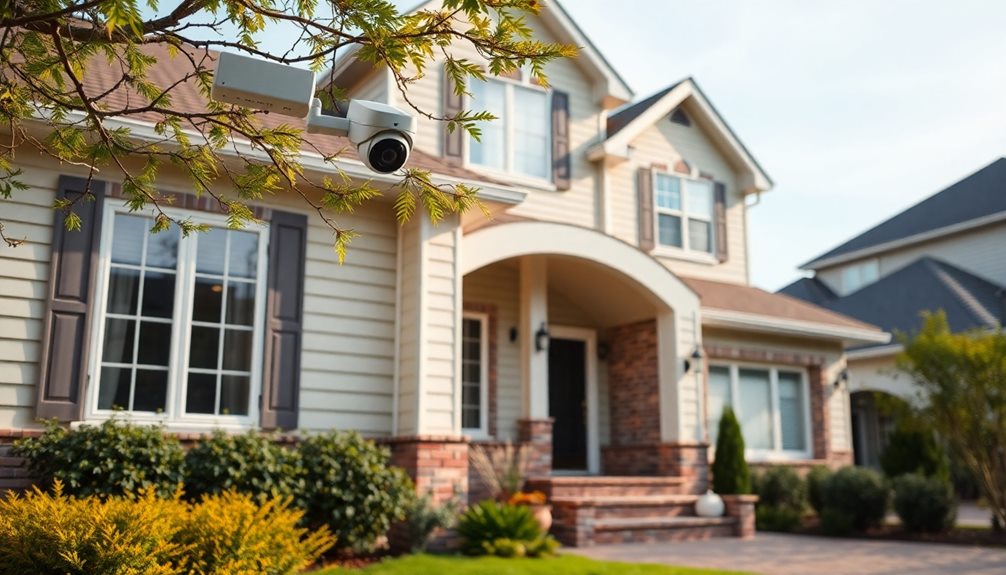
When it comes to installing security cameras, placement is key.
You should focus on high-traffic entry points like the front and back doors, as well as off-street windows and garages.
Ensuring your cameras are positioned at the right height and angles will maximize their effectiveness and keep your property secure.
Front and Back Doors
To protect your home effectively, installing security cameras at both the front and back doors is essential. About 34% of burglars enter through the front door, so placing a camera here can deter intrusions and monitor activity.
Similarly, the back door accounts for 22% of break-ins, making it vital to have coverage at this entrance point as well.
When positioning your security cameras, mount them at a height of 8-10 feet. This prevents tampering while providing a clear view of anyone approaching.
Opt for cameras with a wide-angle lens to minimize blind spots and enhance your overall security. This way, you can capture more of the surrounding area, ensuring you don't miss any important details.
Additionally, consider installing strategic lighting near both doors. Good lighting will improve the night vision capabilities of your cameras, making them more effective during low-light conditions.
Windows and Garage Areas
Securing windows and garage areas is just as important as monitoring your front and back doors. You should position security cameras to cover all ground-floor windows, since about 23% of break-ins happen through these entry points. This visibility is essential for deterring potential thieves.
Additionally, installing cameras in the garage is fundamental, as it often contains valuable items that attract burglars. Make sure to cover off-street windows, too, because they're less visible to passersby and represent a considerable percentage of break-ins.
The placement of security cameras should also capture your garage door, allowing you to monitor vehicles and deter unauthorized access.
Don't forget about outdoor lighting; it plays a key role in enhancing camera visibility. Proper lighting around windows and garage areas improves night vision capabilities, making it easier for your security cameras to capture clear footage.
Optimal Height and Angles
Mounting security cameras at the right height and angle is essential for effective surveillance. For ideal height, install your security cameras between 8 to 10 feet off the ground. This height prevents tampering while allowing for clear facial recognition of individuals approaching your home.
When positioning cameras, focus on angles that minimize blind spots. Patterns like back-to-back or corner-to-corner placements can greatly enhance your overall surveillance effectiveness.
It's important to install outdoor cameras at key entry points, such as front and back doors and off-street windows. Remember, 34% of burglaries happen at these locations, so proper placement strategy is critical.
Make sure your outdoor cameras are in well-lit areas to improve night vision capabilities. Avoid spots with direct sunlight, as glare can diminish footage quality.
Using wide-angle lenses can help cover larger areas, but keep a balance between height and angle to capture as much detail as possible.
Areas to Avoid for Cameras
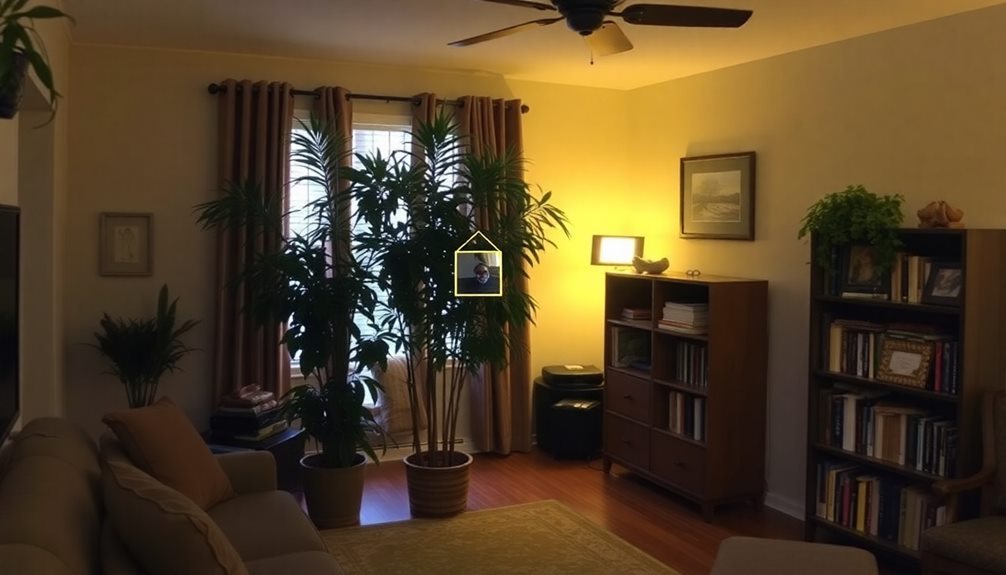
When setting up your security cameras, you'll want to avoid direct sunlight, as it can create glare that messes with image quality.
Also, keep cameras away from obstructions and unstable spots to guarantee clear footage and prevent tampering.
Direct Sunlight Challenges
Direct sunlight can pose significant challenges for home security cameras, leading to issues like glare and compromised image quality. To guarantee your security camera placement is effective, it's crucial to avoid direct sun exposure, especially during peak hours.
Here are some security camera placement tips:
- Avoid direct sunlight: Position cameras away from intense sunlight for extended periods.
- Watch for reflections: Shiny surfaces, like windows or metal objects, can distort images.
- Consider sunlight patterns: Regularly assess how sunlight moves across your property through the seasons.
Using cameras with High Dynamic Range (HDR) technology can help mitigate the impact of bright lighting, improving overall image quality.
Remember, glare not only affects visibility but can make it challenging to identify faces or events. By strategically placing your cameras and paying attention to sunlight patterns, you can maintain peak functionality year-round.
Regularly revisit your placements to guarantee that reflections and bright spots don't interfere with your security setup. With thoughtful planning, you can enhance your home security without the pitfalls of direct sunlight challenges.
Obstruction and Stability Issues
Often overlooked, obstruction and stability issues can greatly impact the effectiveness of your home security cameras. To make sure your placement strategy is ideal, avoid the following areas that may hinder performance:
| Areas to Avoid | Reason for Avoidance |
|---|---|
| Direct sunlight | Causes glare, degrading image quality |
| Behind glass windows | Reflections obstruct clear footage |
| Low visibility zones | Limits thorough coverage of critical areas |
| Unstable structures | Leads to movement or damage, compromising surveillance effectiveness |
| Easily accessible locations | Heightens risk of potential tampering |
Visibility and Coverage Considerations
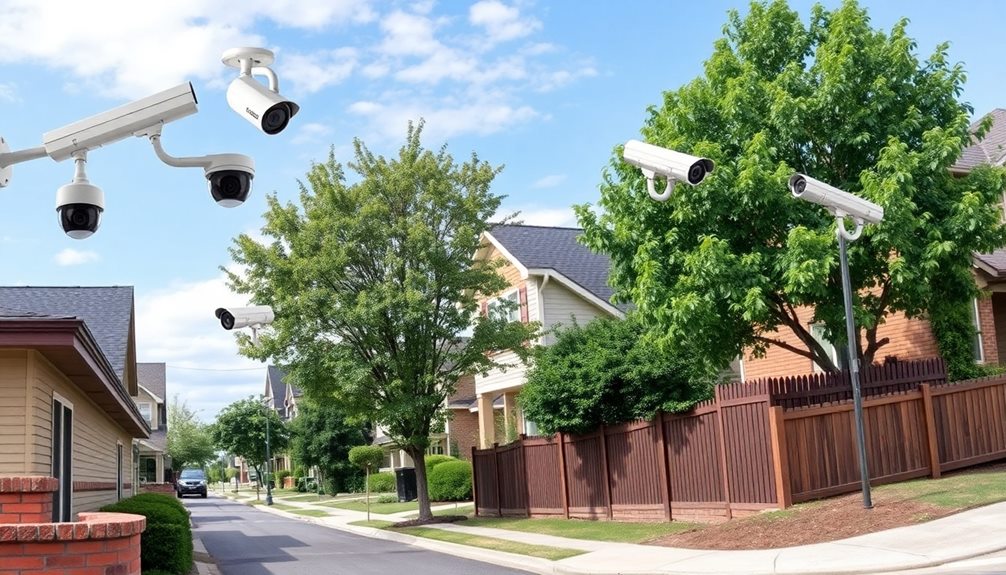
Effective visibility and coverage are crucial for maximizing the deterrent effect of security cameras. To effectively protect your property, consider these essential placement strategies:
- Position cameras near entry points like front and back doors, since over 50% of burglaries happen through these access points.
- Utilize wide-angle lenses to enhance coverage in larger areas, guaranteeing you capture every angle.
- Overlap views from multiple cameras to eliminate blind spots and provide a thorough security network.
When your security cameras are visible to the public, they greatly boost their deterrent capability. Studies show that around 60% of criminals will steer clear of properties equipped with visible security cameras.
By strategically placing cameras at a height of 8-10 feet, you can cover larger areas while minimizing risks of tampering. This height also guarantees a clear line of sight, enhancing visibility.
Prioritizing these visibility and coverage considerations won't only protect your property but also give you peace of mind.
Height and Angle Optimization
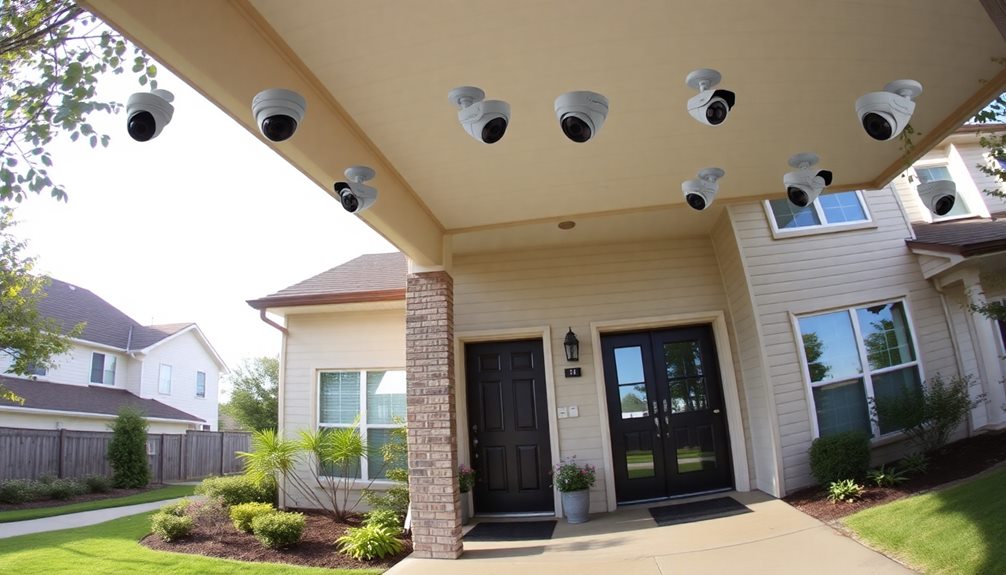
Optimizing the height and angle of your security cameras is key to enhancing their effectiveness. Mount your security cameras at a height of 8 to 10 feet; this prevents tampering and allows for effective facial recognition while maximizing the field of view.
Adjust camera angles to eliminate blind spots, ensuring essential areas like entry points and high-traffic zones are fully monitored.
When selecting lenses, consider using wide-angle lenses for expansive areas to capture more movement, while narrow lenses are ideal for focusing on specific zones where detailed surveillance is necessary.
If you're using PTZ cameras, position them higher to enhance long-distance viewing and improve perspective, allowing you to track movement across a larger area.
Regularly assess your camera positioning and angles to adapt to any environmental changes or obstructions that could impair visibility.
By implementing these height and angle optimization strategies, you'll greatly enhance the overall security of your property, ensuring that your security cameras provide maximum coverage and effectiveness.
Legal and Ethical Guidelines
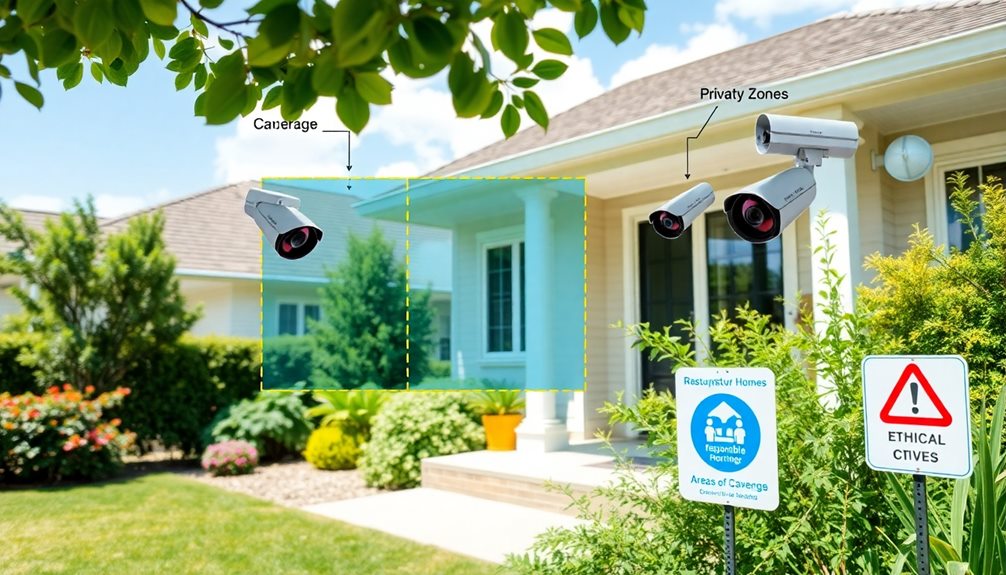
What should you know about the legal and ethical implications of installing security cameras? First, it's essential to understand that local laws vary considerably, so you need to research your state's laws regarding camera placement. This helps you avoid any legal repercussions.
Here are a few key points to keep in mind:
- Consent: In some jurisdictions, like New South Wales and Victoria, you may need consent to install cameras, especially in private spaces.
- Expectation of privacy: Recording individuals in areas where they expect privacy, like bedrooms or bathrooms, is generally illegal and can lead to serious consequences.
- Neighbors' privacy rights: Make sure your cameras don't capture footage of adjacent properties to avoid disputes or legal complaints.
Transparency is key. Always inform visitors about the presence of security cameras when required by law.
Common Placement Mistakes
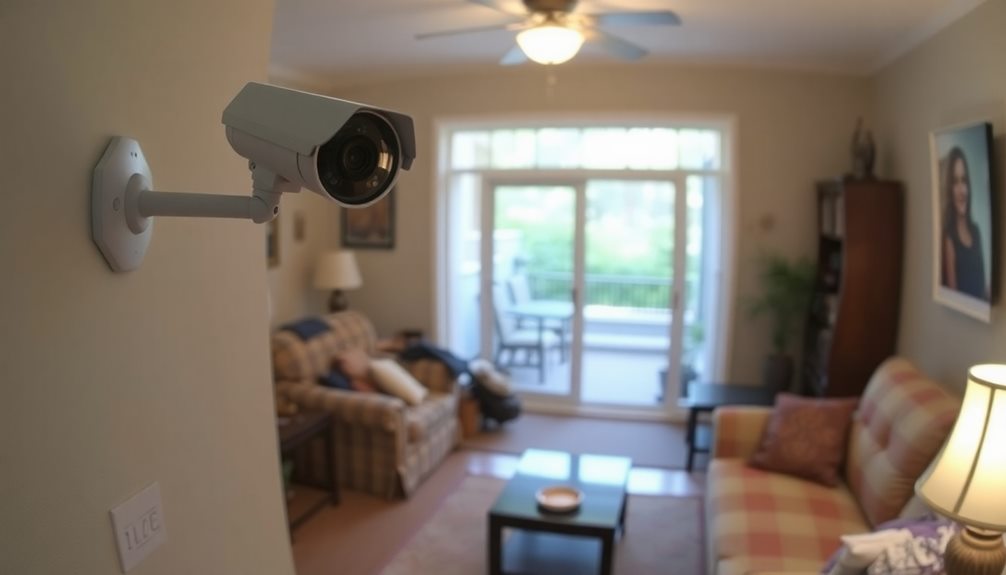
Understanding legal and ethical guidelines is just the beginning when it comes to home security cameras; proper placement is equally important for maximizing their effectiveness.
One common mistake is mounting security cameras lower than 9 feet. This increases the risk of tampering or theft. You should also avoid placing cameras too high, as they may not capture clear facial recognition, making it difficult for you to identify intruders.
Another mistake is failing to evaluate the specific roles of each camera. Overlapping coverage can create blind spots, which hinders overall security effectiveness.
You'll want to strategically place cameras in common areas, ensuring you monitor all indoor and outdoor spaces. Don't overlook high-value areas like safes or valuable collections; ignoring these spots can leave them unmonitored and at risk.
Additionally, make sure you have reliable power sources for your cameras. If you don't, a dead battery or power loss can lead to downtime, rendering your security ineffective.
Installation Options and Techniques
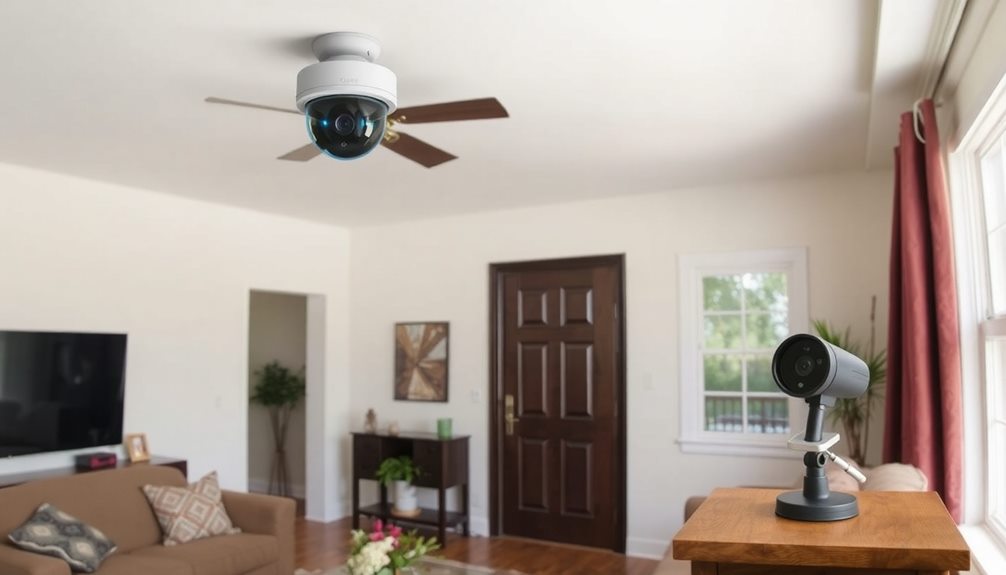
Installing home security cameras can seem intimidating, but with the right approach, you can achieve effective surveillance with minimal hassle. You have two main options: DIY installation or professional installation. Most security camera systems are designed for easy DIY setup, often with app guidance. However, for those who prefer a hands-off approach, hiring professionals, like ADT or Vivint, guarantees peak performance.
When you decide to place security cameras, consider the following best practices:
- Mount cameras 8-10 feet high to maximize their field of view and minimize tampering.
- Use structure-mounted cameras for stability, especially under soffits or eaves to protect against weather elements.
- Choose between wired or wireless models based on your comfort level; wired cameras may require more complex installation due to cabling.
If you opt for DIY installation, make sure to read the instructions carefully and follow the app prompts.
If you're unsure about any step, remember that professional installation can provide a clean finish and peak functionality, especially for outdoor home security camera systems.
With these tips, you'll be well on your way to securing your home!
Surveillance Features to Consider
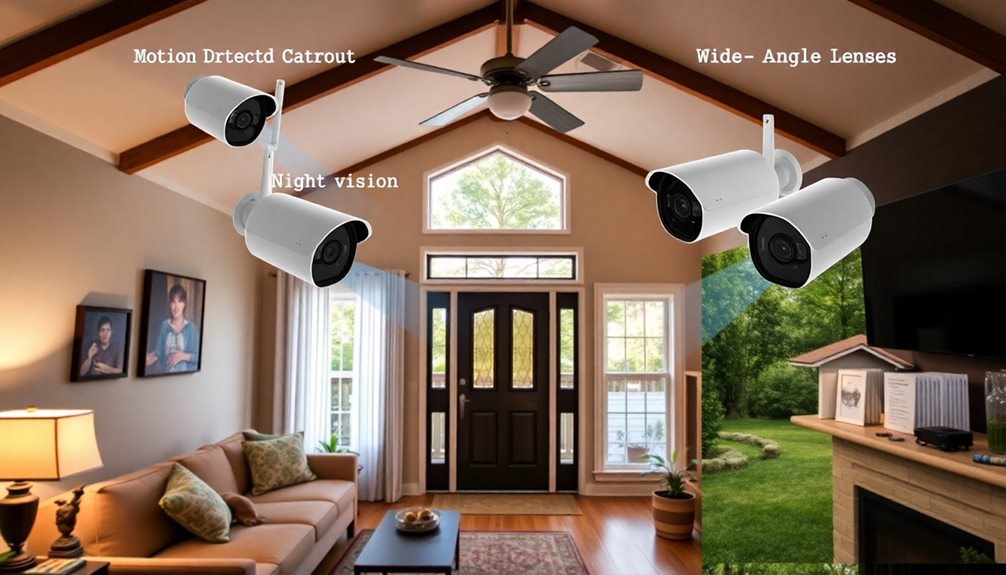
When choosing home security cameras, it's important to focus on the features that will best protect your property.
Start with resolution quality; opt for at least 1080p for clear images, but consider 4K for even better detail in identifying faces and license plates.
Next, think about night vision capabilities. Cameras equipped with infrared or color night vision can effectively monitor low-light conditions, as many incidents occur after dark.
Motion detection is another vital feature. Look for advanced motion detection that sends alerts to your smartphone, enabling you to respond immediately to potential intrusions.
Don't overlook two-way audio; this feature lets you communicate with visitors or intruders in real-time, enhancing your security system's effectiveness.
Frequently Asked Questions
Where Should Home Security Cameras Be Positioned?
You should position security cameras at all exterior doors and off-street windows. Aim for at least three cameras to monitor driveways and common areas, mounting them 8 to 10 feet high for ideal visibility and protection.
Where Not to Install Security Cameras?
You shouldn't install security cameras in direct sunlight, behind glass windows, in low visibility zones, unstable locations, or private spaces like bedrooms and bathrooms. These placements can compromise footage quality and violate privacy laws.
How Many Security Cameras Do I Need Around My House?
You've got a fortress to protect, right? Ideally, aim for four to six cameras to cover vital spots like entryways and blind spots. Think about overlapping coverage to guarantee nothing escapes your watchful eye.
How Should You Position Your Camera?
You should position your cameras 8-10 feet high, focusing on critical entry points. Use a mix of indoor and outdoor cameras, ensuring they're away from direct sunlight, and regularly assess their placements to eliminate blind spots.
Conclusion
In the end, finding the perfect spot for your home security cameras often feels like a game of chance. Just when you think you've nailed it, you might discover a blind spot. By strategically placing your cameras and considering visibility, height, and angle, you can enhance your home's safety. Remember, the best security systems adapt to your unique layout, so take your time and don't leave anything to coincidence—your peace of mind depends on it.
Xavier – Your Operations Partner Xavier is your operations partner, working tirelessly behind the scenes to ensure that everything runs smoothly so you can enjoy a seamless experience with Perfect Fit Living. From managing inventory to coordinating logistics, he’s committed to making your experience with us hassle-free.
Home Essentials
Home Bar Essentials: Complete Setup Guide
Find out how to transform your home into a cocktail haven with essential tips that will elevate your hosting game to the next level.

Setting up your home bar is an exciting adventure that elevates your entertaining skills. Start with a sturdy, mobile bar cart that provides ample storage. Equip yourself with essential bartender tools like cocktail shakers, jiggers, and strainers. Stock up on key mixers, including soda, tonic, and juices, along with cardinal liquors like whiskey, gin, vodka, tequila, and rum. Don't forget diverse glassware to suit various cocktails. Mastering measured techniques and presentation will enhance your drinks. As you fine-tune your cocktail-making craft, you'll discover the joy of creating unique concoctions and hosting memorable gatherings. Keep exploring for more tips!
Key Takeaways
- Select a durable and mobile bar cart with sufficient storage for spirits, glassware, and tools to enhance accessibility.
- Equip your bar with essential bartending tools like cocktail shakers, jiggers, and strainers for effective cocktail preparation.
- Stock a variety of cardinal liquors, including whiskey, gin, vodka, tequila, and rum, to create a diverse cocktail menu.
- Use different types of glassware, such as highball and coupe glasses, to enhance the presentation and experience of your cocktails.
- Engage in mixology education through workshops and tasting events to continually improve your cocktail-making skills and knowledge.
Essential Bar Cart Features
When setting up your home bar, choosing the right bar cart is essential for both functionality and style. A well-designed bar cart should feature a sturdy frame, often made from materials like wood or metal, to support the weight of your bottles and bar essentials while ensuring durability.
Look for carts that offer excellent mobility, with locking wheels that make it easy to move the cart around your space while preventing any accidental rolling during drink preparation.
Storage capacity is another vital factor; you'll want enough space to accommodate your favorite spirits, glassware, and bartending tools without overcrowding. This keeps everything accessible and organized, allowing you to whip up cocktails efficiently.
Additionally, incorporating shelves or compartments specifically designed for glassware and mixers can greatly enhance your setup.
Must-Have Bartending Tools

A well-stocked bar cart is just the beginning of your home bartending journey; equipping yourself with the right tools elevates your cocktail-making experience.
First up, you'll need a cocktail shaker. The Boston shaker, a two-piece design, is popular among professionals, while the cobbler shaker offers an integrated strainer for convenience.
Next, grab a jigger—this little tool is crucial for accurately measuring your spirits, typically marked at 1 ounce and 1.5 ounces. Consistency is key in cocktail making!
Don't overlook the muddler. This handy tool lets you crush herbs, fruits, or spices, releasing their flavorful oils for drinks like Mojitos and Old Fashioneds.
To guarantee your cocktails are smooth, a reliable strainer is necessary. The Hawthorne strainer, with its built-in spring, provides excellent control when filtering out ice and solids.
Key Mixers for Cocktails

Mixers are essential for crafting delicious cocktails that impress your guests and enhance your home bartending skills. Understanding the key mixers will elevate your cocktail game, allowing you to create a variety of flavors and styles.
Here's a quick overview of some essential mixers:
| Mixer | Description |
|---|---|
| Soda Water | Adds effervescence, ideal for highballs and spritzers. |
| Tonic Water | Offers a distinct bitter-sweet taste, perfect with gin or vodka. |
| Juices | Fresh flavors from orange, cranberry, and lime enhance acidity. |
| Simple Syrup | Balances sweetness in cocktails, made from sugar and water. |
Bitters are another vital component. These concentrated flavoring agents enhance cocktail complexity, important for classics like the Old Fashioned and Manhattan. A bottle of Angostura bitters is a must-have in your collection.
Essential Alcohol Selections

Stocking your home bar with essential alcohol selections is important for crafting a diverse range of cocktails. To create a well-rounded collection, focus on the five cardinal liquors: whiskey, gin, vodka, tequila, and rum. Each plays a significant role in cocktail creation.
For whiskey, consider brands like Bulleit, Angels Envy, and Buffalo Trace, which are perfect for both mixing and sipping. If you want a budget-friendly option, Irish whiskey such as Saint Brendan's is a solid choice.
When it comes to vodka, Tito's, Grey Goose, and Kettle One are top picks, though New Amsterdam offers great quality at a lower price.
Tequila also deserves your attention. Important selections include Herradura and Cazadores Reposado, while el Jimador is excellent for making margaritas without breaking the bank.
Variety of Glassware

Creating cocktails isn't just about the right spirits; the glassware you choose can greatly enhance the experience. A well-stocked bar is complete without an array of glassware tailored for various cocktails. Each type serves its purpose and adds to the aesthetic of your drink.
| Glass Type | Ideal For | Features |
|---|---|---|
| Highball Glasses | Mixed drinks | Tall and straight, perfect for gin and tonic or rum and cola. |
| Rocks Glasses | Neat or on the rocks | Short tumblers, essential for Old Fashioneds and Negronis. |
| Coupe Glasses | Classic cocktails | Wide, shallow bowl, ideal for Daiquiris and Champagne cocktails. |
Additionally, don't forget about martini glasses, which are perfect for shaken or stirred cocktails, and wine glasses for those versatile drinks like sangrias. With this variety of glassware, you'll find that your cocktails not only taste better but also look more inviting. So, invest in these essentials to elevate your home bar experience and impress your guests!
Tips for Cocktail Preparation

Mastering the art of cocktail preparation can elevate your home bar experience considerably. Start by using a jigger to accurately measure your ingredients; this guarantees consistency and balance in flavor across your mixed drinks.
Next, choose the right mixing technique: shake cocktails with fruit juices or dairy, and stir spirit-only drinks to maintain clarity and texture.
Don't underestimate the power of presentation—garnish wisely! Fresh herbs, citrus peels, or even edible flowers can enhance both the visual appeal and flavor of your cocktails.
Remember to chill your glassware by placing it in the freezer or filling it with ice water before serving; this keeps your cocktails colder longer and improves the overall drinking experience.
Experiment with ice, too. Using larger cubes or spheres melts slower, diluting your drinks less and preserving the intended flavor of your cocktails.
Invest in essential bar tools, including a cocktail strainer, to guarantee smooth pouring and presentation.
With these tips, you're well on your way to crafting fantastic cocktails at home that impress your guests and elevate your skills behind the bar.
Engaging With Cocktail Culture

Engaging with cocktail culture is all about bringing friends together for social gatherings that celebrate creativity.
You can craft unique recipes that reflect your style while experimenting with flavors that excite your palate.
Social Cocktail Gatherings
When you host social cocktail gatherings, you open the door to a world of creativity and interaction. A well-stocked bar cart is essential for providing delicious cocktails that cater to your guests' tastes. Start with the essentials you need: vodka, gin, rum, tequila, and whiskey, along with a selection of mixers and garnishes. This allows everyone to explore various flavors and styles while enjoying a festive atmosphere.
To make your gatherings even more successful, consider utilizing social media platforms for targeted promotions and sharing your cocktail recipes with friends and followers, as this can help build a community around your events niche selection in book marketing.
Consider incorporating seasonal ingredients or themed cocktails to elevate your gathering, creating a unique touch that reflects special occasions. This not only fosters conversation but also enhances the overall experience.
Engage your guests by encouraging them to participate in cocktail-making; this transforms a simple gathering into a memorable event filled with laughter and shared experiences.
You can also deepen your appreciation for cocktail culture by hosting tastings or workshops, sharing insights and knowledge with your friends. These activities create opportunities for bonding and turn your home bartending skills into an engaging experience.
Ultimately, social cocktail gatherings can be a delightful way to connect, experiment, and create lasting memories with those you care about.
Crafting Unique Recipes
Crafting unique cocktail recipes not only showcases your creativity but also deepens your connection to cocktail culture. Start by mastering classic cocktails, which serve as a solid foundation for your creations.
Once you've got those down, experiment with unique variations by incorporating seasonal ingredients or your favorite brands. This exploration allows you to elevate the flavor profile of your drinks, making them more inviting and personal.
Consider attending local mixology workshops or tastings to gain insights from experts. You'll learn about different spirits and cocktail techniques, expanding your knowledge and skills.
Engaging with others through online forums or local whiskey clubs can also enhance your experience, as sharing and discussing recipes with fellow enthusiasts fosters a sense of community.
Don't forget to document your successful recipes in a journal. Tracking flavors, preferences, and inspirations will help you recreate your favorite cocktails for future gatherings with ease.
As you continue to refine your skills and experiment with new ingredients, you'll develop a unique cocktail repertoire that reflects your taste and creativity, solidifying your place in the vibrant cocktail culture.
Frequently Asked Questions
What Do I Need for a Full Bar Set Up?
To set up a full bar, you'll need whiskey, gin, vodka, tequila, and rum for liquors; mixers like tonic and juices; essential tools like a shaker and jigger; and various glassware for serving drinks.
What Tools Are Needed for a Home Bar?
For your home bar, you'll need a shaker, jigger, muddler, strainer, and bar spoon. These tools help you mix, measure, and serve cocktails perfectly, ensuring your drinks taste great and impress your guests.
How Do You Fully Stock a Home Bar?
To fully stock your home bar, start with five key liquors: whiskey, gin, vodka, tequila, and rum. Then, add essential mixers and invest in proper tools and glassware to enhance your cocktail-making experience.
How Many Bottles Should a Home Bar Have?
You should start with at least five essential bottles—vodka, gin, rum, tequila, and whiskey. As you grow your collection, aim for around 10-15 bottles to enhance your cocktail options and versatility.
Conclusion
With your home bar set up, you've created a space for both relaxation and celebration. It's where the simplicity of a quiet evening with a neat whiskey meets the excitement of crafting vibrant cocktails for friends. Embrace the art of mixing drinks while savoring the stories behind each recipe. Whether you're toasting to life's big moments or unwinding after a long day, your home bar will be the perfect backdrop for unforgettable memories. Cheers to that!
Xavier – Your Operations Partner Xavier is your operations partner, working tirelessly behind the scenes to ensure that everything runs smoothly so you can enjoy a seamless experience with Perfect Fit Living. From managing inventory to coordinating logistics, he’s committed to making your experience with us hassle-free.
Home Essentials
Essential Kitchen Knives: Building Your Collection
Join us as we explore the essential kitchen knives every cook needs, and discover the secrets to building a collection that lasts.
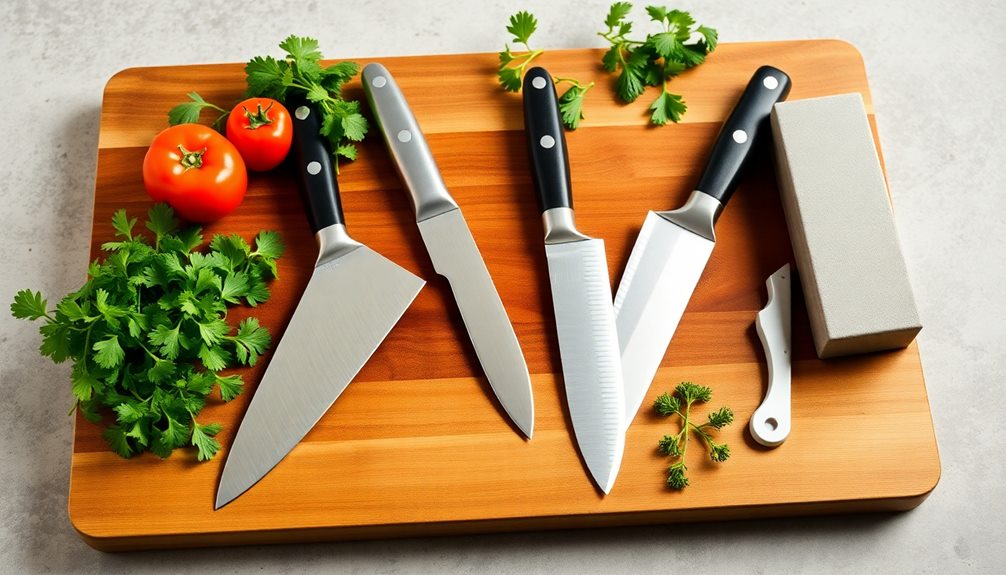
Building your collection of essential kitchen knives starts with four key pieces: a chef knife, serrated bread knife, utility knife, and paring knife. These tools cover most cooking tasks and offer flexibility as you grow your skills. As you advance, consider adding specialized knives like a boning or Santoku knife to refine your techniques. Focus on quality over quantity; high-carbon stainless steel knives with full-tang construction will guarantee longevity and performance. Don't forget to maintain your knives with regular honing and proper storage. Stick around, and you'll discover more tips to enhance your kitchen experience.
Key Takeaways
- Start your collection with essential knives: chef knife, serrated bread knife, utility knife, and paring knife for versatility in the kitchen.
- Gradually expand your knife collection based on your cooking habits, skills, and budget, adding specialized knives as needed.
- Prioritize high-quality, full-tang knives made from high-carbon stainless steel for better performance, durability, and comfort.
- Regular maintenance, including honing and proper storage, extends the lifespan of your knives and improves your cooking experience.
- Consider your cooking style and needs when shopping for knives, focusing on materials, reviews, and warranties for informed choices.
Essential Types of Kitchen Knives
When it comes to equipping your kitchen, knowing the essential types of kitchen knives is crucial. Every cook needs a reliable set of chef's knives to tackle various tasks. At the top of the list is the chef knife, typically measuring 6 to 8 inches. It excels at chopping, mincing, and butchering, making it the most versatile tool in your knife collection.
Next, you'll want a serrated bread knife. Its jagged edge allows for easy slicing through crusty loaves, cakes, and soft fruits with minimal drag.
For precision tasks, the utility knife is necessary. This smaller version of the chef knife can step in as a paring knife when needed, helping you with intricate slicing.
While specialized knives like the santoku knife are designed for specific tasks—such as slicing vegetables—your focus should be on these foundational tools.
The essential knives you choose will greatly influence your cooking experience. By having a well-rounded collection, you'll guarantee you're prepared for any culinary adventure that comes your way.
Specialized Knives to Consider
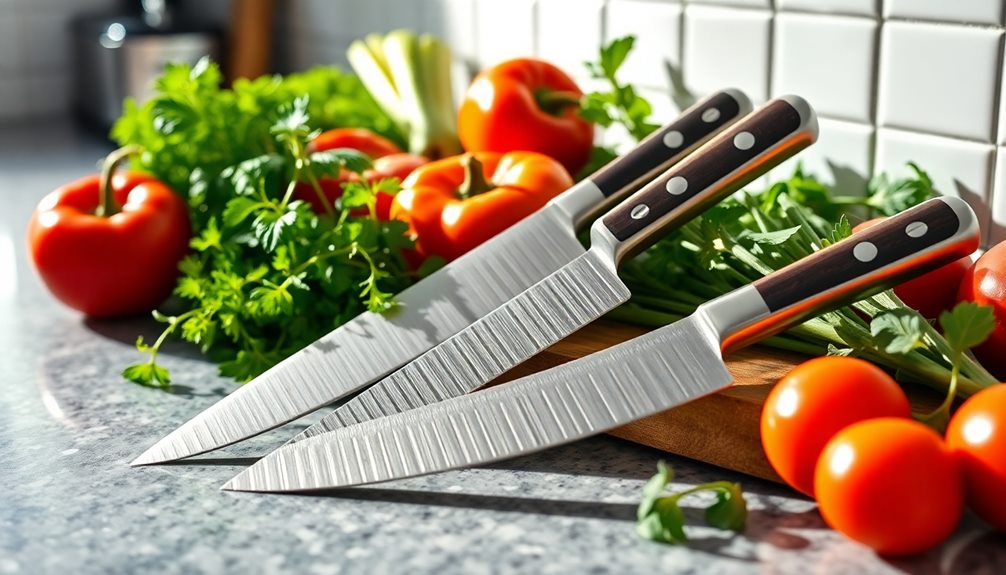
When you're in the kitchen, having the right knife can make all the difference.
Specialized knives, like the Santoku or boning knife, offer unique functions that enhance your cooking experience.
Choosing the right style not only improves your efficiency but also elevates the quality of your dishes.
Unique Knife Functions
If you're looking to elevate your culinary skills, specialized knives can make all the difference in your kitchen. Each knife has unique functions that cater to specific tasks, enhancing your efficiency and precision.
Here are four specialized knives to take into account:
- Santoku Knife: This Japanese-style knife features a shorter, flatter blade that excels in push-cut chopping. It's perfect for slicing vegetables, meat, and fish with precision.
- Nakiri Knife: Designed specifically for slicing thick vegetables, the nakiri resembles a small cleaver. It's ideal for vegetable-heavy cooking, allowing you to chop with ease.
- Boning Knife: With a long, flexible blade, the boning knife enhances butchery efficiency. It's perfect for precise deboning of whole cuts of meat.
- Cleaver: This knife's large blade makes it essential for tackling tough tendons and thick vegetables. It's perfect for heavy-duty tasks and animal butchery.
Additionally, think about a Carving Knife for smooth, precise cuts; it's essential for carving large proteins and guarantees an elegant presentation.
Incorporating these best knives into your kitchen will open up a world of unique knife functions, making your cooking experience more enjoyable.
Choosing the Right Style
Selecting the right style of specialized knives can greatly enhance your cooking experience, allowing you to tackle a variety of tasks with ease.
When you're building your kitchen, consider adding a Santoku knife for precision chopping, especially for vegetables. Its shorter, flatter blade makes it a favorite in Japanese cuisine.
If you often work with thick vegetables, the Nakiri knife is a must-have; its squared-off blade resembles a small cleaver, making vegetable prep efficient.
For those who enjoy meat preparation, a boning knife is essential. Its long, flexible blade allows you to debone cuts of meat with control and accuracy.
You might also want a sturdy cleaver in your collection. This heavyweight knife is perfect for cutting through tough tendons and thick veggies.
Deciding on Knife Quantity
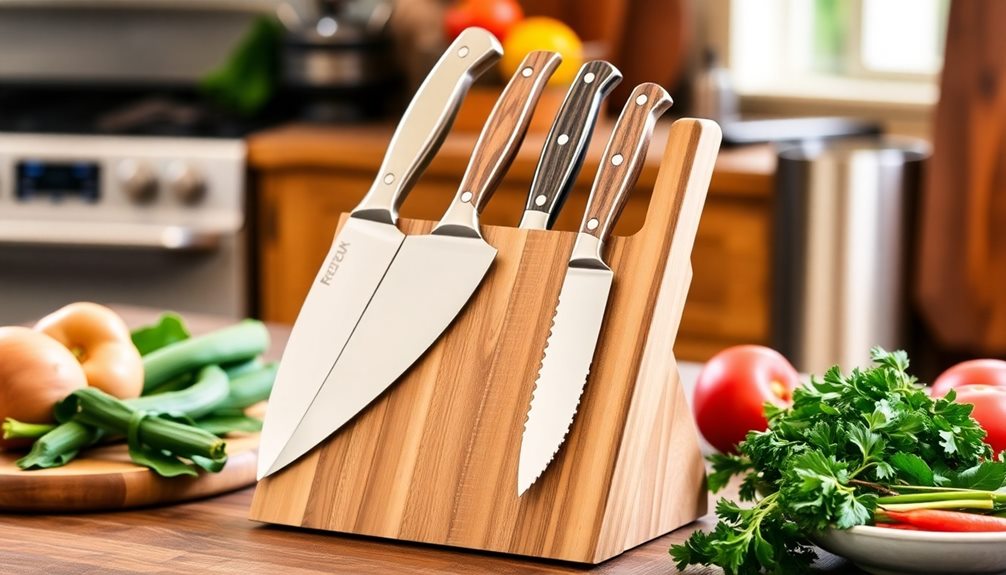
When deciding on the number of knives you need, start with the four essentials: a chef knife, bread knife, paring knife, and utility knife.
It's smart to gradually build your collection based on your cooking habits and budget.
Starter Knife Recommendations
For anyone stepping into the world of cooking, a well-chosen starter knife set is essential. Investing in high-quality knives can dramatically enhance your cooking experience.
You don't need a massive collection right away; just four essential knives will cover a wide range of tasks in your kitchen.
Here's a recommended starter knife set:
- Chef Knife: The workhorse of your kitchen, perfect for chopping, slicing, and dicing.
- Bread Knife: With its serrated edge, this knife makes cutting through crusty loaves effortless.
- Paring Knife: Ideal for intricate tasks like peeling fruits and vegetables or mincing garlic.
- Utility Knife: A versatile tool for various cutting tasks, bridging the gap between a chef knife and a paring knife.
These essential knives will accommodate your cooking habits while saving valuable kitchen space.
By focusing on high-quality options instead of numerous lower-quality knives, you'll improve your efficiency and enjoyment in the kitchen.
As you grow more comfortable, you can gradually expand your knife collection based on your evolving needs.
Gradual Collection Strategy
Building your knife collection should be a thoughtful process, balancing your cooking needs with available space and budget. Start with the essentials: a chef knife, bread knife, paring knife, and utility knife. These high-quality knives provide the versatility you need to tackle a variety of kitchen tasks without cluttering your space.
Consider a gradual collection strategy. Instead of rushing to purchase every knife on the market, focus on acquiring one or two high-quality knives at a time. This approach allows you to invest wisely and guarantees each knife serves a specific purpose.
By limiting your collection to four essential knives, you can efficiently manage your kitchen tasks while avoiding overwhelming your workspace. Space considerations are important, too. Each knife should enhance your cooking experience, so think about how often you'll use each one.
As you grow more confident in your cooking skills, you can gradually add specialized knives to your collection. This method not only keeps your kitchen organized but also helps you develop a deeper appreciation for each tool you own. Ultimately, a thoughtful, gradual collection will elevate your culinary adventures.
Quality Over Quantity
Choosing the right quantity of knives for your collection is just as important as selecting their quality.
When building a knife collection, prioritize quality over quantity. High-quality knives, especially full-tang, fully-forged options, offer better performance and longevity, making them a worthwhile investment.
Instead of overcrowding your space with numerous tools, focus on essential knives that cover your culinary needs.
Here's a recommended starter set for home cooks:
- Chef Knife: The workhorse of the kitchen, ideal for chopping and slicing.
- Bread Knife: Perfect for cutting through crusty loaves without squishing the bread.
- Paring Knife: Great for peeling and intricate tasks that require precision.
- Utility Knife: Versatile for various cutting tasks, filling the gap between a chef knife and a paring knife.
Knife Quality and Durability
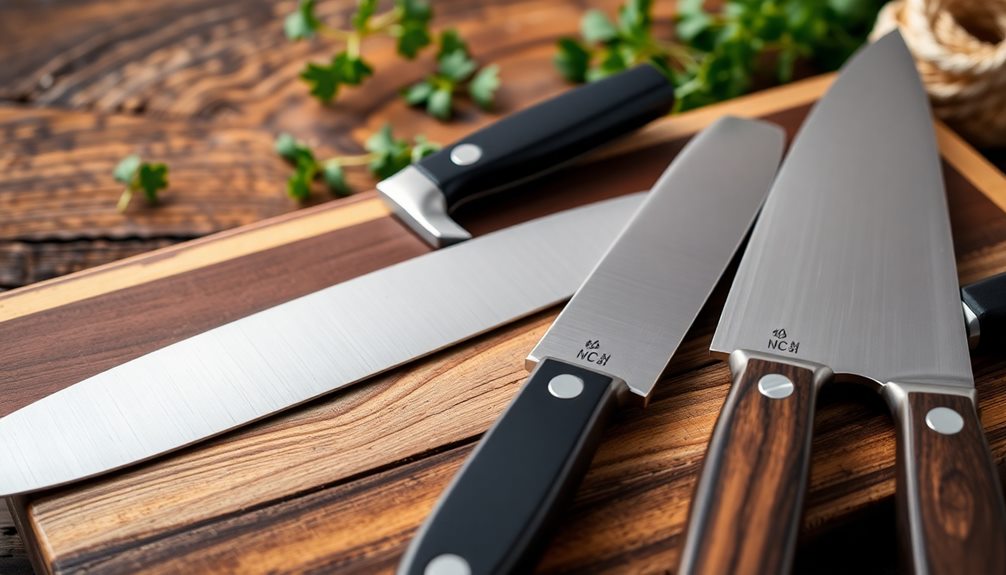
A high-quality kitchen knife is essential for any serious home chef, as it directly impacts your cooking experience and efficiency.
When you invest in knives made with premium materials like high-carbon stainless steel, you're ensuring they maintain their sharpness longer and resist chipping or corrosion.
Look for knives featuring full-tang construction, which enhances durability and balance during use, making them easier to handle.
Ergonomic handles are another important aspect, designed to provide comfort and control, reducing fatigue during prolonged chopping sessions.
The longevity of your knife heavily relies on a consistent maintenance routine; regular honing and proper storage can greatly extend its lifespan.
Shopping for Knives
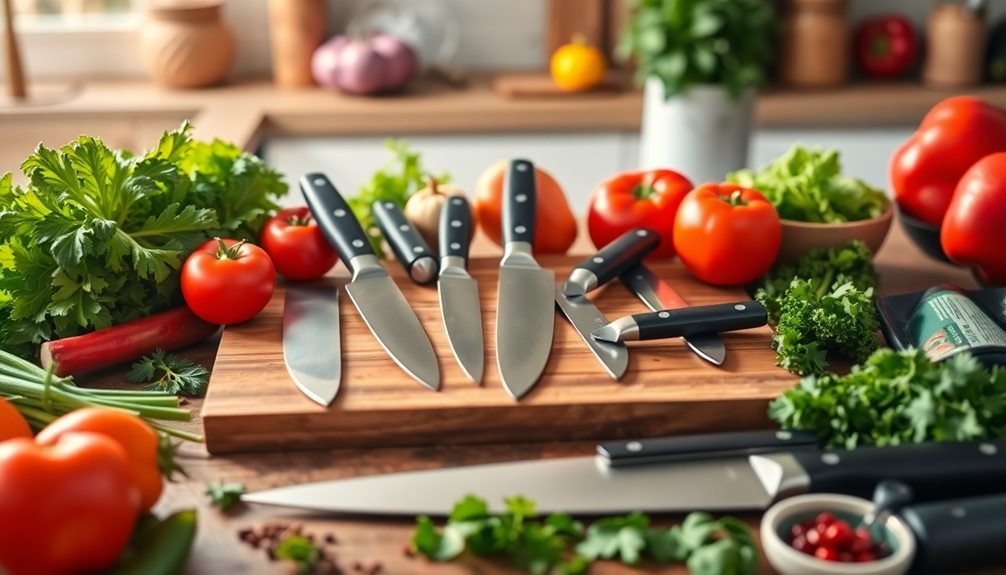
When it comes to shopping for kitchen knives, understanding your needs and preferences can make all the difference.
Begin by evaluating your cooking habits. Are you a casual cook or a kitchen enthusiast? This will guide you in deciding between individual knives or a complete set.
A recommended starter set should include:
- Chef knife
- Bread knife
- Paring knife
- Utility knife
These essentials cover most tasks in your culinary adventures.
Focus on high-quality materials, like full-tang and fully-forged construction, to guarantee longevity in your knife collection.
Don't overlook customer reviews and warranties when selecting knives. These insights can reveal performance and reliability, helping you make informed choices.
If you find gaps in your existing collection, consider specialized knives such as a boning knife for meat preparation or a santoku knife for versatile chopping and slicing.
With thoughtful consideration and research, you can build a knife collection that not only meets your needs but also enhances your kitchen experience.
Happy shopping!
Knife Maintenance and Accessories
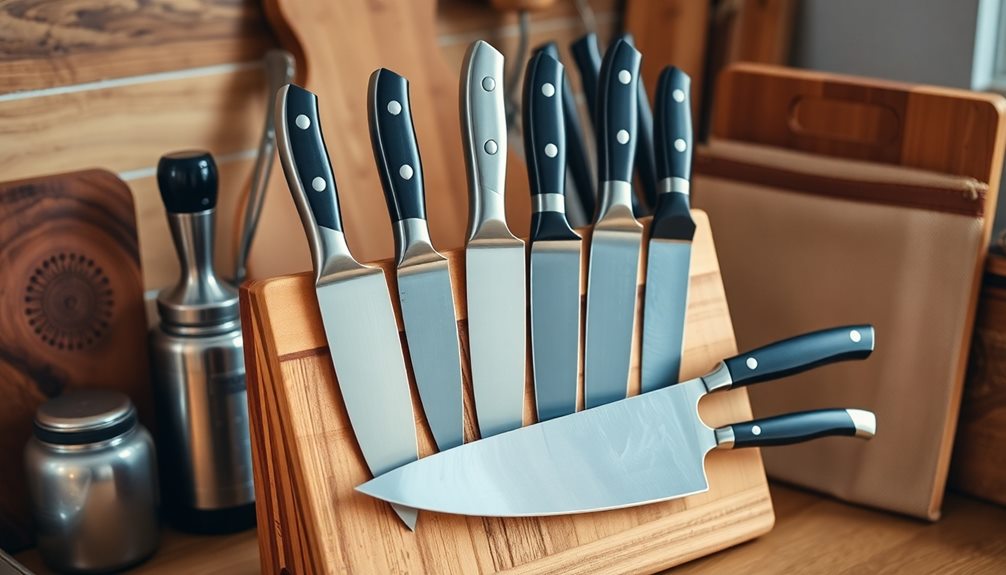
Maintaining your knife collection is vital for guaranteeing their performance and longevity. Regular knife maintenance not only enhances functionality but also extends the life of your knives. Start by honing your knives with a honing steel, like the ZWILLING Kramer 12.25-Inch Honing Steel, to keep edges sharp between sharpenings. Sharpening knives every few months using whetstones or electric sharpeners is essential for peak performance.
To protect your investment, always hand wash knives instead of using a dishwasher, which can cause damage and rust. Proper storage solutions, such as magnetic knife strips or a knife block, guarantee that blades stay sharp and safe from dulling.
Here's a quick reference table for effective knife maintenance:
| Maintenance Task | Recommended Tool |
|---|---|
| Regular Honing | Honing Steel |
| Sharpening | Whetstone or Electric Sharpener |
| Cleaning | Hand Washing |
| Storage | Magnetic Knife Strips |
| Accessories | Shapton Ha No Kuromaku Set |
Investing in quality knife accessories can greatly enhance your collection's longevity. Take care of your knives, and they'll reward you with years of excellent service.
Frequently Asked Questions
What Are the 5 Essential Knives?
You need five essential knives in your kitchen: a versatile chef's knife for chopping, a paring knife for peeling, a serrated bread knife for crusty loaves, a utility knife for precision, and a boning knife for meat.
What Are the 3 Essential Knives?
When you think of a culinary adventure, three essential knives come to mind: the versatile chef's knife for all-purpose tasks, the precise paring knife for delicate work, and the serrated bread knife for effortless slicing.
What Knives Should Every Kitchen Have?
Every kitchen should have a chef's knife for versatility, a paring knife for precision tasks, and a serrated bread knife for clean cuts. Consider adding a utility knife and boning knife to enhance your collection.
How to Build a Kitchen Knife Collection?
Building your knife collection isn't about quantity; it's about quality. Start with a few essential knives, then expand based on what you enjoy cooking. Prioritize durability and maintain them well for lasting performance.
Conclusion
Building your kitchen knife collection doesn't have to be overwhelming. Remember, "a good knife is a chef's best friend." Focus on the essential types and consider adding specialized knives as you grow more confident in your skills. Choose quality over quantity, and you'll enjoy your knives for years to come. With proper maintenance and the right accessories, your collection will not only serve you well but also inspire your culinary creativity. Happy cooking!
Xavier – Your Operations Partner Xavier is your operations partner, working tirelessly behind the scenes to ensure that everything runs smoothly so you can enjoy a seamless experience with Perfect Fit Living. From managing inventory to coordinating logistics, he’s committed to making your experience with us hassle-free.
Home Essentials
Air Quality Monitors: Which Features Matter Most
Discover the essential features of air quality monitors that can enhance your health awareness, but which ones truly stand out for your needs?
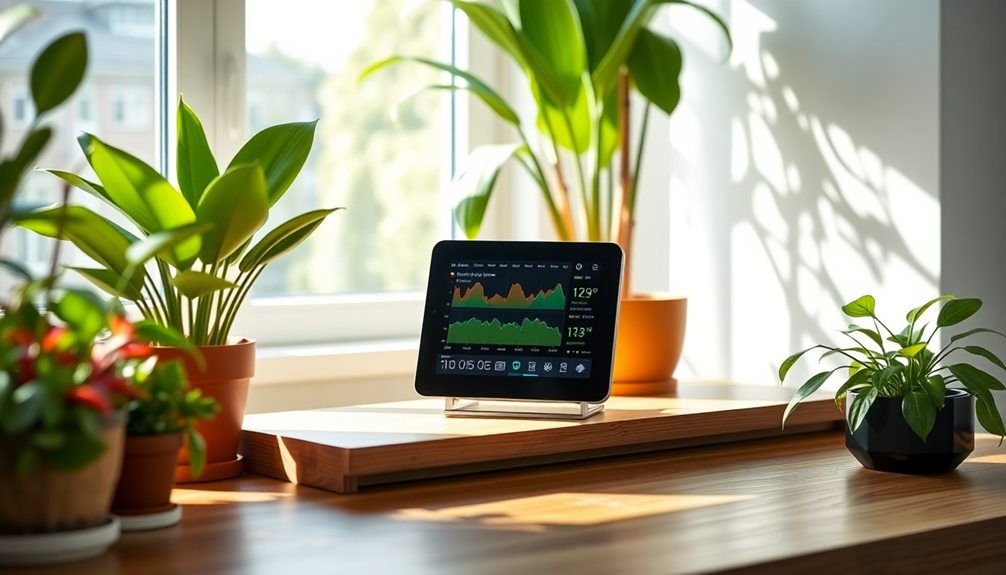
When you're choosing an air quality monitor, certain features really matter. Look for multi-pollutant detection to capture various contaminants like PM2.5 and VOCs. Real-time data reporting helps you stay informed about changes in air quality instantly. A user-friendly interface guarantees you can easily navigate the information. Don't overlook accuracy, as it's vital for reliable readings. Consider devices with mobile app integration for remote monitoring and alerts. These features work together to empower you to make informed choices about your health. Exploring more specifics can help you choose the right monitor for your needs.
Key Takeaways
- Multi-Pollutant Detection: Monitors should assess various contaminants for a comprehensive understanding of air quality.
- Real-Time Data Reporting: Immediate insights allow users to take timely action against poor air quality conditions.
- User-Friendly Interface: A simplified interface enhances interaction and encourages regular engagement with air quality monitoring.
- Mobile App Integration: Enables remote monitoring and instant alerts, connecting devices to smart home ecosystems for automated responses.
- Accuracy and Calibration: Ensuring reliable readings through regular calibration is crucial to prevent health risks linked to misleading data.
Overview of Air Quality Monitors
Have you ever wondered how clean the air you breathe really is? Air quality monitors are essential devices that measure various pollutants like PM2.5, VOCs, CO2, and ozone, providing you with vital insights into both indoor air quality and outdoor conditions.
With increasing consumer interest in personal air quality data, these monitors have gained popularity, especially as awareness of the health impacts of poor air quality rises.
You'll find various options designed for different environments—home, office, outdoor settings, and even portable use. When choosing an air quality monitor, accuracy is key. Inaccurate readings can lead to poor health decisions, making professional-grade monitors a reliable choice.
Today's air quality monitors often feature real-time data reporting, allowing you to stay informed about immediate air quality levels. Many also provide multi-pollutant detection, ensuring you're aware of multiple contaminants at once.
User-friendly interfaces make it easy to navigate the data, while historical data tracking helps you understand trends over time. By monitoring indoor air pollution effectively, you can take proactive steps to improve your environment and safeguard your health.
Key Features to Consider
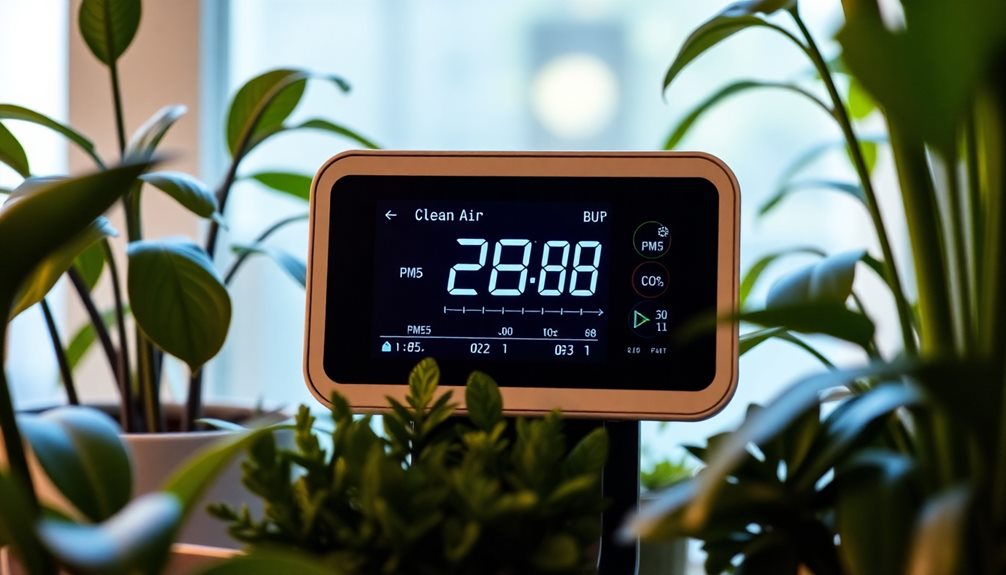
When selecting an air quality monitor, it's vital to take into account several key features that will guarantee you get the most accurate and extensive insights.
| Feature | Importance | Considerations |
|---|---|---|
| Multi-pollutant detection | Measures PM2.5, PM10, VOCs, CO2, temperature, and humidity | Ensures a thorough assessment |
| Real-time data reporting | Provides immediate insights into air quality changes | Enables timely action for improvements |
| Historical data tracking | Analyzes long-term air quality trends | Helps identify patterns for informed decisions |
You should prioritize user-friendly interfaces that offer clear displays, making it easier to navigate through the data. Mobile app integration is another feature that enhances usability, allowing you to monitor air quality remotely and set customizable alerts for specific pollutants. Additionally, consider battery life, especially if you need a portable monitor. A longer battery life will support several hours of operation, which is essential for on-the-go assessments in various environments. By focusing on these key features, you'll ensure that your air quality monitor meets your needs effectively.
Importance of Accuracy
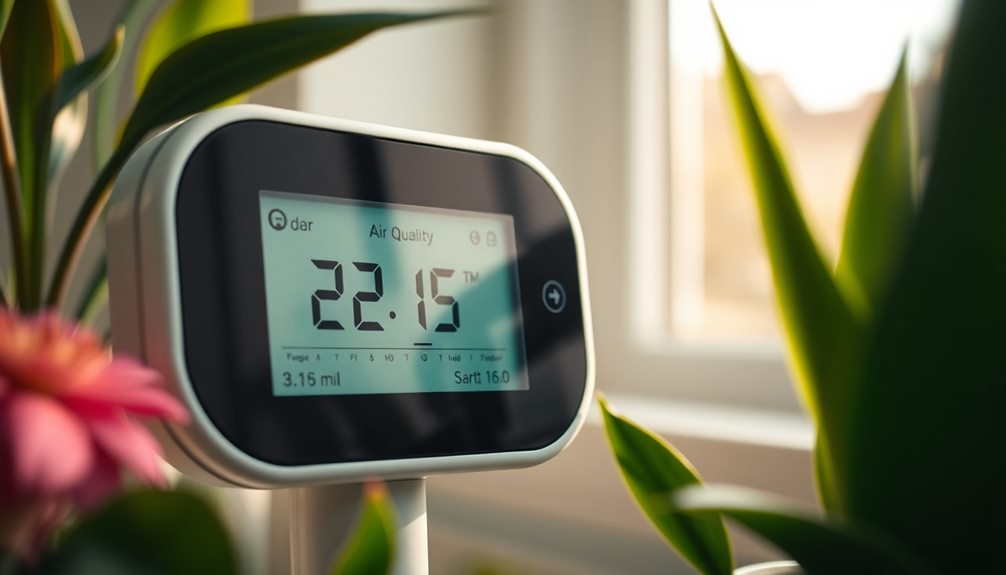
Accuracy in air quality monitors is vital—just a slight error can lead to significant health risks. When you rely on these devices to track pollutants like PM2.5 and VOCs, you need to trust their readings. Inaccurate data can skew your health decisions, exposing you to harmful environments without you even knowing it.
To maintain accuracy, regular calibration is key. Sensors in air quality monitors can drift over time, affecting their reliability. Professional-grade devices typically provide better accuracy and advanced calibration options compared to entry-level monitors, which mightn't deliver consistent performance.
User reviews often reveal discrepancies in accuracy between different models, underscoring the need to choose monitors with proven track records. Additionally, studies show that elevated indoor CO2 levels can impair cognitive function, emphasizing the importance of precise monitoring for healthy indoor air quality.
Ultimately, when you're evaluating air quality, accuracy isn't just a nice-to-have feature; it's a necessity. Investing in reliable air quality monitors will guarantee you're making informed health decisions based on accurate data, keeping you and your loved ones safe.
Types of Monitors Available
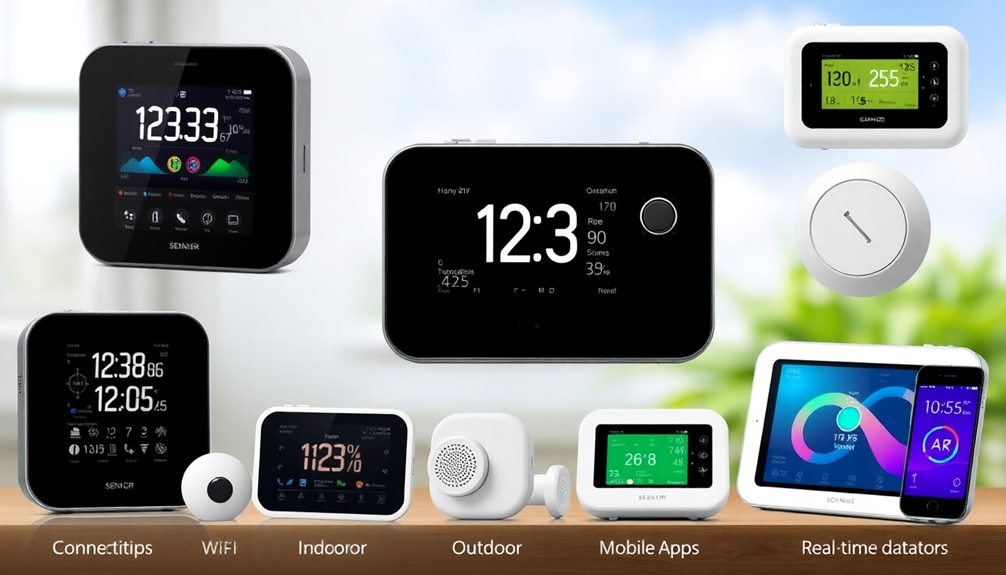
Understanding the different types of air quality monitors available can help you choose the right one for your needs.
Indoor air quality monitors are essential for measuring pollutants and allergens in your home, focusing on factors like PM2.5, VOCs, CO2, and humidity levels.
If you're often on the move, portable devices let you monitor air quality wherever you go, whether in hotels or at outdoor events.
Smart air quality monitors take it a step further by integrating with smart home devices, allowing you to control them through mobile apps and receive real-time air quality alerts.
These monitors often utilize various types of sensors, including VOC sensors, to give you detailed insights into your environment.
For more specialized needs, consider specialty monitors that target specific pollutants like radon.
Outdoor air quality monitors, on the other hand, assess larger areas, providing real-time data on regional pollution levels as recommended by the Environmental Protection Agency.
Budget and Price Ranges
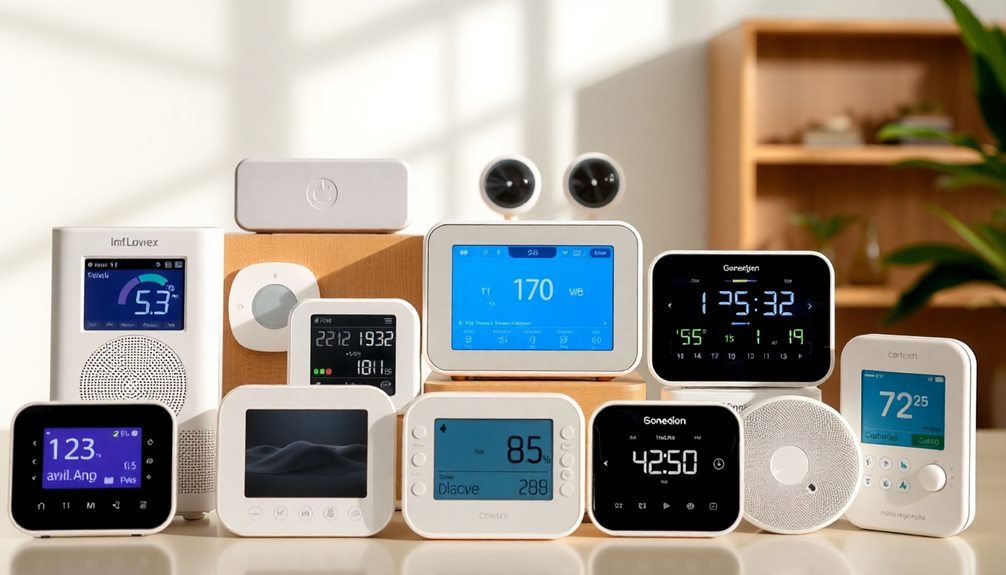
Choosing the right air quality monitor also involves considering your budget and the price ranges available. Air quality monitors come in a broad spectrum, from budget options under $100 to high-end models exceeding $500.
If you're looking for basic functionalities, entry-level devices might suffice, but they often lack advanced features like multi-pollutant detection and mobile app integration.
For those who want a bit more, mid-range monitors, typically priced between $100 and $300, strike a balance between cost and functionality. These devices usually provide more accurate readings and additional features compared to budget options, making them a popular choice.
If you're serious about air quality, high-end monitors priced above $300 are worth considering. They often include extensive data tracking capabilities, smart home integration, and superior accuracy, catering to health enthusiasts and professionals alike.
Ultimately, it's crucial to align your choice with your consumer needs and budget constraints. While more expensive models may offer better performance and reliability over time, verify you select one that fits your specific requirements without overspending.
User Experience and Usability
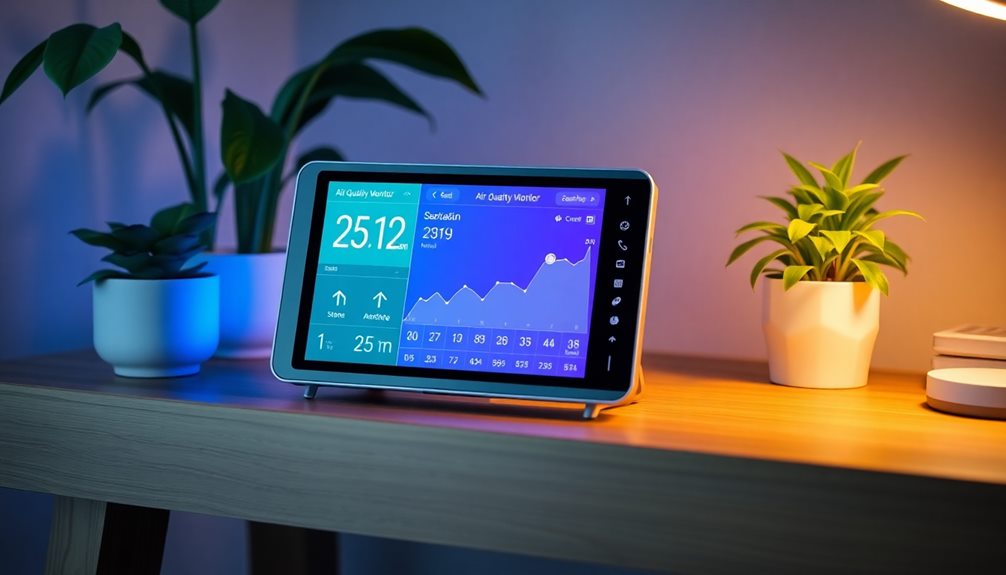
When choosing an air quality monitor, you'll want to pay attention to display readability, as a larger, color-coded screen helps you quickly assess air quality from a distance.
Additionally, app integration lets you monitor air quality remotely and receive real-time alerts, making it easier to stay informed.
These features greatly enhance your overall user experience and usability.
Display Readability Importance
In the domain of air quality monitors, display readability stands out as a key factor that directly impacts user experience and usability. You need to quickly comprehend air quality metrics, and high-quality displays enable you to view information from a distance. Color-coded alerts provide immediate visual cues, helping you identify when pollutant levels are high without squinting at fine print.
| Feature | Importance | Benefit |
|---|---|---|
| Display Readability | Essential for quick assessments | Immediate understanding |
| Larger Screen Sizes | Improves visibility | Easier to read in dim light |
| User-Friendly Interfaces | Enhances wayfinding | Effortless data access |
| Color-Coded Alerts | Quick status updates | Instant recognition of hazards |
| Touch Controls | Simplifies interactions | Intuitive user experience |
Monitors with larger screen sizes, like the 5-inch LCD on the AirVisual Pro, enhance accessibility, especially for those with visual impairments. User-friendly interfaces, incorporating touch controls and intuitive layouts, make wayfinding through data a breeze. While mobile apps enable remote monitoring, the initial display readability remains vital for on-the-spot assessments, ensuring you can act quickly.
App Integration Benefits
App integration greatly enhances the user experience of air quality monitors by enabling remote monitoring and real-time data tracking on your smartphone. With app integration, you can receive instant alerts about air quality changes, ensuring you stay informed without constant manual checking.
Many monitors seamlessly connect with popular smart home ecosystems like Apple Home and Google Home, allowing for automated responses alongside your other devices.
Mobile apps often include historical data tracking, giving you insights into air quality trends over time. This information empowers you to make informed health decisions. A user-friendly interface simplifies interaction, making it easy to set up customizable notifications for specific pollutant levels, so you're only alerted when it matters most.
Additionally, enhanced data visualization tools within these apps help you quickly interpret complex air quality metrics. You can easily grasp the implications of the data and take actionable steps to improve your environment.
Frequently Asked Questions
What to Look for When Buying an Air Quality Monitor?
When buying an air quality monitor, you should look for multiple pollutant detection, real-time alerts, user-friendly displays, smart home integration, and historical data tracking. These features help you manage and understand your indoor air quality effectively.
What Are the Most Important Air Quality Indicators?
When evaluating air quality, focus on PM2.5 and PM10 levels for respiratory health, monitor CO2 to prevent cognitive issues, and watch VOCs for potential health effects. Humidity and temperature also greatly influence overall air quality.
What Are the Most Important Air Quality Parameters?
When considering air quality parameters, you should focus on PM2.5, PM10, VOCs, CO2 levels, humidity, and temperature. These factors directly impact health, comfort, and overall indoor air quality, influencing your daily well-being.
What Are the Features of Air Quality Monitor?
When choosing an air quality monitor, don't worry about complexity. You'll want real-time data, historical tracking, user-friendly interfaces, and integration with smart systems to effortlessly improve your indoor environment and stay informed about air quality.
Conclusion
In choosing an air quality monitor, think of it as selecting a trusted companion on a journey to better health. Just like you'd want a reliable map for a road trip, the right monitor provides you with accurate data to navigate your environment. With various features and price ranges, you're sure to find one that fits your needs. Remember, the clearer the air, the clearer your path to wellness—breathe easy, knowing you've made an informed choice.
Xavier – Your Operations Partner Xavier is your operations partner, working tirelessly behind the scenes to ensure that everything runs smoothly so you can enjoy a seamless experience with Perfect Fit Living. From managing inventory to coordinating logistics, he’s committed to making your experience with us hassle-free.
-

 Vetted8 months ago
15 Best EMS Foot Massagers for Neuropathy to Soothe Your Feet
-

 Vetted7 months ago
14 Best Personalized Father's Day Gifts for Your Husband – Show Him You Care
-

 Alfresco7 months ago
Alfresco Stacker Doors: Seamless Indoor-Outdoor Living!
-

 Tableware and Dining Accessories2 weeks ago
What Is the Meaning of the Word Tableware
-

 Tableware and Dining Accessories2 weeks ago
When Is Tableware on Sale at Hobby Lobby
-

 Tableware and Dining Accessories2 weeks ago
Which of the Following Is Not Classified as Tableware
-

 Craft and Textiles8 months ago
15 Best Places to Buy Appliances for Your Home – Top Retailers Reviewed
-
 Vetted6 months ago
Battle Born Batteries Review: Reliable Power Solution


