Starting DIY home improvement is exciting and approachable for beginners. Focus on simple projects like repainting walls, installing shelves, or updating fixtures such as lighting or faucets. Gather basic tools like a screwdriver, hammer, and tape measure, and prepare your space by clearing clutter and covering furniture. Follow step-by-step guides for painting or installing storage, and always prioritize safety. Keep exploring different projects to build confidence—more helpful tips and tricks await your next project.
Key Takeaways
- Start with simple projects like repainting walls or updating hardware for quick, visible results.
- Prepare your workspace by clearing clutter, covering furniture, and organizing tools for efficiency.
- Use basic hand tools and safety gear to ensure safe and effective completion of DIY tasks.
- Follow proper surface prep and painting techniques for a professional-looking finish.
- Upgrade fixtures and install storage solutions to enhance space functionality and aesthetics.

DEKOPRO Tool Set:Tool Kit with 8V Cordless Drill,Tool Box with Drill,Hand Drill Set for Men & Women,Home Tool Kits for House Repair,Handyman,DIY 126 Piece
【Lightweight Cordless Drill】The 8V drill set can be used for drilling in wood and plastic, and tightening/loosening screws.Press…
As an affiliate, we earn on qualifying purchases.
As an affiliate, we earn on qualifying purchases.
Choosing Your First Project: Easy and Manageable Ideas

If you’re new to DIY home improvement, starting with simple and manageable projects can build your confidence and skills. Begin by choosing projects that don’t require advanced techniques or extensive time, like repainting a wall or updating cabinet hardware. When selecting your first project, consider decorating tips that can instantly refresh a space without costly renovations. Budget planning is essential—set a realistic budget to avoid overspending and to help prioritize materials and tools. Focus on projects that give visible results quickly, boosting your motivation. Keep it simple and gradually take on more complex tasks as you gain experience. Remember, the goal is to enjoy the process and learn, not to perfect everything on your first try. Additionally, understanding resources and tools available for DIY projects can help you find guidance and support throughout your home improvement journey. Exploring project planning techniques can further streamline your efforts and ensure successful outcomes. Learning about basic carpentry or painting skills can also provide a solid foundation for more advanced projects in the future. For beginners, choosing a project that aligns with your dog’s names or other personal interests can make the experience more engaging and enjoyable. It’s also helpful to look into the best beginner tools to ensure you have the right equipment to start with confidence.

Pro Grade Paint Roller Kit, Brush & Roller,10 Piece Set, Wall Painting Naps for Professionals & Homeowners – All Paints & Stains, Washable, Reusable, Easy to Clean, Superior Absorbency.
Complete Painting Solution: This ten piece set includes everything for interior paint jobs; use paint brushes for walls…
As an affiliate, we earn on qualifying purchases.
As an affiliate, we earn on qualifying purchases.
Essential Tools and Supplies for Beginners

To get started, you’ll need some basic hand tools like a hammer, screwdriver, and tape measure. Essential power tools such as a drill and saw will make your projects easier and faster. Don’t forget safety gear like goggles and gloves to protect yourself while working. Additionally, understanding best laundry detergents can help you keep your work clothes clean and fresh after completing your projects.
Basic Hand Tools
Equipping your toolbox with the right basic hand tools is the first step toward successful DIY home improvements. Start with a hammer, screwdrivers (both flathead and Phillips), a tape measure, and pliers. These tools handle most everyday tasks. To keep your tools in top shape, practice hand tool maintenance by cleaning and storing them properly. Good tool storage solutions, like a toolbox or wall-mounted racks, help prevent damage and make your workspace efficient. A set of adjustable wrenches and a utility knife add versatility. Remember, quality tools last longer and perform better, making your projects easier. Building a solid collection of basic hand tools sets the foundation for tackling more complex projects with confidence.
Essential Power Tools
Starting with the right power tools can substantially boost your DIY projects. A power drill is essential because it handles drilling holes and driving screws quickly and efficiently. Look for one with adjustable speed settings for versatility. A cordless screwdriver is also a must-have; it simplifies driving screws into different materials without the hassle of cords. Both tools save you time and reduce effort, making your projects smoother. Choose lightweight models that are easy to handle, especially if you’re just starting out. Consider batteries with long life to avoid frequent recharging. These tools form the backbone of many home improvement tasks, from assembling furniture to hanging shelves. Investing in quality power tools now guarantees you’re prepared for a wide range of projects ahead.
Necessary Safety Gear
Safety should always come first when tackling home improvement projects. Wearing the right personal protective equipment helps prevent injuries and keeps you hazard aware. Essential safety gear includes:
- Safety glasses or goggles to protect your eyes from debris
- Dust masks or respirators for airborne particles
- Work gloves to prevent cuts and splinters
These supplies are crucial for maintaining hazard awareness and reducing accidents. Always check that your safety gear fits properly and is in good condition. Remember, investing in quality protective equipment can make a significant difference in your safety. Never skip safety gear, even on small tasks. Staying alert and prepared ensures your DIY projects stay safe and enjoyable from start to finish. Additionally, understanding electric dirt bike safety features can be beneficial if working around motorized tools.
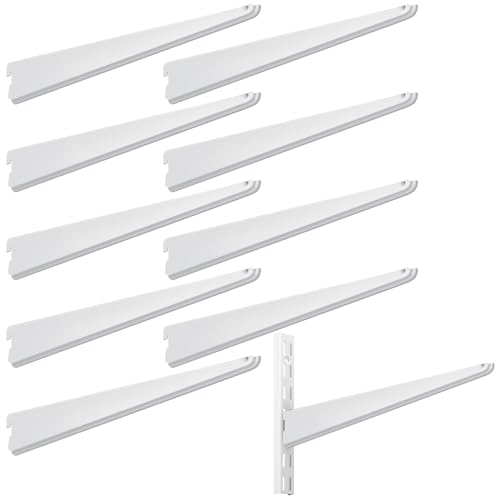
Yalikop 10 Pack Adjustable Shelf Brackets for Double Track System Closet Organization Heavy Duty Wire Shelf Brackets (White,11.5 Inches)
Comprehensive Package: our package consists of 10 adjustable shelving brackets, easy installation without tools, designed to cater to…
As an affiliate, we earn on qualifying purchases.
As an affiliate, we earn on qualifying purchases.
How to Prepare Your Space Before Starting

Before diving into your home improvement project, it’s essential to clear and organize your workspace. Start by removing furniture or covering it with drop cloths to protect it from dust and paint splatters. Organize your tools and supplies, ensuring everything you need is within reach to avoid interruptions. Consider storage organization to keep your workspace tidy and efficient. Before selecting paint colors, make sure the area is clean and well-lit so you can accurately see how different shades will look. Remove unnecessary items and declutter the space to create a safe, open environment. Proper prep prevents accidents, saves time, and makes your project smoother. Additionally, understanding self watering plant pots can inspire you to incorporate low-maintenance greenery into your space, enhancing your environment and productivity. Exploring water-resistant materials can also help you choose durable finishes suitable for areas prone to moisture, ensuring longevity in your renovation. Incorporating modern fixtures like a best modern toilet or updated shower can also elevate your renovation’s overall look and functionality. Taking these steps ensures you’re ready to work confidently and effectively on your DIY home improvement project.

Under Cabinet LED Lighting Kit Plug in or Hardwired, 6 pcs 12 Inches Light Strips, 2000 Lumen, Super Bright, for Kitchen Counter, Closet, Shelf Lights, 31W, Warm White (6 Bars)
【Super Bright】 —31W bright warm white cabinet lighting kit. No LED dots. No light glaring.
As an affiliate, we earn on qualifying purchases.
As an affiliate, we earn on qualifying purchases.
Step-by-Step Guide to Painting a Room

Before you start painting, make sure your space is well-prepared by covering furniture and taping edges. Once everything’s set, you can focus on applying the paint smoothly and evenly. Following these steps will help you achieve a professional-looking finish with less hassle. Additionally, using high-quality exfoliating products like glycolic acid can enhance your skin’s appearance, ensuring you look your best during and after your DIY project. Remember that proper dream interpretation techniques can also help you gain insights and clarity, much like preparing your space sets the stage for a successful painting project.
Preparing the Space
Have you ever wondered why proper preparation makes all the difference when painting a room? It’s the key to a smooth, professional-looking finish. Start by clearing the space and removing furniture or arranging it to maximize access and minimize obstacles. Cover remaining items with drop cloths to protect them from paint splatters. Tape off edges, trim, and switches for sharp lines. This step is also perfect for considering decorating ideas—like accent walls or color schemes—that suit your style. Proper preparation guarantees a clean, even surface and prevents accidents or damage. Additionally, understanding the importance of surface prep can significantly enhance the durability and appearance of your paint job. Incorporating ergonomic workspace principles during prep can also make the painting process more comfortable and less tiring. Plus, it makes the whole process more enjoyable and efficient. When your space is well-prepped, you’ll find painting feels easier, and your results look more polished. Moreover, knowing about pinball machine weights can help you better plan for moving and positioning heavier equipment if you decide to incorporate game rooms into your home improvement projects.
Applying the Paint
Are you ready to start applying the paint? Begin with your chosen paint color selection, ensuring it complements your space. Dip your brush into the paint and use smooth, even brush techniques to avoid drips and streaks. Start by cutting in along edges and corners, then move to larger wall areas with long, consistent strokes. Keep a wet edge to prevent visible lines. For best results, don’t overload your brush—less paint helps control application and reduces drips. Work systematically to cover each section evenly. Take your time, and don’t rush the process. Proper brush techniques combined with careful paint color selection will give your room a professional finish. Once finished, let the first coat dry before deciding if a second is needed for full coverage. Additionally, using the right brush techniques can significantly improve the finish quality and reduce the need for touch-ups later. Remember that maximizing space and organization in your workspace can make your painting project more efficient and enjoyable.
Installing Shelves and Storage Solutions
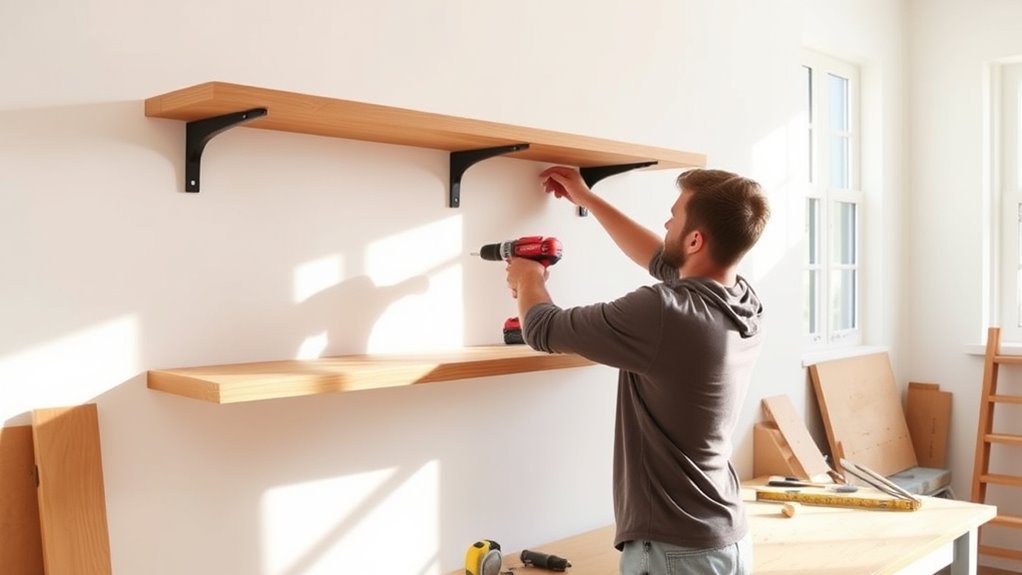
Thinking about adding extra storage to your home? Installing shelves and storage solutions is a simple way to maximize space and showcase decorative wall accents. To get started, consider these key tips:
- Use sturdy brackets and quality anchors to guarantee your shelves hold up over time.
- Mix functional storage with decorative elements to enhance your space’s style.
- Organize items effectively by applying storage organization tips—group similar items and keep everyday essentials within reach.
Choose open shelves for display and closed options for clutter. Properly installed shelves can serve as both practical storage and eye-catching decor. Keep safety in mind and mark stud locations for secure mounting. With these tips, you’ll create a tidy, attractive space that’s easy to maintain.
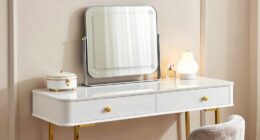
Upgrading Fixtures: Lighting, Faucets, and Handles
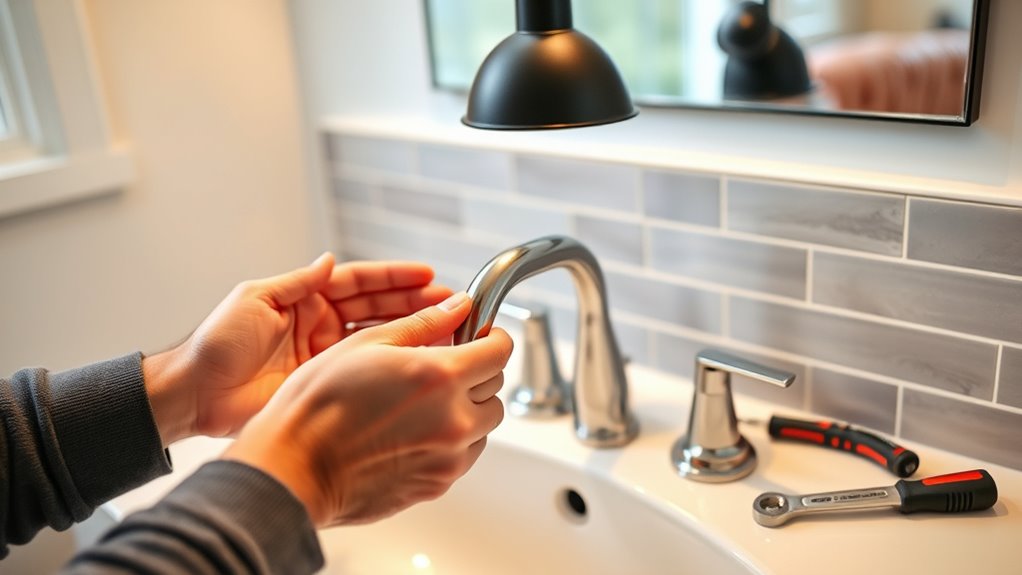
Looking to give your home a fresh look? Upgrading fixtures like lighting fixtures, faucets, and handles is an easy way to do just that. Start by swapping out old lighting fixtures for modern, energy-efficient options that brighten your space and add style. When it comes to faucet upgrades, replacing outdated or leaky faucets with sleek, functional models can improve both aesthetics and performance. Don’t forget to update handles on cabinets and drawers—new hardware makes a noticeable difference. These upgrades are straightforward and cost-effective, and they give your home a polished, refreshed feel. With a few simple tools and some basic instructions, you can successfully complete these projects and enjoy the improved look and functionality of your spaces.
Frequently Asked Questions
How Do I Ensure Safety During DIY Home Projects?
To guarantee safety during your projects, always wear appropriate safety gear like goggles, gloves, and masks to protect yourself from hazards. Keep your workspace organized, and use tools correctly. Prepare for emergencies by having a first aid kit nearby and knowing emergency procedures. Stay alert, avoid distractions, and don’t rush. These steps help you stay safe and handle unexpected situations confidently during your DIY endeavors.
What Are Common Mistakes to Avoid as a Beginner?
Think of avoiding mistakes like steering clear of potholes on a road trip. As a beginner, you should prioritize power tool safety by reading instructions carefully and wearing protective gear. Always store tools properly to prevent accidents and damage. Rushing through tasks can lead to mistakes, so take your time. Keeping safety in mind and organizing supplies helps you stay on the right path, making your project safer and more successful.
How Can I Estimate Project Costs Accurately?
To estimate project costs accurately, you should start with detailed budget planning. List all materials you’ll need and research current prices through reliable material sourcing. Include extra funds for unexpected expenses, and don’t forget to add labor costs if applicable. Comparing prices from different suppliers helps you find the best deals. Regularly update your estimates as you gather more information to stay within your budget and avoid surprises.
What Are Eco-Friendly Materials Suitable for DIY?
You want to know about eco-friendly materials suitable for DIY projects. Consider sustainable options like bamboo, reclaimed wood, and recycled metal for durability and environmental benefits. For finishes, eco-friendly paints with low VOC content are great choices, reducing indoor air pollution. These materials help you create sustainable spaces while minimizing environmental impact. Always check product labels to ascertain they meet eco standards, making your project both eco-conscious and stylish.
How Do I Handle Unexpected Issues During Projects?
Ever faced unexpected challenges that seem to pop up like surprise guests? When handling these issues, stay calm and assess the situation carefully. Use troubleshooting tips like checking tools, re-reading instructions, or seeking advice from online forums. Remember, setbacks are part of the process. By staying adaptable and patient, you’ll turn unexpected challenges into valuable learning experiences, ensuring your project stays on track without frustration.
Conclusion
So, now you’re officially a DIY aficionado—well, almost. With your newfound skills, you can confidently take on that “simple” project that’ll surely turn into a masterpiece… or at least a funny story. Remember, every mistake is just a fancy way of saying “learning experience.” So go ahead, grab that hammer, roll up those sleeves, and transform your home—because who needs professionals when you’ve got determination and a sprinkle of stubbornness?