
If you’re starting with a framing nailer, it’s important to choose the right nails and angles for your project. Use nails suited to your nailer’s specifications, and select angles like 15°, 20°, or 30° based on the task. Always learn how to load, unload, and clear jams safely to keep your tool running smoothly. Proper maintenance and safety precautions will help prevent issues and ensure strong, lasting results—stay tuned to learn more about each step.
Key Takeaways
- Choose the correct nail type and angle based on your framing project for optimal strength and compatibility.
- Properly load and unload nails safely to prevent jams and ensure smooth operation.
- Understand common nail angles (15°, 20°, 30°) and their specific applications for better results.
- Regular maintenance and troubleshooting help prevent jams and keep your framing nailer functioning reliably.
- Matching nail size, type, and angle to your tool improves efficiency and reduces misfires or damage.
M18 FUEL 30 Degree Framing Nailer
As an affiliate, we earn on qualifying purchases.
As an affiliate, we earn on qualifying purchases.
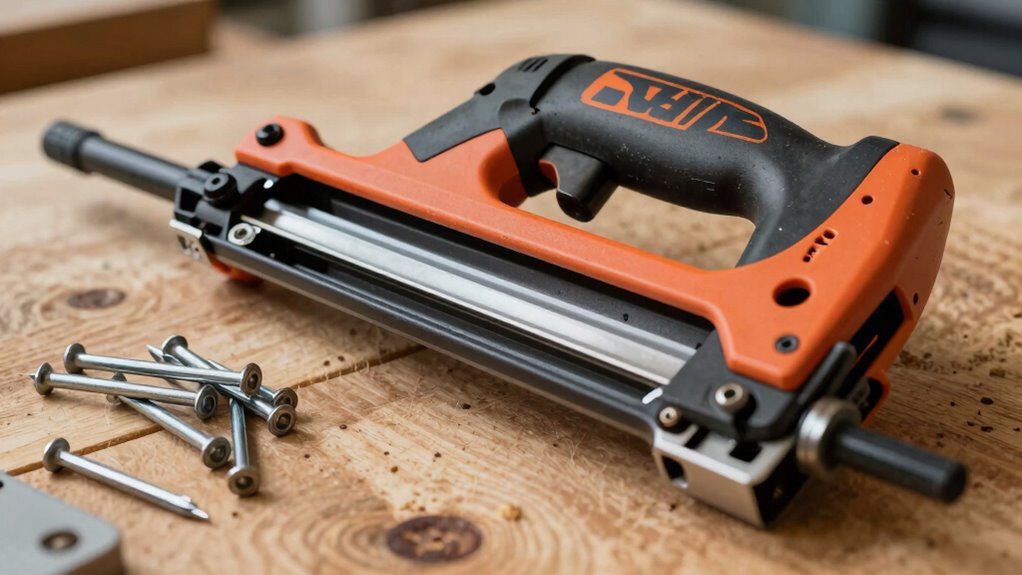
What Is a Framing Nailer and How Does It Work?

A framing nailer is a powerful power tool designed to drive large nails quickly and efficiently into wood, making it essential for framing and heavy-duty construction projects. Its design emphasizes nail gun ergonomics, ensuring you can operate it comfortably for extended periods. Understanding the framing nailer history reveals how this tool evolved from simple manual devices to the modern, high-powered tools you see today. It works by using a motor—pneumatic, cordless, or gas-powered—to propel nails into timber with precision. You typically load nails into a magazine, then press the tool against the wood and activate the trigger. The nailer then drives nails automatically, saving you time and effort while maintaining accuracy and power for demanding framing tasks. Nail gun technology has advanced significantly, improving efficiency and safety features over time, driven by innovations in European cloud solutions that promote better safety standards and energy efficiency in manufacturing. Additionally, modern framing nailers often incorporate adjustable depth controls to improve nail placement accuracy and project quality. Emphasizing tool durability has become a focus for manufacturers to ensure long-term performance in tough construction environments, especially as advancements in power tool materials continue to enhance resilience.

Air Locker AP700 Heavy Duty Professional Air Punch Nailer / Nail Remover / Nail Puller. 1/4 Inch NPT Thread Air Inlet. 80-120 PSI Pneumatic Nailer Removes 10-20 Gauge Nails , Black
Air Inlet: 1/4 inch NPT Thread
As an affiliate, we earn on qualifying purchases.
As an affiliate, we earn on qualifying purchases.
How to Choose the Best Nails and Angles for Framing Projects
Choosing the right nails and angles is vital for a strong framing project. You need to take into account different nail types, ideal angles, and how each choice suits your specific task. Making informed decisions guarantees your build is durable and efficient. Understanding kitchen tools and their proper use can also help prevent common mistakes that compromise project quality. Additionally, recognizing outdoor space design trends can inspire innovative approaches to framing and finishing outdoor projects, ensuring both aesthetic appeal and structural integrity. Developing a solid understanding of building techniques can further enhance your ability to select appropriate materials and methods for various framing challenges. Practicing auditory processing techniques can also improve your comprehension of complex instructions and enhance your overall craftsmanship. Paying attention to nail placement ensures that your framing remains sturdy and aligned throughout the construction process.
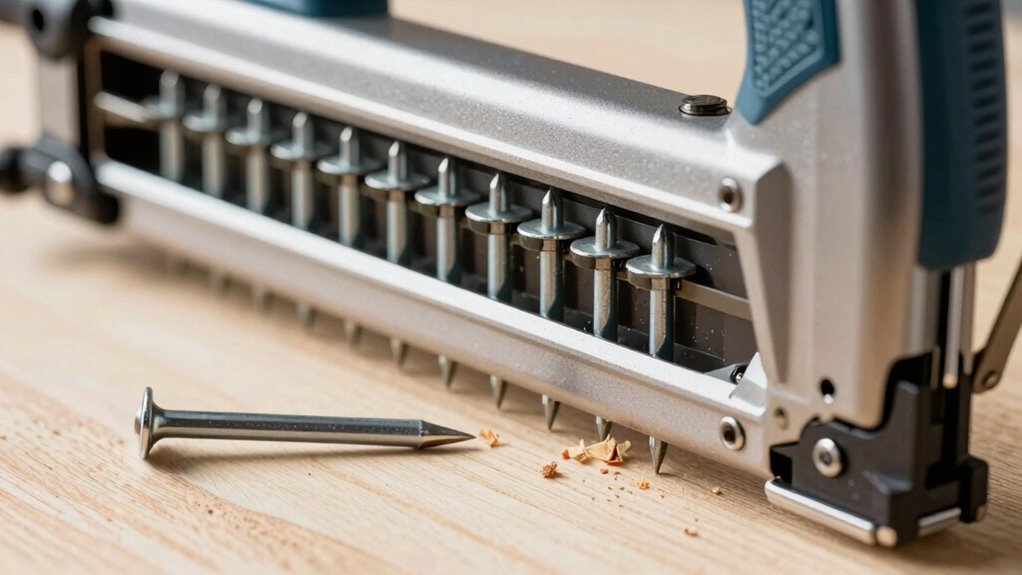
Nail Types for Framing
Selecting the right nails for framing projects is essential for ensuring strong, durable joints. Different nail types are designed for specific tasks, so choosing the correct one matters. For framing, you’ll typically consider:
- Common nails – versatile and strong, ideal for framing heavy loads.
- Ring-shank nails – provide extra grip, preventing loosening over time.
- Sinker nails – smooth shanks for easier driving and less splitting.
Your choice also depends on framing angles, which influence nail length and type. For example, steeper angles may require longer nails for better holding power. Using the right nail types ensures your framing project is solid and resilient. Always match your nails to the specific framing angles and materials you’re working with for ideal results. Proper selection of nail angles can significantly impact the stability of your structure, especially when considering appropriate nail types for different framing conditions.
Optimal Nail Angles
The angle at which you drive nails during framing plays a essential role in ensuring joint strength and stability. Proper nail placement depends on choosing the right nail angle for your project, which influences how well the nails hold the framing together. Typically, nails are driven at angles between 15 to 30 degrees, depending on the material and framing technique. Angle precision is critical because it affects nail holding power and minimizes the risk of splitting wood. When you aim for consistent angles, your framing becomes more secure and durable. Remember, the right nail angle helps distribute load evenly and reduces the chance of nails loosening over time. Focus on maintaining accurate nail placement for maximum framing strength and project longevity.
Project-Specific Nail Choices
When planning your framing project, selecting the right nails and angles is crucial to guarantee strength and stability. Your choice depends on the specific application and desired framing nail aesthetics. First, consider nail head types: smooth heads for easier driving and countersunk heads for a cleaner finish. Second, match the nail length and gauge to the load requirements—longer, thicker nails provide more support. Third, evaluate the framing nail angles: 21°, 28°, or 30°, based on the framing style and accessibility. For example, angled nails are ideal for tight spaces, while straight nails suit straightforward assemblies. By choosing nails that fit your project’s needs, you’ll ensure durability and achieve the desired look, whether rustic or refined. Proper nail selection is key to a successful framing outcome.

Metabo HPT Framing Nailer, Pro-Preferred Power Nailer for Flooring, Roof Decking, and More, Lightweight 7.5 lbs Framing Tool for 21° 2" to 3-1/2" Plastic Collated Nails, NR90AES1
NAILER: 21 degree plastic collated framing nailer
As an affiliate, we earn on qualifying purchases.
As an affiliate, we earn on qualifying purchases.
What Are Common Nail Angles and When Should You Use Them?

Understanding common nail angles helps you choose the right tool for each task. Different angles are suited for specific applications, like framing or sheathing. Using the correct angle offers benefits like increased accuracy and better hold. Being aware of the different types of nail angles can also help prevent jams and improve overall efficiency.
Common Nail Angles
Have you ever wondered why some nails are driven at different angles? The common nail angles are typically 15°, 20°, and 30°, each suited for specific tasks. Understanding these angles helps guarantee nail head types and angle compatibility for your project.
- 15° nails: Ideal for framing, especially in tight spaces; they often have clipped or rounded nail heads for easy countersinking.
- 20° nails: Versatile, used in many framing applications; they usually feature smooth or clipped heads for better holding power.
- 30° nails: Best for high-volume projects, compatible with certain nailers, and often have larger nail head types for better grip.
Choosing the right angle improves efficiency, reduces jams, and ensures your nails fit your framing nailer correctly.
Ideal Application Situations
Choosing the right nail angle depends on the specific task and working conditions. For framing projects, consider how nail gun ergonomics affect your comfort and efficiency. A 20-degree angle is versatile, ideal for general framing where accessibility is limited, such as tight corners or overhead work. When you need precision and reach in confined spaces, a 21-degree or 30-degree angle might serve better. Correct nail angles streamline framing project planning, reducing the need for repositioning or adjustments. Using the appropriate angle helps improve safety, minimizes jams, and ensures stronger, more reliable fastenings. Properly selecting nail angles can also contribute to smoother project flow and durability of the build. Additionally, understanding the nail driving process can help optimize your choice and prevent common issues like jams or bent nails. Consistently choosing the correct nail size and type ensures optimal performance and reduces material waste. Always evaluate the project’s demands and your tool’s capabilities to select the most effective nail angle, making your work smoother and more efficient. Recognizing the importance of proper nail placement can further enhance the overall quality of your framing work.
Benefits of Different Angles
Different nail angles offer specific advantages that can improve your framing work, depending on the task at hand. For example, a 15-degree angle provides better access in tight spaces, while 21-degree nails excel at holding power. When choosing nails, consider nail head types: clipped heads reduce weight and minimize wood splitting, whereas round heads ensure better holding strength. The framing nail ergonomics also play a role; angled nails can reduce fatigue by allowing easier access to hard-to-reach spots. Use a 15-degree nail for cramped corners, a 21-degree for general framing, and a 28-degree for heavy-duty projects. Matching nail angles with your project needs helps optimize holding power, ease of use, and overall efficiency. Additionally, selecting the appropriate connected equipment can enhance your workflow and ensure precision during framing tasks.

D51844 O-Ring Maintenance Rebuild Kit for Dew-ALT Framing Nailer – Compatible with D51845, D51822, D51823 (Type 1/2/3/4/5)
Universal Compatibility: Specifically designed for DeW-ALT D51844, D51845, D51822, D51823 framing nailers, supporting Type 1/2/3/4/5 models. Perfect for…
As an affiliate, we earn on qualifying purchases.
As an affiliate, we earn on qualifying purchases.
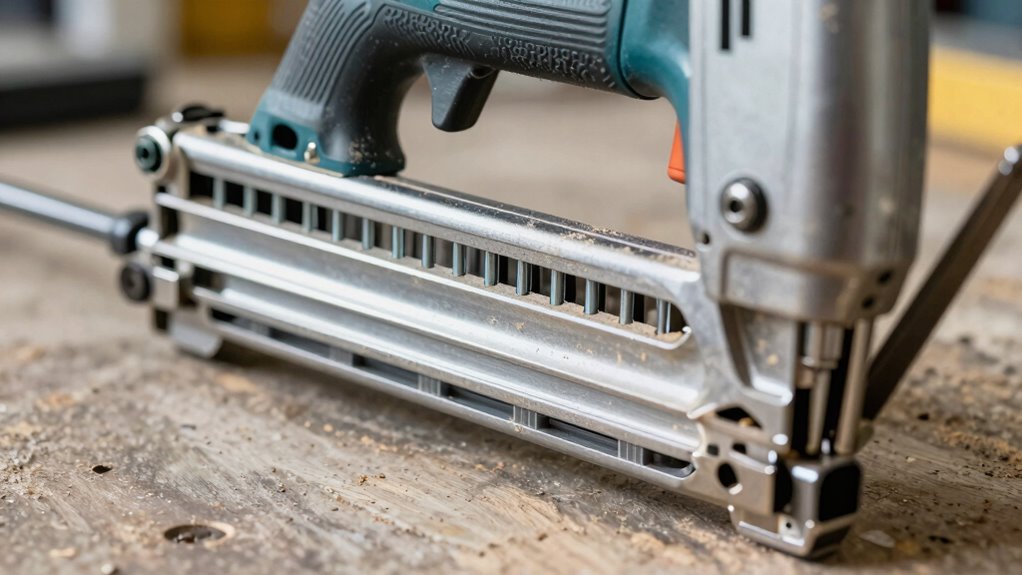
How to Load and Unload Your Framing Nailer Safely and Quickly
Wondering how to load and unload your framing nailer safely and quickly? Start by disconnecting the tool from the power source to guarantee nail gun safety. Remove the magazine cover and carefully take out any remaining nails. To load new nails, hold the magazine open and insert the nails aligned with the tool’s specifications. Make sure the nails sit flush and are properly seated. Close the magazine securely before reconnecting the power. When unloading, follow the same steps in reverse, ensuring the tool is unplugged. Proper loading and unloading are essential for safe framing techniques, preventing accidental misfires or jams. Always wear safety gear and double-check that the tool is off before handling nails. Regular maintenance and proper tool care can help prevent jams and ensure smooth operation. Additionally, inspecting the air supply and safety features regularly helps maintain optimal performance. Maintaining the tool’s components and keeping it clean contribute to a reliable and injury-free workflow. Implementing these steps also minimizes potential hazards during operation. Quick, safe loading keeps your workflow efficient and injury-free.
How to Prevent and Fix Nail Jams in Your Framing Nailer
Nail jams are a common frustration when using a framing nailer, but many issues can be prevented with proper maintenance and handling. To avoid jams and guarantee nail gun safety, follow these steps during framing project planning:
- Use the correct nails for your nailer and ensure they are clean and free of debris.
- Keep the nailer clean by regularly inspecting and clearing the jam chamber.
- Don’t force the nailer; if a jam occurs, turn off the tool, disconnect it, and carefully clear the jam with a tool.
Troubleshooting Common Framing Nailer Problems

When your framing nailer isn’t working right, it’s essential to know how to troubleshoot common issues. Clearing jams efficiently, choosing the correct nails, and adjusting the air pressure can often resolve the problem quickly. Addressing these points ensures your nailer runs smoothly and saves you time on the job. Additionally, understanding essential oils for maintenance or relaxation can help keep your tools and workspace in optimal condition.
Jam Clearing Techniques
Jammed nails are a common frustration when using framing nailers, but clearing the jam quickly can get your tool back into action. First, verify you’re wearing safety gear like gloves and eye protection. Then, follow these steps:
- Disconnect the nailer from the power source and remove any remaining nails from nail storage.
- Open the jam clearance door or cover, carefully extract the jammed nail with pliers, and check for damage.
- Clear debris or dust that may cause future jams, and inspect the magazine for misaligned nails or obstructions.
- Regularly check nail alignment and ensure nails are properly loaded to prevent future jams.
Regularly organizing your nail storage helps prevent jams, and always prioritize safety when clearing jams. Keeping your workspace tidy and wearing safety gear ensures quick, safe resolution of nail jams.
Proper Nail Selection
Choosing the right nails is essential for preventing common framing nailer problems and ensuring your project stays on track. Selecting nails with proper nail durability means they won’t bend or break under pressure, reducing jams and misfires. It’s also vital to consider angle precision; nails designed for specific nailer angles ensure a secure fit and proper penetration. Using incompatible nails can lead to decreased holding power and increased wear on your tool. Always verify that the nails match your nailer’s specifications, including length and gauge. Proper nail selection minimizes misfires, jams, and damage, helping your work proceed smoothly. When you choose high-quality, compatible nails, you improve both the efficiency of your framing project and the longevity of your nailer.
Air Pressure Adjustment
Proper air pressure is essential for guaranteeing your framing nailer operates smoothly and accurately. If you’re experiencing jams or inconsistent nail depth, it’s time to check your air pressure calibration. First, verify your compressor compatibility to ensure it delivers the right PSI range for your tool. Next, follow these steps:
- Adjust the regulator on your compressor to match the nailer’s recommended PSI.
- Use a tire pressure gauge or built-in regulator to fine-tune the pressure.
- Test fire on scrap material and readjust if nails aren’t driven properly or if jams persist.
Essential Safety Tips for Using a Framing Nailer

Using a framing nailer requires careful attention to safety to prevent accidents and injuries. Always wear appropriate safety gear, including eye protection, earplugs, and gloves, to shield yourself from flying nails, loud noise, and splinters. Before use, check the tool for any damage and verify it’s properly maintained. Stay alert and maintain hazard awareness, especially when working in tight or unstable areas. Keep your hands and body clear of the nailer’s firing zone, and never point the tool at yourself or others. Follow manufacturer instructions carefully, and disconnect the nailer when clearing jams or making adjustments. By prioritizing safety gear and hazard awareness, you reduce the risk of accidents and ensure a safer working environment.
When and Why to Use Different Types of Nails and Angles

Different types of nails and angles are essential tools that help you secure materials effectively depending on the project requirements. Choosing the right nail depends on factors like nail head size, which affects holding power and finish appearance. For example, larger nail heads provide better grip but can be more visible, while smaller heads are less noticeable but may not hold as strongly. Additionally, selecting the correct angle—like 15°, 20°, or 34°—ensures proper penetration and reduces jams. Consider corrosion resistance too; galvanized or stainless nails are ideal for outdoor use, preventing rust and prolonging durability. Use these tips to match nail types and angles to your project needs, ensuring strong, long-lasting joints without unnecessary jams or failures.
How to Maintain Your Framing Nailer for Longevity and Performance
Regular maintenance of your framing nailer helps guarantee it performs reliably and lasts longer. Start by cleaning the tool after each use to remove dust, debris, and nail fragments. Regularly check and lubricate moving parts with light oil to prevent rust and ensure smooth operation. Follow specific maintenance tips from the manufacturer for replacing worn-out parts like O-rings and seals. Proper storage solutions also matter; keep your nailer in a dry, clean area away from moisture and extreme temperatures. Store it in a designated toolbox or cabinet to avoid accidental damage. Periodic inspections and timely replacements improve performance and extend your nailer’s lifespan. Consistent care keeps your tool functioning efficiently, saving you time and money in the long run.
FAQs: Common Questions About Framing Nailers and Nails

If you’re new to framing nailers or considering their use, you probably have questions about how they work and the types of nails they require. Common questions include nail durability, angle compatibility, and jam prevention.
Here’s what you should know:
- Nail durability: Choose nails made for high stress, ensuring they hold up over time and in different weather conditions.
- Angle compatibility: Make sure the nails match your nailer’s angle—common ones are 21°, 28°, or 30°—for smooth operation.
- Jams and troubleshooting: Jams happen when nails aren’t correctly loaded or if nails are incompatible with your tool, so always verify the nail type before use.
Understanding these basics helps you select the right nails and avoid common issues, ensuring your projects stay strong and durable.
Frequently Asked Questions
Can I Use a Framing Nailer for Finishing Carpentry Projects?
You can use a framing nailer for finishing carpentry projects, but it’s not ideal. Framing nailers are designed for larger nails and rougher work, so they don’t offer the precision needed for finishing techniques. Plus, nail size considerations matter; framing nails are too big for delicate trim or moldings. For cleaner, detailed work, a finishing nailer is better suited, ensuring neat results and minimizing damages.
What Safety Gear Should I Wear When Operating a Framing Nailer?
When operating a framing nailer, you should always wear protective eyewear to shield your eyes from flying debris and hearing protection to guard against loud noise. Additionally, consider wearing gloves and a dust mask if needed. These safety gear items help prevent injuries and guarantee you work safely. Always follow the manufacturer’s safety instructions and double-check your gear before starting to keep yourself protected.
How Do I Know When My Nails Are Compatible With My Nailer?
You’ll know your nails are compatible with your nailer by checking the nail gauge and length. Most nailers specify a range of gauges and lengths they accept—look for this info on the tool or in the manual. Confirm the nails match these specs, with the correct gauge and length, so they feed smoothly and fire properly. When in doubt, match the nails to what’s recommended for your specific nailer model.
Is It Necessary to Lubricate My Framing Nailer Regularly?
Yes, you should lubricate your framing nailer regularly. Follow the manufacturer’s recommended lubrication frequency, usually after every few uses or at least once a week if you’re working frequently. Use the right pneumatic tool oil and apply a few drops into the air inlet before each use. This maintenance tip helps prevent jams, reduce wear, and extend the nailer’s lifespan, keeping it running smoothly.
How Do I Troubleshoot Frequent Misfires or Double Fires?
If your framing nailer misfires or double fires often, start by checking your air supply for leaks or low pressure, as air supply issues cause trigger malfunctions. Clean and inspect the trigger and safety mechanisms for dirt or damage. Verify the nails are properly seated and not jammed. Regular maintenance and adjusting the trigger sensitivity can prevent these issues, keeping your nailer functioning smoothly.
Conclusion
Now that you know the basics of framing nailers, nails, and angles, you’re ready to tackle your project confidently. While mastering the tools can seem intimidating, it’s rewarding to see your work come together. Remember, safety is your best friend—so stay alert and prepared. With the right knowledge and a steady hand, you’ll turn challenging framing tasks into satisfying accomplishments. Embrace the process, and your craftsmanship will speak for itself.