
To ensure precise cuts, start by properly zeroing and aligning your miter saw, using a reliable square or digital gauge to set the blade parallel to the fence and table. Double-check your angles before each cut, and verify with test pieces. Keep the fence square and secure, and regularly maintain and calibrate your saw for long-term accuracy. Master these setup tricks, and you’ll gain access to professional-level precision every time. Keep going to learn more expert tips.
Key Takeaways
- Regularly calibrate and align the miter and bevel angles using reliable measurement tools like squares or digital gauges.
- Use test cuts on scrap material to verify and fine-tune the accuracy of angles and fence alignment.
- Keep blades sharp, clean, and properly installed to ensure precise, smooth cuts and prevent inaccuracies.
- Consistently check and square the fence to the blade for accurate material positioning during cuts.
- Maintain dust collection systems and clean saw surfaces to improve visibility and measurement precision.

Wixey Digital Angle Gauge | Digital Angle Finder for Table Saw & Miter Saw (Magnetic) – Precision Bevel & Compound Angle Measuring Tool for Woodworking with Backlight
Ultra-Precise Measurements – Set angles with confidence using the Wixey Digital Angle Gauge. Features 0.1° resolution and ±0.2°…
As an affiliate, we earn on qualifying purchases.
As an affiliate, we earn on qualifying purchases.
How to Zero and Align Your Miter Saw for Accurate Cuts
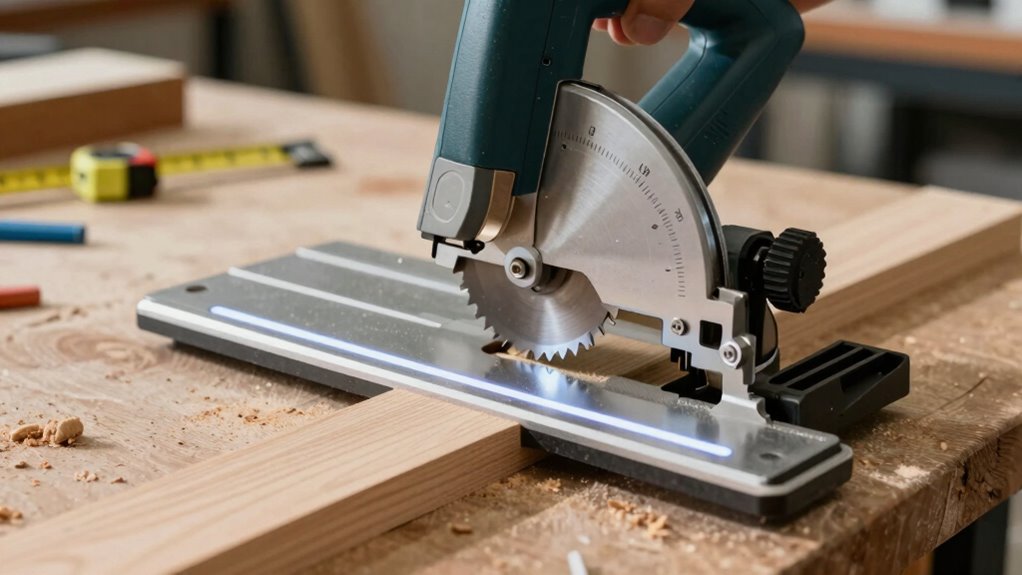
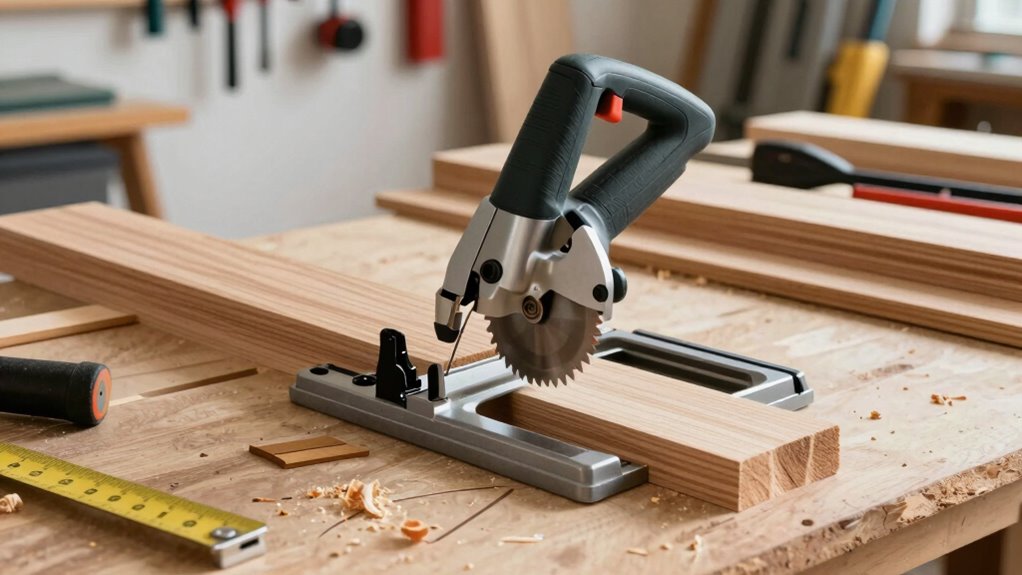
To guarantee your miter saw makes precise cuts, you need to zero and align it correctly. Start by unplugging the saw and wearing safety precautions, like goggles and gloves, to protect yourself. Begin with blade selection—use a sharp, appropriate blade for your project to ensure clean cuts and safety. To zero the saw, loosen the bevel and miter locks, then carefully align the blade with your marked cut line using a square. Double-check the alignment from different angles. Tighten all locks securely once aligned. Regularly inspecting and adjusting your saw ensures consistent accuracy and safety. Proper zeroing prevents uneven cuts and minimizes the risk of kickback, making your work safer and more precise. Additionally, consulting your owner’s manual can provide specific calibration procedures for your model, ensuring optimal performance. Incorporating proper calibration techniques helps maintain your saw’s accuracy over time. It’s also helpful to use a reliable square to verify your measurements and alignments for the most accurate cuts. For added precision, consider checking the blade alignment periodically, especially after transporting or rough handling.

Dremel A679-02 Sharpening Attachment Kit, For Sharpening Outdoor Gardening Tools, Chainsaws, and Home DIY Projects,
Simplified to support your backyard and garden projects and giving your go-to tools a new lease on life….
As an affiliate, we earn on qualifying purchases.
As an affiliate, we earn on qualifying purchases.
Why Proper Miter and Bevel Angles Make or Break Your Projects
Proper miter and bevel angles are vital because they determine how precisely your pieces fit together. If your angles are off, joints won’t align properly, leading to weak or unattractive projects. Choosing the right blade selection is essential, as different blades cut at various angles and materials, impacting accuracy. Accurate angles also reduce the need for rework, saving you time and material. Good dust collection helps maintain visibility and precision during cuts, guaranteeing angles stay consistent. Failing to set proper angles can result in gaps, misaligned corners, or weak joints. By mastering angle adjustments and understanding blade selection, you improve cut quality and overall project durability. Keep dust collection in check to make certain your cuts are clean and precise, making your projects look professional. Proper angle calibration ensures your saw maintains consistent and accurate cuts over time, further enhancing project quality. Additionally, regularly verifying and adjusting your saw’s measurement accuracy helps prevent cumulative errors that could compromise your work. A reliable setup also involves checking safety features, so you can operate confidently and prevent accidents. Regular maintenance of the saw’s components also plays a crucial role in maintaining overall cut precision and safety. Incorporating calibration techniques can further optimize your setup and ensure ongoing accuracy during your projects.
miter saw fence square
As an affiliate, we earn on qualifying purchases.
As an affiliate, we earn on qualifying purchases.
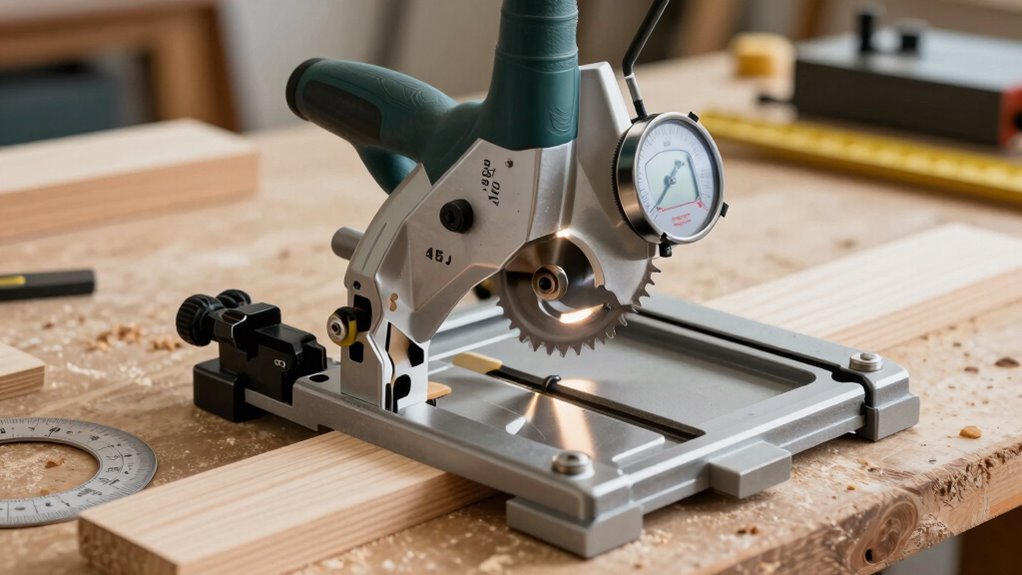
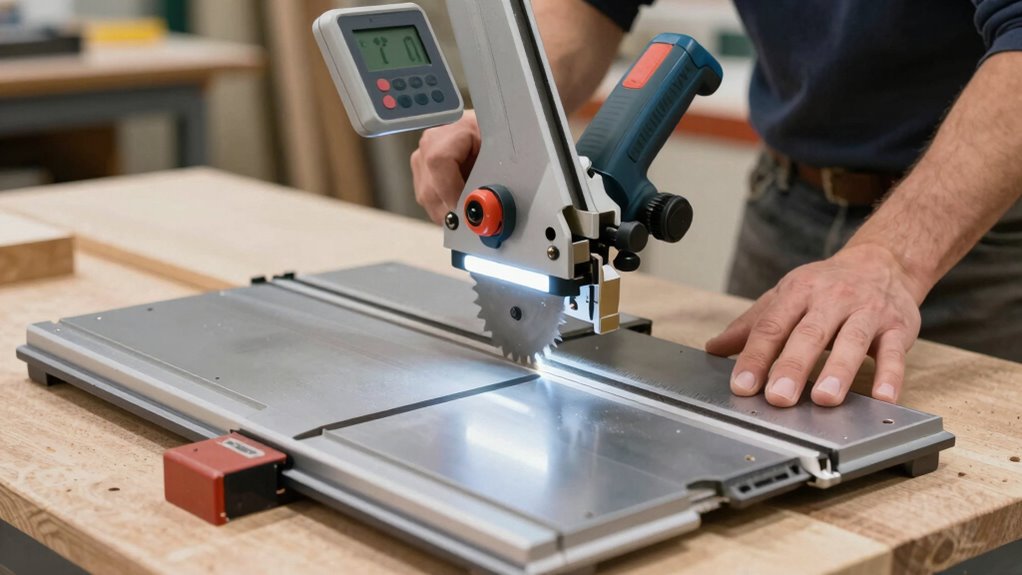
How to Adjust and Verify Your Miter and Bevel Angles
To guarantee your cuts are accurate, you need to calibrate your miter angle first. Then, align the bevel settings so they match your project’s requirements. Finally, verify your adjustments with test cuts to confirm everything is precise. Proper calibration techniques are essential for maintaining consistent and accurate results over time. Incorporating angle measurement tools can further enhance your setup accuracy and confidence in your cuts. Regularly checking your saw’s tool alignment ensures ongoing precision and safety during use. Additionally, understanding workshop safety practices can help maintain optimal airflow and safety in your workshop.
Calibrate Miter Angle
Calibrating your miter angle is essential to guarantee accurate cuts, especially when working on detailed projects. Proper calibration ensures your miter gauge is precise and your blade alignment is spot-on. To verify your miter angle, start by checking the gauge against a reliable angle standard. Use a square or digital angle finder for accuracy. Make adjustments to your miter gauge until the indicated angle matches your measurement. Remember, even slight misalignments can lead to imperfect cuts. Regular calibration maintains your saw’s precision and prevents errors. Keep in mind:
- Confirm the miter gauge’s zero setting
- Check blade alignment with a square
- Use a reliable angle measuring tool
- Recalibrate after any impact or transport
Align Bevel Settings
Aligning your bevel settings is essential for making accurate angled cuts, especially when working on complex projects. Proper bevel alignment ensures your cuts are precise and consistent. To verify your angle calibration, start by setting the bevel to zero and adjusting the saw to your desired angle. Use a reliable square or digital angle gauge for accuracy. Here’s a quick reference:
| Bevel Angle | Adjustment Method | Verification Tool |
|---|---|---|
| 0° | Lock and check | Square or digital gauge |
| 45° | Loosen, adjust, lock | Digital gauge |
| Custom | Fine-tune adjustments | Protractor or digital |
Regularly checking your bevel alignment guarantees your cuts stay true, preventing errors in your projects. Additionally, understanding miter saw setup techniques helps maintain consistent accuracy over time.
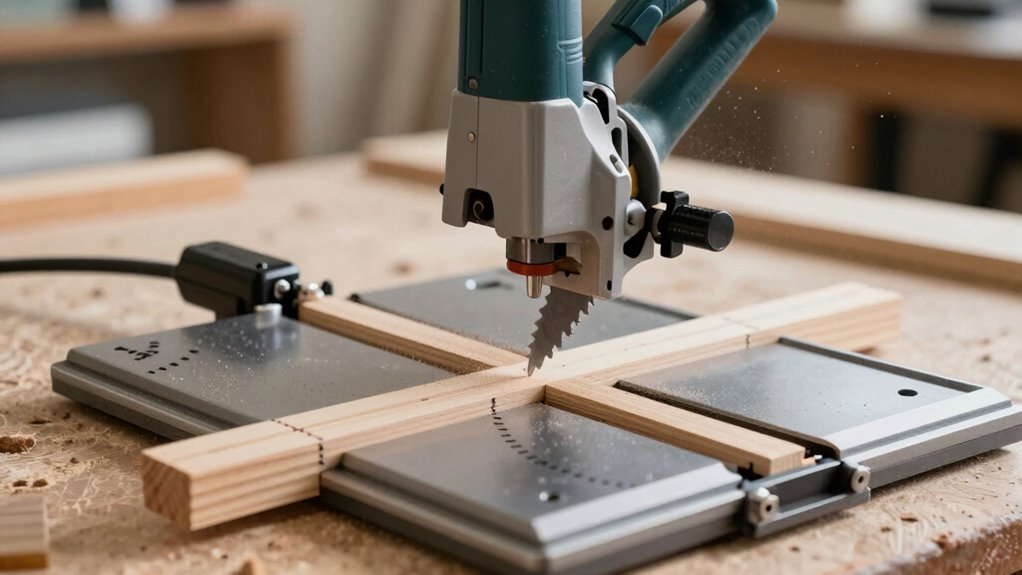
Confirm With Test Cuts
After setting your miter and bevel angles, it’s important to verify their accuracy through test cuts. This step ensures your adjustments are precise and your cuts are perfect. Use scrap wood to make sample cuts, checking the angles with a square or protractor. Remember, blade maintenance is vital—dull blades can compromise accuracy and safety. Always follow safety precautions, such as wearing eye protection and unplugging the saw during adjustments. Take note of any misalignments and make fine-tune adjustments as needed. Recheck after each tweak to confirm the angles are correct. This process helps prevent costly errors and ensures your finished project meets expectations. Proper verification with test cuts guarantees your saw is accurately set up, saving time and reducing the risk of accidents. Confirming your setup with test cuts and measurements is essential for optimal precision and safety. Additionally, ensuring your blade sharpness is maintained will further improve your cut accuracy and safety.

Improved Dust Collection Port for DeWalt DWS779 & DWS780 Miter Saws – Virtually No Mess – Made in the USA
Compatible with DeWalt Miter Saws DWS779 & DWS780 (Double Bevel Sliding Miter Saw, 12-inch)
As an affiliate, we earn on qualifying purchases.
As an affiliate, we earn on qualifying purchases.
Setting and Checking the Fence for Consistent, Clean Cuts

Ensuring your fence is properly set and checked is vital for making consistent, clean cuts with your miter saw. Start by confirming the fence is square to the blade using a reliable square. Proper clamp placement helps keep the fence stable during cuts, preventing movement that can lead to inaccuracies. Double-check the fence alignment regularly, especially after transporting or adjusting your saw. Good dust collection is also essential—dust buildup can affect measurements and clamp positions over time. Keep the area clean and verify dust ports are unobstructed to maintain precision. Consistently verifying the fence’s position before each cut guarantees accuracy and smooth operation, saving you time and material. A well-calibrated fence setup is the foundation of perfect cuts. Regularly inspecting tool calibration can help you identify potential hazards and ensure a safer workspace while operating your tools. Additionally, monitoring dust management practices can prolong the accuracy of your measurements and extend the life of your equipment.
Using Test Cuts to Calibrate and Fine-Tune Your Setup
Using test cuts is essential for calibrating your miter saw setup accurately. Make sure to use consistent test material and measure your cuts precisely to identify any discrepancies. This approach helps you fine-tune your angles and fences for perfect, repeatable results. Additionally, understanding media literacy can help you interpret your measurements correctly and avoid common pitfalls. Being aware of measurement accuracy techniques ensures that your adjustments lead to reliable, high-quality cuts. Practicing these calibration steps regularly can also help you develop a keen eye for precision, ultimately improving your overall woodworking outcomes. Incorporating proper calibration methods into your routine guarantees consistent results and enhances your confidence in every cut. Regularly reviewing measurement techniques can further improve your calibration process and ensure accuracy over time.
Consistent Test Material
Have you ever wondered how to get perfectly accurate cuts every time? The key is using consistent test material. When your test pieces are uniform, your calibrations stay reliable, and adjustments become precise. To guarantee consistency, select the same type of wood or material for each test cut. Use proper clamping techniques to hold your test pieces steady, preventing movement that could skew results. Effective dust collection keeps your workspace clean, making it easier to see cut quality and avoid debris interference. Additionally, mark your test material clearly to maintain uniformity. This consistency allows you to fine-tune your miter saw setup confidently, knowing each test cut reflects true performance. Regularly using the same material streamlines calibration and improves overall cut accuracy. Incorporating test cut techniques based on natural materials can also help you better understand how your saw performs under different conditions.
Precise Measurement Techniques
To achieve pinpoint accuracy with your miter saw, precise measurement techniques are essential when performing test cuts. Start by using measuring tapes to verify dimensions before making any cuts, ensuring your material is correctly aligned. Incorporate woodworking jigs to hold pieces securely and maintain consistent angles, reducing errors. After making a test cut, measure the piece carefully to check if it matches your desired dimensions. Adjust the saw’s settings accordingly, then repeat the process until your measurements are exact. Keep your measuring tapes close and double-check measurements often to avoid mistakes. Using woodworking jigs helps you maintain repeatability and precision, especially when fine-tuning your saw’s setup. Consistent measurement practices are the key to achieving perfect cuts every time.
Troubleshooting Common Miter Saw Setup Issues
When your miter saw isn’t cutting accurately, it’s often due to setup issues that can be quickly corrected. Common problems include misaligned blades, poor blade maintenance, dust buildup, and loose fixtures. To troubleshoot:
- Check and realign the blade to ensure it’s perpendicular to the table.
- Clean and inspect the blade regularly for dullness or damage.
- Improve dust collection to prevent debris from affecting cuts.
- Tighten all bolts and clamps to maintain stability during operation.
Focusing on blade maintenance keeps cuts clean and precise, while proper dust collection prevents debris from interfering with measurements. These simple adjustments can considerably improve accuracy, saving you time and material waste. Addressing these issues ensures your saw performs at its best every time.
How to Maintain Your Miter Saw for Long-Term Precision

Regular maintenance is key to keeping your miter saw performing accurately over time. Start by inspecting and sharpening your blade regularly to ensure clean, precise cuts. Dull blades cause inaccuracies and strain the motor, so replace or sharpen them as needed. Keep the blade clean and free of debris to prevent wobbling and uneven cuts. Proper dust collection is also essential; regularly empty the dust bag or vacuum the dust port to maintain visibility and prevent dust buildup that can interfere with adjustments. Wipe down the saw’s surfaces, rails, and pivot points to keep everything moving smoothly. Consistent maintenance not only prolongs your saw’s lifespan but also guarantees long-term precision, helping you achieve perfect cuts every time.
Advanced Tips for Complex Cuts and Custom Jigs
Mastering complex cuts with a miter saw often requires going beyond basic adjustments, and using advanced tips can considerably enhance your accuracy and efficiency. To tackle intricate projects, focus on effective dust collection to keep your workspace clear and improve visibility. Selecting the right blade is vital; choose blades designed for specific materials and cut types to guarantee clean, precise results. Custom jigs can help you make repetitive complex cuts with consistency—just ensure they’re accurately aligned. Additionally, fine-tune your saw’s settings for bevels and angles before each cut to avoid errors. Consider using digital protractors or angle finders for precision. These advanced tips, combined with proper dust management and blade selection, let you execute complex cuts confidently and with professional quality.
- Optimize dust collection for cleaner cuts
- Select blades tailored for specific materials
- Use custom jigs for repetitive precision
- Double-check angles with digital tools
Final Checklist: Confirm Your Miter Saw Is Ready for Precision Work
Before starting your precision cuts, ensuring that your miter saw is properly set up and fully ready is vital. Begin with blade maintenance—check that the blade is sharp, clean, and free of debris to guarantee clean, accurate cuts. Confirm that the blade is securely installed and aligned correctly. Next, inspect the dust collection system; clear any blockages and ensure it’s functioning properly to keep your workspace clean and visibility ideal. Double-check that your saw’s bevel and miter angles are locked in place, and that the fence and stops are secure. Test the saw’s operation with a small cut to verify smooth movement. A well-maintained blade and effective dust collection system are indispensable for achieving precise, professional results every time.
Frequently Asked Questions
How Often Should I Recalibrate My Miter Saw?
You should recalibrate your miter saw whenever you notice uneven cuts or after moving it to a new workspace. Regularly check blade alignment and fence squareness to guarantee precision. A good rule of thumb is to recalibrate every few months or after a significant impact. Staying vigilant about these adjustments helps maintain cut accuracy, making your projects safer and more professional-looking.
What Safety Precautions Are Essential During Setup?
Did you know that proper safety precautions reduce injury risk by over 80%? When setting up your miter saw, always wear safety gear like goggles, ear protection, and gloves. Make certain the saw is unplugged before adjusting, and double-check all clamps and fences for stability. Familiarize yourself with emergency procedures, such as how to quickly shut off the saw. Staying vigilant keeps you safe while achieving perfect cuts.
Can Different Miter Saw Brands Require Unique Adjustments?
Yes, different miter saw brands can require unique adjustments. You should check blade alignment and fence calibration for each saw, as models vary in design. Always verify the blade is perfectly aligned with the fence and ensure the fence is accurately calibrated for precise cuts. These small tweaks help you attain consistent results, regardless of the brand, and prevent errors or accidents during your projects.
How Do Environmental Factors Affect Cut Accuracy?
Environmental factors like climate humidity and dust contamination can considerably impact your cut accuracy. High humidity causes wood to swell, making precise cuts harder, while low humidity can cause shrinkage. Dust contamination in the air or on your saw can clog parts and affect blade movement, leading to less accurate cuts. Always keep your workspace clean, and adjust your setup for changing conditions to maintain ideal precision.
What’s the Best Way to Store and Transport My Miter Saw?
You should store your miter saw in a dry, protected area to prevent rust and damage. Use a sturdy case or cover to shield it during transport, and secure the saw to avoid movement. Regular saw blade maintenance keeps it sharp, ensuring cleaner cuts, while dust collection tips help minimize debris, keeping your workspace tidy. Proper storage and transport methods protect your saw’s accuracy and longevity.
Conclusion
With your miter saw properly zeroed, aligned, and calibrated, you’re like a master craftsman wielding a finely tuned instrument. Every cut becomes a brushstroke on your project’s canvas, precise and confident. Remember, consistent setup and maintenance are your trusted tools—your own compass guiding you through complex designs. Keep this routine in mind, and your craftsmanship will stand as a testament to skill and patience, carving out perfection with every cut.