
To repair window glazing putty, start by inspecting for cracks or looseness, then carefully remove the old or damaged putty using a putty knife and safety gear. Clean and prep the surface, guaranteeing it’s dry and dust-free. Apply fresh glazing compound evenly and smoothly, then let it cure fully before finishing with light sanding and paint. Proper application and maintenance extend the window’s lifespan — learn more about each step to ensure a professional finish.
Key Takeaways
- Inspect the window for cracks, gaps, or looseness in the glazing putty before beginning repairs.
- Carefully remove old or damaged putty using a putty knife, heat gun, and safety gear.
- Apply new glazing putty in thin, even layers, pressing firmly into the frame and glass.
- Allow the putty to cure for 24-48 hours, then smooth and sand for a professional finish.
- Regularly inspect and maintain the glazing to prevent future deterioration and ensure weatherproofing.
Identifying Damaged Glazing Putty

Damaged glazing putty can compromise the integrity of your window and lead to further issues if left unaddressed. To identify this damage, look for cracks, peeling, or crumbling around the glass. Historical glazing techniques often used soft, natural materials that degrade over time, making damage more apparent. Modern repair alternatives have improved the process, but early detection remains vital. Check for gaps or looseness in the putty, especially after storms or temperature fluctuations. If you notice any deterioration, it’s a sign that the glazing needs attention. Recognizing these signs early helps prevent drafts, leaks, and further deterioration. Additionally, understanding how different materials, such as self-watering planters, can impact maintenance routines is beneficial for long-term preservation. Recognizing how to spot damaged glazing putty is essential for maintaining your window’s strength and longevity.
Gathering the Necessary Tools and Materials
Before you start repairing your window glazing putty, you need to gather all the necessary tools and materials. Make an inventory of essential items like putty knives, sandpaper, and glazing compound, and verify you have everything on your list. Don’t forget to include safety equipment such as gloves and eye protection to work safely. If you’re working on a project that involves repairing electric tools, ensure they are properly maintained and suitable for your task.
Essential Tools Inventory
To successfully repair window glazing putty, you’ll need to gather a specific set of tools and materials. For decorative glazing and historic window restoration, having the right equipment guarantees a clean, professional finish. Start with a putty knife or glazing tools to carefully remove old glazing. You’ll also need a wire brush to clean the sash and window frame thoroughly. Additionally, having a glazing compounding tool or small trowel helps apply new putty smoothly. These tools help preserve the window’s historic character while achieving a neat appearance. Properly selected tools streamline the process, prevent damage, and make your repair more efficient. With these essentials, you’re well-equipped to restore your window’s beauty and integrity effectively.
Required Materials List
Gathering the right materials is essential for a successful window glazing putty repair. To maintain historic accuracy and improve energy efficiency, select quality supplies. Here’s a basic list to get started:
| Material | Purpose | Notes |
|---|---|---|
| Linseed oil-based putty | Glazing and sealing | Historic restoration focus |
| Putty knife | Applying and smoothing | Choose flexible blades |
| Sandpaper (fine grit) | Surface preparation | Ensures adhesion |
| Glazing points | Securing glass in frame | Compatible with old frames |
| Protective gloves | Safety and clean application | Prevents skin irritation |
Using traditional materials like linseed oil-based putty helps preserve the window’s authenticity and longevity. Having these materials ready guarantees a smooth process, enhances energy efficiency, and preserves the historic integrity of your windows.
Safety Equipment Needed
Ensuring you have the right safety equipment is essential for a safe and efficient window glazing putty repair. Proper personal protective gear minimizes risks and keeps you prepared for emergencies. Before starting, gather these key items:
- Safety goggles to protect your eyes from dust and debris
- Gloves to shield your hands from sharp edges and chemicals
- A dust mask or respirator for air quality and inhalation safety
- Choosing the appropriate safety equipment can prevent injuries and ensure compliance with safety standards.
Having this gear in place enhances your emergency preparedness and guarantees you work confidently. Remember, safety isn’t an afterthought—it’s a vital part of the process. Wearing the proper personal protective gear reduces the likelihood of injury and creates a safer work environment. Prioritize safety, and your repair will proceed smoothly and securely.
Removing Old or Cracked Putty
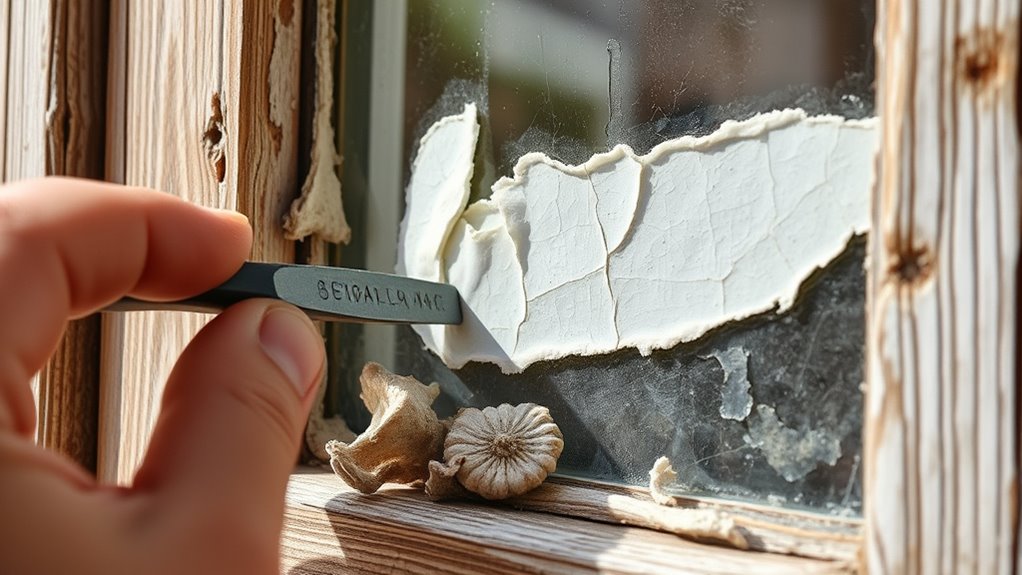
Before removing old or cracked putty, you need to prioritize safety by wearing gloves and eye protection. Using proper techniques, gently loosen the putty with a putty knife or scraper without damaging the glass or frame. Always work slowly and carefully to prevent accidents or damage during the removal process. Incorporating proper safety precautions ensures a safer and more effective repair process.
Safety Precautions
Have you considered the potential hazards of removing old or cracked glazing putty? It is crucial to prioritize safety to avoid injury or exposure to harmful substances. Always wear the right personal protective gear, including gloves, safety goggles, and a dust mask. Be aware of hazards like sharp glass edges, splinters from the window frame, and possible lead-based paint if your window is old.
- Sharp glass shards that can cause cuts
- Dust and debris that may contain lead or other toxins
- Fragments of brittle, cracked putty that can fly during removal
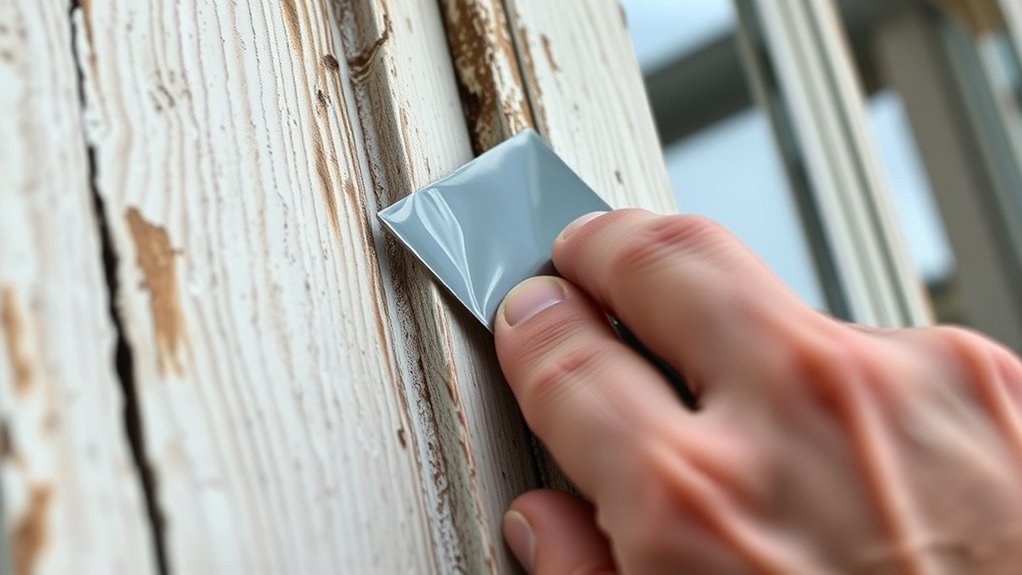
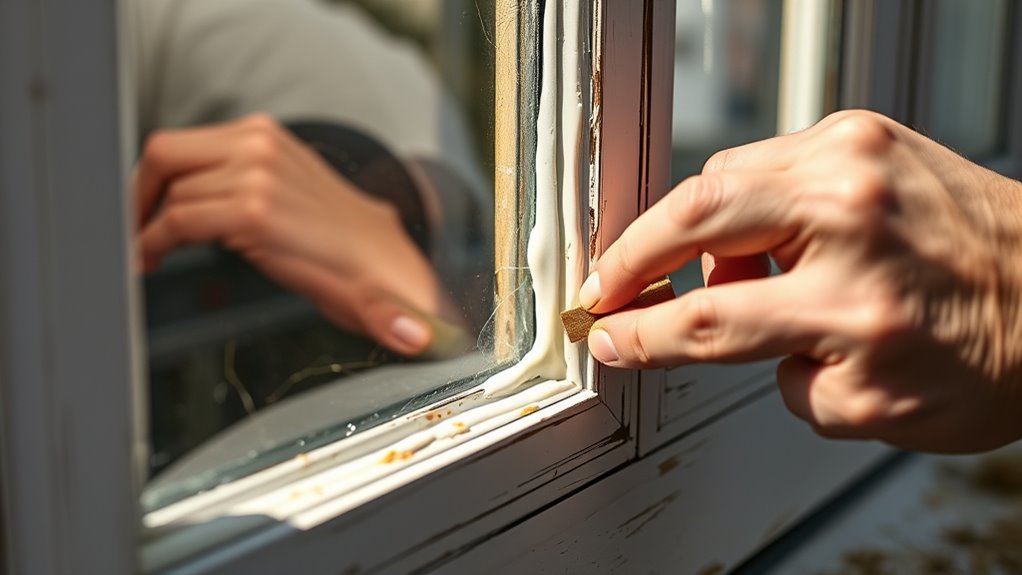
Proper Removal Techniques
To effectively remove old or cracked glazing putty, you need to approach the task carefully and systematically. Start by inspecting your window, considering its historical style, as older windows often require gentle methods to preserve delicate frames. Use a putty knife or scraper to gently loosen the old putty, working around the edges without damaging the glass or wood. For stubborn areas, applying a heat gun can soften the putty, making removal easier—just be cautious not to overheat, especially with historic windows. Modern glazing techniques emphasize clean removal to ensure a smooth surface for new putty. Always wear safety gear and take your time, as rushing can crack glass or damage the frame, complicating repairs and affecting the window’s integrity. Additionally, understanding window glazing techniques can help ensure proper preparation for the next step in your repair process.
Preparing the Window Surface
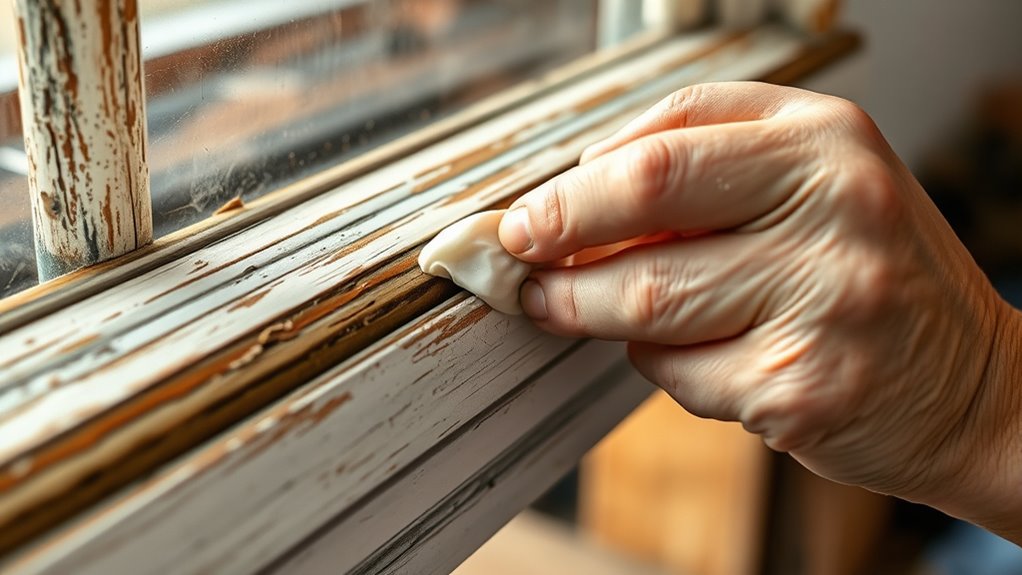
Preparing the window surface is a crucial step to guarantee a successful glazing repair. You need a clean, smooth surface to ensure the new putty adheres properly. Start by inspecting the window frame and glass pane for dirt, old paint, or loose debris. Carefully remove any remaining glazing compound and loose paint from the edges. Use a putty knife or scraper to create a flat, even surface around the glass. Be gentle to avoid damaging the glass pane or the frame. Ensure the surface is dry and free of dust before applying new putty. This preparation helps create a secure seal, preventing leaks and drafts, and guarantees a neat, long-lasting finish. Proper surface prep is the foundation for a professional-looking repair. Additionally, understanding seasonal maintenance can help you identify potential issues early and keep your windows in optimal condition.
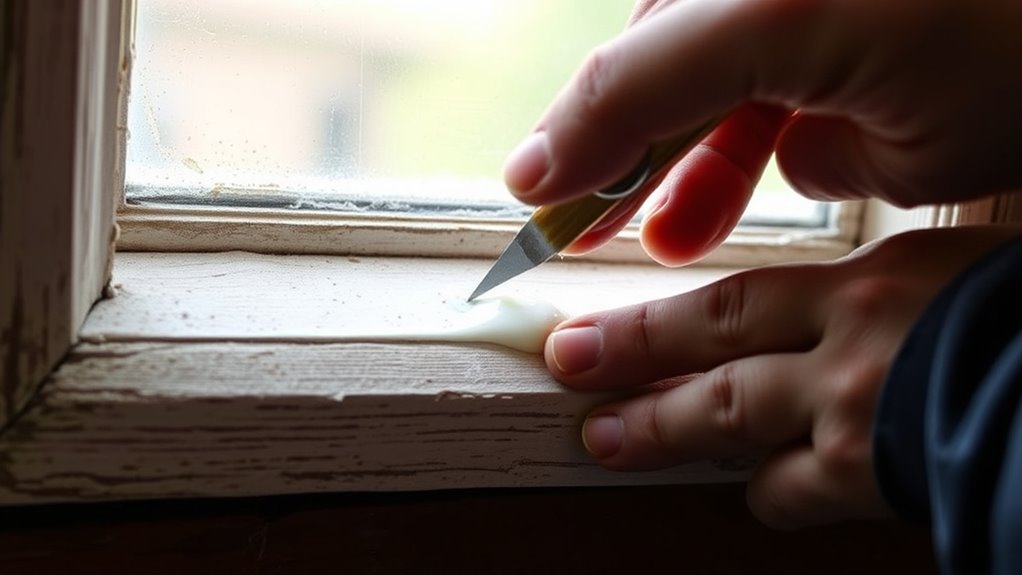
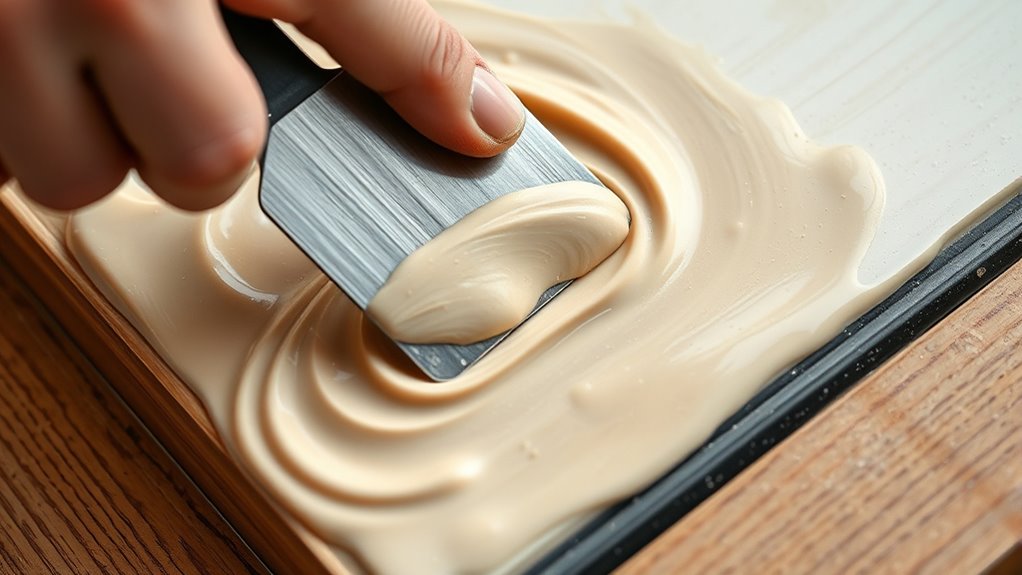
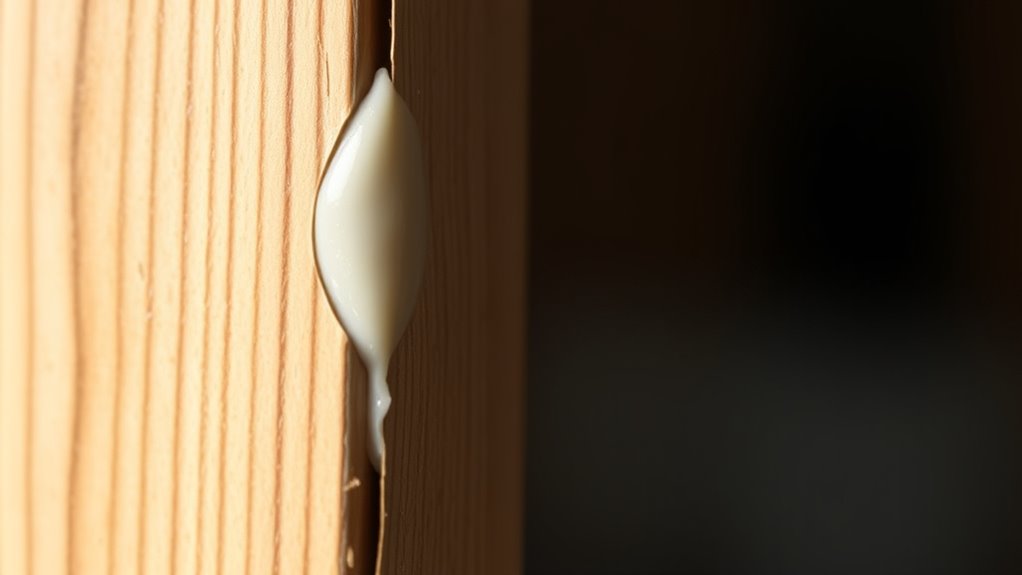
Applying New Glazing Compound
Applying new glazing compound requires careful attention to detail to guarantee a secure seal. To maintain historical accuracy, choose a glazing compound that matches the original material used during the window’s construction. Using the right compound ensures your repair remains authentic and preserves the window’s period character. Cost efficiency is also important; selecting a quality, durable compound minimizes future repairs and saves money over time. When applying, work in thin, even layers, pressing the compound firmly into the frame and glass to prevent gaps. Avoid over-application, which can crack or cause improper sealing. Proper application not only secures the glass but also maintains the window’s original appearance, ensuring your repair remains both authentic and cost-effective for years to come. Additionally, selecting a high-quality glazing compound helps ensure the longevity and effectiveness of your repair.
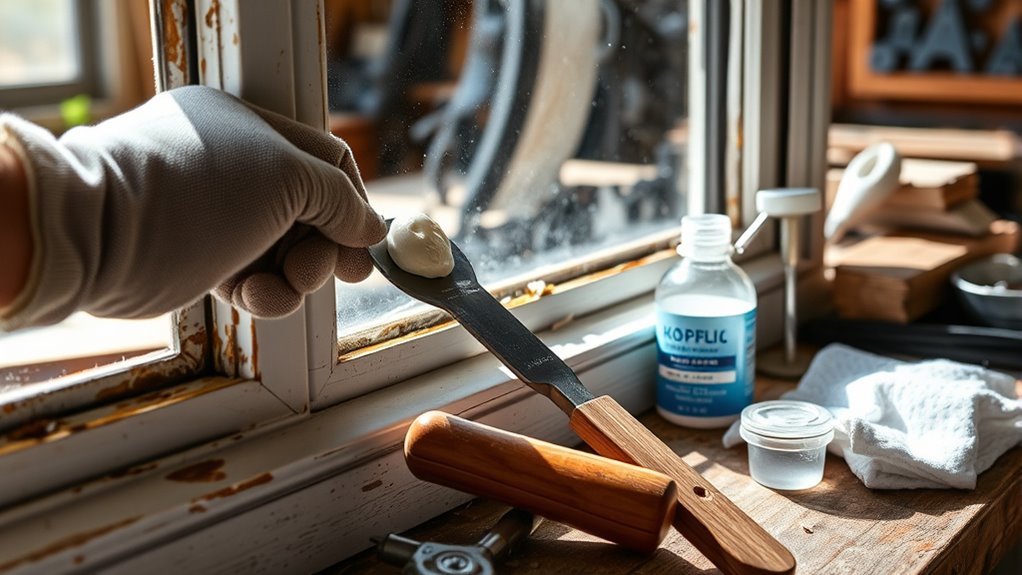
Smoothing and Finishing the Putty
Once you’ve applied the glazing putty and allowed it to set, the next step is to smooth and finish the surface. This guarantees a clean, professional look and helps preserve the window’s historical integrity. Use a damp cloth or fine-grit sandpaper to gently level the putty, removing excess and imperfections. Achieving a smooth finish not only enhances the window’s appearance but also improves energy efficiency by sealing gaps effectively. During this process, imagine the window’s historical restoration, maintaining its authenticity while upgrading its performance. Think of the surface as a blank canvas, ready for the final touches. Understanding AI’s impact can also inform how innovative tools might assist in future restoration projects. Carefully sand the surface to remove ridges and bumps. Wipe away dust with a damp cloth for a clean finish. Ensure the surface is smooth and flush with the surrounding wood.
Curing and Painting the Repaired Area
After smoothing the putty, it is vital to allow it to cure properly before moving on to painting. Proper curing ensures that the putty develops strong paint adhesion, preventing peeling or cracking over time. Check the manufacturer’s instructions for the recommended drying period, usually 24 to 48 hours. During this time, keep the area free from dust and moisture, which can compromise weather resistance. Once cured, lightly sand the surface to create a smooth, even finish, enhancing paint adhesion. Use a high-quality primer suitable for your window material to further improve weather resistance. Applying paint too early or skipping proper curing can lead to poor adhesion and reduced durability. Taking these steps ensures your repair withstands the elements and maintains its integrity. Additionally, understanding the benefits of proper curing can help ensure the longevity of your repair.
Tips for Maintaining Your Window Glazing
Maintaining your window glazing helps extend its lifespan and keeps your windows looking their best. To preserve the integrity of your historical window styles, regularly inspect for cracks or gaps in the glazing. Use proper glazing techniques when repairing or reapplying putty to prevent deterioration. Keep the glazing clean and free of dirt or debris that can trap moisture and cause damage. Repainting the putty every few years, especially after harsh weather, helps protect it from cracking or peeling. Applying a fresh coat of paint also highlights the window’s charm and authenticity. Regular upkeep ensures your windows remain both functional and beautiful, preserving their historical value and enhancing curb appeal.
Regularly inspect and repaint window glazing to preserve beauty, prevent damage, and maintain historical charm.
- Visualize a beautifully restored sash window with pristine glazing.
- Imagine the smooth, even application of traditional glazing techniques.
- Envision the elegant details of period-specific window styles preserved over time.
Frequently Asked Questions
How Long Does New Glazing Putty Typically Last?
New glazing putty typically lasts around 10 to 15 years, depending on factors like climate and maintenance. You might notice signs of putty deterioration over time, which can reduce glazing longevity. To extend its lifespan, guarantee proper application and regular upkeep. If you see cracks or crumbling, it’s time to reapply or repair the putty to maintain the window’s seal and protect the glass.
Can Glazing Putty Be Painted Immediately After Application?
You shouldn’t paint glazing putty immediately after application. It needs a proper drying time, usually about 24 hours, to cure fully. Painting too soon can hinder the drying process and negatively affect paint adhesion. Make sure the putty is completely dry and hardened before you apply paint, ensuring a smooth finish and long-lasting results. Patience at this stage results in better durability and a professional-looking window.
What Are the Best Weather Conditions for Glazing Repairs?
Imagine repairing a window on a clear, mild spring day—you’ll get the best results. Weather considerations like low humidity, moderate temperatures, and dry conditions are ideal for glazing repairs. Seasonal timing matters, so avoid extreme cold or heat, which can cause putty to crack or not cure properly. Aim for days with stable weather, ideally between 50-70°F, to make sure the putty sets correctly and lasts longer.
Is It Necessary to Wear Protective Gear During the Process?
Yes, you should wear protective gear during glazing repairs. Safety precautions are essential to protect your eyes, skin, and lungs from harmful dust, fumes, and sharp tools. Gloves, safety glasses, and a mask or respirator help prevent injuries and health issues. Always prioritize your safety by following proper safety protocols, especially when handling chemicals or working with broken glass, ensuring a safer, more effective repair process.
How Often Should Glazed Windows Be Inspected for Damage?
You should inspect glazed windows annually as part of your historical window maintenance routine. Regular checks help identify damage early, ensuring the glazing safety protocols are followed. Look for cracks, peeling, or deterioration in the putty, and address issues promptly to prevent further damage. Staying vigilant maintains the window’s integrity, preserves its historical value, and keeps you safe during any repair process.
Conclusion
Repairing your window glazing putty keeps your home energy-efficient and protected from the elements. Did you know that properly maintained windows can save you up to 15% on heating and cooling costs? By following these simple steps, you not only extend the life of your windows but also enhance their appearance. Don’t forget, regular upkeep can prevent costly repairs down the line. Stay attentive to your windows, and they’ll serve you well for years to come.