Home Decor
How Can Thrifted Glass Globes Be Made Into Vintage Candle Holders?
Find unique treasures in thrift stores and transform them into enchanting vintage candle holders that radiate warmth and character.
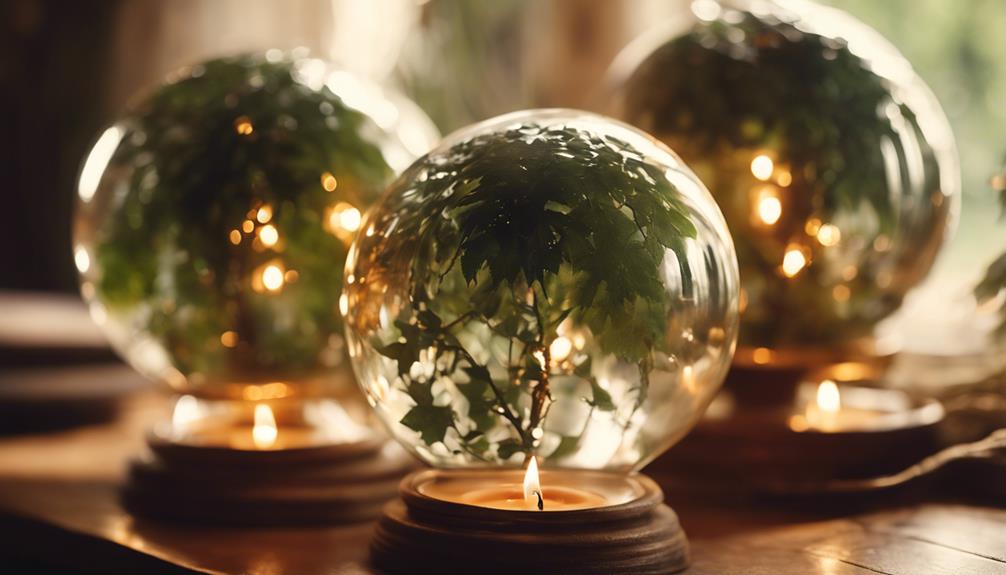
We're about to breathe new life into antique treasures by transforming thrifted glass globes into enchanting vintage candle holders that exude warmth and character. First, we select unique globes with suitable openings for candles, ensuring they're free from damage. Next, we clean and prepare them, experimenting with painting techniques, vintage-inspired decals, and custom designs to match our decor styles. By attaching a hanging mechanism and adding tea lights or votives, we create a beautiful centerpiece. With customizable options, safety precautions, and creative display ideas, we can create a one-of-a-kind masterpiece. Now, let's dive deeper into the details to reveal the full potential of our vintage-inspired creations.
Key Takeaways
• Select unique glass globes from thrift stores with suitable openings for candles and ensure they are damage-free.
• Clean and prepare globes by gently washing, removing stickers, and inspecting for cracks before decorating.
• Decorate globes using techniques like painting or applying vintage-inspired decals to infuse them with vintage charm.
• Attach a hanging mechanism using wire and a diamond-tipped drill bit to securely display the candle holders.
• Add tea lights or votives to the globes, choosing scents and colors that match your desired ambiance.
Gathering Thrifted Glass Globes
We head to our favorite thrift stores in search of unique glass globes that will soon become beautiful vintage candle holders. Thrift stores are treasure troves for finding one-of-a-kind glass globes in different shapes and sizes. As we browse through the shelves, we keep an eye out for globes with interesting designs and patterns that will add a touch of nostalgia and charm to our decor.
We're not just looking for any ordinary glass globes, but ones that will provide a unique glass light when transformed into candle holders. We inspect each globe carefully, ensuring they're free from cracks or significant damages that could hinder their transformation. With a keen eye for detail, we select globes with a lip or opening that will allow for easy attachment of wires or hangers, making it possible to create stunning hanging candle holders.
Cleaning and Preparing Globes
With mild soap and warm water, we gently scrub the thrifted glass globes to remove dirt and grime that may have accumulated during their storage. This thorough cleaning is crucial to guarantee our candle holders shine with a warm, soft light.
Next, we inspect each globe for any cracks, chips, or damage that may impact their usability. We take extra care to dry the globes thoroughly, preventing water spots or residue from affecting the candle holder's appearance. Any stickers or labels are carefully removed using a gentle adhesive remover.
Finally, we inspect the globes once more to confirm they're clean and free of debris. With our glass globes sparkling clean, we're now ready to transform them into beautiful vintage candle holders.
Choosing the Right Candle

Choosing the ideal candle is crucial for crafting a stunning vintage candle holder, as it can either enhance or diminish the ambiance of the entire piece. When selecting the right candle, we take into account the size and shape of the thrifted glass globe to confirm it can accommodate our chosen candle.
For a small and versatile option, we opt for tealight candles, which fit most glass globes. We're also mindful of the burn time and safety features of the candle, making sure it won't compromise the overall aesthetic or pose a fire hazard.
As an alternative, we consider LED tea lights, which offer a safe and long-lasting solution. For an added touch, we experiment with scented tealights to add an extra layer of ambiance to our vintage candle holder.
Whether we're creating a Hanging Candle or a simple centerpiece, the right candle can elevate the entire piece. By selecting the perfect candle, we set the tone for a warm and inviting atmosphere that complements our thrifted glass globe.
Decorating the Glass Globe

As we move forward with decorating our glass globe, we're excited to explore the world of painting techniques and decal designs.
We'll discover how to add a personal touch to our vintage candle holder with a range of creative approaches.
From subtle, muted hues to bold, eye-catching designs, we'll uncover the secrets to transforming our thrifted glass globes into one-of-a-kind masterpieces.
Painting Techniques
We immerse ourselves in the world of creative expression by delving into the diverse painting techniques that can transform our thrifted glass globes into one-of-a-kind masterpieces.
When it comes to painting our glass globes, we can choose from a range of techniques to achieve the desired look. For a light, airy feel, we can use glass paint for a transparent finish or opt for spray paint for an opaque look.
Next, we can experiment with techniques like sponge painting, stenciling, or decoupage to customize our glass globe and make it a unique addition to our home decor. For a touch of glamour, we can use metallic paints, while chalk paint can give our globe a vintage, matte finish.
With a little creativity, our thrifted glass globes can become stunning candle holders that add a warm, inviting ambiance to any room.
Decal Designs
By applying decal designs to our thrifted glass globes, we can instantly elevate their aesthetic appeal and infuse them with a touch of vintage elegance. Vintage-inspired decals can add a touch of sophistication and charm to our glass globes, making them perfect for creating unique candle holders. Decals come in a variety of designs, from floral patterns to geometric shapes and intricate motifs, allowing us to customize our glass globes to match different decor styles and preferences.
| Decal Design | Description | Compatibility |
|---|---|---|
| Floral Patterns | Delicate flower patterns with soft colors | Rustic, Vintage, Shabby Chic |
| Geometric Shapes | Bold, modern shapes in contrasting colors | Modern, Industrial, Minimalist |
| Intricate Motifs | Elaborate, detailed designs with ornate details | Luxury, Antique, Classic |
Attaching a Hanging Mechanism

Now that we've decorated our glass globe, it's time to think about how we'll hang our new candle holder.
We'll explore our options for wire types, discuss the importance of selecting the right drill bit, and share some tips for securing our hanging mechanism.
Wire Options Explained
When attaching a hanging mechanism to our thrifted glass globes, we turn to black baling wire as a cost-effective and versatile option. This wire is wrapped securely around the lip of the glass globe in sections, providing stability and guaranteeing the candle holder is safely suspended.
One of the benefits of using black baling wire is its flexibility in design. We can cut it to our preferred lengths, allowing us to customize the hanging mechanism to fit our desired aesthetic. To secure the wire ends, we simply squeeze them with pliers, creating a neat finish that complements our vintage candle holders.
The wire wrapping technique not only adds a touch of elegance but also ensures the candle holder is securely attached to the glass globe. With black baling wire, we can achieve a professional-looking finish without breaking the bank.
Drill Bit Selection
We select a diamond-tipped drill bit to securely attach a hanging mechanism to our thrifted glass globes. This type of drill bit is ideal for drilling glass due to its durability and precision. When choosing a diamond-tipped drill bit, make sure the size matches the size of the hanging mechanism or wire for a snug fit.
Here are some key considerations for drill bit selection:
- Durability: Diamond-tipped drill bits are designed to withstand the hardness of glass.
- Precision: These drill bits provide accurate drilling, reducing the risk of cracking or shattering the glass.
- Size: Choose a drill bit that matches the size of the hanging mechanism or wire for a secure fit.
Secure Attachment Tips
To guarantee a secure attachment of the hanging mechanism, we wrap wire around the lip of the glass globe in sections, using pliers to tighten the wire ends and create a sturdy base for our vintage candle holder. This guarantees that our creation can safely hold the weight of the candle and any additional decorative elements.
We cut the wire to our preferred lengths, making sure to wrap it securely around the glass globe loops. Next, we squeeze the wire ends with pliers to make sure a tight and stable hanging mechanism. To allow for easy attachment to hooks, we create loops at the ends of the hanging wires.
Finally, we customize the length and design of the hanging wires to suit the space where the candle holder will be placed. By following these secure attachment tips, we can confidently display our upcycled glass globe candle holders, knowing they're safe and secure.
With a little creativity and patience, we can transform thrifted glass globes into stunning vintage-inspired decorations.
Adding a Tea Light or Votive
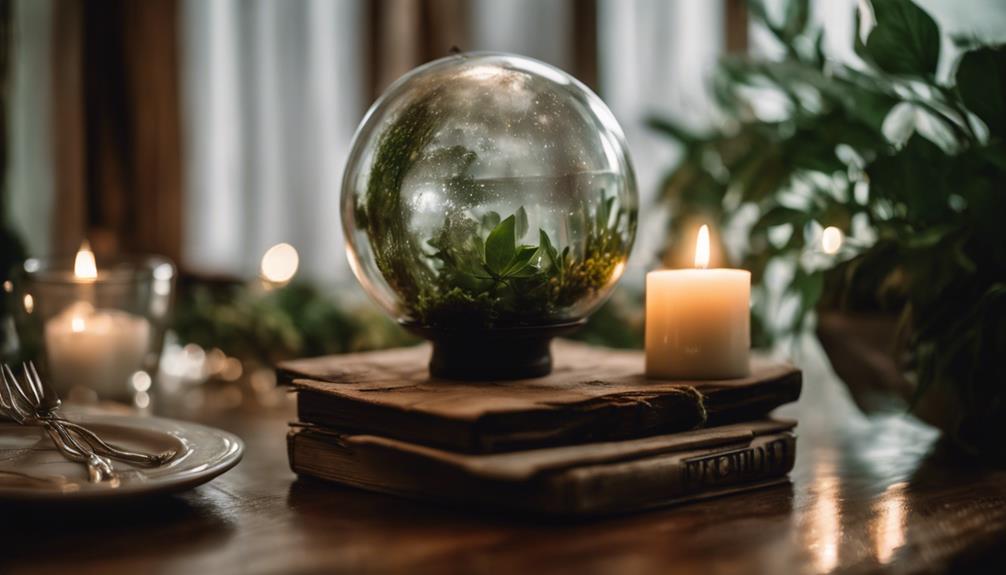
We simply place a tea light or votive inside the thrifted glass globe to instantly create a warm and inviting ambiance. This is the easiest part of the process, and the result is well worth the minimal effort.
By adding a tea light or votive, we can bring new life to an old, discarded glass globe and turn it into a beautiful, functional piece.
Here are a few things to keep in mind when choosing a tea light or votive:
- Scents and colors: Tea lights and votives come in a variety of scents and colors, allowing us to customize our candle holder to fit our personal style.
- Burn time: Tea lights and votives have different burn times, so we can choose the one that best fits our needs.
- Size: Tea lights are smaller and more delicate, while votives are slightly larger and provide a more substantial lighting effect.
Creating a Unique Centerpiece

As we create a unique centerpiece, we'll want to start by preparing our glass globes, cleaning them thoroughly to remove any dirt or grime.
Next, we'll explore our options for decorative fillers to add visual interest to our candle holders.
Globe Preparation Tips
We select vintage glass globes with unique designs and sturdy lips, knowing these features will make our centerpiece truly special. As we prepare our globes, we keep in mind that a little creativity goes a long way.
Here are some tips to get us started:
- Choose wisely: Select globes with interesting designs and sturdy lips, making it easier to attach suspension wires.
- Clean and prepare: Thoroughly clean the globes to remove any dirt or residue, ensuring a smooth surface for our decorations.
- Add a personal touch: Consider incorporating decorative elements like springs or beads to give our centerpiece a unique flair.
Glass Cleaning Essentials
Now that our globes are selected and prepped, let's get down to business and clean them thoroughly to bring out their original shine.
We'll start by washing them with mild soap and water to remove any dirt and grime that's accumulated. This important cleaning process will help prevent any scratches or damage to the glass.
Next, we'll use a soft cloth to polish the globes, restoring their shine and clarity. It's vital to inspect each globe carefully for any cracks, chips, or damage that could affect their use as candle holders.
If we find any wax residue, we'll use hot water to remove it effectively. Proper cleaning is necessary in transforming these thrifted glass globes into beautiful vintage candle holders for a unique centerpiece.
Decorative Filler Options
We're excited to explore the endless possibilities of decorative filler options that can elevate our vintage candle holders into a truly unique centerpiece. With a few simple additions, we can transform our thrifted glass globes into stunning conversation pieces.
Here are three decorative filler options to contemplate:
- Metal or glass beads: Add a touch of elegance with these small, shiny accents.
- Nuts: Bring in a natural element with nuts of various shapes and sizes.
- Non-flammable items: Get creative with small ornaments, pebbles, or other decorative items that won't catch fire.
To take our design to the next level, we can add springs to each wire for added interest and creativity. By attaching the springs to the glass cover loops, we can complete the look of our vintage candle holder. Finally, we can adjust the wires to verify they're all the same length, creating a symmetrical and visually appealing centerpiece.
With these decorative filler options, we can personalize our vintage candle holder and create a one-of-a-kind masterpiece.
Tips for Customization Options

By incorporating unique elements and experimenting with wire wrapping techniques, you can transform thrifted glass globes into one-of-a-kind vintage candle holders that reflect your personal style.
We can customize our glass globes by adding wire hangers with decorative elements like springs or beads, giving our candle holders a personalized touch. We can also experiment with different wire wrapping techniques to create unique designs that fit our desired aesthetic.
Another way to personalize our candle holders is by adjusting the length and style of the hanging wires to fit our desired space or style. To add an extra layer of nostalgia, we can incorporate vintage or themed elements like jute or bubble glass effects.
Additionally, we can explore various decorating options such as metal or glass beads to enhance the appearance of our candle holders. By exploring these customization options, we can create one-of-a-kind vintage candle holders that truly reflect our personal taste and style.
Safety Precautions and Considerations

As we set out to transform thrifted glass globes into vintage candle holders, it's important to recognize and tackle the potential safety concerns that come with repurposing these delicate items. We must prioritize caution to make sure our creations don't become hazards.
Here are some essential safety precautions to keep in mind:
- Cleanliness is key: Thoroughly clean the glass globes to remove dirt and residue, which can impact the stability of the candle holder.
- Stability is vital: Consider the weight and stability of the glass globe when adding candles to prevent tipping or breakage.
- Fire safety first: Use non-flammable materials or battery-operated lights to avoid fire hazards, and place the candle holders on stable surfaces away from flammable materials.
Displaying Your New Candle Holder
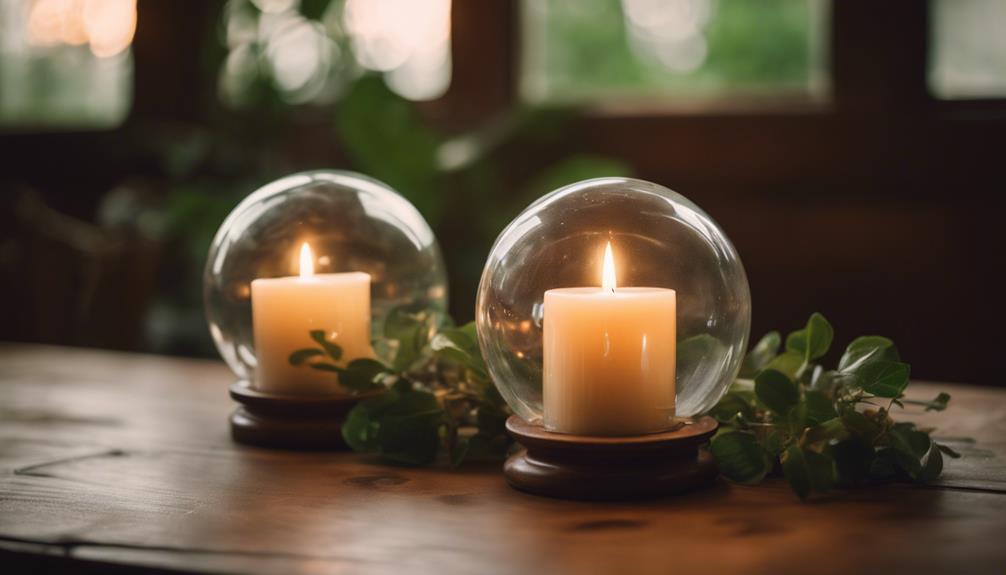
We'll proudly display our new candle holder in a prominent place to showcase the beauty and history of the repurposed glass globe. After all, we've worked hard to transform it into a unique piece of home decor. Now, it's time to show it off!
Here are some ideas to get you started:
| Method | Description | Tips |
|---|---|---|
| Mantle Display | Place the candle holder on a mantle or shelf | Use decorative items around it to create a vignette |
| Hanging Display | Suspend the candle holder from a hook or chain | Experiment with different lengths and angles |
| Coffee Table Display | Place the candle holder on a coffee table or side table | Group it with other decorative items for a cohesive look |
| Window Display | Place the candle holder on a windowsill | Take advantage of natural light to highlight the globe |
| Shelves Display | Place the candle holder on a bookshelf or étagère | Group it with other vintage or decorative items |
Frequently Asked Questions
How Do You Make a Mercury Glass Candle Holder?
We make a mercury glass candle holder by first preparing a thrifted glass globe.
Then, we mix vinegar and water, spraying it onto the globe to create a distressed look.
Next, we apply a metallic spray paint to achieve a reflective, mercury-like finish.
After that, we let it dry and add a tea light or votive candle inside.
How to Repurpose Candle Holders?
While transforming old candle holders into unique decorative pieces, we often ask ourselves: how can we repurpose them?
We've experimented with various materials, from upcycled glass containers to revamped metal frames.
By rethinking their original purpose, we've created one-of-a-kind centerpieces, planters, and even quirky bookends.
The key is to identify the holder's unique features and adapt them to fit our desired outcome, giving new life to an otherwise discarded item.
How to Decorate Glass Jars for Candles?
We start by thoroughly cleaning our glass jars to guarantee a smooth surface.
Then, we get creative with glass paint, adhesive stencils, or decorative tape to create unique designs.
We can add a personal touch with ribbons, twine, or charms.
Experimenting with techniques like etching, decoupage, or frosting can also produce stunning results.
For a modern look, we can use spray paint or metallic markers to give our candle jars a polished finish.
Can You Use Glass Candle Jars as Drinking Glasses?
We can't help but wonder, who wouldn't want to drink from a candle jar? But seriously, yes, we can use glass candle jars as drinking glasses.
First, make sure the jars are made of food-safe materials. Then, remove any wax residue and labels, and inspect for cracks or damages.
After a thorough cleaning, our candle jar-turned-drinking glass is ready for its new life. It's a creative way to reduce waste and get crafty, all while enjoying our favorite beverages.
Conclusion
As we carefully place the candle inside our transformed glass globe, the soft glow illuminates the intricate details, and our DIY project comes full circle.
Like a phoenix rising from the ashes, our thrifted find has been reborn into a unique, vintage-inspired candle holder.
With a dash of creativity and some TLC, we've breathed new life into a discarded treasure, and it's now ready to shine bright in our homes.
Interior
When Is Best to Paint Interior
Discover the best time to paint interior spaces for a flawless finish and efficient results – it might not be when you think!
When you are prepared to paint the inside of your home, think about taking on the project in the winter for optimal outcomes. The cooler temperatures during the winter months assist the paint in drying effectively, saving you time and guaranteeing a flawless finish. Additionally, with more flexible scheduling and lower professional rates in the winter, it is the perfect time to give your home a rejuvenated appearance. Get prepared to revamp your space effortlessly and efficiently by selecting the best season for your interior painting project.
Key Takeaways
- Winter is ideal due to cooler temperatures for efficient drying.
- Low humidity in winter prevents adhesion and drying issues.
- Professional rates are more affordable in the off-peak season.
- Cool temperatures lead to faster drying and a smoother finish.
- Consider season impact for a stress-free, efficient painting project.
Optimal Temperature for Interior Painting
To achieve the best results when painting indoors, aim to work within the temperature range of 60-80°F for ideal drying times and a flawless finish. Painting in this temperature sweet spot guarantees that the paint dries efficiently, leading to a smooth and professional-looking outcome.
When tackling interior painting projects, especially in colder weather, it's important to pay attention to the temperature. Cold weather can prolong drying times, making it challenging to achieve that perfect finish you desire. Similarly, high humidity levels can also impede the drying process, affecting the overall quality and durability of your paint job.
Maintaining the right temperature while painting indoors isn't just about comfort but also about ensuring the paint adheres well and dries properly on your walls. By painting within the recommended temperature range, you set yourself up for success, improving the longevity and appearance of your paint job.
Impact of Humidity on Painting Process

High humidity levels can impact your painting process in several ways. It can cause paint to dry slowly and affect its adhesion. This, in turn, may lead to issues like dripping, streaking, and an overall poor finish. Ensuring the humidity levels are between 40% to 70% can help you achieve the best results when painting your interior walls.
Having the right humidity level is crucial for a successful paint job. Incorrect humidity can lead to various problems, from slow drying times to poor adhesion. Maintaining a humidity level between 40% and 70% is ideal for achieving a smooth and flawless finish on your painted walls.
Humidity and Paint Adhesion
When painting indoors, it's vital to take into consideration how humidity levels can affect the adhesion of the paint. High humidity can slow down the drying process, leading to issues like blistering, cracking, or peeling of the paint. Excess moisture in the air hinders proper curing of the paint, impacting its finish. In humid conditions, paint may take longer to dry, affecting its overall adhesion. Proper ventilation is essential in such environments to make sure that the paint adheres effectively. Here's a table to highlight the impact of humidity on paint adhesion:
| Aspect | Impact |
|---|---|
| Humidity Levels | Above 70% can cause blistering, cracking, or peeling |
| Drying Process | Slowed down due to high moisture content |
| Ventilation | Critical for ensuring effective adhesion |
Drying Time Affected
Considering the impact of humidity on the painting process, the drying time is greatly impacted by high moisture levels in the air. High humidity can greatly slow down paint drying times, as moisture in the air interferes with the evaporation process, leading to longer wait times.
To guarantee best results, aim for low humidity levels, especially in cold weather, as this can help speed up the drying process. Proper ventilation plays a key role in controlling humidity levels during interior painting, facilitating a smoother and faster finish.
Best Season for Interior House Painting
Winter is the ideal season for interior house painting because the cooler temperatures help paint dry efficiently, saving you time and money.
With more scheduling availability and lower professional rates during the off-peak season, completing painting projects in winter is both productive and cost-effective.
Take advantage of the benefits of winter painting, like faster drying times and discounts, to transform your home into a cozy haven with a fresh coat of paint.
Ideal Painting Temperatures
For essential paint drying and finish quality, interior house painting is best done in temperatures ranging between 60-80°F. This perfect temperature range guarantees ideal paint drying, leading to a smooth finish that enhances the overall look of your space.
Cold weather can prolong drying times, while high humidity can hinder the drying process, affecting the quality of the paint job. Moisture in the air also plays a role, impacting paint evaporation and potentially causing issues with application and drying.
Hence, choosing the right season for your interior painting project is vital. By maintaining proper indoor temperatures and humidity levels, you set yourself up for success in achieving the best results when painting the interior of your house.
Weather Impact on Paint
To achieve the best results in your interior house painting project, timing your paint job according to the weather conditions is essential. Winter is the ideal season for interior painting due to low humidity, faster drying times, and cost savings. The cooler temperatures help the paint dry more efficiently, resulting in a smoother finish. Additionally, winter is an off-peak season for painters, meaning you may benefit from reduced professional rates and increased scheduling availability. Choosing to paint your interiors in winter can make the process less stressful and more cost-effective. Embrace the season and transform your home with a fresh coat of paint that not only looks great but also saves you time and money.
| Benefits of Winter Interior Painting | |
|---|---|
| Low Humidity | Faster Drying |
| Cost Savings | Smoother Finish |
Choosing the Right Interior Paint
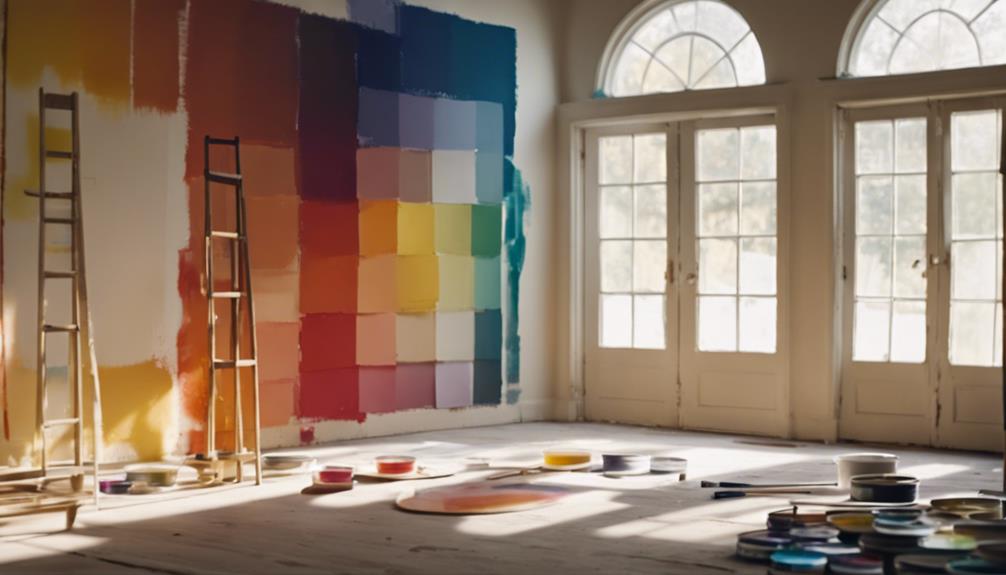
When selecting the right interior paint for your project, prioritize low-to-zero VOC options to maintain healthier indoor air quality. Opt for 100% acrylic latex paints like Benjamin Moore for a durable and long-lasting finish on your walls.
Quality Painting is essential for a professional look; choose reputable brands known for their coverage, durability, and drying times. Using low-to-zero VOC paints not only benefits your health but also the environment. These paints emit fewer harmful chemicals, making them ideal for your home.
Benjamin Moore and Behr are trusted brands that offer a wide range of colors and finishes to suit your preferences. Make sure to check the paint labels for recommended drying times and temperature thresholds for the best application.
Proper Techniques for Interior Painting
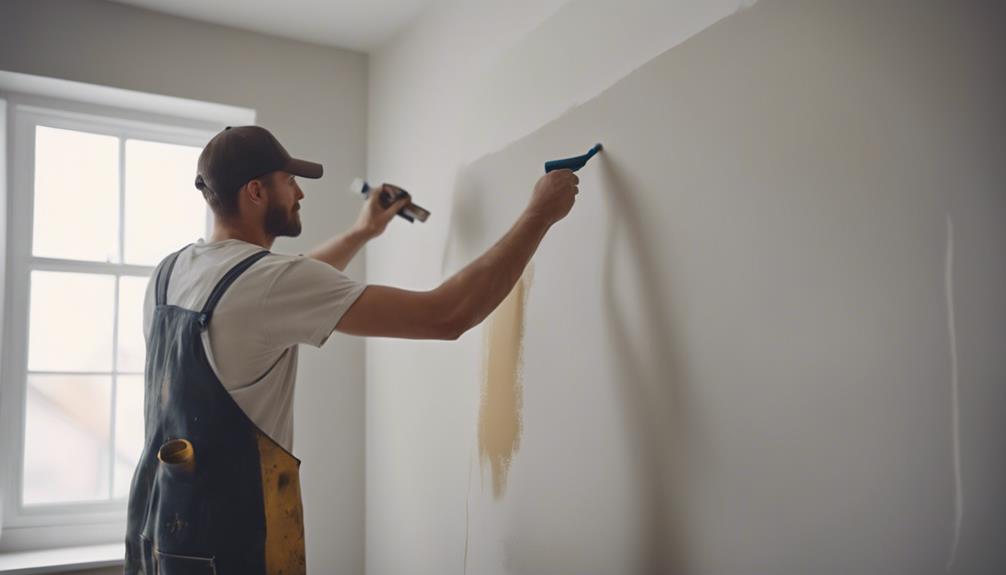
Utilize high-quality brushes and rollers to achieve a smooth and professional finish when painting interiors. When tackling interior house painting, it's important to master proper techniques to guarantee a flawless result. Start by selecting excellent paint brushes and rollers that will make the application process easier and provide a clean outcome. Practice different painting techniques such as cutting in for edges, rolling for larger surfaces, and spraying for a more even coat.
Remember to follow a sequence of painting, typically starting from the ceiling, then moving to the walls, and finishing with the trim, for the best efficiency.
Allow sufficient drying time between coats to prevent smudges or imperfections, ultimately leading to a durable and even finish. Once the job is complete, don't forget the importance of proper clean-up. Wash your tools thoroughly, store any leftover paint appropriately, and dispose of waste responsibly to maintain a tidy workspace and prolong the life of your equipment.
Factors to Consider Before Painting
Taking into account the season before painting can greatly impact the overall process and outcome of your interior painting project. Winter months, surprisingly, can be the best time to paint your interiors. During winter, the low humidity prevents drying issues and enhances paint adhesion, leading to a smoother finish. Professional rates are often reduced during this off-peak season, making it a cost-effective time to hire contractors for your project. Additionally, cooler temperatures in winter help paint dry faster, resulting in quicker completion times. To help you understand the benefits of painting during the winter months, here is a table summarizing the key factors to contemplate before starting your interior painting project:
| Factors to Contemplate | Benefits |
|---|---|
| Low Humidity | Prevents drying issues and enhances paint adhesion |
| Professional Rates | Cost-effective bids from contractors |
| Cool Temperatures | Faster drying times and smoother finish |
| Off-Peak Season | Reduced stress and more scheduling availability |
| Paint Adhesion | Better adherence to surfaces for long-lasting results |
Frequently Asked Questions
What Is the Best Weather to Paint Interior?
For painting interior spaces, the best weather is between 60-80°F with low humidity levels. This range allows for ideal drying times and smooth paint application.
Winter's lower humidity and cooler temperatures can expedite drying, making it a favorable time to paint.
In summer, guarantee proper ventilation to prevent rapid drying and achieve a flawless finish. Extreme heat or humidity can impact the quality of your paint job, so choose your painting days wisely.
When Should You Not Paint Your House?
When deciding when not to paint your house, consider avoiding extreme temperatures, high humidity, rainy conditions, direct sunlight, and strong winds. These factors can affect paint application, drying times, adhesion, and overall finish.
Ideal conditions include moderate temperatures, low humidity, dry weather, shaded areas, and calm winds.
Is It Okay to Paint Interior Walls in the Winter?
Yes, it's definitely okay to paint interior walls in the winter! Lower humidity levels speed up drying times, and cooler temperatures help paint stick better.
You can save money too, as contractors offer reduced rates during the off-peak season. Winter's low humidity also prevents paint issues like blistering.
Plus, with faster drying times and more scheduling availability, winter painting can be less stressful for you as a homeowner.
Which Month Is Best for Painting a House?
When it comes to painting your house, the best month can be a tough nut to crack. But fear not! Consider the benefits of tackling this task in the winter months.
With cooler temps aiding in paint drying and pro painters having more availability, you're in for a smooth ride. Plus, cost savings are always a win! So, go ahead, embrace the winter wonderland and give your home a fresh coat of paint.
Conclusion
To wrap up, when painting the interior of your home, it's crucial to take into account factors like temperature, humidity, and paint quality. Some may argue that painting can be done at any time, but selecting the right conditions can make a significant difference in the final result.
By taking these factors into consideration and following proper techniques, you can guarantee a smooth and successful painting project that will leave your home looking fresh and vibrant.
Home Decor
What Is Minimalist Home Decor
Discover the essence of minimalist home decor – a serene, clutter-free oasis that transforms living spaces with simplicity and functionality.
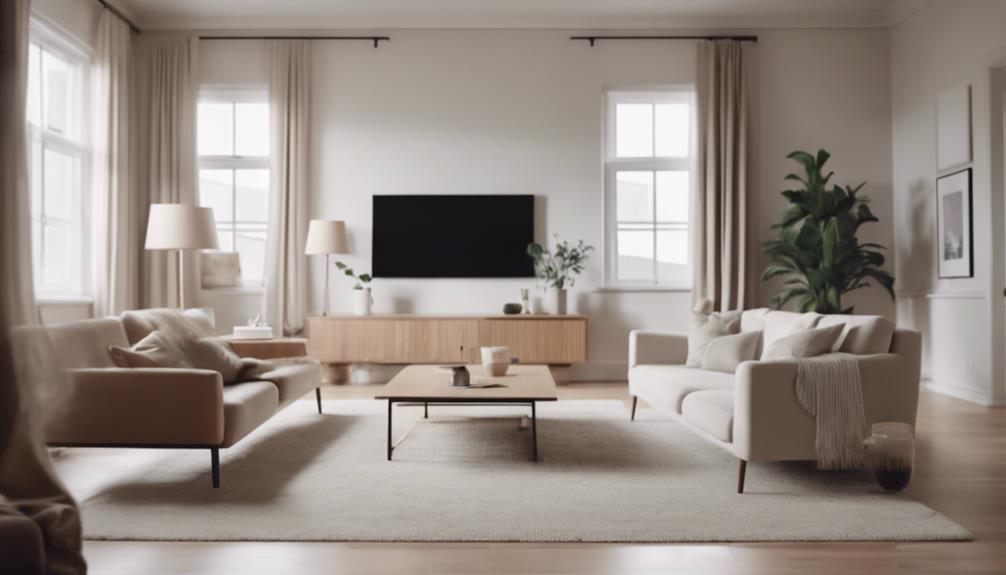
Minimalist home decor is all about simplicity and functionality, removing any excess to highlight the essential elements of your interior. This design concept originated in the mid-20th century as a response to the excessive consumer culture. Some key features include clean lines, neutral colors, and natural materials such as wood. The idea behind this philosophy is to create a visually calming and mentally decluttering space with a welcoming, serene atmosphere. To achieve a minimalist aesthetic, opt for a simple color palette, minimalist furniture, and make the most of natural light. Practical storage solutions and a tranquil bedroom design are also crucial elements. For further insights on minimalist decor, check out tips for every room in your home.
Key Takeaways
- Emphasizes simplicity and functionality in design.
- Focuses on clean lines and uncluttered spaces.
- Utilizes neutral colors and natural elements like wood.
- Strives for a serene atmosphere and visual calm.
- Incorporates smart storage solutions and minimalist accessories.
History of Minimalist Home Decor
Minimalist home decor emerged in the mid-20th century as a response to the excesses of consumer culture, emphasizing simplicity and functionality. This design approach sought to strip away unnecessary elements and focus on essential aspects of interior spaces. The history of minimalist home decor is deeply rooted in the idea of living with only what's necessary, promoting a sense of calm, order, and visual harmony in living spaces.
Influenced by the minimalist art movement, minimalist home decor emphasizes clean lines, open spaces, and a monochromatic color palette. This style of design is characterized by a lack of clutter, the use of natural materials like wood and stone, and a focus on essential elements. By embracing minimalism, individuals were encouraged to make intentional design choices that fostered a decluttered environment conducive to mindful living.
Key Characteristics of Minimalist Decor
After exploring the historical roots of minimalist home decor and its connection to intentional living, let's now outline the key characteristics that define this design approach.
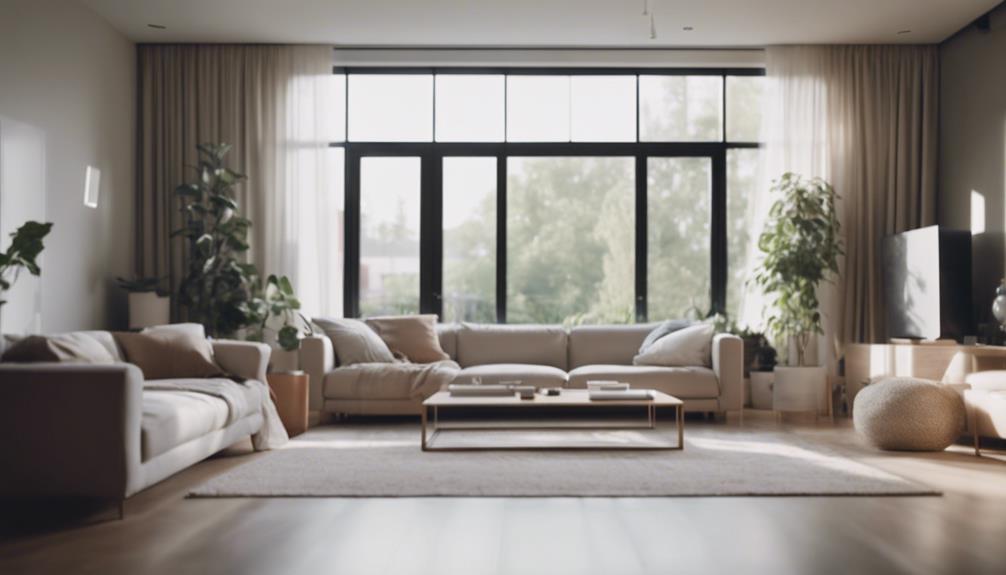
Minimalist decor is all about simplicity, with clean lines and uncluttered spaces taking center stage. The use of neutral colors such as whites, grays, and blacks creates a calm and open feel in minimalist interiors. Natural elements like wood, stone, and metal are incorporated to add texture and warmth to the space, enhancing the minimalist lifestyle.
Furniture in minimalist decor follows a streamlined design philosophy, free of fancy frills, to maintain a cohesive and harmonious look. Smart storage solutions and simple accessories play an essential role in minimalist home decor, ensuring that the space remains clean, organized, and clutter-free. By focusing on these key characteristics, minimalist decor creates a serene environment that promotes relaxation and a sense of clarity in the living space.
Benefits of Minimalist Interior Design
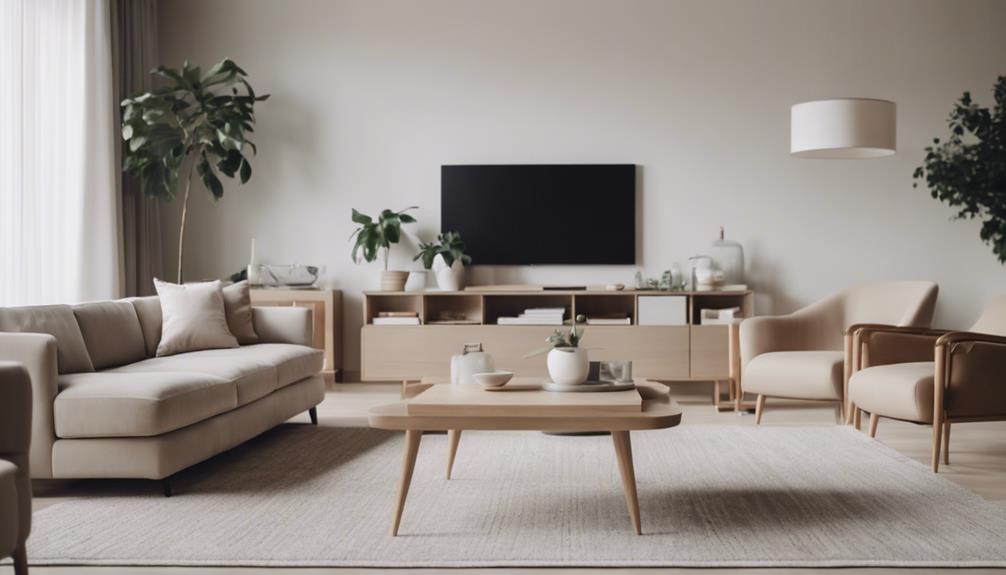
Promoting visual calm and mental decluttering, minimalist interior design creates welcoming and serene living spaces. By embracing simplicity and essential elements, minimalist interior design fosters a sense of relaxation in the home.
The emphasis on clean, clutter-free environments helps to establish a serene atmosphere that feels inviting and tranquil. While minimalist design focuses on functionality and practicality, it also incorporates warmth to prevent spaces from appearing cold or sterile.
This blend of practicality and warmth enhances the beauty of simplicity, making minimalist interior design both aesthetically pleasing and functional. Overall, the benefits of minimalist interior design lie in its ability to create spaces that aren't only visually appealing but also conducive to a sense of peace and tranquility.
The practical aspects of minimalist design work harmoniously with the warmth and simplicity to cultivate a living environment that promotes well-being and comfort.
Minimalist Color Palette Choices
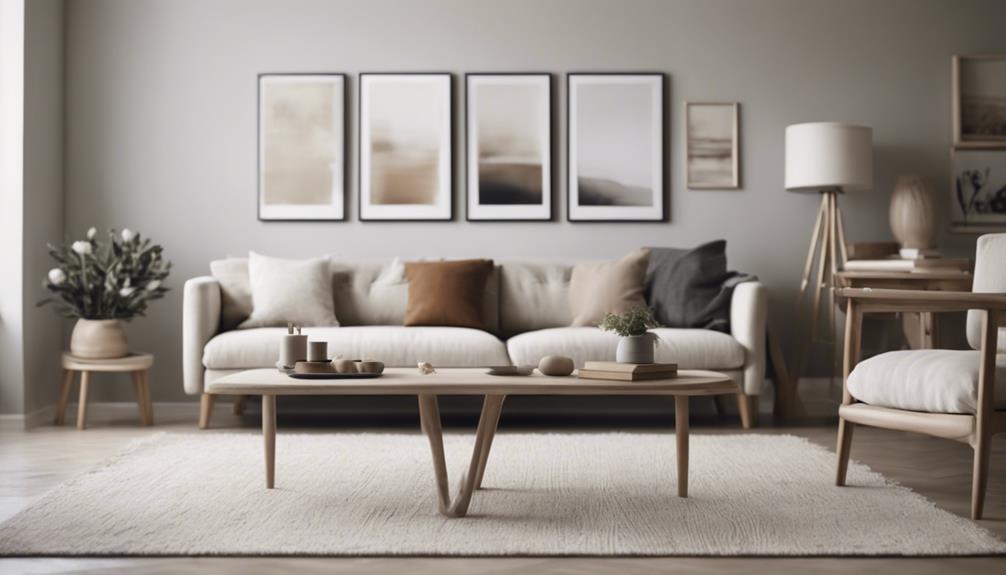
When contemplating minimalist color palette choices for your home decor, it's crucial to focus on a neutral color scheme, incorporating whites, grays, and blacks. These colors create a serene and uncluttered ambiance, allowing for a clean and sophisticated look.
While adhering to neutral tones, integrating a pop of color strategically can add visual interest and personality to the space.
Neutral Color Scheme
Utilizing neutral hues like whites, grays, and blacks forms the cornerstone of a minimalist color palette, creating a serene and spacious ambiance in home decor. In minimalist style, white walls are often chosen to enhance the feeling of simplicity and cleanliness.
These neutral colors not only provide a calming backdrop but also allow other design elements to stand out without overpowering the space. Minimalist decor frequently employs a monochromatic palette, where different shades of a single color are used to maintain a cohesive and uncluttered look.
The use of a neutral color scheme in minimalist design emphasizes sophistication and elegance while promoting a sense of tranquility and minimalism within the living space.
Monochromatic Design Elements
In minimalist home decor, the integration of monochromatic design elements, such as whites, grays, and blacks, guarantees a cohesive and visually harmonious aesthetic. Embracing a monochromatic color palette in minimalist design offers various benefits that contribute to the overall feel of the space:
- Minimalist design aesthetic: Monochromatic colors align with the essence of minimalism, emphasizing simplicity and functionality.
- Visual harmony: The use of a single color family creates a sense of balance and unity throughout the room.
- Timeless aesthetic: Monochromatic schemes have a classic appeal that transcends trends, ensuring longevity in style.
- Reduced visual distractions: By limiting the color palette, monochromatic design reduces clutter and allows key elements to shine in the space.
Pop of Color
To enhance the minimalist aesthetic with a touch of vibrancy, consider incorporating a carefully chosen pop of color into your decor.
While minimalist design typically revolves around a neutral color palette of whites, grays, and blacks, adding a pop of color through accent pieces can bring visual interest and personality to the space.
Opt for a single hue that contrasts with the neutral backdrop to create a striking visual impact. This pop of color can be introduced through items like cushions, artwork, or a statement furniture piece, serving as focal points that draw attention without overwhelming the overall simplicity of the design.
Furniture Selection for Minimalist Spaces
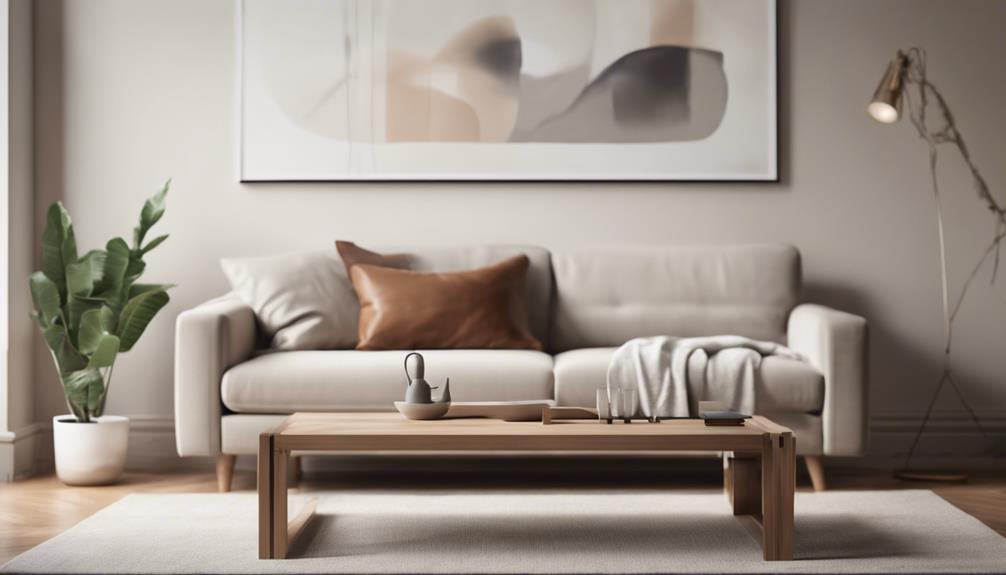
When furnishing minimalist spaces, it's essential to opt for furniture with clean lines and simple designs.
Choosing pieces made of natural materials like wood, metal, or stone can add warmth and an organic touch to the room.
To maximize functionality, consider selecting furniture that serves a dual purpose, such as items with hidden storage options.
Essential Furniture Pieces
Opting for essential furniture pieces is key when outfitting minimalist spaces for a sleek and uncluttered look. When selecting furniture for a minimalist home decor, consider these items:
- A sleek sofa with clean lines and a minimalistic design to serve as the focal point of the living room.
- Simple coffee table or side table made of natural materials such as wood or metal for a touch of warmth.
- Functional storage solutions like a minimalist bookshelf or a sleek media console to keep items organized and maintain the clean aesthetic.
- Minimalist dining table with a simple design and neutral color palette to anchor the dining area without overwhelming the space.
These furniture pieces embody the essence of minimalist design, creating a harmonious and serene atmosphere in your living spaces.
Neutral Color Schemes
Choosing furniture pieces with neutral color schemes is fundamental for creating a serene and cohesive minimalist space. Neutral colors like whites, grays, and blacks help reduce visual clutter, promoting a sense of spaciousness even in smaller rooms. Furniture with clean lines and no elaborate details enhances the flow and fits well in minimalist spaces. To add warmth and texture, consider incorporating natural elements such as wood, stone, and metal in your furniture and decor. This combination of neutral colors and natural elements fosters a calm and open ambiance, allowing other design elements to shine while maintaining simplicity and elegance.
| Neutral Color Schemes in Minimalist Home Decor | ||
|---|---|---|
| Reduce visual clutter | Create a sense of spaciousness | Enhance simplicity and elegance |
Functional Space Utilization
To maximize space utilization in minimalist home decor, our focus shifts towards selecting furniture that embodies functionality and practicality. In minimalist spaces, furniture with clean lines and simple designs is favored to maintain a clutter-free environment.
When choosing furniture for a minimalist home, consider multifunctional pieces like storage ottomans or nesting tables. These items not only serve their primary function but also provide additional storage or versatility. In a minimalist setting, furniture selection is deliberate, aiming to avoid unnecessary items that can clutter the space.
The goal is to curate a harmonious environment with a visually appealing aesthetic, free of distractions.
Incorporating Natural Elements in Decor
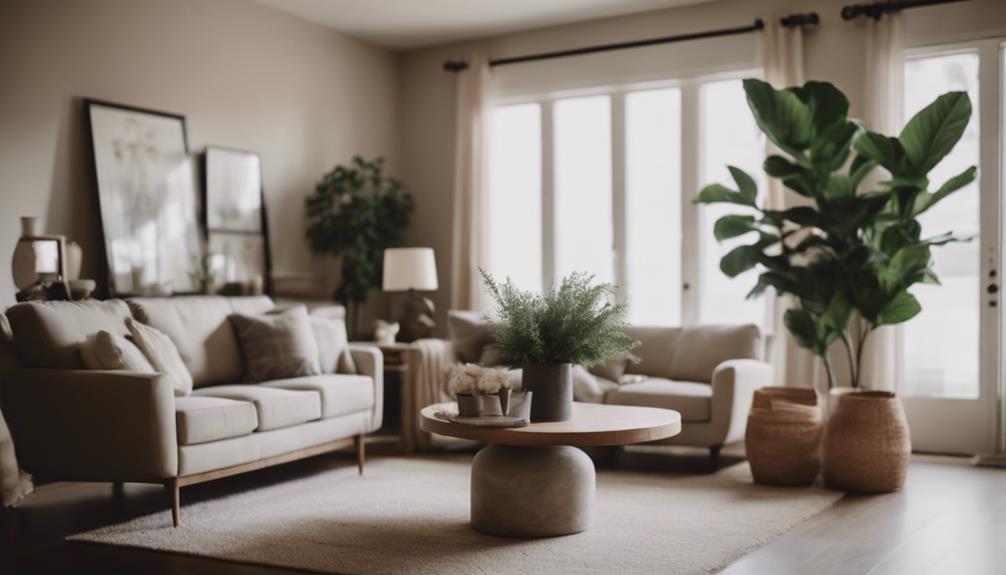
In minimalist home decor, we consistently find that incorporating natural elements like wood, stone, and metal enhances the overall aesthetic with texture and warmth. By integrating these organic materials, we can create a soothing ambiance that connects the space to nature, enhancing the minimalist design. Hand-hewn exposed beams and marble, for instance, can serve as striking focal points in a minimalist decor, adding a touch of elegance and sophistication. Additionally, subtle hints of rustic elements can be introduced to provide contrast and visual interest in an otherwise clean and uncluttered space.
To further illustrate how natural elements can transform a minimalist home, consider the following table:
| Natural Materials | Enhancing Minimalist Decor |
|---|---|
| Wood | Adds warmth and texture |
| Stone | Provides a sense of calm |
| Metal | Offers a sleek aesthetic |
| Marble | Creates a luxurious feel |
| Exposed Beams | Adds a touch of rustic charm |
Integrating these elements thoughtfully can elevate the overall look and feel of a minimalist space, emphasizing simplicity and natural beauty simultaneously.
Maximizing Natural Light in Minimalist Homes
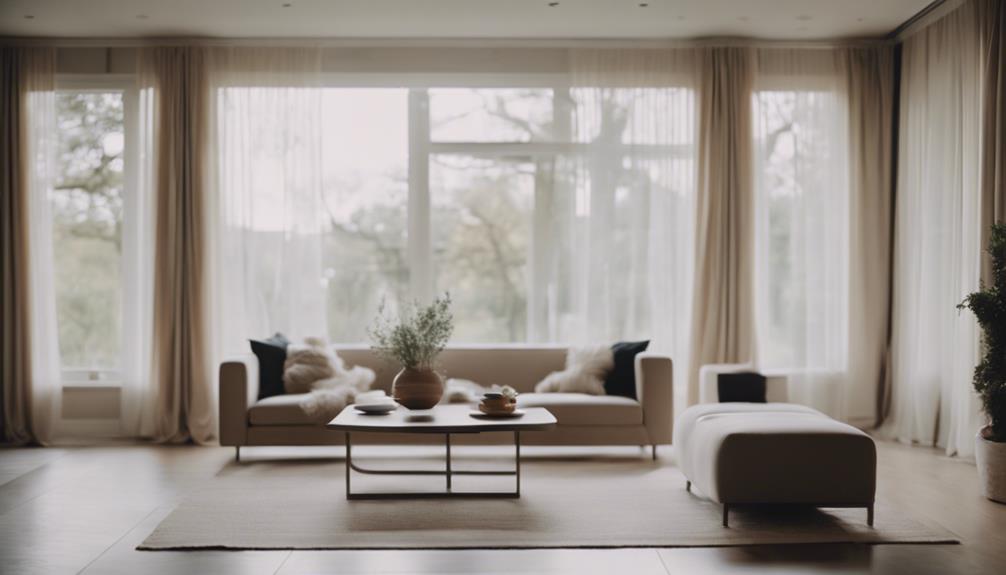
Maximizing natural light in minimalist homes plays an essential role in creating an open and expansive ambiance, complementing the incorporation of natural elements for a harmonious design. To achieve this, consider the following:
- Large Windows: Installing large windows allows abundant natural light to flood the space, enhancing the minimalist home decor.
- Reflective Surfaces: Incorporating mirrors and reflective surfaces helps bounce light around the room, creating a brighter and more spacious feel.
- Skylights: Utilizing skylights or light tubes is a great way to introduce natural light from above, adding a unique touch to minimalist interiors.
- Control Options: Using sheer curtains or blinds gives you the flexibility to adjust the amount of light entering the room while maintaining the clean and uncluttered aesthetic.
Minimalist Storage Solutions
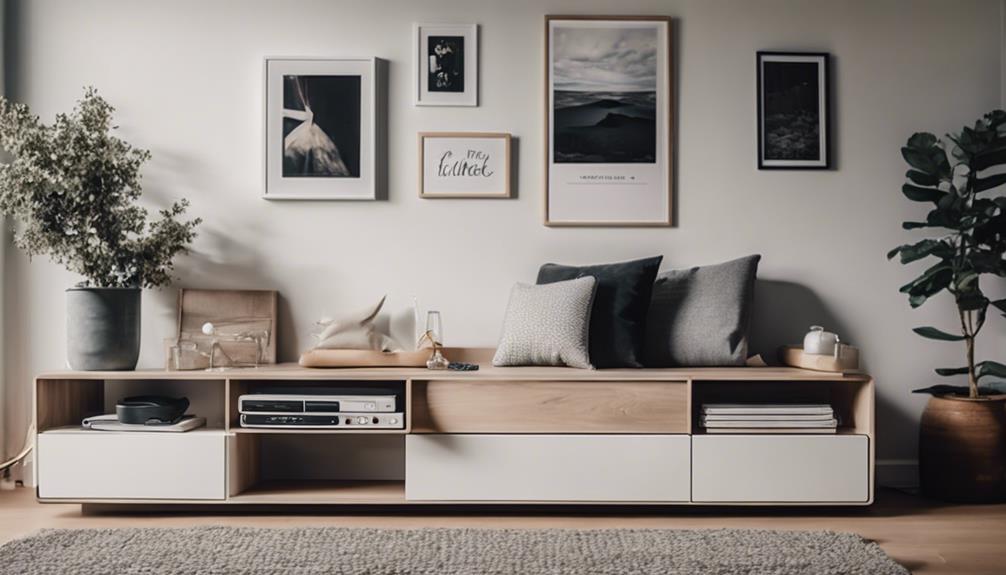
Minimalist storage solutions in home decor often prioritize sleek designs that utilize push-latch closures and concealed appliances for a clean and uncluttered look. By skipping visible hardware and opting for push-latch closures on cabinets, the aesthetic remains streamlined and modern.
In minimalist kitchens, the use of concealed appliances helps maintain the uncluttered feel, with panel-ready appliances being a popular choice to seamlessly blend into cabinetry for a cohesive look. This seamless blending of elements extends to other spaces as well, with concrete backsplashes and countertops often chosen to create a unified and clutter-free storage solution.
Emphasizing simplicity and functionality, minimalist storage solutions aim to create a sense of calm and order within a space while still being visually appealing. The key lies in the integration of design elements to achieve a harmonious and serene environment that's both practical and beautiful.
Creating Serene Minimalist Bedrooms
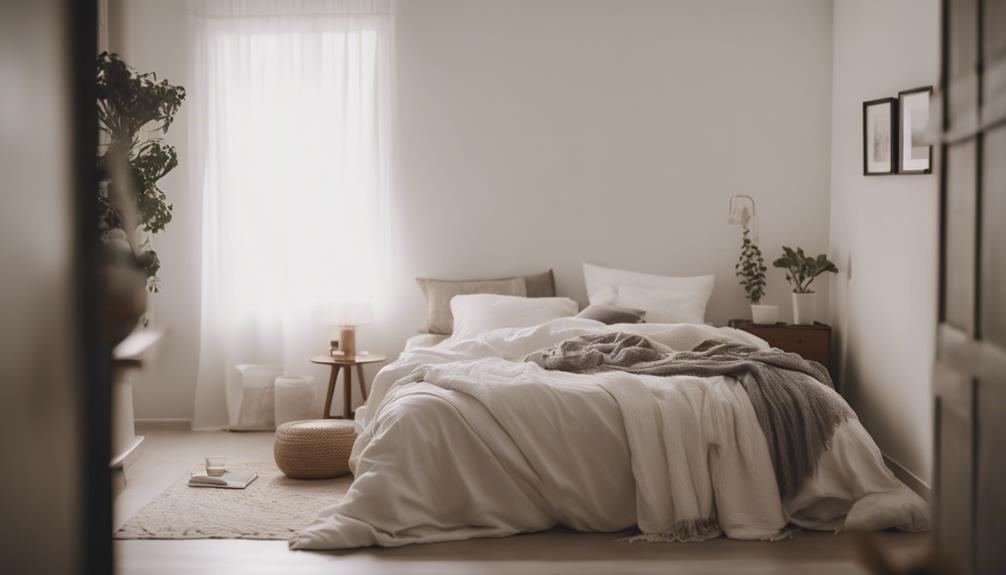
Moving from minimalist storage solutions, let's now explore how to cultivate serene minimalist bedrooms.
When designing a serene minimalist bedroom, consider the following:
- Neutral Color Palettes: Opt for whites, beiges, and greys to create a calming ambiance.
- Natural Materials: Incorporate wood, stone, and cotton to add warmth and texture to your bedroom decor.
- Essential Furniture Pieces: Focus on minimalist essentials like platform beds, simple dressers, and unobtrusive nightstands.
- Decluttering and Smart Storage: Keep surfaces clear and utilize hidden drawers or under-bed storage to maintain the minimalist aesthetic.
Minimalist Decor Tips for Every Room
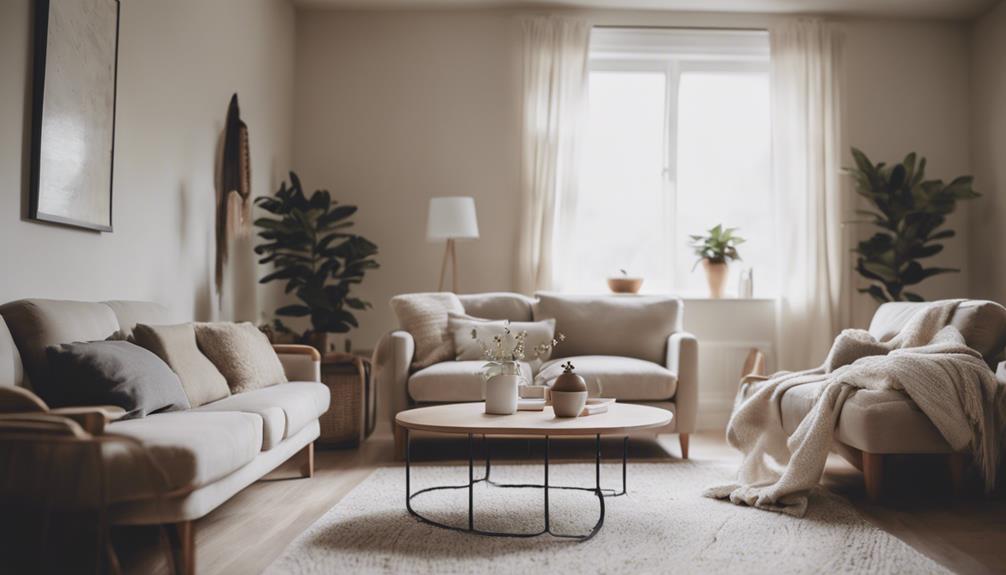
When designing a minimalist space, essential furniture placement and a neutral color palette are key factors to take into account. These elements help create a sense of openness and tranquility in every room.
Essential Furniture Placement
Strategically placing furniture in each room is essential for achieving an open and uncluttered space in minimalist home decor. When it comes to furniture placement in minimalism, consider these key points:
- Flow: Arrange furniture to create a harmonious flow that allows for easy movement throughout the room.
- Functionality: Position pieces to serve their intended purpose efficiently, avoiding unnecessary clutter.
- Space: Opt for furniture that maximizes space without overcrowding, maintaining a sense of openness.
- Organization: Keep furniture placement organized and visually appealing to enhance the overall minimalist design.
Neutral Color Palette
To achieve a serene and uncluttered ambiance in minimalist home decor, incorporating a neutral color palette is key for enhancing the overall aesthetic of every room. Neutral tones like whites, grays, and blacks create a calm and open feel, allowing other elements in the room to stand out and promoting simplicity.
These colors help minimize distractions and maintain a clean, uncluttered look in every space. By using a neutral color scheme, you can enhance the flow and visual appeal of minimalist rooms. Additionally, neutral colors provide a versatile backdrop for minimalist decor, making it easier to coordinate with different design elements.
Embracing a neutral color palette is a fundamental step towards achieving the desired minimalist look in your home.
Frequently Asked Questions
What Is Minimalist Decorating Style?
Minimalist decorating style is all about simplicity, clean lines, and uncluttered spaces. It focuses on functionality over ornate decorations to create a calming atmosphere.
Neutral colors such as whites, greys, and beiges are commonly used. Natural materials like wood, stone, and metal add texture and warmth.
Smart storage solutions and minimal accessories are key in achieving this aesthetic.
What Does a Minimalist Home Look Like?
A minimalist home embodies simplicity, featuring clean lines, neutral colors, and uncluttered spaces to create a serene and spacious environment.
Furniture is streamlined with no elaborate details, promoting a cohesive and calming atmosphere. Decorations are minimal yet carefully selected to add character without overwhelming the space.
An open layout enhances the sense of freedom and movement, while incorporating natural elements like wood and metal brings warmth and a connection to nature for a soothing ambiance.
What Is a Minimalist Interior Concept?
A minimalist interior concept prioritizes simplicity, clean lines, and uncluttered spaces. It focuses on functionality, essential elements, and a monochromatic color palette. This design promotes a sense of calm, tranquility, and visual decluttering.
Incorporating natural materials, textures, and warmth helps balance minimalist spaces. Originating in the 60s and 70s, it was influenced by minimalist art movements and modern design principles.
Why Do People Like Minimalist Decor?
We like minimalist decor for its calming, uncluttered vibe, promoting relaxation. It emphasizes quality items over quantity, making spaces easier to maintain.
Its timeless appeal avoids trends, fostering mindfulness and intentionality in design choices. The simplicity of minimalist decor not only looks good but also encourages a more thoughtful lifestyle.
How Can I Incorporate Minimalist Elements into My Home Decor Aesthetic?
Incorporating minimalist elements into your home decor aesthetic can create a sleek and sophisticated look. To discover your home decor aesthetic, consider decluttering and using a neutral color palette. Opt for clean lines and simple furniture to achieve a minimalist vibe, while adding natural textures for warmth and depth.
Conclusion
To sum up, minimalist home decor is a design style that emphasizes simplicity, functionality, and clean lines. It promotes a sense of calm and clarity in your living space, making it easier to relax and focus.
By decluttering and focusing on quality over quantity, minimalist decor can transform your home into a peaceful retreat.
So, embrace the minimalist lifestyle and experience the joy of living in a space that feels like a serene sanctuary.
Home Decor
How Long Is Interior Decorating School
Start your journey in interior decorating school and unravel the diverse durations that can shape your career success – from diplomas to master's degrees.

Interior decorating school may vary in length from six months for a diploma course, up to four years for a bachelor’s degree, and even further to a master’s program lasting a few additional years. These programs provide different levels of expertise that are customized to suit individual career goals, ranging from basic skills to advanced design concepts. It is crucial to comprehend the different timelines and educational options in order to align your education with your aspirations. If you are seeking more information on the duration of interior decorating schools and how it can affect your career prospects, you can find further details in our comprehensive research.
Key Takeaways
- Diploma courses typically last 6 months to 1 year, focusing on fundamental techniques and design principles.
- Bachelor's degree programs take 4 years, covering advanced theory and providing internships for practical experience.
- Master's degree programs span 2 years, offering advanced concepts, research projects, and specialized exploration.
- State licensure takes about a month, certification varies from 6 months to 1 year, and NCIDQ certification can range from 1 month to 5 years.
- Interior decorating education duration ranges from 6 months to 4 years, depending on the program and career goals.
Duration of Diploma Courses

When diving into the duration of diploma courses in interior decorating, let's explore the typical timeline for completion.
Diploma courses in interior decorating usually last between 6 months to 1 year. During this time, students are exposed to fundamental techniques that form the backbone of their understanding in this field. These courses offer a focused curriculum that centers on essential skills and knowledge required for a successful career in interior decorating.
Students can expect to engage in hands-on training and gain practical experience to complement their theoretical learning. The emphasis is on mastering design principles and developing a strong foundation in interior decorating. Diploma courses provide a quicker route to kickstarting a career in this industry compared to longer degree programs, making them a popular choice for individuals looking to enter the workforce sooner.
Bachelor's Degree Timeframe

A bachelor's degree in interior decorating typically takes 4 years to complete.
During this time, students engage in coursework covering advanced design theory, history, and practical skills.
Additionally, they may participate in internships to gain valuable hands-on experience in the field.
Degree Completion Timeline
Our bachelor's degree program in interior decorating typically spans four years, covering key design principles and practical skills necessary for a successful career in the field. This timeframe allows students to explore courses on design theory, color concepts, spatial arrangements, and more. Additionally, completing a bachelor's degree in interior decorating involves fulfilling general education requirements alongside specialized coursework tailored to the discipline. Throughout the program, students may have the opportunity to engage in internships and gain hands-on experience, further enhancing their understanding of the industry. By the end of the four-year completion timeline, graduates are equipped with a solid foundation in interior decorating that prepares them for various roles within the field.
| Year | Milestones |
|---|---|
| Year 1 | Introduction to Design Principles |
| Year 2 | Advanced Color Theory and Space Planning |
| Year 3 | Internship Opportunities and Hands-on Experience |
Coursework and Requirements
Moving from the degree completion timeline to the coursework and requirements of a bachelor's degree in interior decorating, students explore design theory, history, and hands-on studio work. Throughout the four-year program, coursework investigates areas such as color theory, textiles, space planning, and sustainable design practices. Students also learn about the history of interior design to understand its evolution and significance in contemporary spaces.
Practical studio work allows students to apply theoretical knowledge to real-world projects, honing their skills in creating functional and aesthetically pleasing interiors. Requirements for the bachelor's degree may include internships, design projects, and portfolio development to enhance practical experience and build a professional portfolio. Graduates emerge prepared for entry-level positions in the dynamic field of interior decorating.
Internship and Experience
During the bachelor's degree timeframe, students typically engage in a 6-month to 1-year internship or work experience requirement as part of their interior decorating education. This essential learning opportunity allows students to work with professionals in the field, gaining practical skills and insights that complement their classroom knowledge.
Through internships, students can apply theoretical concepts to real-world projects, honing their communication skills and building a strong portfolio. Additionally, the experience garnered during these internships can greatly enhance students' job prospects post-graduation, as employers value candidates with practical experience in addition to academic qualifications.
Master's Degree Duration

Master's degree programs in interior decorating typically span over a period of 2 years, although accelerated options can be completed in as little as 12 months.
During these programs, students explore advanced design concepts, engage in research projects, and investigate specialized areas within the field.
Additionally, many master's programs require students to complete a thesis or a final project showcasing their expertise in interior decorating.
Program Length Options
In interior decorating, the duration of master's degree programs typically spans around 2 years, with flexibility in program structures influencing the length. Master's Degree in Interior programs offer options for Interior Designers looking to advance their skills.
Some programs at institutions like Interior Decorators International may provide accelerated paths for completion in 1.5 years, catering to those seeking a quicker route to specialization. Conversely, part-time study choices allow students to balance education with other commitments, extending the program duration to 3 years.
Throughout these programs, students explore in depth advanced design concepts, research methodologies, and practical applications, enabling them to investigate specialized areas within interior decorating thoroughly. The length of the master's degree program ensures a thorough understanding of the field.
Coursework and Research
Engaging in hands-on projects, conducting research, and presenting design concepts are essential components of coursework for interior decorating master's degree programs, typically lasting 2 years.
Throughout the program, students explore coursework covering design principles, advanced techniques, and research methodologies. Hands-on projects allow students to apply theoretical knowledge to practical scenarios, fostering a deep understanding of interior decorating concepts.
Research methodologies are refined through exploration of trends, materials, and innovative design solutions, preparing students for the complexities of the industry. Design presentations play a vital role in showcasing students' creativity and problem-solving skills.
Specializations in areas like sustainable design, historic preservation, or hospitality design offer students the opportunity to focus their studies on specific interests within the field.
Thesis or Project
Completing a thesis or final project in interior decorating master's degree programs typically involves focused research or design work over a period ranging from a few months to a year. During this phase, students explore a specific research topic or design project that showcases their acquired knowledge and skills. The thesis or final project serves as a culmination of the master's program, requiring students to defend their work successfully. This milestone is important for completing a master's degree in interior decorating and demonstrates the student's expertise in the field. Below is a table highlighting key aspects of the thesis or final project in interior decorating master's degree programs:
| Aspect | Description | Importance |
|---|---|---|
| Research Focus | Specific topic or project explored in depth | Essential |
| Duration | Ranges from a few months to a year | Significant |
| Defending Process | Required to showcase knowledge and skills acquired during the program | Critical |
National Certification Timeline

The timeline for achieving National Certification (NCIDQ) varies based on individual preparation, exam scheduling, and passing requirements. Typically, obtaining NCIDQ certification can take anywhere from 1 month to 5 years.
To become certified, candidates must meet eligibility criteria, pass three exams, and fulfill work experience requirements. NCIDQ certification is essential for demonstrating proficiency and commitment to the interior design profession. It not only validates one's skills but also opens doors to career advancement and recognition within the industry.
State Licensure Timeframe

State licensure for interior decorators typically takes about a month to complete, involving verifying qualifications, submitting forms, and passing exams.
It's important to check with the relevant licensing board as requirements vary by location.
Understanding the licensing process duration, exam preparation timeline, and requirements completion time is key to becoming a licensed interior decorator.
Licensing Process Duration
Researching and understanding specific state regulations is vital when determining the timeframe for obtaining a license in interior decorating.
The licensing process duration for interior decorators can vary greatly depending on the state regulations. In some states, individuals may need to fulfill specific education requirements and pass exams before becoming licensed. This process can take anywhere from a few weeks to several months.
It's important to carefully review the licensing process in the state where you intend to practice to make sure you meet all the necessary criteria. By being knowledgeable about the education requirements and state regulations, you can streamline the licensing process and work towards becoming a licensed interior decorator efficiently.
Exam Preparation Timeline
Exam preparation for state licensure as an interior decorator typically takes a few weeks to a month, allowing individuals to focus on mastering relevant laws, regulations, and industry standards. The timeline for exam preparation may vary depending on study habits and familiarity with the content.
State licensure exams for interior decorators primarily assess knowledge of laws, regulations, and industry standards. To enhance the chances of passing, it's essential to dedicate ample time to review and practice exam-related materials. Some individuals may choose to utilize exam prep courses or study guides to aid in their preparation for the state licensure exam.
Requirements Completion Time
After finishing interior decorating school requirements, the timeframe for state licensure can vary, typically ranging from a few weeks to a month. Students may opt for diploma courses to acquire fundamental techniques in interior decorating within a shorter timeframe. These courses offer a quick route to gaining essential skills compared to longer degree programs.
State licensure requirements post-education often involve verification processes for interior decorating certification. Completing the necessary steps promptly after finishing interior decorating school is important to obtaining licensure efficiently. By understanding the completion time for these requirements and planning accordingly, individuals can streamline the process of becoming a licensed interior decorator. It's advisable to stay informed about specific state regulations to ensure a smooth progression from school to professional practice.
Program Length Variability

In interior decorating school, the length of programs can vary greatly, ranging from as short as 6 months for a diploma course to up to 4 years for a bachelor's degree program. Diploma courses typically take around 6 months to 1 year to complete, providing a more detailed and quicker route into the field.
On the other hand, bachelor's degree programs in interior decorating are more thorough and in-depth, requiring 3 to 4 years for students to finish. These programs offer a deeper understanding of the principles and practices of interior decorating, preparing students for a wider range of career opportunities in the industry.
The duration of the program often depends on the institution, the specific curriculum, and whether students are studying full-time or part-time. It's essential for aspiring interior decorators to take into account their career goals and time commitments when choosing between a diploma course or a bachelor's degree program in interior decorating.
Degree Completion Periods

Degree completion periods for interior decorating programs vary depending on the level of degree pursued, with certificate programs typically lasting 6-12 months, associates degree programs taking 2 years, bachelor's degree programs requiring 4 years, master's degree programs spanning over 2 years, and doctorate degrees lasting 4+ years.
| Degree Level | Completion Period |
|---|---|
| Certificate | 6-12 months |
| Associate's Degree | 2 years |
| Bachelor's Degree | 4 years |
| Master's Degree | >2 years |
Certificate programs offer a quick route to gaining fundamental knowledge, usually completed within a year. Associates degrees explore further into the field and provide a thorough understanding over 2 years. Bachelor's degrees provide extensive education, covering various aspects of interior decorating in a 4-year period. Master's degree programs focus on advanced concepts and research, typically exceeding 2 years. Doctorate degrees, the highest level, involve in-depth research and can extend beyond 4 years. Each degree level equips students with specific skills and knowledge essential for a successful career in interior decorating.
Pursuing Advanced Degrees

Exploring advanced degrees in interior decorating provides an opportunity to investigate further into specialized areas of study for those passionate about the field. When considering pursuing advanced degrees in interior decorating, individuals should be aware of the varying time frames for completion at different levels of education. Here are some key points to keep in mind:
- Bachelor's degree programs in interior decorating typically take around 4 years to complete, offering a thorough foundation in the field.
- Master's degree programs in interior decorating usually last for 2 years, allowing students to explore deeply into specific aspects of design and decoration.
- Doctorate degrees in interior decorating can take 4 or more years to finish, focusing on advanced research and academic exploration within the discipline.
- Certificate programs in interior decorating provide a quicker option, with completion possible in 6-12 months, offering specialized training for those seeking to enhance their skills in a shorter time frame.
Certification and Licensure Timelines
How long does it typically take to complete certification and licensure requirements for interior decorating?
Certification for interior decorating usually ranges from 6 months to 1 year. This process involves completing specific courses or programs to gain the necessary skills and knowledge in the field.
On the other hand, licensure requirements for interior decorating can vary by state and may take up to 1 month to obtain. It's essential to check with your state's licensing board to understand the specific requirements needed to practice as an interior decorator legally.
National Certification (NCIDQ) for interior decorating is another avenue worth exploring, typically taking anywhere from 1 month to 5 years to achieve. This certification demonstrates a high level of expertise and can enhance job prospects in the industry.
Diploma courses in interior decorating offer fundamental techniques within a 6-month to 1-year timeframe, providing a solid foundation for aspiring decorators. Remember that state licensure for interior decorating may entail thorough verification and documentation before approval.
Educational Pathway Comparison

Comparing the educational pathways for interior decorating, typical durations for completing a diploma course, a bachelor's degree in interior design, and a master's degree program are as follows:
- Diploma Course: Interior decorating diploma programs can range from 6 months to 1 year, offering a quicker entry into the field.
- Bachelor's Degree: Pursuing a degree in interior design usually takes 3 to 4 years, providing a thorough education in the field.
- Master's Degree: Master's degree programs in interior design can last from 1 to 4 years, allowing for specialization and advanced knowledge.
- Career Opportunities: Obtaining a degree in interior design opens up various career opportunities, including working for design firms, real estate companies, or starting a private practice.
Considering the different durations and levels of depth in education, individuals can choose an educational path that aligns with their career goals and aspirations in the field of interior design programs.
Frequently Asked Questions
How Many Years Does It Take to Learn Interior Design?
It's crucial to research specific programs and career goals for accurate timeframes. Learning interior design typically takes around 3 to 4 years for a bachelor's degree program.
Additional studies for a master's degree can add 1 to 4 years. Acquiring national certification (NCIDQ) may vary from 1 month to 5 years.
State licensure could take up to 1 month. These timelines will depend on the individual's dedication, program requirements, and any additional certifications pursued.
How Long Does It Take to Complete an Interior Design Course?
We can complete an interior design course in 6 months to 1 year for a diploma. Pursuing a bachelor's degree in interior design usually takes 3 to 4 years.
A master's degree can take 1 to 4 years for advanced knowledge. Achieving National Certification (NCIDQ) may vary from 1 month to 5 years.
Fulfilling state licensure requirements typically takes up to 1 month.
How Long Does It Take to Finish Interior Design?
When completing interior design, the time frame varies based on the program level. Certificate programs usually take 6-12 months. Associate's degrees typically require about 2 years, while bachelor's degrees span 4 years. Master's degrees usually last 2 years. Doctorate degrees can take 4 or more years.
These durations reflect the extensive nature of interior decorating education, covering various aspects of design theory and practical application.
Is It Hard Being an Interior Decorator?
Being an interior decorator can be challenging, requiring a blend of creativity, attention to detail, and understanding clients' needs. It involves mastering color theory, design principles, and space planning. Practical experience through internships or hands-on projects can enhance skills.
Success in this field depends on individual talents and dedication. While it may have its difficulties, the rewards of creating beautiful spaces tailored to clients' preferences can make it a fulfilling career choice.
Is There a Connection Between Learning Interior Decorating and Purchasing Home Decor in China?
Learning interior decorating can greatly enhance your ability to effectively buy home decor in China. Understanding design principles and color theory will allow you to make informed decisions when purchasing home decor items, ensuring that they complement your overall interior aesthetic.
Conclusion
So, how long does it take to complete interior decorating school?
The duration can vary depending on the level of education you pursue. Diploma courses typically last a few months to a year, while a bachelor's degree can take around four years. Master's degrees may require an additional two to three years of study.
National certification and state licensure timelines also play a role in the overall length of your educational journey. Consider your goals and aspirations when choosing your educational pathway.
-

 Vetted8 months ago
15 Best EMS Foot Massagers for Neuropathy to Soothe Your Feet
-

 Vetted7 months ago
14 Best Personalized Father's Day Gifts for Your Husband – Show Him You Care
-

 Alfresco7 months ago
Alfresco Stacker Doors: Seamless Indoor-Outdoor Living!
-

 Tableware and Dining Accessories2 weeks ago
What Is the Meaning of the Word Tableware
-

 Tableware and Dining Accessories2 weeks ago
When Is Tableware on Sale at Hobby Lobby
-

 Tableware and Dining Accessories2 weeks ago
Which of the Following Is Not Classified as Tableware
-

 Vetted8 months ago
15 Best Detergents for Wool: Keep Your Woolens Looking Fresh and Fabulous
-

 Craft and Textiles5 hours ago
15 Best Places to Buy Appliances for Your Home – Top Retailers Reviewed


