Installing a ceiling fan involves several key steps tailored to each room. Start by measuring the space to choose the right blade size and verify the ceiling box is fan-rated. Turn off the power, and mount a sturdy junction box suitable for the fan's weight. Wire the fan carefully, connecting the black and white wires securely. Attach the blades and any lighting components, ensuring everything is tight and stable. Finally, test the fan to confirm its functionality. Each room has specific needs, so stick around to discover more tailored tips for your installation success.
Key Takeaways
- Measure room size to determine the ideal ceiling fan blade span for effective airflow and ambiance enhancement.
- Ensure a fan-rated junction box is securely mounted and can support at least 50 lbs for safety.
- Follow proper wiring techniques, connecting hot and neutral wires securely to avoid electrical issues.
- Test fan functionality and speed settings after installation to confirm smooth operation and correct airflow direction.
- Consider room-specific factors, such as ceiling height and moisture resistance, when selecting and installing your ceiling fan.

Westinghouse 0110000 Saf-T-Brace for Ceiling Fans, 3 Teeth, Twist and Lock,Silver(Pack of 1)
- Easy fan and fixture installation: Safe, simple installation process
- High weight capacity support: Supports fixtures up to 150 lbs
- Multiple knockout options: Includes 6 knockouts for wiring
As an affiliate, we earn on qualifying purchases.
As an affiliate, we earn on qualifying purchases.
Preparation for Installation
Before you start installing your ceiling fan, it's essential to prepare properly to guarantee a safe and effective setup. First, measure the room size to determine the ideal blade span for your ceiling fan. Typically, you can calculate this by dividing the room's square footage by four.
Additionally, ensuring that the lighting in the room is optimal can enhance the overall ambiance, similar to how contrast ratios in projectors impact image quality in home cinema setups. Next, inspect the existing ceiling box for stability. Make sure it's a fan-rated electrical box, as this is necessary for safety and can support the fan's weight.
Clear the installation area of any obstacles, ensuring you have a minimum clearance of 7 feet from the floor to the fan blades and 30 inches from the blade tips to the walls. This ideal airflow is crucial for your fan's performance.
Before you begin installation, turn off power at the circuit breaker and use a voltage tester to confirm that electricity is off. This step is essential for your safety.
Safety Measures
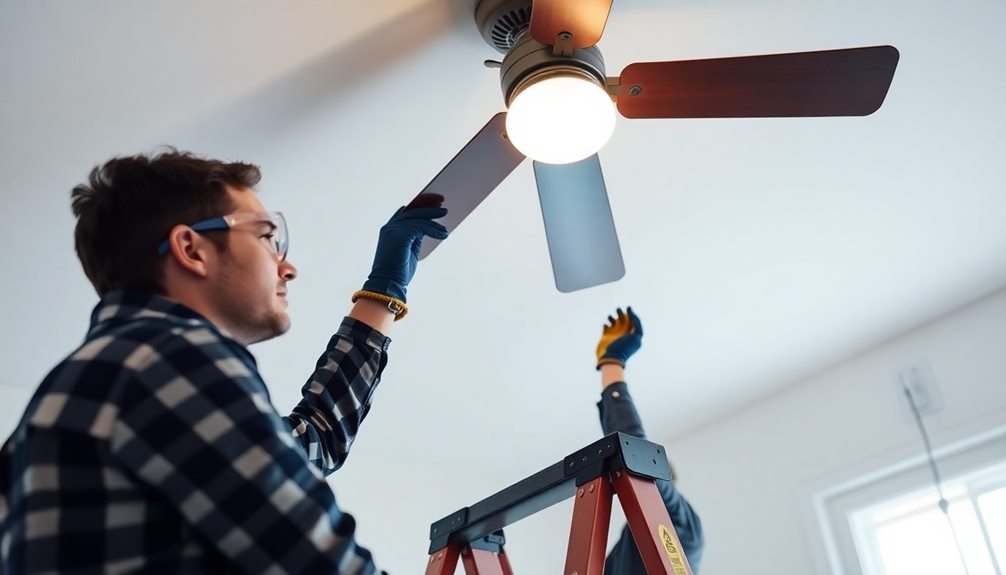
Safety is paramount when installing a ceiling fan. Always start by turning off the power at the circuit breaker to prevent electrical shock. After that, use a voltage tester to confirm that the power is completely off before you begin any ceiling fan installation work.
Additionally, be aware that maintaining good indoor air quality is essential, as poor air quality can impact your health, especially for individuals with respiratory issues. Regularly checking air quality indices can inform necessary actions to improve indoor air quality, such as using an air purifier for added protection improving overall indoor air quality.
Next, verify that your ceiling structure can support the fan's weight. This means using a fan-rated electrical box and verifying its stability. A proper installation is vital for both safety and functionality.
Don't forget to wear safety goggles to protect your eyes from debris. It's also important to work in a dry environment to minimize the risk of accidents. Following all manufacturer safety instructions is key to a successful installation.
Lastly, make certain your installation complies with local and national electrical codes. This not only guarantees your safety but also protects your home from potential hazards down the line.
Mounting the Junction Box

When you're mounting the junction box for your ceiling fan, make certain you choose a fan-rated box that can handle at least 50 lbs.
Position it carefully against a ceiling joist for maximum stability.
Proper installation techniques, like securing the box flush with the ceiling, are essential to guarantee your fan is safely supported.
Junction Box Selection Criteria
Choosing the right junction box is vital for a successful ceiling fan installation. Start by selecting a fan-rated junction box that can support the weight of your ceiling fan and any additional light fixtures. Standard electrical boxes often lack the necessary weight support, which could lead to dangerous failures.
Confirm the junction box is securely mounted to a ceiling joist or a brace that spans two joists, providing the extra stability your installation needs. It's important to verify that the junction box is UL-listed and specifically designed for ceiling fans. This guarantees compliance with safety standards, keeping your home safe.
Additionally, look for a junction box with ample space for wiring connections, allowing for easy access and efficient wire management. When you're installing the junction box, position it at least 8 inches from the ceiling to guarantee adequate airflow clearance for the fan blades.
Proper clearance not only enhances airflow but also reduces noise and wear on the fan. By following these selection criteria, you'll set the foundation for a secure and efficient ceiling fan installation.
Proper Installation Techniques
For a successful ceiling fan installation, proper mounting of the junction box is vital. Start with a fan-rated box that can support your ceiling fan's weight. Center the junction box against the ceiling, guaranteeing it's at least 7 feet high for ideal clearance. Use a pencil to trace the outline of the box on the drywall, which helps achieve a snug fit when cutting.
Next, feed the electrical cable through the knockout hole, and secure the box to the ceiling joist using 1.5-inch screws as mounting hardware for stability. It's essential to confirm that the mounting bracket is also securely attached to the junction box.
Here's a quick reference table to assist you:
| Step | Action |
|---|---|
| 1. Box Type | Use a fan-rated box |
| 2. Box Height | Center at least 7 feet from the floor |
| 3. Secure the Box | Use 1.5-inch screws to secure to joist |
Wiring the Ceiling Fan

Wiring a ceiling fan is a vital step that guarantees your fan operates safely and efficiently. Start by verifying the power is turned off; use a voltage tester to confirm this. Once you're certain it's safe, you can begin wiring your ceiling fan.
Before starting, it's also wise to verify your installation area is free from any flammable materials to promote a safe work environment, similar to the precautions taken with wood stove safety standards. Connect the black wire (hot) from the fan to the black wire from your household circuit, the white wire (neutral) to the white wire, and the ground wire (green or bare) to the ground wire.
Always use wire connectors, like wire nuts, to secure connections. Make sure they're tight and insulated to prevent electrical shorts. It's essential to follow the manufacturer instructions for your specific fan model, as wiring requirements might differ.
After connecting the wires, gently push all securely connected wires back into the junction box. This keeps your installation neat and prevents any accidental disconnections.
Taking these steps will help verify your ceiling fan is wired correctly and ready for use. Remember, safety is your top priority, so don't rush through any part of this process.
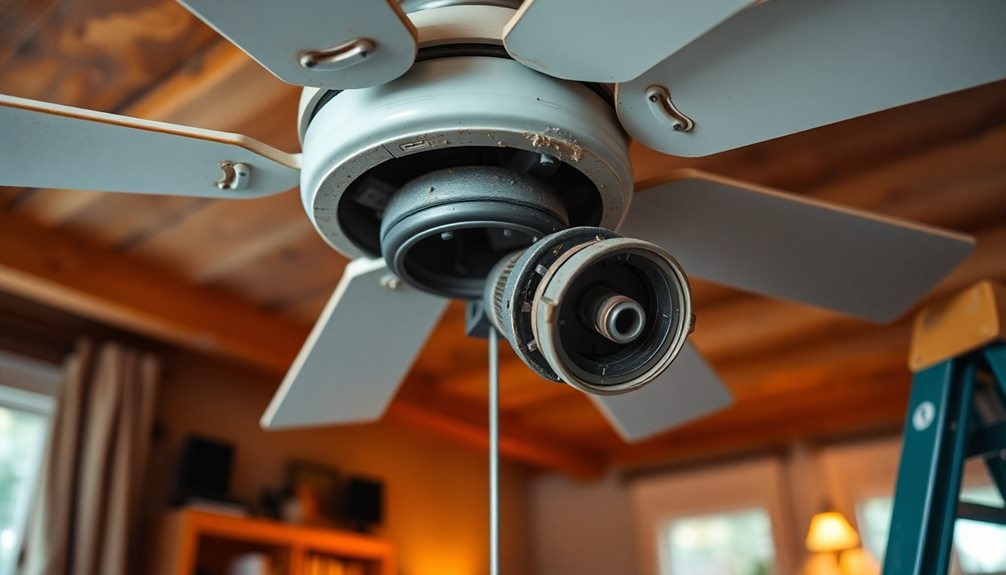
Attaching the Fan Blades

Attaching the fan blades is an essential step that directly impacts your ceiling fan's performance and aesthetics.
To begin, you'll want to carefully align the blades with the blade brackets. Make sure the side with the decorative finish is facing downwards. Using the provided hardware, hand-tighten the screws into each blade bracket before fully tightening them with a screwdriver. This careful approach helps prevent over-tightening, which could damage the fan blades.
If your fan features quick-install blades, simply align the blade into place and lock it according to the manufacturer's instructions.
For standard blades, use screws to secure them to the blade arms. Once you've securely attached the fan blades, it's vital to check for any wobbling. Gently spin the fan and observe its movement. If you notice any wobbling, revisit the screws to secure them tightly and verify the blades are evenly spaced.
Installing Lighting Components
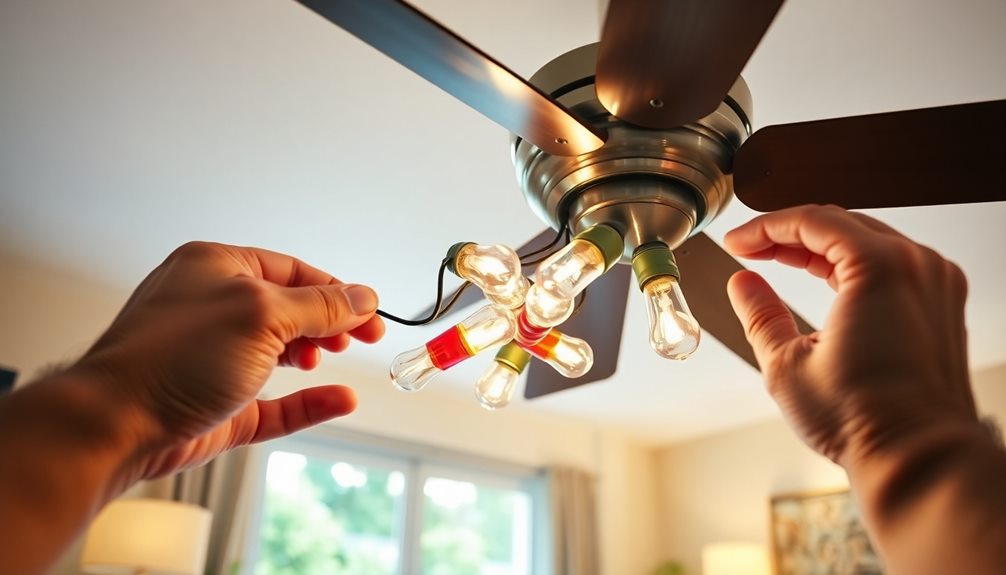
Installing the lighting components on your ceiling fan is a straightforward process that enhances both functionality and style.
Before you start, make certain the fan is securely mounted and the power is turned off at the circuit breaker to avoid electrical shock.
Follow these steps to install the light kit:
- Secure the Light: Attach the light fixture to the designated mounting points on the fan's canopy using screws, affirming it's firmly in place.
- Electrical Wiring: Connect the wiring by joining the black wire from the light kit to the black wire from the fan and the white wire to the white wire. Double-check these wire connections for security.
- Use Appropriate Wattage: Install the specified LED bulbs according to the fan's documentation to maximize energy efficiency and prevent overheating.
After you've installed the lighting components, restore power to the circuit.
Now, it's time to test the light functionality using any included pull chains or remote controls.
Testing Fan Functionality

Now that you've restored power at the circuit breaker, it's time to test your fan's functionality.
Use the pull chains or remote to check the fan speed settings and make sure everything responds as expected.
Don't forget to observe the blade alignment; it should be rotating counterclockwise for cooling in the summer.
Power Restoration Steps
After completing your ceiling fan installation, it's time to restore power and test its functionality.
Begin by flipping the circuit breaker that controls your fan's electrical supply. Once power is restored, activate the fan using the wall switch or pull chain.
Here's how to verify everything's working smoothly:
- Check Fan Operation: Make sure the fan runs without any issues and that any integrated light fixtures illuminate properly.
- Inspect Fan Blades: Confirm that the fan blades are level and secure. This step is essential to prevent wobbling, which can cause noise or damage.
- Test Speed Settings: While you won't adjust them just yet, check that all speed settings (high, medium, low) respond correctly for ideal airflow.
If the fan doesn't operate as expected, revisit your wiring connections.
Verify everything is secure and that the electrical supply is functioning properly.
Taking these steps will assure your ceiling fan operates efficiently and adds comfort to your space.
Enjoy the invigorating breeze!
Fan Speed Settings
Understanding your ceiling fan's speed settings is essential for maximizing comfort and energy efficiency in your home. Ceiling fans typically feature multiple fan speed settings, such as low, medium, and high, allowing you to adjust airflow according to your needs and the season.
To test fan functionality, turn the fan on and cycle through each speed setting. Confirm it operates with smooth operation, free from wobbling or unusual noises.
If your ceiling fan has a reverse switch, engage it to change the blade direction. This feature can enhance heating efficiency in winter by circulating warm air downward.
Additionally, if your fan includes a remote control, check the battery functionality and confirm that all settings respond correctly during your test.
Regularly testing the fan speed settings helps maintain ideal airflow and confirms the fan runs efficiently. By doing this, you can also prolong its lifespan.
Blade Alignment Check
Checking the alignment of your ceiling fan blades is an essential step in guaranteeing smooth operation and ideal airflow. Proper blade alignment prevents noticeable wobbling and noise during use. Here's how to verify everything is set correctly:
- Check that the fan blades are evenly aligned and securely attached. This helps avoid any imbalance that could lead to damage.
- Use a level to verify the blades are horizontal. If they're not, you may need to adjust the blade brackets for proper alignment.
- Test the fan by running it at different speed settings. Observe how the blades rotate smoothly without obstruction.
Additionally, stand beneath the fan to observe the airflow direction. In summer, the blades should rotate counterclockwise for a cooling effect, while in winter, they should go clockwise to circulate warm air.
If you notice any wobbling or uneven airflow, recheck the blade attachment. Make sure all screws are tightened securely to the motor and blade arms.
Following these steps will help you enjoy the full benefits of your ceiling fan while guaranteeing its longevity.
Room-Specific Considerations

When it comes to ceiling fan installation, room-specific considerations are key to maximizing comfort and efficiency.
In your living room, verify your fan is installed at least 7-10 feet above the floor with a minimum of 30 inches clearance from wall edges for ideal circulation. If you're working with a sloped ceiling, choose the right ceiling fan model that accommodates this feature.
For bedrooms with lower ceilings, consider low-profile fans to maintain headroom while still providing airflow.
When you install a ceiling fan in the kitchen, opt for moisture-resistant models, making sure they're positioned at least 8 inches from the ceiling to prevent heat buildup.
When selecting a fan for outdoor spaces like patios, go for outdoor-rated fans that can withstand moisture. They should be mounted securely at least 8 feet above the ground to meet safety standards.
In a home office, position the fan to complement your HVAC system, ideally with blades 7-9 feet from the floor. This setup not only enhances comfort but can also help reduce your energy bill by promoting ideal air circulation.
Maintenance and Troubleshooting
Regular maintenance is essential for keeping your ceiling fan operating efficiently and quietly. To guarantee peak performance, follow these steps:
- Clean the blades: Regularly wipe down the fan blades with a damp cloth to prevent dust buildup, which can affect performance and create noise.
- Inspect the wiring: At least twice a year, check the wiring connections to verify they're secure and free from corrosion. This can help prevent electrical issues down the line.
- Lubricate the motor: According to the manufacturer's recommendations, lubricate the fan motor every six months to maintain smooth operation and prevent overheating.
If you notice any unusual noises, it's time to troubleshoot. Check for loose screws and tighten them as needed.
Also, confirm the blades are properly balanced. Finally, don't forget to replace remote control batteries annually or when the fan starts acting erratically to maintain consistent functionality.
Frequently Asked Questions
How Do I Calculate Ceiling Fans for a Room?
To calculate ceiling fans for your room, divide the square footage by four. This gives you the ideal blade span. Guarantee proper clearance from walls and the ceiling for maximum airflow and safety.
What Rooms to Put Ceiling Fans In?
Think of ceiling fans as gentle breezes that dance through your home. You'll want them in living rooms, bedrooms, kitchens, and outdoor spaces to enhance comfort, improve airflow, and create inviting atmospheres for relaxation and productivity.
Where Should Ceiling Fans Be Placed?
You should place ceiling fans centrally in the room, ideally above seating areas, ensuring they're 7-10 feet from the floor and at least 30 inches from walls for ideal airflow and safety.
Is a 52 Inch Fan Too Big for a 12X12 Room?
A 52-inch fan can feel like a gentle breeze on a hot day, perfectly suited for your 12×12 room. It'll provide ample airflow, making your space comfortable without overwhelming it. You'll love the difference!
Conclusion
To sum up, installing a ceiling fan can enhance your home's comfort and efficiency. Did you know that ceiling fans can reduce energy costs by up to 40% in summer? By following this room-by-room guide, you can tackle the installation yourself and enjoy the benefits of a well-placed fan. Remember to prioritize safety and maintenance to keep your fan running smoothly. Now, go ahead and create a more comfortable living space with your newly installed ceiling fan!