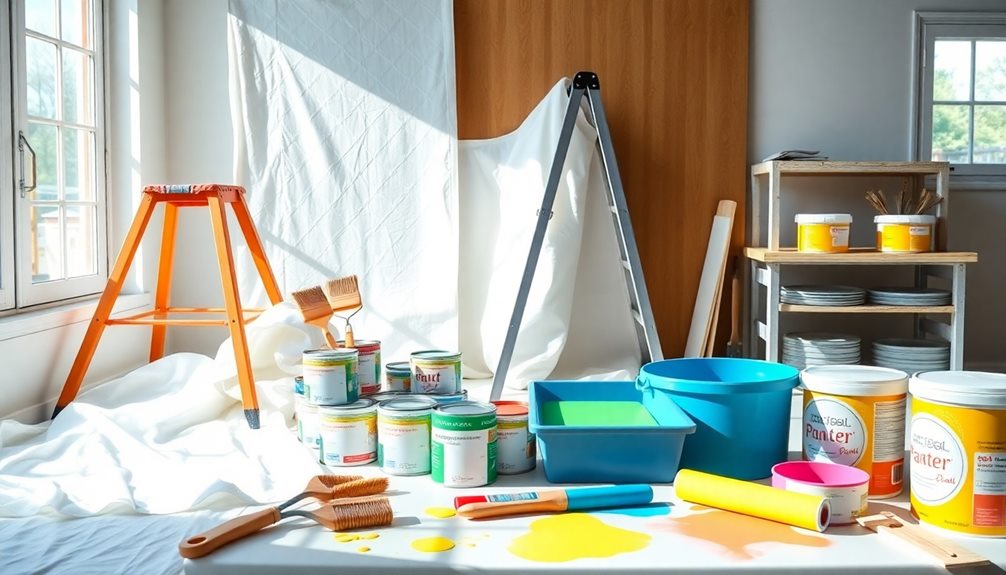
To patch drywall seamlessly, start by cleaning and sanding the area for better adhesion. Select a sandable, shapeable patching compound or drywall patch that matches your wall’s texture. Firmly press the patch in place and feather the edges with a putty knife to blend it smoothly. Sand the area finely, then prime and carefully match your paint color and finish, applying light coats. Keep going to discover more tips for making your repair truly disappear.
Key Takeaways
- Properly clean and sand the area to ensure smooth, dust-free surfaces for seamless patch adhesion.
- Choose a matching patching compound and texture to blend the repair into the existing wall.
- Feather the edges of the patch with a putty knife for a gradual transition into the surrounding drywall.
- Sand the patched area lightly with fine-grit sandpaper to smooth out imperfections without creating dips.
- Prime and paint with thin, even coats, blending edges to make the repair invisible.
Preparing the Damaged Area
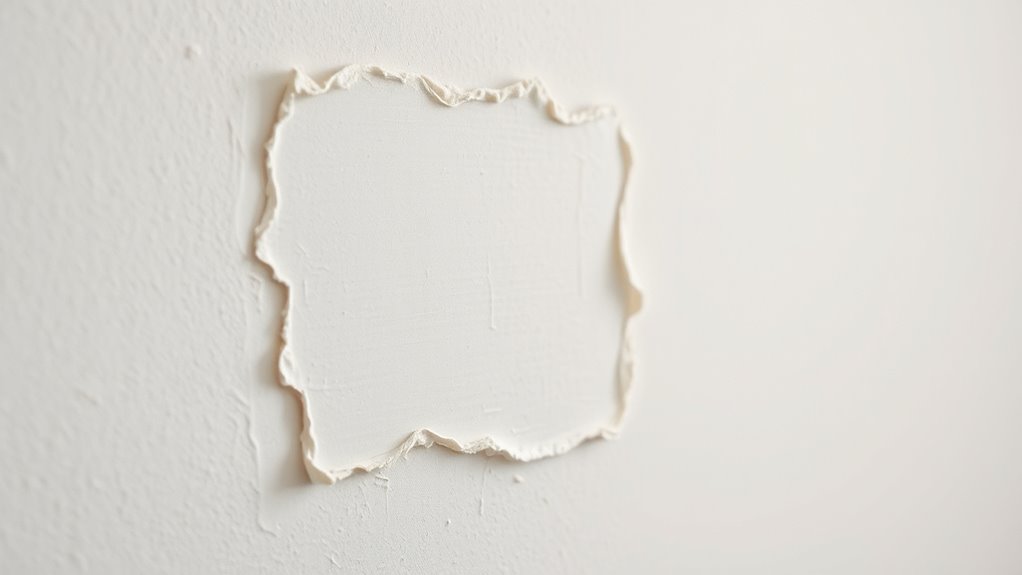
Before you begin patching, you need to properly prepare the damaged area to guarantee a smooth repair. Start by cleaning the surface to remove dust, loose drywall, or debris, ensuring the patch adheres well. Next, sand around the damage to create a smooth, even surface, which helps with seamless blending later. When it comes to tool selection, choose the right tools such as a utility knife, sanding sponge, and putty knife to make the prep work efficient. Consider color matching when selecting the patch or primer, so the repair blends with your wall’s original color. Proper preparation sets the foundation for a flawless finish, making the subsequent steps easier and ensuring your repair disappears into the wall. Additionally, understanding proper home maintenance techniques can help prevent future drywall damage and maintain a clean, well-kept look.
Choosing the Right Patching Materials

Selecting the appropriate patching materials is essential for a durable and seamless repair. To match your wall’s texture, choose patching compounds that can be sanded and shaped easily, ensuring it blends with the surrounding drywall. If your wall has a specific texture, look for products designed for texture matching or consider adding texture after the patch dries. Patch adhesives can be useful for small repairs, providing a strong bond and quick application. For larger holes, a joint compound combined with mesh or drywall patches works best. Using the right materials helps prevent future cracks or peeling, making your repair almost invisible. Always read product labels to ensure compatibility and follow the manufacturer’s instructions for the best results. Incorporating well-being tips can also help maintain your home’s comfort and safety during repairs.
Applying the Patch for a Seamless Finish
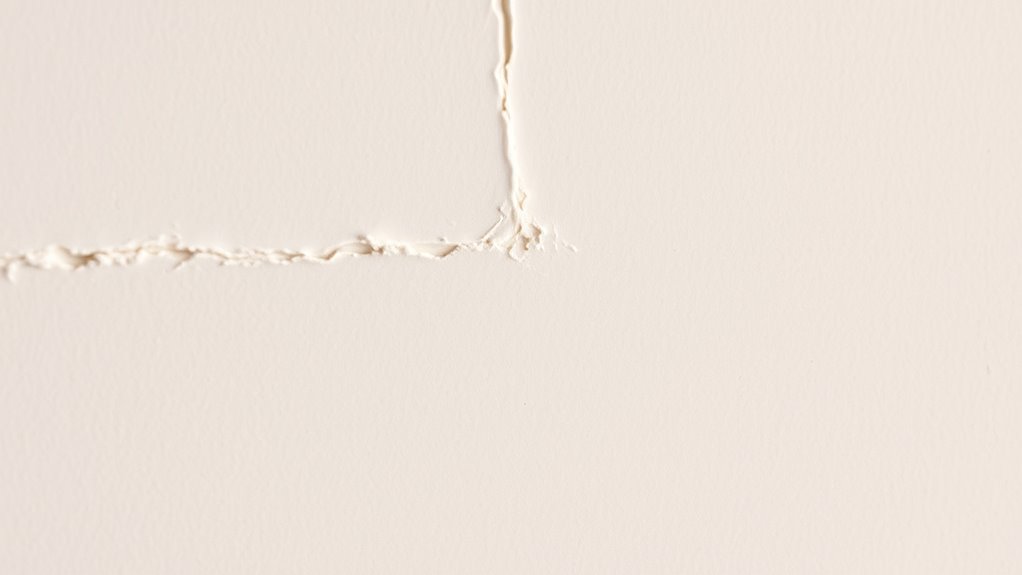
To achieve a seamless finish, you need to carefully apply the patch so it blends smoothly with the existing wall. Begin by pressing the patch firmly into place, ensuring it aligns with the wall’s texture. Use a putty knife to feather the edges, gently blending the patch into the surrounding drywall to minimize any ridges or bumps. Texture matching is essential here; if your wall has a specific finish, replicate it with a sponge or brush before the patch dries. Once the patch is dry, apply a coat of primer over the area. Primer helps the patch blend with the rest of the wall and prepares it for painting, ensuring a uniform, invisible repair that looks just like the original surface. Additionally, understanding the importance of Texture matching can significantly improve the overall appearance of your repair.
Sanding and Smoothing the Repair

Once the patch has dried completely, you should start sanding and smoothing the repair to achieve a flush, seamless surface. Use a fine-grit sanding sponge or block to gently sand the patched area, blending it into the surrounding wall. Focus on feathering the edges to help with texture blending, making the repair less noticeable. Be careful not to oversand, which can create dips or uneven spots. After smoothing, wipe away dust with a damp cloth. Applying a primer over the patched area helps seal the surface and prepares it for painting. Primer application ensures the patch matches the wall’s texture and color, making the repair virtually disappear once painted. Proper sanding and primer application are key to a clean, professional-looking finish. Additionally, using the right tuning techniques can improve the overall quality of your drywall repair, ensuring it remains durable and visually seamless.
Painting and Blending to Match the Wall

After the primer has dried completely, you can begin painting the repaired area. To achieve a seamless blend, focus on texture matching by choosing a paint finish that matches your wall’s existing surface, whether matte, eggshell, or semi-gloss. Proper primer selection is essential; use a primer compatible with your wall finish to ensure even absorption and color consistency. When applying paint, start with light, thin coats and gradually build up color. Use a feathering technique around the edges to blend the new paint into the existing wall, minimizing visible lines. If your wall has a textured finish, consider using a textured roller or sponge to mimic the original surface. Careful blending and attention to detail will make the patch virtually disappear. Additionally, understanding wall surface types can help you select the most suitable tools and techniques for a flawless finish.
Frequently Asked Questions
How Long Should I Wait Before Painting After Patching?
You should wait at least 24 hours before painting after drywall repair to ensure the compound dries completely. This drying time is essential for a smooth, professional finish and to prevent cracks or peeling later on. Keep in mind that humidity and temperature can affect the painting timeline. If you’re unsure, touch the patched area; if it feels dry and firm, it’s ready for paint, guaranteeing your drywall repair looks seamless.
Can I Use Spackle Instead of Joint Compound?
Yes, you can use spackle instead of joint compound for small repairs. Spackle dries faster, usually within 30 minutes to a few hours, making it ideal for quick fixes. However, for larger patches or smoothing, joint compound is better because it adheres more smoothly and sands easily. When switching between them, remember to verify drying times to ensure each layer is fully dry before sanding or painting for a seamless finish.
What Tools Are Best for Feathering the Patch Edges?
Imagine you’re blending a new drywall patch seamlessly into the wall. You’ll want a putty knife or drywall taping knife to feather the patch edges. Use gentle, overlapping strokes with joint compound techniques that help smooth shift. Sanding strategies, like using fine-grit sandpaper, will refine the edges. These tools and techniques guarantee your patch disappears, leaving a flawless surface that’s ready for paint.
How Do I Fix Uneven or Textured Walls After Patching?
To fix uneven or textured walls after patching, start by blending the patch with proper texture matching. Use a sponge or brush to recreate the wall’s original texture. Then, employ gentle sanding techniques to smooth out any rough edges, ensuring the patch seamlessly integrates. Be patient and take your time, gradually refining the texture and surface until it blends perfectly, making the repair virtually invisible.
Is It Necessary to Prime the Patch Before Painting?
Yes, priming your patch is necessary to guarantee good paint adhesion and a seamless finish. Priming seals the patch, preventing uneven absorption of paint, which can make the repair stand out. It also helps match the texture and color of the existing wall. Skipping this step can lead to visible differences and a less professional look. Always apply a primer suited for drywall to achieve the best, most durable results.
Conclusion
Now that you’ve mastered patching drywall, your wall will look as smooth as a calm lake at dawn. Just like the craftsmen of old who perfected their art with patience, take your time to sand, paint, and blend for a flawless finish. Before you know it, your repair will vanish into the wall, leaving no trace of the damage—only a pristine surface that’s as seamless as a well-stitched tapestry.