Home Decor
How to Create a Great Weathered Wood Finish
Yearning for a vintage vibe, discover the secrets to crafting a stunning weathered wood finish that exudes character and charm.

We're often drawn to the unique character of weathered wood finishes, which evoke a sense of nostalgia and history. To create a great weathered wood finish, we start by selecting the right wood type, such as softwoods like pine or cedar, and prepare the surface by sanding and filling imperfections. Next, we mix a weathered stain using water-based walnut stain and light grey acrylic paint, adjusting the ratio to achieve the desired color intensity. By layering the stain, distressing the surface with hammering and sanding, and sealing with poly-acrylic, we can achieve a professional-looking, unique weathered finish, and by following these steps carefully, we'll uncover even more techniques to master this distinctive look.
Key Takeaways
• Choose the right wood type, such as softwoods like pine or cedar, for a weathered finish with rich, warm color tones.
• Thoroughly sand and prepare the wood surface, filling cracks and holes, to ensure a smooth finish.
• Mix water-based stain with acrylic paint to achieve a customizable weathered finish, and experiment with ratios on scrap wood.
• Use distressing techniques like hammering, sanding, and staining to create subtle, random imperfections and a naturally weathered look.
• Seal the finish with poly-acrylic for preservation and durability, and allow each coat to fully dry before applying the next layer.
Selecting the Right Wood Type
When choosing the right wood type for a weathered finish, we narrow down our options to softwoods like pine or cedar, which absorb stains more effectively and showcase weathering effects beautifully. These wood types are ideal for achieving that distressed, vintage look we're going for.
On the other hand, hardwoods like oak or maple may require more sanding and preparation to achieve the same effect, making softwoods a more practical choice. Additionally, we consider the natural color variations and grain pattern of the wood, as these can greatly impact the final appearance of our piece.
A wood with a rich, warm color tone, for instance, will produce a unique and stunning weathered finish. By selecting the right wood type, we set ourselves up for success in creating a beautifully weathered wood finish that's full of character and charm.
Preparing the Wood Surface

Now that we've selected the perfect wood type, we're ready to prepare the surface to guarantee a beautifully weathered finish. Wood surface preparation is a vital step in achieving the desired outcome.
We'll start by sanding the wood thoroughly to remove any existing finish or imperfections. Next, we'll clean the wood with a tack cloth or damp rag to remove dust and debris. This ensures a smooth, even surface for staining.
To prevent uneven stain absorption, we'll apply a wood conditioner, allowing the stain to penetrate evenly. If there are any cracks or holes, we'll fill them with wood filler to create a smooth finish. It's important to make sure the wood surface is completely dry before applying any stain or paint.
Mixing the Weathered Stain

As we proceed with creating a weathered wood finish, we'll focus on mixing the perfect stain to achieve an authentic, distressed look.
Now, it's crucial to choose the right tones that will blend seamlessly with the natural wood texture, and we'll explore how to do just that.
Choosing the Right Tones
We'll start by mixing a water-based walnut stain with light grey acrylic paint to achieve a versatile weathered wood tone that suits our project's aesthetic.
By adjusting the ratio of stain to paint to water, we can fine-tune the color intensity to our liking. This allows us to create a range of weathered wood looks, from subtle to dramatic, without overpowering the natural wood grain.
To get it just right, we can experiment with different ratios on scrap wood, testing the results until we achieve the perfect tone. By layering the stain mixture, we can build up a customizable finish that's uniquely suited to our project.
And, by sealing the weathered wood finish with poly-acrylic, we can preserve the color and add durability. With a little patience and experimentation, we can create a stunning weathered wood look that adds character and charm to our project.
Blending With Distress
With our tone in mind, we mix the water-based American Walnut stain with light grey acrylic paint, carefully adjusting the ratio of stain to paint to water to achieve the perfect blend for our weathered wood finish. This blend will give us the desired intensity of color and create a unique, weathered look. To get it just right, we experiment with different ratios of stain, paint, and water, applying the blend to the wood surface using a brush, foam brush, or rag for even coverage.
| Stain | Paint | Water |
|---|---|---|
| 2 parts | 1 part | 1 part |
| 1 part | 2 parts | 1 part |
| 1 part | 1 part | 2 parts |
Achieving Authentic Look
We mix 1/4 cup of American Walnut water-based stain with 2 tablespoons of light grey acrylic paint and 1-1 1/2 cups of water to achieve an authentic weathered wood finish. This blend creates a DIY Wood Stain that's perfect for giving our wood projects a distressed, vintage look.
To make sure we get the desired effect, we apply the stain using a foam brush or a rag on any type of wood surface. We can layer the stain for a richer color without overpowering the natural wood grain.
Here are some key takeaways to keep in mind:
- Store the DIY weathered wood stain in a glass or mason jar for future projects.
- Apply the stain using a brush, foam brush, or rag on any type of wood surface.
- Layer the stain for a richer color without overpowering the natural wood grain.
- Seal the finish with poly-acrylic or leave it as is for a greige wood color effect.
Applying the Stain Technique

To achieve an authentic weathered look, we apply Minwax Dark Walnut stain using a lint-free cloth, carefully working it into the wood grain to create a rich, dark base tone. This stained wood provides an excellent foundation for our weathered finish.
Next, we add a layer of white acrylic paint, using a dry-brushing technique to create a distressed appearance. This subtle, textured effect gives our wood a worn, aged look.
To further enhance the vintage vibe, we sand and distress the painted surface with Grade 2 Steel Wool, creating a beautifully worn, weathered appearance. We take care to allow each coat of stain or paint to fully dry before applying the next layer, ensuring a professional-looking finish.
Achieving the Weathered Look

As we explore the art of achieving a weathered look, it's important to select the right wood type, since it greatly influences the absorption of our carefully crafted treatments. This vital step will make or break the overall aesthetic of our piece of furniture.
To guarantee a successful weathering technique, we must follow a few key steps. Here are some essential tips to keep in mind:
- Test the weathering technique: Before applying it to the entire surface, test the technique on a small area to confirm the desired outcome.
- Sand for a smooth finish: Sanding may be necessary, especially for furniture, to ensure a smooth finish. Sanding between coats of treatment can improve the final appearance of the wood.
- Apply Minwax Dark Walnut stain correctly: Applying Minwax Dark Walnut stain with a lint-free cloth can help achieve a weathered look on wood.
- Apply treatments carefully: Applying treatments in a controlled environment, with the right tools and materials, will help us achieve the desired weathered look.
Tips for Distressing Wood

As we explore the art of distressing wood, we'll examine three essential techniques to achieve an authentically weathered look.
We'll learn how sanding down smoothly can create a subtle, worn appearance, how hammering out dents can mimic the imperfections of aged wood, and how roughing up edges can add a touch of ruggedness to our project.
Sanding Down Smoothly
We start by tackling the rough wood surface, sanding down smoothly to create a perfect canvas for our distressing techniques. Before we immerse ourselves in the world of distressing, it's crucial to have a smooth surface to work with. Sanding down the wood helps to create a flawless base, allowing our distressing techniques to shine.
To achieve the desired texture and appearance, we use different grit sandpaper, gradually moving from coarse to fine.
Here are some essential tips to keep in mind when sanding down smoothly:
- Focus on edges and corners: These areas tend to show wear and tear first, giving our wood a naturally weathered look.
- Sand in the direction of the wood grain: This prevents splintering or damage to the wood.
- Use different grit sandpaper: Gradually move from coarse to fine grit for a smooth finish.
- Wipe down the wood after sanding: Remove dust and ensure a clean surface for distressing.
Hammering Out Dents
We'll use a hammer to create dents and dings in the wood, simulating the natural wear and tear that occurs over time. This distressing technique helps achieve a weathered finish that looks like it's been around for decades.
To get the most realistic results, we'll vary the pressure and angle of our hammer strikes, focusing on areas that would naturally experience wear and tear, such as corners and edges. Experimenting with different hammer sizes and textures can also produce unique distressing patterns on the bare wood.
By combining hammering with other distressing techniques like sanding and staining, we can create an authentic weathered finish that's full of character. Remember, the key to a convincing distressed look is to create subtle, random imperfections that mimic the natural aging process.
With practice and patience, we can create a weathered wood finish that looks like it's been lovingly worn in over the years.
Roughing Up Edges
To add a convincing distressed look to our wood, let's start roughing up the edges with sandpaper or steel wool, focusing on areas that would naturally show wear over time. By doing so, we'll create a weathered effect that adds character to our wood.
To achieve this, we'll vary the pressure and technique to create a realistic look.
Here are some tips to keep in mind:
- Focus on high-wear areas: Corners and edges are prone to wear, so focus on these areas to create a realistic distressed look.
- Experiment with techniques: Try out different tools and methods to achieve the desired level of distressing.
- Practice makes perfect: Don't be afraid to experiment on a scrap piece of wood before applying your technique to your project.
- Be patient and persistent: Distressing wood takes time and effort, so be prepared to put in the work to achieve the desired look.
Frequently Asked Questions
How to Create a Weathered Wood Finish?
We're often asked how to achieve that perfect weathered wood finish, and we're excited to share our secrets! We start by sanding the wood surface to create a smooth base, then apply a darker stain or paint to give it an aged look.
How to Make Wood Look Grey and Aged?
We crave the worn, mystical aura of aged wood, so we're on a mission to conjure a grey, weathered look – think driftwood on a windswept shore – by layering grey hues and distressing our wooden masterpiece.
What Finish to Use on Weathered Wood?
We're deciding on a finish for our weathered wood project, and we're leaning towards a water-based polyurethane or polyacrylic finish to preserve the natural look and texture, ensuring a durable and long-lasting result.
How to Create a Distressed Finish on Wood?
Did you know 75% of homeowners prefer distressed wood finishes for their unique charm? We're excited to create a distressed finish on wood by sanding the surface, dry-brushing white acrylic paint, and distressing with Grade 2 Steel Wool for a perfectly weathered look.
Conclusion
As we wrap up our journey to achieve a great weathered wood finish, remember that 'patience is a virtue' – and in this case, it's the key to revealing a truly authentic, weathered look.
By following these steps, you'll be well on your way to creating a finish that's as unique as a snowflake and as rugged as a well-worn pair of boots.
With practice and persistence, you'll master the art of weathering wood, and the results will be well worth the wait.
Lighting
How to Choose the Right Transformer Size for LED Strip Lighting
Journey into optimal LED strip lighting performance by selecting the perfect transformer size to match your wattage needs.
When selecting the appropriate size of transformer for LED strip lighting, it is important to first calculate the total wattage of the LED strips that will be connected. It is crucial to match the wattage with the transformer load in order to ensure efficiency and durability. Avoid using transformers that are underpowered, as they may cause flickering and dimming, or overpowered ones that can lead to overheating and premature failure. Proper matching of wattage guarantees optimal performance and longevity. Additionally, it is essential to consider the voltage requirements of the LED strips and choose a transformer that aligns with these specifications for optimal functioning. Ensuring that the transformer size matches the LED strip wattage is key. Explore more insights for a well-functioning lighting setup.
Key Takeaways
- Calculate total LED strip wattage accurately for transformer selection.
- Ensure voltage alignment between LED strip requirements and transformer output.
- Match transformer wattage slightly higher than total LED strip wattage.
- Avoid underpowered transformers to prevent flickering or dimming issues.
- Prevent overpowered transformers to avoid overheating and premature failure.
Calculate Total LED Strip Wattage
To calculate the total LED strip wattage accurately, multiply the wattage per foot by the strip's length and factor in the power consumption of each LED. This calculation takes into account the total wattage of the LED strip by considering the number of LEDs present and their individual power consumption.
By understanding the power requirement of each LED, one can determine the overall power needed for the entire strip. It's crucial to calculate this total LED strip wattage to guarantee that the transformer size selected can handle the combined wattage of all LEDs effectively.
This meticulous calculation aids in choosing an appropriate transformer size that meets the power demands of the LED strip, thereby ensuring satisfactory performance. By accurately evaluating the total LED strip wattage, one can make an informed decision regarding the transformer size needed for the lighting setup.
Determine Voltage Requirements

Determining the voltage requirements for LED strip lighting is important for guaranteeing peak performance and selecting the appropriate transformer size. LED strip lighting commonly operates at either 12V or 24V DC, with different strips having specific voltage needs for best operation. It's essential to understand these voltage specifications to make sure that the transformer matches the requirements of the LED strip.
Selecting the correct transformer voltage is crucial for the safe and efficient operation of the lighting system. Failure to align the transformer's voltage with the LED strip's requirements can lead to issues such as flickering lights, dimming problems, or even damage to the LED strip itself. Therefore, before choosing a transformer size for LED strip lighting, evaluating the voltage requirements of the LED strips being used is a fundamental step to ensure proper functioning and longevity of the system.
Match Wattage With Transformer Load

When matching LED strip wattage with the transformer load, it's essential to guarantee compatibility and proper functioning of the lighting system. To achieve this, one needs to calculate the total wattage of all LED strips that will be connected to the transformer. It's important to avoid oversizing the transformer, as this can lead to unnecessary costs and inefficiency in the system. Conversely, undersizing the transformer can result in power supply failure and potential damage to the LED strips due to insufficient power delivery.
For best performance and longevity of the LED strip lighting system, it's recommended to select a transformer with a wattage slightly higher than the total wattage of the LED strips. This slight increase in transformer wattage ensures that the system operates efficiently without being overburdened. By matching the wattage of the LED strips with the transformer load appropriately, you can ensure a well-functioning and durable lighting setup.
Avoid Underpowered Transformers

Underpowering transformers can cause LED strip lights to function inadequately. When a transformer is undersized for the total wattage of the LED strip lighting, it may struggle to provide sufficient power, leading to issues like flickering or dimming of the LEDs.
An underpowered transformer mightn't be able to handle the peak power requirements of the lights, resulting in inconsistent performance. To guarantee peak performance and longevity of the LED strip lights, it's vital to select a transformer that matches the wattage requirements of the lighting system.
Prevent Overpowered Transformers

To prevent potential issues, make sure that the transformer selected for LED strip lighting has a wattage slightly higher than the total LED strip wattage. Overloading a transformer can lead to overheating and premature failure of the LED strip lighting system.
It's important to calculate the minimum rated power supply accurately using the formula: (LED strip length x watts per foot) / 0.80 for best performance. By selecting an appropriately sized transformer, you guarantee efficient power delivery and the longevity of the LED strips.
Mismatching transformer wattage with LED strip requirements should be avoided to maintain safe and reliable operation. Ensuring that the transformer's wattage is slightly higher than the total LED strip wattage is vital for preventing overloading, which can compromise the system's efficiency and reliability.
Consider Transformer Longevity

Consideration of transformer longevity is vital in ensuring the top performance and durability of LED strip lighting systems. LED transformers typically have a lifespan of 50,000 hours or more, but certain factors can influence their longevity.
Choosing a transformer with higher wattage than required can extend its lifespan, as it operates more efficiently when not near its maximum capacity. Lower power consumption by LED strips also contributes to prolonging the transformer's life.
Proper ventilation and temperature control are essential in maximizing transformer durability, as excessive heat can shorten its lifespan. Opting for quality transformers from reputable brands is another key factor in ensuring reliability and longevity.
Optimize LED Strip Performance
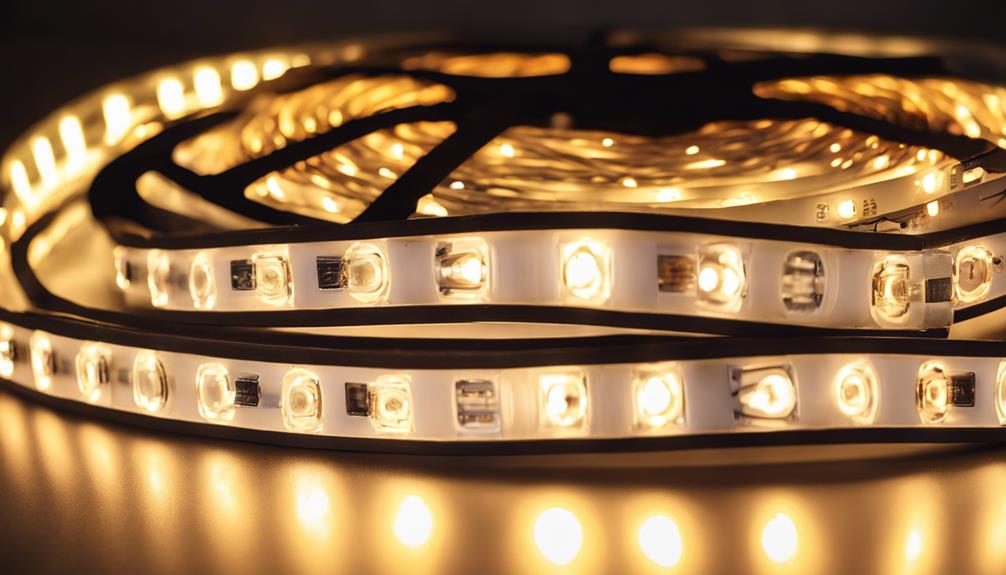
To enhance the performance of LED strip lighting, users can optimize the transformer size based on the strip length and wattage requirements to guarantee efficient operation. When considering LED power supplies for a strip, it's important to calculate the power consumption by multiplying the wattage of each LED by the LED quantity for the specified strip length.
Voltage drop can occur in longer runs, causing power loss and reducing the real power output as the strip length increases. Some manufacturers adjust the strip output wattage using different resistors to account for these factors. For instance, SMD3528 LEDs have been replaced by SMD2835 LEDs with a lower 0.1W power consumption, affecting the overall wattage rating of the LED strip.
Selecting the appropriate transformer for LED strips based on the strip length and wattage rating is essential to optimize the performance and maintain efficient operation.
Ensure Proper Voltage Compatibility

Ensuring proper voltage compatibility between the LED strip and transformer is essential for safe and efficient operation. LED strips typically require either 12V or 24V power input, which is achieved by stepping down mains voltage using a transformer. Matching the output voltage of the transformer to the voltage requirement of the LED strip is vital to prevent damage to both components. A voltage mismatch can lead to malfunction or even permanent damage in the LED lighting system. By selecting a transformer with the correct output voltage, you can guarantee the longevity and best performance of your LED strip lights. Refer to the table below for a clearer understanding of the importance of proper voltage compatibility in LED strip lighting systems.
| Importance of Proper Voltage Compatibility |
|---|
| Prevents damage to LED strips and transformer |
| Ensures safe and efficient operation |
| Avoids malfunction or permanent damage in the system |
Frequently Asked Questions
How Do I Know What Size LED Transformer I Need?
When determining the appropriate size of an LED transformer, individuals need to calculate the total wattage of their LED strip lights.
It's important to choose a transformer with a wattage that exceeds the total LED strip wattage to prevent overloading.
Considering voltage drop over distance and future expansion plans is essential.
Compatibility between the LED strip voltage and the transformer's output voltage must also be confirmed for proper function.
What Size Light Transformer Do I Need?
When determining the size of a light transformer needed for LED strip lighting, calculating the total wattage and factoring in voltage drop are vital. Selecting a transformer that can handle the peak current draw of the system is necessary.
Choosing an appropriate wire gauge and transformer capacity based on the total load is also significant. Opt for a transformer size with a capacity higher than the actual power consumption to avoid potential issues.
How Many Lights Can a 200 Watt Transformer Handle?
A 200-watt transformer can typically handle around 16.7 amps for LED strip lighting.
The number of lights it can power depends on the wattage of each LED and the total power consumption.
For instance, with each LED consuming 4 watts, a 200-watt transformer can support about 50 LEDs.
It's important to take into account the transformer's power rating to make sure it effectively manages the LED strip lighting system's load.
How Many LED Lights Can You Put on a 300 Watt Transformer?
A 300 watt transformer can typically handle around 750 LEDs on an LED strip. To determine the number of lights a transformer can support, one must consider the wattage of each LED and the total wattage of the LED strip.
It's important to calculate the total wattage of the LEDs to make sure it doesn't exceed the transformer's wattage rating. Matching the transformer's capacity with the LED lights' power requirements is essential for best performance.
Conclusion
In summary, selecting the right transformer size for LED strip lighting is essential for peak performance and longevity.
One interesting statistic to note is that using an overpowered transformer can decrease the lifespan of your LED strips by up to 50%.
By carefully calculating the total LED strip wattage, matching it with the transformer load, and considering voltage compatibility, you can guarantee your LED strip lighting operates efficiently and effectively.
Make informed choices to maximize the potential of your lighting setup.
Lighting
How to Choose the Right Cable Size for LED Lighting
Achieve optimal performance and safety with the right cable size for LED lighting by considering key factors – find out more!
When selecting the appropriate cable size for LED lighting, take into account total wattage, voltage drop, peak current draw, wire gauge, and transformer capacity for optimal performance and safety. Calculate total wattage and divide by 12 to determine the necessary amperage, which is crucial in choosing the right wire gauge. Matching the amperage rating to the wire size helps prevent overheating and voltage drop, ensuring the integrity and safety of the system. It is essential to use insulation that can handle voltage and current, with proper color-coding for easy identification. Test the wire connections with a multimeter to confirm efficient power transfer and prevent any potential hazards. These steps are essential for maintaining an effective and secure LED lighting system.
Key Takeaways
- Consider total wattage of LED lights and voltage drop over cable length.
- Calculate total amperage needed by dividing total wattage by 12.
- Match amperage rating with appropriate wire gauge to prevent issues.
- Use proper insulation and protection for safety and performance.
- Test wire connections with a multimeter for efficiency and safety.
Cable Sizing Basics
When sizing cables for LED lighting, consider the total wattage of the LED lights to determine the appropriate cable size. LED lights require a specific amount of power to function correctly, and this total wattage will guide the selection of the wiring to ensure peak performance.
It's essential to factor in the voltage drop over the cable's length when choosing the cable size for LED lighting. Voltage drop can affect the efficiency of the LED setup, so selecting the right cable size helps minimize this issue.
Additionally, make sure that the cable can handle the peak current draw of the LED lights to prevent overheating or damage. Using the correct wire gauge and transformer capacity is vital to support the total load of the LED lighting system.
Thicker cables are recommended for longer cable runs to reduce voltage drop and maintain the proper functioning of the LED lights. By considering these factors, one can establish a reliable and safe LED lighting setup.
Calculating Amperage for LED Lights

To accurately determine the amperage required for LED lights, calculate the total wattage and divide it by 12. Understanding the total amperage needed for your LED lighting system is important for selecting the appropriate wire gauge. By dividing the total wattage of the LED lights by 12, you can find the total current, or amperage, the system will draw. This amperage calculation is essential for ensuring that the wire size chosen can safely handle the current flow without overheating or causing a voltage drop.
Proper amperage calculation plays a significant role in the efficient and safe operation of LED lighting systems. It helps prevent issues related to resistance, power loss, and potential hazards. By accurately determining the amperage requirements, you can select the right cable size and wire gauge to support the efficient functioning of your LED lights. Paying attention to these details during the planning stage can lead to a more reliable and long-lasting lighting setup.
Matching Amperage to Wire Size

Matching the amperage rating of the LED lighting system with the appropriate wire size is essential for ensuring safe and efficient operation. When the wire size isn't compatible with the amperage rating, issues such as overheating, voltage drop, and electrical hazards can arise.
It's vital to calculate the total amperage draw of the LED lights to determine the required wire size that can handle the maximum current flow without causing problems. Selecting a wire gauge that aligns with the amperage rating of the LED lighting system is key to preventing potential hazards and ensuring reliable functionality.
Properly matching the amperage to the wire size not only maintains the integrity of the LED lighting setup but also guarantees excellent performance and safety. By choosing the right wire size, you can create a secure electrical connection that supports the efficient operation of your LED lighting system.
Importance of Insulation and Protection

What role does proper insulation play in safeguarding LED lighting systems from potential hazards and damage?
Insulation is vital for protecting wires in LED setups, preventing electrical hazards, and ensuring the longevity of the system. The thickness of the insulation should be adequate to withstand the voltage and current flowing through the cable. Quality insulation materials are indispensable for the safety and efficiency of LED applications. Additionally, insulation color coding assists in identifying wires and their functions within the setup.
To enhance durability and reliability, it's important to provide adequate protection such as conduits or cable trays. These protective measures can safeguard the cable from external factors that could lead to damage or malfunction. By prioritizing insulation and protection in LED lighting systems, users can mitigate risks, extend the lifespan of their equipment, and maintain a safe operating environment.
Testing Wire Connections for Efficiency

Effectively testing wire connections using a multimeter is vital for ensuring the proper functioning and safety of LED lighting systems. By checking for voltage drop, continuity, overheating, and resistance in wire connections, one can verify efficient power transfer and prevent electrical hazards.
It's essential to confirm that wire connections are secure and properly insulated to maintain a safe operating environment. Before powering up the LED lighting system, conducting a thorough inspection of the wire connections is necessary to identify any potential issues that could affect performance or safety.
Frequently Asked Questions
What Size Wire Do I Need for LED Lights?
When determining the wire size for LED lights, consider the total wattage to calculate the current flow. Thicker wires are recommended for longer lengths to minimize voltage drop.
By consulting a wire gauge chart based on the current flow, one can select the appropriate wire size for efficient and safe operation of the LED lighting system.
This guarantees top-notch performance and longevity of the lights.
What Cable Should I Use for LED Lights?
When deciding on the cable for LED lights, opting for 18 gauge solid core wire is ideal for its simplicity and effectiveness. This choice minimizes voltage drop, ensuring peak performance and safety. Manufacturers' recommendations should be checked to guarantee compatibility and efficiency with LED setups.
Solid core wire is favored over stranded wire due to its reliability. By selecting the right wire gauge, users can prevent overheating and maintain a secure lighting environment.
What Gauge Wire Should I Use for a LED Light Bar?
For a LED light bar, it's best to use 18 gauge solid core wire. Thicker wire like 18 gauge minimizes voltage drop and efficiently handles current flow.
Solid core wire is favored over stranded wire due to its simplicity and durability. Selecting the right wire gauge guarantees proper current management and prevents overheating in LED setups.
Opting for the correct wire gauge, such as 18 gauge solid core wire, is essential for safety and maximizing LED light bar longevity.
Can I Use 14 Gauge Wire for LED Lights?
Using 14-gauge wire for LED lights is suitable for most setups with low power needs. While it handles minimal current draw well, longer wire runs may require thicker gauges to prevent voltage drop.
Factors like total wattage, wire length, and voltage drop affect the wire gauge choice for LED lights. In general, 14-gauge wire is sufficient for shorter LED setups but may need adjustments for longer distances or higher power demands.
Conclusion
Just like a well-chosen cable supports and powers LED lighting, making the right decisions in life can illuminate our path and guide us towards success. Remember, the right cable size guarantees efficiency and safety, just as making informed choices leads to a brighter future.
So, whether it's selecting the right wire gauge or making important life choices, always remember that the right fit is key to achieving your goals. Choose wisely and shine bright!
Home Decor
Does Costco Own Kirkland Home Decor
Only the curious will discover the truth behind whether Costco owns Kirkland Home Decor – unravel the mystery within!
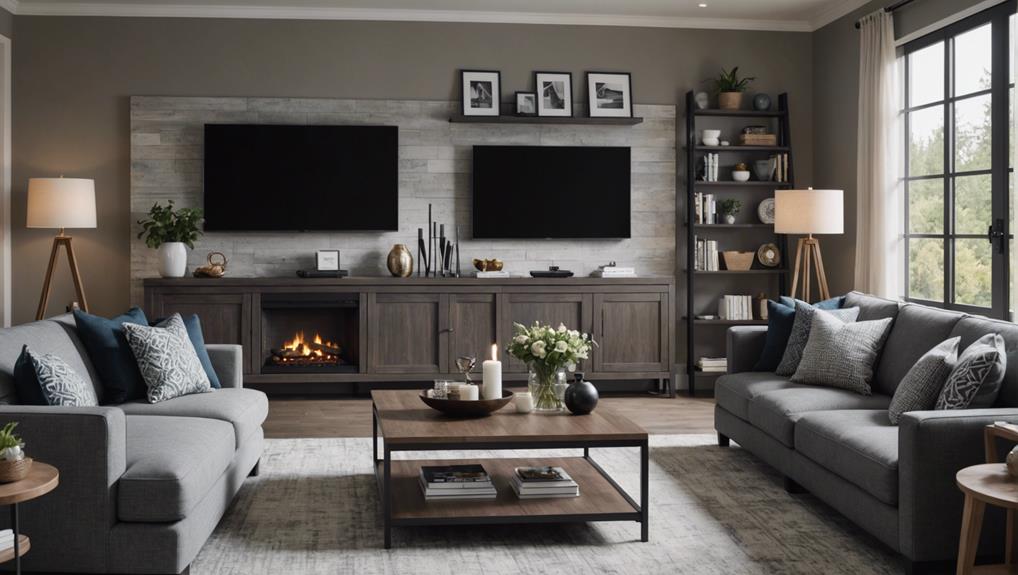
Costco does not own Kirkland Home Decor. Kirkland’s Home Decor is an independent retail brand that specializes in unique decor items for interior design enthusiasts. They operate separately, offering a wide range of options to enhance living spaces. Established in 1966 by Carl and Robert Kirkland, Kirkland’s has grown from a gift shop to a decor store with 434 locations across 37 states. With trendy and affordable items, Kirkland’s appeals to a broad customer base looking for stylish decor. Recognizing this distinction can help you explore more about Kirkland’s unique products and growth strategies.
Key Takeaways
- Costco does not own Kirkland's Home Decor.
- Kirkland's is an independent home decor retailer.
- Kirkland's was founded by the Kirkland brothers in 1966.
- Kirkland's specializes in unique and trendy decor items.
- Kirkland's operates separately from Costco's Kirkland Signature brand.
Kirkland's Home Decor Ownership

Kirkland's Home Decor stands as an independent retail chain specializing in stylish and unique home decor items, separate from Costco's ownership. Kirkland's offers a diverse range of products tailored for interior design and decor enthusiasts. Known for its distinctive and fashionable home decor items, Kirkland's operates autonomously from Costco, maintaining its own identity in the market.
When you step into a Kirkland's store, you'll encounter a treasure trove of home decor possibilities. From elegant wall art to cozy throw pillows, Kirkland's provides a plethora of options to elevate your living space. Whether you're looking for a statement piece or small accents to enhance a room, Kirkland's offers something for every taste and style preference.
Embrace the opportunity to explore Kirkland's Home Decor, where creativity knows no bounds. Immerse yourself in a world of design inspiration and transform your living spaces into personalized havens with Kirkland's unique and chic home decor selections.
History of Kirkland's Home Decor

Founded in 1966 by cousins Carl Kirkland and Robert Kirkland in Jackson, Tennessee, Kirkland's Home Decor started as a gift shop before evolving into a specialized store for home accessories. Over the years, the company has expanded its presence to operate 434 stores across 37 states, offering customers a diverse selection of interior design products.
Despite its name similarities, Kirkland's Home Decor is an independent entity in the home decor retail sector and isn't owned by Costco. Known for its distinctive and trendy home decor items, Kirkland's caters to individuals seeking affordable yet stylish design options for their living spaces.
The brand has carved a niche for itself in the market by providing unique and quality products that appeal to a broad customer base looking to enhance their homes with a touch of elegance and creativity.
Comparison: Kirkland's Vs. Costco

When comparing Kirkland's and Costco, you'll notice a significant difference in price points. Kirkland's tends to offer more affordable home decor items compared to Costco.
Additionally, Kirkland's provides a wider variety of stylish home decor products, catering to different tastes and preferences.
Price Difference Analysis
Comparing the pricing of home decor items between Kirkland's and Costco reveals distinct strategies tailored to their respective retail focuses. While Kirkland's specializes in offering a unique selection of stylish home decor items, Costco, the membership-based warehouse chain that sells home decor under the Kirkland Signature brand, focuses on providing bulk discounts and competitive pricing across various product categories. Here is a comparison table showcasing the differences in pricing strategies between Kirkland's and Costco:
| Pricing Comparison | Kirkland's | Costco |
|---|---|---|
| Pricing Strategy | Individualized based on item type | Bulk discounts and competitive pricing |
| Product Range | Stylish home decor items | Kirkland Signature products in bulk |
| Target Market | Interior design enthusiasts | Broad consumer base with diverse needs |
| Special Offers | Seasonal discounts and promotions | Exclusive member deals and discounts |
| Membership Requirement | None | Costco membership required |
Both retailers aim to provide value to customers through their distinct approaches to pricing and product offerings.
Product Selection Variety
Moving from analyzing the pricing strategies of Kirkland's and Costco, let's now focus on their product selection variety to understand how these retailers differ in catering to customer needs.
Kirkland's Home Decor Stores specialize in home decor and interior design items, offering a curated selection tailored towards home decor enthusiasts seeking trendy and affordable options. They provide unique and stylish pieces for those looking to enhance their living spaces.
On the other hand, Costco carries a wide range of products, including the Kirkland Signature brand, catering to a diverse range of needs beyond home decor. While Kirkland's focuses on a specific niche, Costco offers a broader selection of merchandise across various categories, making it a one-stop shop for a variety of products.
Branding: Kirkland Signature Vs. Kirkland's

The distinction between Kirkland Signature and Kirkland's Home Decor Stores is essential for understanding the branding strategies of these two separate retail entities.
Kirkland Signature, a brand by Costco since 1992, offers a range of products like clothing, food, and beauty items. In contrast, Kirkland's Home Decor Stores, established in 1966, focuses on home decor, furniture, and gifts.
Despite sharing the name 'Kirkland,' these brands cater to distinct market segments and aren't directly related. Kirkland Signature derives its name from Costco's headquarters in Kirkland, Washington, while Kirkland's Home Decor Stores was founded by Carl Kirkland in Jackson, Tennessee.
It's important to note that although the names may cause confusion, Costco doesn't own Kirkland's Home Decor Stores; they operate independently in the retail industry. Understanding the unique branding approaches of Kirkland Signature and Kirkland's Home Decor Stores sheds light on their individual identities and market positions.
Expansion of Kirkland's Home Decor

Kirkland's Home Decor has been expanding its product range to offer a wider selection of interior design items. They've been collaborating with various designers to bring unique and stylish pieces to their stores.
Additionally, Kirkland's has been focusing on market expansion efforts to reach more customers seeking trendy and affordable home decor.
Kirkland's Product Range
Boasting an extensive selection of furniture, rugs, and wall art, Kirkland's presents a diverse range of home decor products to cater to various design preferences and needs. You can explore trendy and affordable decor pieces, including seasonal items for holidays and special occasions.
Kirkland's offers both indoor and outdoor decor options, providing everything you need for a complete home makeover. With frequent updates to reflect current design trends, the store maintains a fresh and relevant product range for shoppers. Whether you're looking for stylish accessories or unique decorations, Kirkland's has a wide array of options to enhance your living spaces.
Visit Kirkland's for a one-stop shop to elevate your home decor.
Design Collaborations
Explore the exciting expansion of Kirkland's Home Decor through innovative design collaborations. Kirkland's Home Decor has been proactive in partnering with designers and artists to create unique and exclusive collections that cater to various home decor styles.
These design collaborations bring fresh perspectives and trends to the brand, offering customers a diverse range of options to elevate their living spaces. By working with talented individuals in the industry, Kirkland's Home Decor continues to stay ahead in the market with its private label offerings that stand out for their quality and style.
These collaborations not only enhance the product range but also showcase the brand's commitment to providing customers with exceptional and on-trend home decor items.
Market Expansion Efforts
With a focus on expanding its market presence, Kirkland's Home Decor is strategically positioning itself to reach a broader audience seeking trendy and affordable interior design options. The retail chain that sells home decor is implementing various strategies to enhance its market reach and attract more customers. This includes:
- Introducing new product lines to cater to different design preferences.
- Opening additional store locations in key regions to increase accessibility.
- Enhancing its online presence through e-commerce platforms for convenient shopping experiences.
Future Prospects for Kirkland's Home Decor

Looking ahead, Kirkland's Home Decor is set to continue its growth and success in the competitive home decor retail market, maintaining its focus on providing unique and budget-friendly decor options for customers. As a leading home decor retailer, Kirkland's Home Decor is poised to maintain its reputation for quality and value in the industry. Here is a glimpse of what you can expect from Kirkland's Home Decor in the future:
| Future Prospects for Kirkland's Home Decor | ||
|---|---|---|
| 1. Expansion of Home Decor Products | 2. Introduction of New Accessories | 3. Enhanced Gift Selection |
| Kirkland's Home Decor plans to expand its range of home decor items, catering to various styles and preferences. | The introduction of new accessories will complement the existing decor lines, providing customers with more options to personalize their spaces. | Enhanced gift selection will make it easier for customers to find the perfect gift for any occasion, further solidifying Kirkland's Home Decor as a go-to destination for home and gift shopping. |
Frequently Asked Questions
Is Kirkwood a Costco Brand?
Kirkland isn't a Costco brand.
Kirkland's Home Decor is a separate retail chain specializing in stylish home decor items. It operates independently from Costco, focusing solely on interior design products.
If you're looking for home decor, consider visiting Kirkland's as it offers a wide range of unique items.
Remember, Kirkland Signature is Costco's brand, distinct from Kirkland's Home Decor.
Is Kirkland Brand Owned by Costco?
No, Kirkland's Home Decor isn't owned by Costco. Kirkland's is an independent retail chain specializing in stylish home decor items. They offer a diverse range of products for interior design.
Kirkland's operates separately from Costco and is known for its unique decor options. So, if you're looking for trendy home decor, Kirkland's is the place to go, separate from Costco's ownership.
Does Costco Have a Parent Company?
Costco does have a parent company. The parent company of Costco is called Costco Wholesale Corporation. This corporation oversees the operations and management of Costco warehouses worldwide.
It's responsible for strategic decisions, financial matters, and overall business direction. Costco Wholesale Corporation plays an essential role in guiding the growth and success of the Costco brand, ensuring its continued prominence in the retail industry.
Is Kirkland's Home Associated With Costco?
Kirkland's Home Decor isn't associated with Costco. Kirkland's is a separate retail chain specializing in stylish home decor items, distinct from Costco.
They operate independently, offering a wide range of interior design products. While both companies cater to home goods, they aren't linked in ownership or partnership.
Conclusion
To sum up, while Costco doesn't own Kirkland's Home Decor, the two brands share a similar name. Kirkland's Home Decor has a rich history and unique branding that sets it apart from Costco's Kirkland Signature line.
With a focus on quality and style, Kirkland's Home Decor continues to expand and explore new opportunities in the market. As you navigate the world of home decor, remember the distinct offerings and potential growth of Kirkland's.
-

 Vetted8 months ago
15 Best EMS Foot Massagers for Neuropathy to Soothe Your Feet
-

 Vetted7 months ago
14 Best Personalized Father's Day Gifts for Your Husband – Show Him You Care
-

 Alfresco6 months ago
Alfresco Stacker Doors: Seamless Indoor-Outdoor Living!
-

 Tableware and Dining Accessories1 week ago
What Is the Meaning of the Word Tableware
-

 Tableware and Dining Accessories1 week ago
When Is Tableware on Sale at Hobby Lobby
-

 Tableware and Dining Accessories1 week ago
Which of the Following Is Not Classified as Tableware
-

 Craft and Textiles8 months ago
15 Best Places to Buy Appliances for Your Home – Top Retailers Reviewed
-

 Tableware and Dining Accessories1 week ago
What Is the Hindi Meaning of Tableware


