To perfect your bread baking, start with high-quality ingredients like bread flour and fresh yeast. Activate your yeast in warm water with a touch of sugar until frothy. Mix it with flour and salt, knead until smooth, and allow your dough to rise until it doubles in size. Shape it, then bake at the right temperature for a great crust. There’s plenty more to discover to enhance your bread-making skills and flavors.
Key Takeaways
- Use high-protein bread flour for optimal gluten development, ensuring a strong dough structure.
- Activate yeast properly by mixing with warm water and sweetener until frothy, indicating it’s alive.
- Knead the dough thoroughly for about 8 minutes to achieve a smooth and elastic texture, adjusting flour as needed.
- Allow the dough to rise twice: first until doubled in size (30-45 minutes) and again (20-30 minutes) for enhanced flavor and texture.
- Cool bread on a wire rack before slicing to maintain texture and prevent gumminess, ensuring the best taste.

King Arthur 100% Organic Bread Flour, Unbleached, 5 lb (Pack of 1) – Non-GMO Project Verified, No Preservatives
- High Protein Content: 12.7% protein for better rise
- Versatile Baking Use: Ideal for bread, pizza, and rolls
- Premium Quality Assurance: Non-GMO, USDA Organic, Kosher
As an affiliate, we earn on qualifying purchases.
As an affiliate, we earn on qualifying purchases.
Understanding the Essential Ingredients
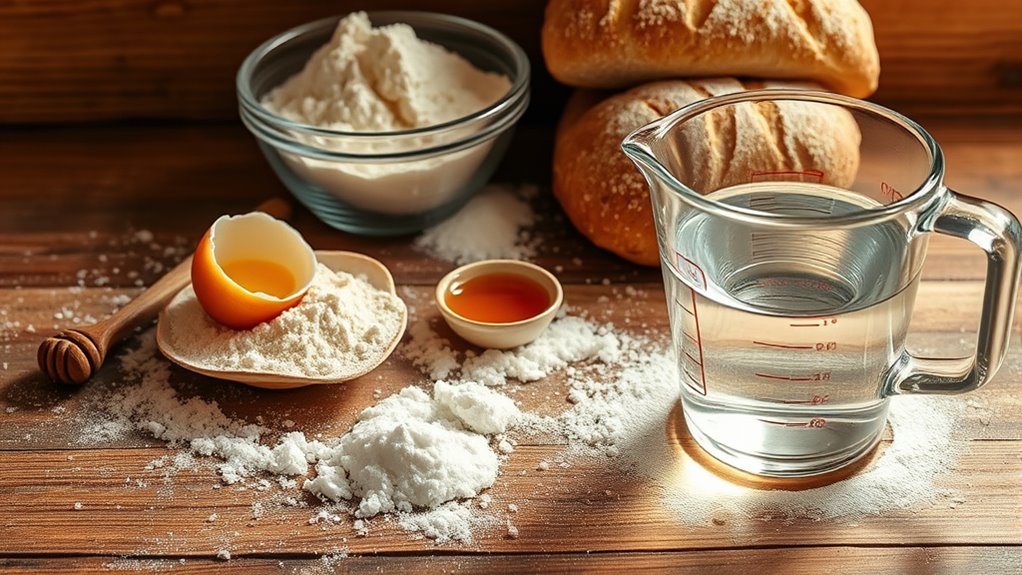
When it comes to baking bread, understanding the essential ingredients is essential. Flour forms the backbone of your dough, with high-protein bread flour being best for gluten development. Furthermore, using whole grains can enhance the flavor and nutritional value of your bread. Additionally, incorporating educational toys in your kitchen can create a fun learning environment for children as they observe and engage in the baking process. Chia seeds can also be added to your bread recipe for their nutrient-dense properties, boosting both texture and health benefits.
Water not only hydrates the flour but also activates the yeast, so using chlorine-free water can enhance fermentation.
Using chlorine-free water not only hydrates the flour but also promotes better yeast activation for enhanced fermentation.
Salt is important; it boosts flavor and regulates yeast activity, preventing over-proofing, and you can adjust its amount to suit your taste.
Speaking of yeast, it’s the key leavening agent that generates carbon dioxide during fermentation. You can choose between Active Dry and Instant/Rapid Rise yeast, both of which are beginner-friendly. Additionally, understanding cookie categories can help you customize your baking experience by allowing you to adjust ingredients to suit your preferences.
Preparing and Activating the Yeast
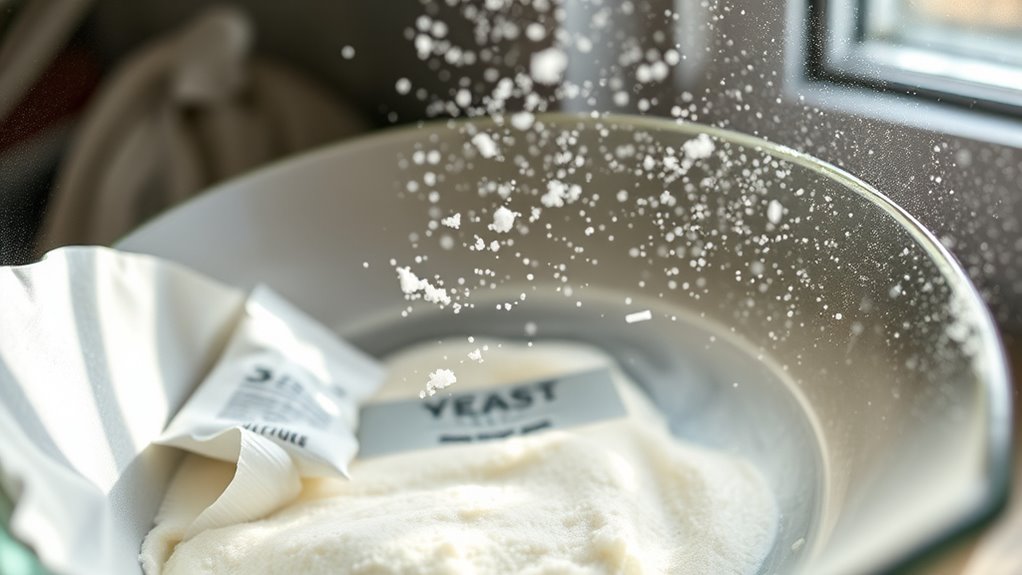
Once you’ve got a handle on your ingredients, it’s time to focus on preparing and activating the yeast, an essential step for achieving that perfect rise.
If you’re activating dry yeast, combine it with warm water (between 100°F and 110°F) and a sweetener like honey or sugar. Let it sit for about 5-10 minutes until it’s frothy and bubbles appear, signaling that the yeast is alive. Butter enhances flavor and moisture in your bread, so consider incorporating it into your recipe for a richer taste. Additionally, ensure you use proper water temperature to avoid killing the yeast. The right contrast ratio in your baking environment can also enhance your overall baking success by helping you better gauge the dough’s rise and texture. Moderation in butter consumption is essential for heart health, as excessive intake can lead to weight gain due to its high-calorie content.
If you’re using instant yeast, you can skip this step and mix it directly with your dry ingredients.
Mixing and Kneading the Dough

As you immerse yourself in mixing and kneading the dough, start by combining your activated yeast mixture with flour and salt in a large bowl.
Mix until a shaggy dough forms that pulls away from the bowl’s sides. Transfer the dough to a lightly floured surface and begin kneading for about 8 minutes. To achieve a smooth and elastic dough, use a method of pressing, folding, and turning to develop gluten and elasticity. If the dough feels too sticky, gradually add more flour, but be careful not to overdo it.
The dough is ready when it’s smooth, elastic, and springs back when pressed. After kneading, allow the dough to rest in a lightly oiled bowl, covered, for about 30-45 minutes, or until it has doubled in size. Adding different types of flour can also impact the texture and flavor of your bread.
Allowing for Proper Rising Times
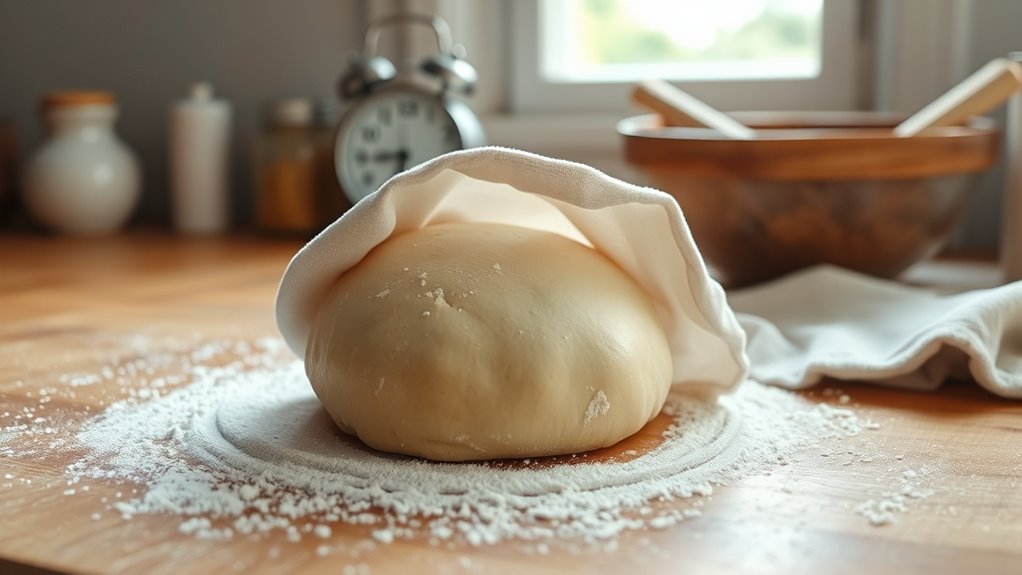
After kneading your dough and letting it rest, the next step is allowing it to rise properly to develop its flavor and texture.
For the first rise, let it rise until it doubles in size, usually taking 30-45 minutes. This is essential for good dough development.
After shaping, don’t skip the second rise; give it an additional 20-30 minutes for that light, airy loaf you crave.
Keep in mind:
- Cover the bowl to retain moisture during the rising process.
- Room temperature can affect how your bread dough rises; adjustments may be necessary.
- Allowing dough to rise twice enhances flavor and texture through fermentation.
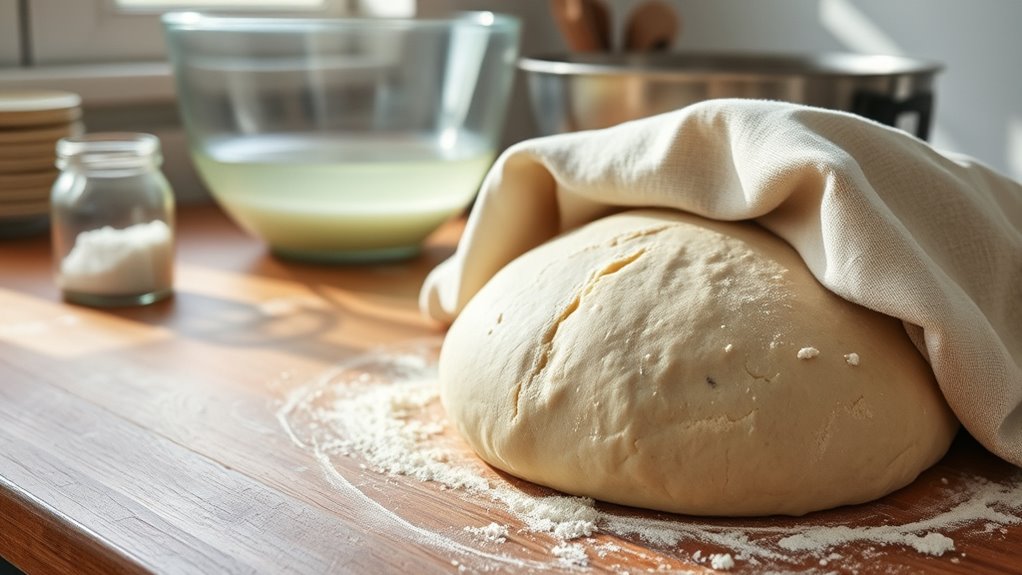
Shaping the Dough for Baking

Shaping the dough is a crucial step in the bread-making process that can greatly impact the final product.
Once your dough has risen and doubled in size, it’s time to start shaping the dough. Use a lightly floured surface to prevent sticking, but be careful not to add too much flour, as this can lead to a dense loaf.
Gently stretch and fold the dough into your desired shape, whether it’s a boule shape for round loaves or a batard shape for oval ones. This technique helps develop the gluten structure, improving the rise during baking.
After shaping, let the dough rest for a short second rise, allowing it to reach the desired texture and volume before baking.
Baking Techniques and Tips
Once you’ve shaped your dough and allowed it to rest, it’s time to focus on the baking process itself.
Start by measuring your ingredients accurately with a digital kitchen scale to guarantee consistency. Allow your dough to rise for 30-45 minutes, and don’t forget to punch it down for a second rise before baking.
Here are some essential tips for perfecting your bread:
- Preheat your oven to the right temperature, typically between 350°F and 475°F, to achieve that perfect oven spring.
- Introduce steam during the initial baking phase with a pan of water or a Dutch oven for a better crust.
- Score the dough with a sharp blade for controlled expansion and creative designs.
Happy baking!
Storing and Enjoying Your Bread

Once your bread has cooled completely on a wire rack, it’s time to think about how to store it for maximum freshness.
Wrapping it properly will keep it from going stale, so you can enjoy that just-baked taste for longer.
Whether you’re savoring it fresh or freezing for later, knowing the right techniques makes all the difference.
Proper Storage Techniques
Properly storing your freshly baked bread is essential to keeping it delicious and fresh for as long as possible. After baking, allow your loaf to cool completely on a wire rack. This prevents moisture buildup, which can lead to sogginess and mold.
For short-term storage at room temperature, wrap the cooled bread tightly in freezer or parchment paper.
– Keep bread in a cool, dry place away from direct sunlight.
For longer storage, slice and place in airtight bags, removing excess air to prevent freezer burn.
If your bread becomes stale, revive slices in a preheated oven for a few minutes to restore freshness.
Following these techniques will help maintain the quality of your bread!
Enjoying Fresh Bread
Freshly baked bread is a treat that deserves to be enjoyed to the fullest. Allow your fresh loaf to cool completely on a wire rack before slicing to maintain its moisture. For storage, keep it in a paper bag or a breadbox at room temperature for up to a week. If you want to preserve it longer, wrap it in freezer paper and freeze it for up to three months. When you’re ready to enjoy, reheat slices in the oven or toast them for a delightful crunch. Don’t forget to experiment with various toppings, cheeses, and spreads to enhance the flavor of your homemade bread!
| Storage Method | Duration | Tips |
|---|---|---|
| Room Temperature | Up to 1 week | Use paper bag or breadbox |
| Freezing | Up to 3 months | Wrap tightly in foil |
| Reheating | A few minutes at 350°F | Enjoy fresh taste |
| Toasting | For added crunch | Perfect for toppings |
| Cooling | Essential before slicing | Maintains texture |
Frequently Asked Questions
What Are the 12 Steps of Bread Baking Step by Step?
To bake bread, start by measuring your ingredients accurately.
Activate the yeast with warm water and a sweetener. Combine the yeast mixture with flour and salt, then knead the dough until smooth.
Let it rise until doubled in size. Shape the dough, allow it to rise again, and preheat your oven.
Finally, bake the loaf until it reaches 190°F (88°C) internally for a perfect finish. Enjoy your homemade bread!
What Are 4 Key Things to Remember When Making Bread?
When you’re making bread, remember these four key things:
First, measure your ingredients accurately for consistent results.
Second, let the dough rise adequately to develop great flavor and texture.
Third, knead the dough until it’s smooth and elastic to create a strong gluten structure.
Finally, preheat your oven to the right temperature to guarantee even baking.
Following these tips will help you achieve a delicious loaf every time!
What Are the 7 Common Bread Making Mistakes and How Do You Prevent Them?
You might think bread-making is easy, but common mistakes can ruin your efforts.
First, weigh your ingredients for accuracy; measuring cups can mislead. Avoid overproofing your dough, as it can collapse.
Knead thoroughly for a smooth texture, and always preheat your oven to the right temperature.
Finally, let your bread cool completely before slicing to prevent a gummy interior.
What Do You Need to Do in Order to Bake Perfect Bread Every Time?
To bake perfect bread every time, you need to measure your ingredients precisely with a digital scale and let your dough rise adequately for ideal texture.
Preheat your oven to the right temperature, usually around 350°F (175°C), for even baking.
Incorporate steam during baking—using a Dutch oven works wonders.
Finally, check for doneness by tapping the bottom for a hollow sound and ensuring the internal temperature reaches about 194°F (90°C).
Conclusion
Now that you’ve mastered the basics of bread-making, remember: “Good things come to those who bake.” With practice, your skills will grow, and each loaf will become a reflection of your dedication. Enjoy the delightful aroma and the warm, crusty bread you create. Share your homemade goodness with friends and family, and savor the joy it brings. So grab your apron, keep experimenting, and let your passion for baking rise like the dough itself!